Fringe Dress by Chalk and Notch

I had been anxiously awaiting the release of the Fringe Dress and Top since Gabriela posted this teaser photo months ago. I applied to be a tester practically the moment she submitted the call. Working with Gabriela is always a pleasure and I love her detailed instructions and interactive tutorials. The Fringe Dress pattern is no exception.

IMG_9421 copy

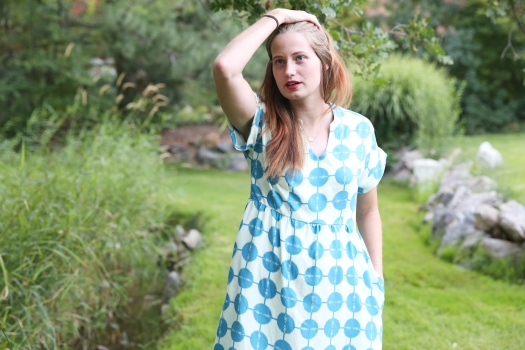
The Fringe pattern includes two views with a dress or top option for each view. You can see both views sewn up in the photo above. My beautiful and multi-talented friend Rachel of Little Fish sewed up view A. You can read a more detailed post about her version here on her blog. I decided to make view B because I was intrigued by the unique neckline.

IMG_9391 copy

Let’s take a quick detour and talk about fabric. For this version I used a soft and slinky rayon challis designed by Anna Maria Horner (buy it here). I purchased the fabric from my very favorite store Suppose. Suppose has just added a ton of amazing apparel fabrics to their Etsy. Many of them, like the fabric used for my Fringe, are out of print and nearly impossible to find anywhere else. I buy at least 80% of my fabric at Suppose and am regularly asked where I’m able to find such a great selection. I worked at Suppose for 5 years and used to joke that it was basically my secret stash. Now the secret is out and I’m happy to share it with all of my online friends.

IMG_9430 copy

Whenever I’m selecting a pattern, I look for certain details that make set a pattern aside from others as well as meeting my requirements for fashion and function. One detail I love about the Fringe is that it’s semi-fitted. The bodice contains both front and back darts that add a bit of shape to flatter many body types. It is just fitted enough to look like a dress and not a sack, but loose enough to make every day activities comfortable. There is also waist tie option if you would like to make the waist a bit more pronounced. The pull over style of the dress makes it a fairly quick sew as no closures are necessary. I know a few of the testers and even Gabriela herself just sewed the button placket of View A closed for some of their versions.

IMG_9433 copy

I’ve already worn my Fringe 3 or 4 times since making it a few weeks ago. It has transitioned seamlessly from church, to the playground, to a night out. It’s my perfect “mom” dress and I plan to make myself a view A dress in the future. There are about a million more great things  I could say about Chalk and Notch and the Fringe pattern, but I’ll just let the photos and other reviews speak for themselves.

IMG_9386 copy

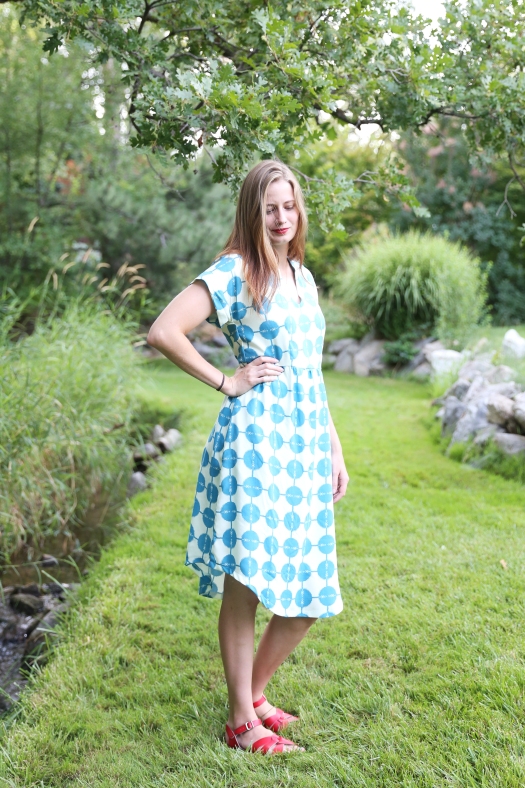
A quick note on sizing: I sewed up a size four with minor adjustments for my height. I’m somewhere between 5’9″ and 5’10”. I added 1/2″ to the bodice length and 3 1/2″ to the skirt length for my desired below knee length. These are the only adjustments I needed and Gabriela included great instructions for adjustment right in the pattern instructions.

Photos by Rachel of Little Fish and Heather of Feathers Flights.

Want to see more items I’ve made with Chalk and Notch patterns? Check out my Waterfall Raglan hack here or my Farrah top here.

Cali Faye Collection Valley Blouse

Last fall, I was working on a children’s clothing collection to show at Utah Fashion Week. I made a children’s unisex top using this gorgeous double gauze by Cotton & Steel and couldn’t help being a bit jealous of the kids who got to wear it. I rarely make clothing in solid colors, but this teal gauze was too good to ignore. I finally settled on the idea of a using the fabric to make myself a Cali Faye Collection Valley Blouse.

IMG_1149

Overall, I really liked the style of the pattern. I did make a few small adjustments to simplify and tailor it to my liking. First, I cut two of the back yoke pieces instead of one as instructed. My reasoning for this was that I wanted the back yoke lined just as the front. When sewing, I sewed the front yoke to the back yoke at the shoulder seams and did the same for the front yoke linings and back yoke lining. I then placed the yoke linings and yoke pieces right sides together and stitched them together along the neckline.

IMG_1135

Second, I omitted the front key hole. The neckline is nice and wide which makes the key hole unnecessary as anything but a design feature. To accomplish this, I simply didn’t cut out the key hole. This allowed me to skip a few steps in the construction and attach the bottom front the same way as instructed for the bottom back.

IMG_1145IMG_1114I finished this blouse about a month ago and haven’t had too many chances to wear this top due to the summer heat. This morning I felt a bit of a chill in the air. It made me hopeful that fall is coming soon. I plan to make a nice fitting pair of Ginger Jeans to pair with this top in the cooler months.

IMG_1101

Side Note: Did you notice that embarrassingly large crease in the center front and center back? I cut out the pieces about a month before sewing up my top and left thee pieces folded. My poor old cheap iron couldn’t press out those dang creases. I have washed my top a couple of times since taking these photos and the creases are now gone. Any suggestions for a new fairly inexpensive iron? Do I need to look at something more high end?


Tea House Dress by Sew House Seven

It’s not often that my husband and I can both agree that a dress is stylish AND flattering. My Tea House Dress, however, is one on which we can both agree.  My style tends to gravitate towards dresses that are cool, flowy, and functional (aka: muumuus). This pattern by Sew House Seven piqued my interest from the first time I saw it.
IMG_1337

A few weeks ago, I attended a dinner with bunch of sewing friends and bloggers. I need deadlines to keep me motivated; so I used the dinner as my deadline for my Tea House Dress. The dinner was to be held on a Monday evening. Naturally, this meant that I started tracing the pattern and cutting my fabric on Friday. It came together pretty quickly and I managed to finish it by sewing for a couple of hours each night of the weekend. I finished the hem and gave it a final press just hours before the dinner. That dinner was two weeks ago. I’ve already worn this dress four times since that evening.

IMG_1289

The Tea House Dress includes a few style details that caught my eye and inspired me to purchase the pattern. First, I love a good v-neckline. It’s low enough to be flattering, but high enough to keep from flashing innocent bystanders when I lean over. Second, The seaming of the yoke and front panels add interest and shaping to an otherwise simple slight a-line shape. Third, the wide waist ties define the waist while also allowing for occasional adjustment (i.e. ate too much ice cream). Fourth, the midi length is perfect for keeping cool in the summer without requiring me to shave up above my knees. Fifth, the pockets are the perfect size for holding my phone and keys. They’re also just a nice feature when I’m feeling awkward and don’t know what to do with my hands.

IMG_1334

IMG_1315

I used a double gauze print from the Charms line designed by Ellen Luckett Baker for Kokka. Since this double gauze is 100% cotton it’s both breathable and comfortable. I love wearing double gauze in the summer as it tends to look a bit more casual than a rayon or lawn, but is every bit as comfortable. I had nearly a yard less fabric than the pattern recommended so I had to get a bit creative when it came to laying out and cutting each pattern piece. It was doable, but I certainly wouldn’t recommend it.

IMG_1322IMG_1343

The pullover style of the Tea House Dress appeals to my no fuss style of getting dressed. I plan to make another one for a family member who sometimes has difficulty with fiddly closures. I’m also planning to make a second one for myself as soon as I find a few extra hours in the day.

IMG_1310IMG_1294

Just a quick note about sizing: I sewed up and straight four with the only alteration being that I added two inches of length at the hem. This is a common adjustment for me and I found no issues with the sizing.