Hacking the Hey June Willamette Shirt into a Dress

Remember when I said (in this post) that I was already planning a fourth Hey June Willamette (pattern here)? Between painting and packing, I managed to squeeze in just enough time for a Willamette Shirt to dress hack. In my last Willamette post, I mentioned that the Willamette is my current pattern obsession. Every time I fall in love with a fabric I think, “Wouldn’t this make a great Willamette?” This was the exact scenario that played out when I set eyes on this fabric from Anna Maria Horner’s Loominous II line. Weeks ago, I was desperately searching Etsy for a continuous 12 yards of another Loominous II fabric I intended to use for curtains. Once I found the desired fabric from La Antigua Textiles this large plaid fabric somehow jumped into my cart as well. When you’re buying 12 yards of fabric, it’s pretty easy to justify the cost of an extra 4 yards. Besides, I had an Etsy gift card that covered the price of this fabric so I can basically pretend it was free, right?

IMG_8363

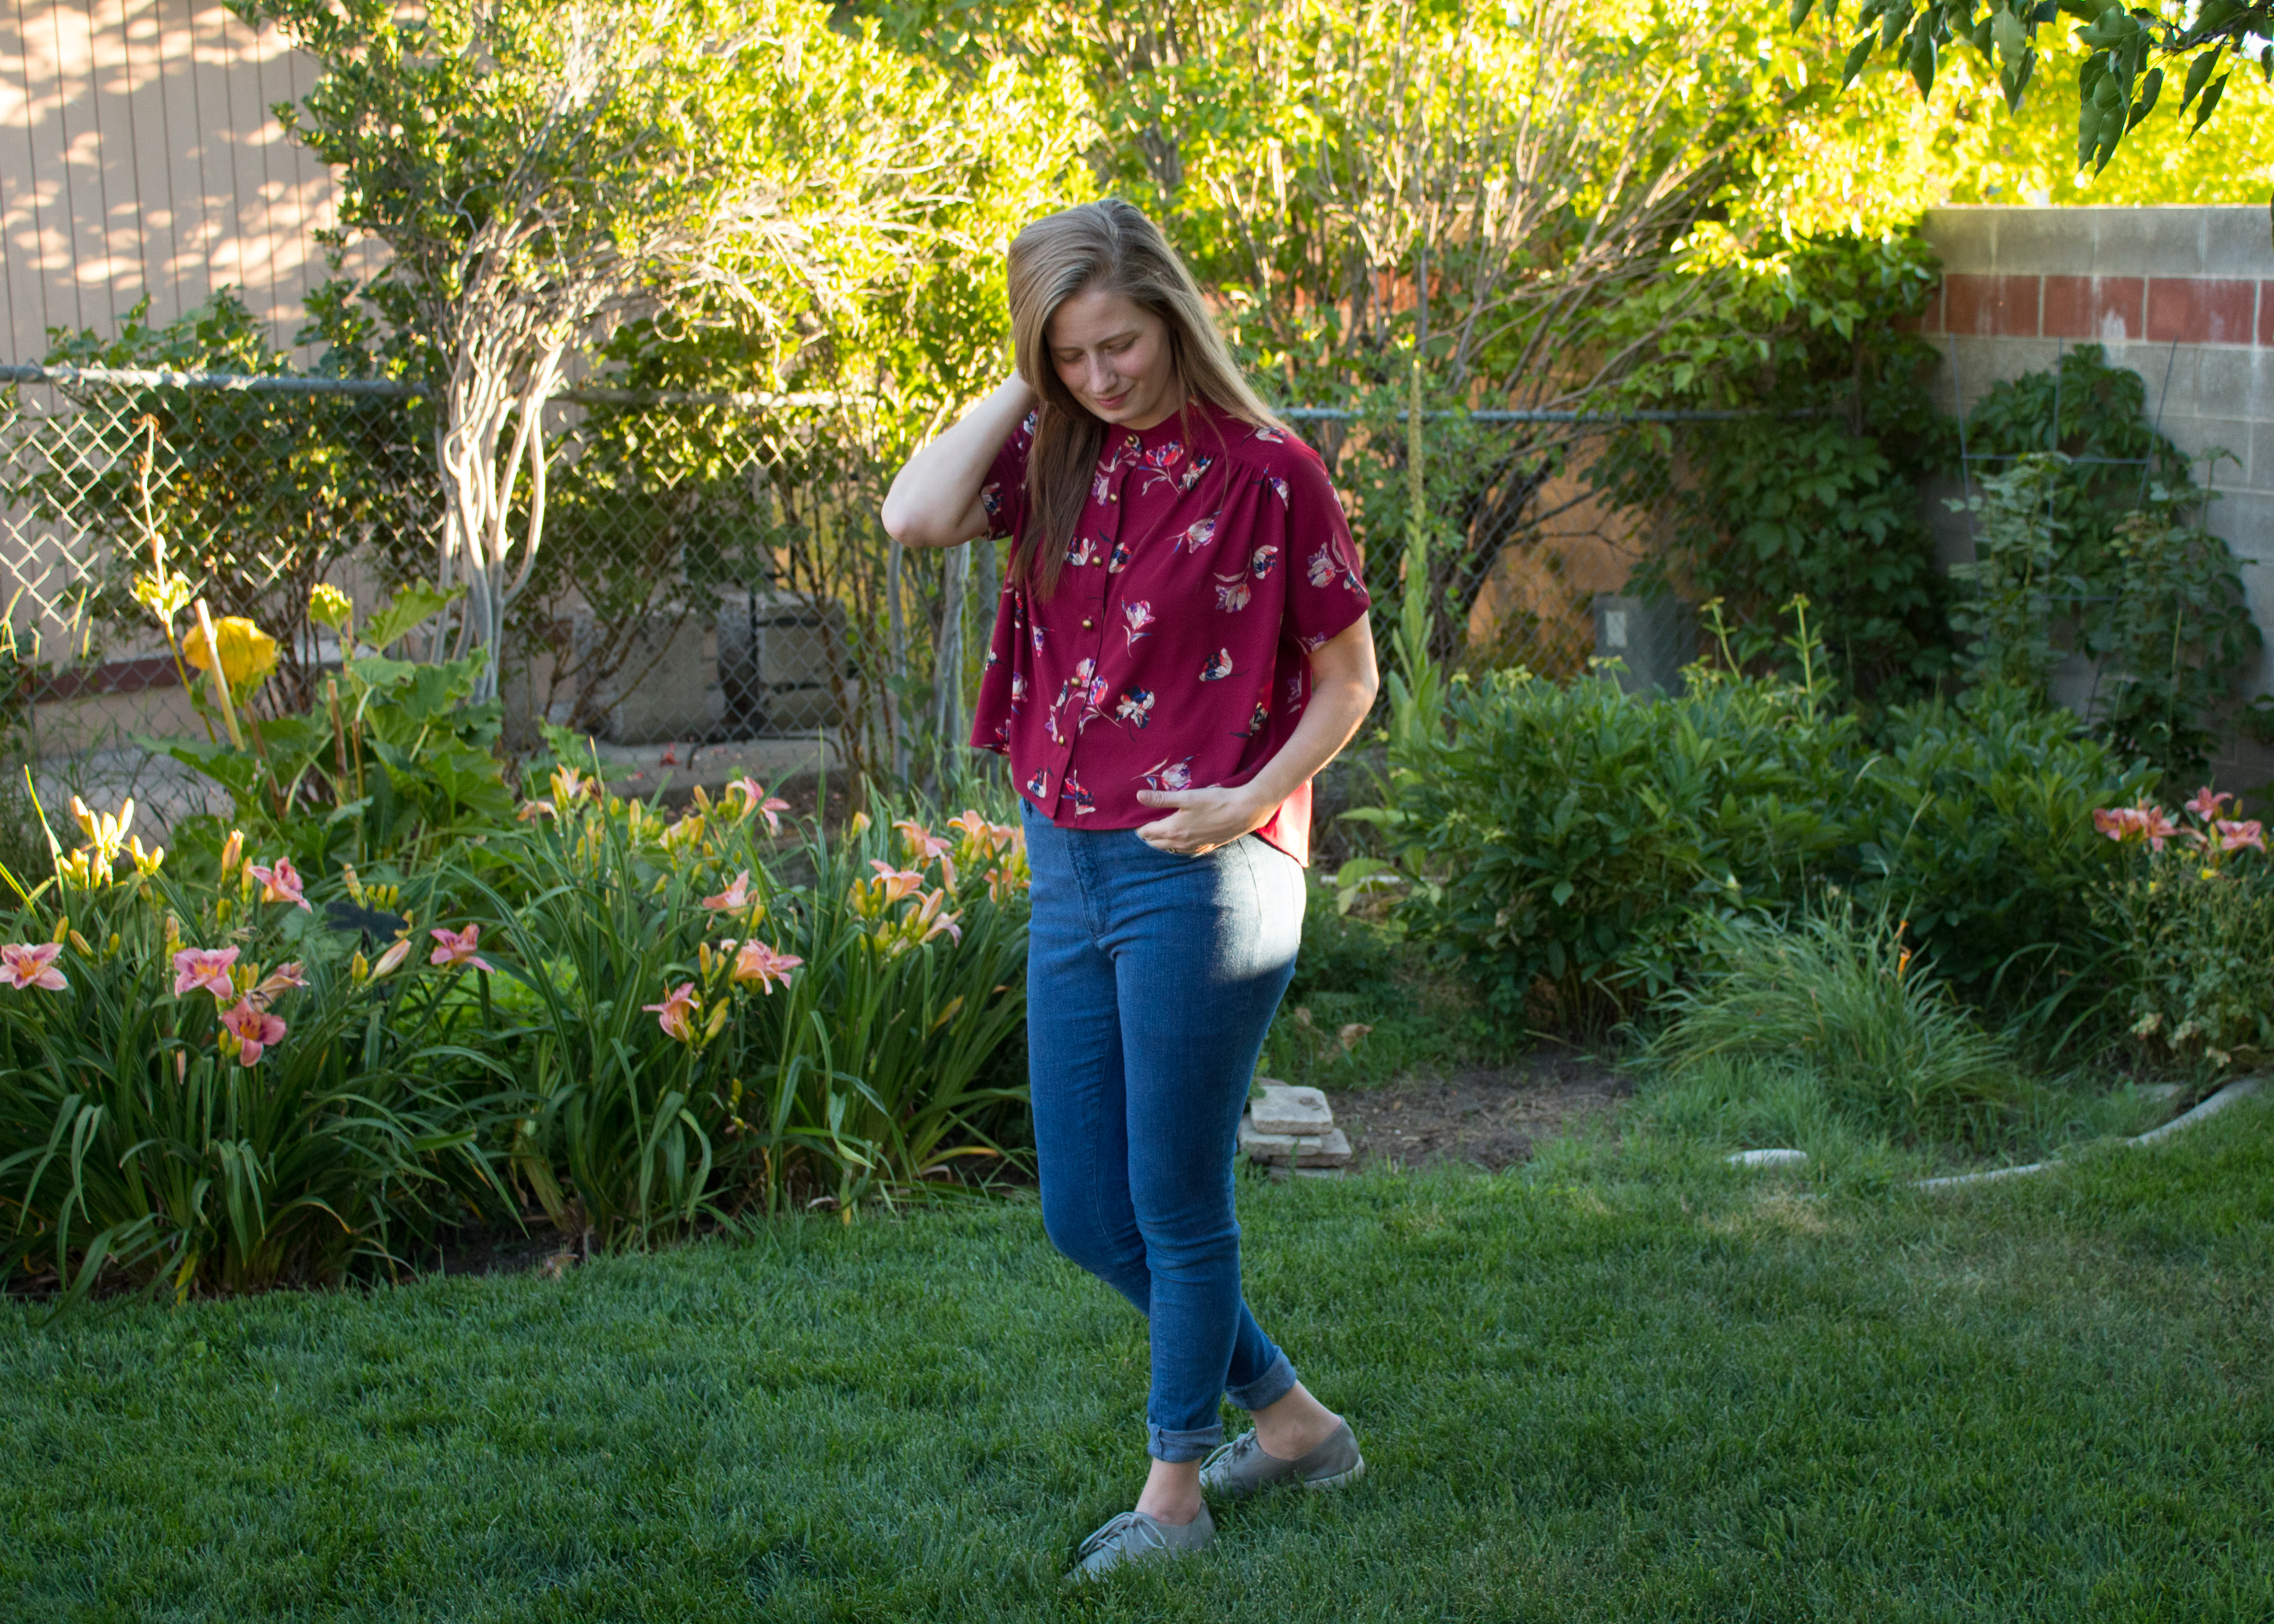
Now, let’s get on to talking about this dress hack. I was inspired by the shape of this dress from Roolee. The boxy shape and minimal gathering are both elements I wanted to include in my latest summer dress. Once upon a time, I regularly wore shorter and more fitted styles but then; I had a child and realized that limited movement was no longer my jam. If I can’t wear something as a house dress, to the park, and to church, then it’s unlikely to find it’s way into my closet. I decided to hack the Willamette for this dress because the collar, cuffs, and yoke detail add interest to the dress and keep it from looking too much like a sack. I, for the record, love a good sack dress, just didn’t want that look for this one.

IMG_8369

The actual “hacking” of this pattern was quite simple. Let’s start with alterations made to the top. I removed 3 inches from the length of the cropped version so that the beginning of the skirt would hit around my natural waist. I opted for a button front instead of sewing the the front pieces together at the placket (Tori of The Doing Things Blog talks about her button front version here). One of my favorite details is the box pleat at the back of the dress. Originally, I just pleated the top of the back bodice piece near the yoke. After attaching the skirt, i realized the back needed a bit more shaping to achieve the desired look. The solution was to repeat the box pleat at the bottom center of the back bodice. It was a simple fix, but required some time with my seam ripper. I considered not fixing the issue, but realized it was worth the extra effort to make something I would be proud to wear. I sucked up my pride, made friends with my seam ripper, and got to work removing the skirt. This fix took about an hour to execute and was worth every minute.

IMG_8378

Moving on to the skirt. This was such a simple “hack” that it feels almost blasphemous to call it one. Since I wanted only minimal gathering I multiplied the finished width of my front and back bodice pieces (both were right around 20″ with that added back pleat) by 1.4. This gave me 28″. I cut two rectangles 28″ x 34″. I then added inseam pockets to the side seams and sewed the side seams together with a 1/2″ seam allowance. There are approximately one million tutorials for adding inseam pockets, but if you’re unfamiliar with them, this is a good one to check out.   Using a basting stitch at 3/8″ and 5/8″ gather the skirt to fit the bodice. Then attach the bodice and skirt right sides together using a 1/2″ seam allowance. Hem the skirt to your desired length and that’s it. You’re done. Seriously, this hack is one of the easiest I’ve ever completed.

IMG_8354

IMG_8375

In the midst of all the (good) stress and craziness of the last month or so it felt good to sit at my machine and sew this dress purely out of a desire to create. I thoroughly enjoyed squeezing in a bit of time here and there to reconnect with my machine. Two more weeks and we have no choice, but to be done with this moving madness (because our apartment lease will be up). A little time simply creating for pleasure was just what I needed to get me through the next weeks. Looking forward to sharing more with you in my new space.

IMG_8362IMG_8359

Thanks for reading! Want to see a different Willamette Shirt to Dress Hack? Check out Michelle’s here. Can’t get enough of Anna Maria Horner’s fabrics? Me either! I’m a total fan girl. Check out other items I’ve made with her fabrics like the Highlands Wrap Dress, Fringe Dress, Butterfly Blouse, Bonn Maxi Dress, and Bonn Shirt.

Favorite Sewing Patterns for Clothing the Baby in Your Life

It’s been a while since my baby was an actual baby (he’s 5). Although I no longer sew for a babe of my own, I’m able to get my fill of baby sewing by making gifts for friends and family. Due to a combination of my geographical location (Utah feels like the baby capital of the US) and life stage, I seem to always know someone having a baby. Over the last few years, I’ve found seven baby sewing patterns that I reach for again and again. Today I’d like to share them with you. I’ve decided to list the patterns starting with my most used first. Be sure to read all the way to the bottom because I’ve just discovered a couple new ones that I’ll definitely be using more often in the future.

img_6753

Alison’s Tiny Harem Pants

I’ve made this FREE pattern at least a dozen times. It takes about 20 minutes to sew and can be made from less than 1/3 yard of fabric. It only comes in one size, but is the perfect size for those teeny tiny newborns. Babies that I’ve made these pants for have usually been able to wear them from their first day until one or two months old. While they’re too small to be worn beyond a few months, the ease of making them and the fact that they’re irresistibly cute make them a baby shower favorite. The shape and style is gender neutral which makes them the perfect gift for every new babe.

Knick Knack Knickers

This is another quick and easy FREE pattern. Just follow the hyperlink above and click on the cute picture of a baby in knickers to download the pattern. These take me a little longer to sew than the pants above mostly because it takes a few minutes to insert the elastic. Don’t worry too much though, they take about 45 minutes to maybe an hour if I’m taking my time. You’ll need just about 1/2 yard of fabric for 1 pair. This is another pattern I’ve made at least a dozen times. I love them because I make the smallest size which works as pants for newborn babes and then as shorts/bloomers until about 1 year old. Babies grow so quickly that having something to grow with your baby is kind of a nice change from pulling out new clothes every couple of months. If you plan to make more than a couple of pairs of these pants; may I suggest buying some of these elastic threaders? They made my life infinitely easier when I had thread 1/4″ elastic through six pairs of these pants.

Piece A Cake Baby Dress

A couple of years ago, it seemed that everyone pregnant woman I knew was having a baby girl. I wanted to make dresses, but didn’t have a lot of time to make them. I stumbled upon this pattern by Anna Maria Horner and was sold. It’s simple shape allows for the use of all the fun prints. The pattern uses about 1/2 yard of fabric and I’ve been able to squeeze it out of a little less when in a pinch. It’s great for using rayons, quilting cottons, double gauze, lawn, basically any woven that isn’t a heavy weight. This is another “grow with me” pattern that can be worn for a long time. A newborn babe can wear it as a dress and then it becomes a cute swing top as she grows. Did I mention this pattern is another FREE one?

Pitaya Bummies

This pattern designed by Sew Like My Mom is worth every penny. The sizing goes from newborn to 5T so you can use it for several years. There are two views and three waistband options. The pattern has even been updated with a fun skirted and ruffle bum variation. I just bought it in March and have already made five pairs (which is a lot when you are only sewing a pattern for gifts). One pair can be whipped up in 15 to 20 minutes using only 1/4 yard of fabric (for the smallest sizes). I’ve made these bummies for both boys and girls and they’ve been worn and loved several times already. If my husband and I ever decide to have another child, these are sure to be a wardrobe staple for my babe.

Field Trip Raglan

I firmly believe that a basic tee pattern is a staple in any child/baby’s wardrobe. You just can’t beat the sweetness of a teeny tiny tee. This basic raglan tee pattern by Oliver + S has been in my collection for years. I’ve used it to make shirts for my son, but hadn’t used it for babies until this year. The size range starts at 6-12 months, but in my experience, most babies can fit in a 6 month size starting at a just a few months old. It’s also nice as a parent to have baby clothing in a variety of sizes since babies grow so quickly. I’ve made this pattern a total of 6 times and twice for babies. Both of those babes have worn their tees and looked like tiny little men. Too cute!

Olli Lined Pants

img_7254

In May, I made the FREE Olli Lined Pants pattern for the first time. I used a mid-weight denim and lined them with flannel. They’re sure to keep baby’s legs cozy during the cold winter months. The pattern ranges from size 0-3 months up to 2-3 years. It also includes a cute side pocket option which I omitted on this pair. I used just under 2/3 yard of each fabric for these pants. This one is worth mentioning because Misusu patterns also just released the Summer Olli Shorts and Pants pattern (in sizes 0-3 months up to 5/6 years) so your babe can wear these stylish pants year-round. I’ve only made the lined pants once for a baby, but just completed three pairs of the shorts for my 5 year old and they’re a hit.

Lullaby Layette Top

IMG_6748

I’m embarrassed to admit that I’ve owned this pattern for over two years and finally made it for the first time last month. I purchased it after seeing this modified version on Instagram. I had under a 1/2 yard left of this beautiful yarn dyed fabric and used pretty much every single inch to make this top. Sewing time was something between 1-2 hours. I ended up loving it so much that I nearly didn’t gift it. I wanted to keep it for myself. The pattern also includes a sweet jacket, pants and a onesie or romper version of this top. I have the pattern pieces and fabric already set aside for the next baby who is in need of this top. Immediately planning a second version is a great indicator of a good make.

Thanks for reading! Hope you’ve been able to find some inspiration for your baby sewing. If you have, get to sewing and clothe those babies! Do you have a favorite baby sewing pattern? If so, I’d love to hear about it. I’m always looking for fun patterns to make and gift.

Perkins Shirt by Ensemble Patterns

In the midst of the madness of buying a home in an insane market, I couldn’t help but apply as a tester for the Ensemble Patterns Perkins Shirt Dress. I was powerless to resist the siren song of this ultra hip take on a traditional button down. Its song was so strong that I made not one, but two versions.

IMG_8339

IMG_8316

On occasion (who am I kidding? about 80% of the time), I blatantly ignore the recommendation to not buy or use my “good” fabric for a test. I do occasionally make up a quick and dirty muslin, but I just love using pretty fabric and have faith that if things don’t work out I’ll be able to refashion the item. This time, however, I actually had some great fabrics in my stash waiting to be used.

IMG_8328

During the first phase of testing, I made the basic cropped version in a black and white striped rayon challis. I purchased this fabric from Raspberry Creek Fabrics back in January and used it to line both my Joy Jacket (here) and  the sleeves of my Clare Coat (here). I had just over a yard of this fabric and was barely able to eke out all the pattern pieces. The simple stripes and drape of the rayon combine to make this top into a closet staple. The pattern’s style lines add visual interest to the top and elevate the cool factor a bit above that of a basic button down. I opted to use the wrong side of the fabric on the back yoke in order to highlight some of those style lines.

IMG_8337

IMG_8333

During the second phase of testing, I made the gathered cropped version. My talented and generous friend Kim of Sweet Red Poppy had some scraps left over from making a couple of dresses last summer (see them on her blog here). She was kind enough to share them with me and I’ve been anxiously awaiting the perfect pattern pairing. The fabric is a polyester crepe from Stylish Fabrics (here). I tend to gravitate towards natural fibers, and as a result, have very little experience working with polyester. This was also my first foray into working with crepe. I was pleasantly surprised with how easy this fabric was to sew. Combining the fabric with this gathered version was a no-brainer. It gathered easily and its drape is a dream. Bonus: These photos were snapped after I’d been wearing this top for several hours during my son’s birthday party. Thanks to the polyester content, The top still looks fresh and wrinkle-free.

IMG_8323

IMG_8327

Let’s talk construction. Once in a while, I come upon a construction method that is simultaneously brilliant and baffling. The “dumpling method,” as Celina referred to it, took a moment to understand, but was surprisingly simple. The instructions provided excellent detail and held my hand throughout the process. This method encloses the sleeve hem and raglan seams. This top also includes french seams along the sides for a clean-finish inside and out. Anyone with an intermediate level of skill shouldn’t have any trouble constructing this top. If you’re an adventurous beginner, however, don’t be discouraged. There’s a good chance you could have success here as well.

IMG_8320

I’ll leave you with a sizing note: My bust measurement put me right at a size 4 for this pattern. Based on that, I sewed a straight size 4 in both versions. My only adjustment was adding 2″ to the length.

IMG_8317

IMG_8330

Now that I’ve got a yard to use as a photo background, I’m really itching to sew up some more summer basics. Realistically, I might not be doing much sewing until fall, but a girl can dream, right? What are you sewing this summer?