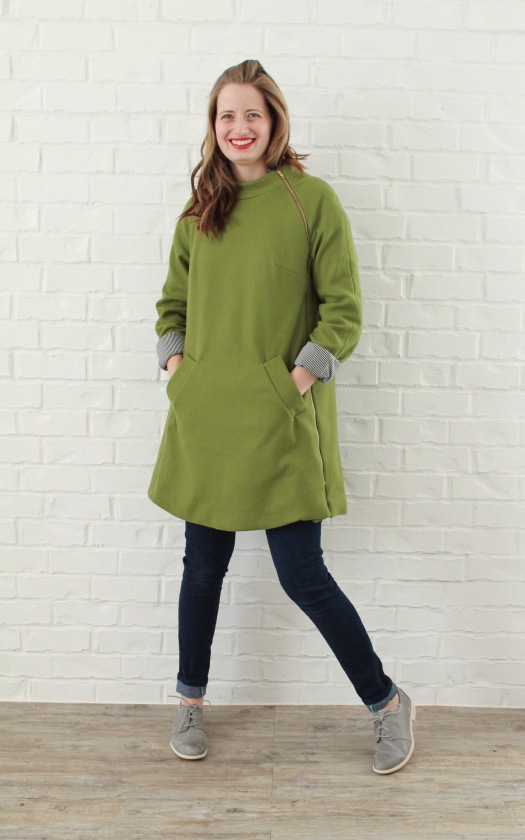
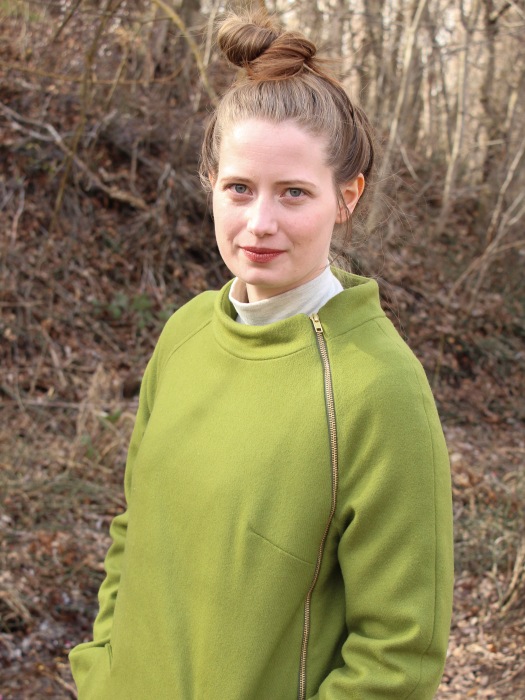
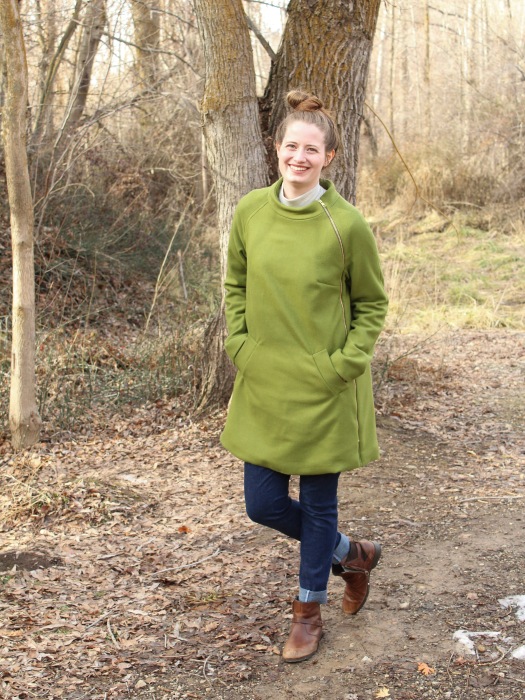
Reversible Tamarack Jacket

Disclosure: The pattern for this post was provided to me by Indiesew. All opinions are my own.

Goooood morning! Today I’m sharing a project that feels like an amalgamation of my sewing journey. I’ve always found joy in creating and had access to a sewing machine from a young age. However, it wasn’t until I took a few college sewing classes that my love of sewing blossomed. Those sewing classes led me to a magical place called Suppose. It was there that my love affair with fabric began. During my five years working there, I came to love quilting and was serendipitously introduced to the world of indie sewing patterns. There I purchased my first indie apparel pattern: a paper copy of the Grainline Studio Scout Tee. Now, years later, I’m here writing a blog post about another Grainline pattern, the Tamarack Jacket.

Preparing the Patchwork

Over the years, I’ve acquired an unhealthily large stash of scraps. Letting go of beautiful fabrics has never been top priority here. In a moment of creative energy, I began piecing together large scraps in October 2018. Then, I cut them down, pieced them back together, and….. forgot about them for nearly a year. Early this October, the project was resumed and I slowly added scraps one fabric or block at a time.

Once the patchwork reached a size of approximately 60″ x 60″, the Tamarack pattern pieces were placed to determine a cutting layout. Then, I roughly cut around each piece leaving about an inch of extra fabric on all sides. Using the roughly cut pieces I cut batting and backing pieces. Finally, each piece was quilted with straight lines 2″ apart and cut down to its proper size.

Sizing Alterations

According to the size chart, I should be a 4 at the bust and a 10 at the hip. Over the years I’ve noticed that Grainline patterns often include a generous amount of ease. Consulting the finished garment measurements confirmed this observation. In the end, I decided to size up in the bust and arms to provide plenty of room for layering. This led me to sew a straight size 6. My only other sizing alteration would be adding 5/8″ to the sleeve length.

Creating the Wrap Front

The simplicity of this particular “pattern hack” makes it feel like less of a hack and more of a pattern shortcut. An added bonus of a simple wrap front vs. the snap or button closure? A fully reversible jacket. Say “hello” to the Ace and Jig inspired side of my Tamarack Jacket. Want the details on how to hack your own? Let’s do this.

Pattern Preparation

  1. Grab your front bodice pattern piece. Draw a diagonal line connecting the top of the neckline (at the shoulder) to the lengthen shorten line at the center front (view B). Curve line slightly for a smoother look. Remove excess paper to the right of this line. Cut front pieces as indicated. For this version I also chose to curve the bottom of the center front.
  2. Create four belt loops by cutting a piece of binding fabric 1.25″ x 13.” Fold in half and sew along the length with a 1/4″ seam allowance. Leave short ends open and use a safety pin or tube turner to turn right side out. Cut this into four 3″ pieces. Baste belt loops to front jacket pieces on both the inside and outside.
  3. Cut a belt piece that is 3″ wide by desired length (mine was about 62″ long). Use a 1/4″ seam to sew around all edges, leaving a 2-3″ opening for turning. Turn right side out and sew the opening.

Construction

  1. Sew shoulder seams as indicated in pattern step 26. Finish the shoulder seams with bias binding for a clean finish.
  2. Apply bias binding to neckline and front as indicated in pattern step 27. Do NOT apply bias binding to the back bottom piece yet.
  3. Follow pattern step 28. Finish this seam with bias binding.
  4. Sew sides as indicated in pattern step 29. Now, starting at end of one sleeve, use continuous piece of binding to bind the sleeve seam, down the side, across the back bottom, up the other side and across the other sleeve seam. This part is probably the most confusing and time consuming of all. Don’t give up. You’re almost finished.
  5. Bind sleeve hems as indicated in pattern step 30. Hooray! Trim any stray threads and enjoy your finished jacket.

Final Thoughts

Last week I posted a photo of my in progress patchwork. One commenter called it a “love letter to a fabric stash.” This sentiment has stuck with me since reading it and holds true in this Tamarack Jacket. In it I see bits of old projects, stray quilt blocks, and scraps left from gifts made for loved ones; all pieced alongside bits of my own fabric favorites. Each fabric connects me to a moment in time, joining my sewing past and present into a wearable warm hug.

Note: If you haven’t heard the news, Indiesew will be closing up shop and no longer available after November 30th. Read the goodbye announcement here for further details. I’m going to miss the enrichment and inspiration that Indiesew has contributed to the online sewing world and wish Allie all the best in her future endeavors. Thank you Indiesew for being a cherished part of the community and my personal sewing journey.

Thanks for reading!

Earrings by Studio Ramii

Suki Robe and Arenite Pants with Indiesew

Disclosure: The fabric for my pants and the Suki Robe pattern were provided to me by Indiesew in exchange for this post. All opinions are my own.

Hello! Today I’m back with my third post as part of the 2019 Indiesew Blogger team. Just now I realized that all of my Indiesew posts have somewhat of a “something old, something new” theme. In each one, I’ve shared a previously sewn pattern and a new to me pattern. It’s a fairly true reflection of my sewing practice as it’s never simply one or the other. There’s a feeling of calm and comfort that comes from knowing a pattern inside and out whose only rival for my attention is the excitement of beginning a new project. Today’s contenders are the Sew Liberated Arenite Pants and the Helen’s Closet Suki Robe. I’ve styled them together, separately, and brought in some reinforcements from previous posts to give them each fighting chance.

Arenite Pants

Styled with an Archer Button Up (from this post), clogs, and my current favorite hat, these slim hack Arenite Pants are ready to put their best foot forward (or would it be leg in this case??).

Fabric

The moment I saw this Tencel Jacquard in Olive Green (also available in Icy Blue) posted on Indiesew’s Instagram grid (this post), I knew it had to be mine. Tencel, texture, and green? Sold! I was not disappointed when it arrived at my doorstep a week later. It’s buttery soft with a fluid drape and dreamy texture. As per usual, I demanded my husband feel the luxury of this fabric and he described it as his perfect blanket. He was not wrong. The light weight of the fabric combines with the texture to make it feel simultaneously cool and cozy. I’m seriously considering ordering 1.5 yards, hemming or binding the fabric, and using it as a lightweight throw blanket in my living room. The only caveat? It does shrink slightly as expected with the fabric content. The fabric is 53″ wide. After washing I measured it at 48″ wide. It’s not recommended to dry Tencel in a dryer but, I always do.

Sizing, Alterations, and Construction

Combining all these aspects here because I’ve blogged about this pattern before and you can click here to read my previous Arenite Pants post. Just as last time I sewed these pants, I used the Arenite Pants “slim” hack that Meg of Sew Liberated (@sewliberated) has detailed in her Instagram story highlights. Again, I used a size 6 with all the same alterations detailed in my last post. My only extra changes here were moving the pockets up an extra 1″ and taking in the ankles an extra 1/8″ seam allowance (for a total of 3/4″ SA). This removed a total of 3/4″ from the width of the ankles for a slightly slimmer look.

Construction was quick and easy. Again, I opted to forego the felled seams and simply stitched, then serged and topstitched them. They still feel plenty secure. Without felled seams, the pants took most of an afternoon to construct.

Suki Robe

While a newcomer in today’s battle of the sewing projects, the Suki Robe is ready to give the competition a wake up call. In order to shine, this robe prefers to stand on its own. This means that for the five minutes we took these photos, I was wearing just my underclothing and a robe in a public park, so um, you’re welcome?

Fabric

This fabric “Lillium” was designed by colorful creative, handmade hustler, and Sew Fancy Pants co-conspirator, Katie Kortman for D&H Fabrics. Both Katie and Tammy of D&H have been great friends and supporters over the last year so when I had the chance to support both of them by purchasing this lovely fabric it was a no-brainer. The fabric is a rayon poplin with great drape and a silky hand.

Sizing and Alterations

I chose to sew the mid-calf length and selected a size medium based on my measurements. My only alterations to the pattern were made out of a desire to fit it onto a smaller than recommended amount of fabric (that was also directional) and not actual necessity. I had 2.5 yards of this print and didn’t want any of the flowers to be upside down so I had to get creative with pattern placement. In the end, I removed 1.5″ from the mid-calf length and 1″ from the waist tie length to make everything fit. Neither made too much difference in the final fit so I decided I could do without the extra length.

Construction

Sewing this Suki Robe took about double the time it took to sew the Arenite Pants. While somewhat time consuming, the construction wasn’t terribly difficult and something that can be achieved by either the intermediate/advanced or beginner sewist. Helen’s directions include beginner friendly options for the sleeve bands and collar or more advanced methods with enclosed seams in the those areas. Since I’ve been sewing regularly for about a decade, I’d consider myself somewhat of an advanced sewist and chose the enclosed collar and sleeve bands. The end result was a well-constructed robe of which I can be proud.

Final Scoring

Okay, okay, the truth is: my handmade clothes and the patterns used for them feel a little like children. I don’t love the older one any less just because a newer one came along. They’ve each got qualities that make them unique while not diminishing what makes the other special. I can’t decide between them so I’ll lay out a few categories and let you do the decision making. (Just for clarification, if I ever had more than one actual child, I would not encourage strangers on the internet to vote for their favorite. ) The categories are: Fabric Use, Versatility, and Construction Time.

Fabric Use

Both my Arenite Pants slim hack and Suki Robe used almost exactly 2.5 yards of fabric with almost no useable scraps left.

Versatility

The Arenite Pants will only ever be pants but, can be styled for outdoor wear year-round. They pair well with a tee shirt as lounge pants or with a dressier top as an outfit for wearing pretty much anywhere.

The Suki Robe is something I only envision wearing outside of the house in fair weather. During the summer it would make a great swim cover up and I love the idea of it as a light layer for cool evenings. However, it will likely get almost daily use as a house robe year-round. This is the first robe I’ve made and I just didn’t know how much I needed one for daily wear until now.

Construction Time

My Arenite pants came together in a flash (just over 3 hours). However, if I had felled the seams as the pattern directs, they likely would’ve taken twice as long.

The Suki Robe was a semi time consuming project for me. It took part of one evening as well as a good chunk of one day. If I had to guess, I’d say it took about 7-8 hours to sew.

There you have it. Do you have a winner in your mind? Are you team ‘Something Old’ (Arenite Pants) or team ‘Something New’ (Suki Robe)? Feel free to cast your vote in the comments section.

Thanks for reading!

Style Maker Fabrics Spring Style Tour 2018

Hello! I’ve been anxiously waiting for this day since Michelle asked me to be part of this tour. Style Maker Fabrics is fully stocked with new arrivals. When I saw all the fabrics, my imagination ran a bit wild and I planned approximately fifty new projects. It took me a day or two to come back down to earth and realize making all of them might not be realistic on any sort of deadline. I spent about a week deliberating and finally narrowed my decision down to three projects and four fabrics.

IMG_8139

I know you’re supposed to save the best for last, but I’m bucking tradition here and going all in by talking about my favorite piece first. This woven stripe was love at first sight. Do you ever see a fabric and think “I need that on my body?” No? Just me? Well, that’s how I felt about this fabric. I considered some sort of button up shirt, but after scrolling through Instagram for inspiration I saw the Wiksten Oversized Kimono from issue 4 of Making Magazine (here) and couldn’t get the thought out of my head. Michelle was a great help in selecting a coordinating fabric and suggested this washed linen. They’re a match made in heaven, don’t you think?

IMG_8116

The over sized shape and giant pockets drew me in, but the possibility of making the kimono reversible is what sold me. If you’ve been following me for a while you might know that I like bold patterns and colors. My love affair with print and color has made my wardrobe a technicolor dream, but that does create some issues when putting outfits together. This way I can have bold, but it will also coordinate better with some of my louder pieces. I realize the over sized look isn’t everyone’s cup of tea although it is certainly mine. This is bound to get endless wear over the next few months and I envision it being my go-to on cold summer evenings.
IMG_8112

Next up, my latest Grainline Studio Lark Tee. Everyone has their favorite tee pattern, and this one is mine. I’ll be honest and say that I actually haven’t made any other basic tee pattern because I liked this one after the first try. I’ve made six or seven of them and wear them regularly.  I made a size 4 and in this coral jersey knit it’s my idea of a perfect fitted, but slightly slouchy tee.

IMG_8129

IMG_8135

Finally, let’s talk about these jeans. These were my second pair of Ginger Jeans (see my first ones here) and was able to sew them up in just a couple of days. I used this brushed denim and comfort is an understatement (hardware kit also available here). They are unbelievably soft and every bit as comfortable as the old worn-in mom jeans that I actually stole from my mom (a bit of a tangent about those on this post). Skinny jeans and comfort don’t usually go hand in hand, but in this case they get along quite nicely. I was careful not to over fit them and they’ll be just as nice to wear for a day at the park as they will be for date night.

IMG_8132

Lest I lead you astray, making these jeans wasn’t all sunshine and rainbows. This was my first attempt at installing rivets which ended up being a bit of an ordeal. First, I attempted to install them at home with a wimpy little hammer that promptly broke. Next, I secured a new hammer at my parent’s house and using an old skillet as a metal surface when I dented the skillet in several places (sorry mom and dad). Then, I dug through boxes and found a cast iron skillet, installed the rivets, and thought everything was complete. Upon a final pressing and inspection I noticed a few tiny holes near the back pockets. These holes were apparently made during my rivet installation fiasco and I almost cried when I saw them. For once, I decided to keep a clear head and find a solution right away. Finally, I settled upon the idea of a little visible mending. I stabilized the holes and used perle cotton to stitch the shape of an asterisk in four places. I chose to stitch four so that it would look more like an intentional design feature than a mistake that needed to be fixed. It may seem silly, but I often toss a project to the side when a mistake like this is made. The extra stitching actually adds a nice little detail and reminds me that sometimes you just have to “make it work.”

IMG_8134
IMG_8128

Now that I’ve gabbed on and on about my outfit, I just want to add on a little shout out to my husband who is the real MVP when it comes to these photos. Due to a small shipping delay and our schedules, the only time we had to take these photos was in the middle of wild winds and under threat of rain. I got dressed, we hopped in the car, and crossed our fingers that we could get the necessary photos. Guys, we took these photos in five minutes. After all the photos he’s taken for me, I think we’ve finally found our stride. The threat of rain and wild winds may have been a factor in making this photo session so quick, but I’m seriously impressed that we were able to just get it done. I’ll leave you with one last decent photo of my outfit and if you scroll to the bottom there’s one that will illustrate the hilarity of our 5 minute session.

IMG_8145

Now, I think that I’ve sufficiently run out of words. Are you ready to shop the Style Maker spring fabrics? Find the new arrivals here. Want more spring sewing inspiration? Check out yesterday’s post by Leslie (here) or see Lori’s post coming tomorrow (here). Want to be inspired by everyone on the Style Maker Spring Style Tour? Find links to all the tour posts here.

Finally, here’s likely the only reason you read or scrolled all the way to the bottom of this lengthy post:

IMG_8108

Whew! You’ve made it all the way to the end? Are you ready to read more? No? that’s cool this was a huge post. Yes? Here are links  to a couple of other projects I’ve made using fabrics from Style Maker. See my Joy Jacket here or my Gemma Dress here.

Closet Case Patterns Clare Coat and a Coat Making Party

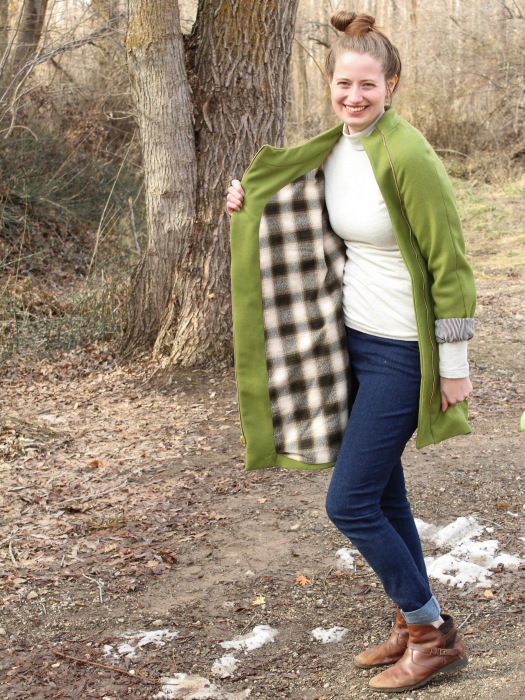
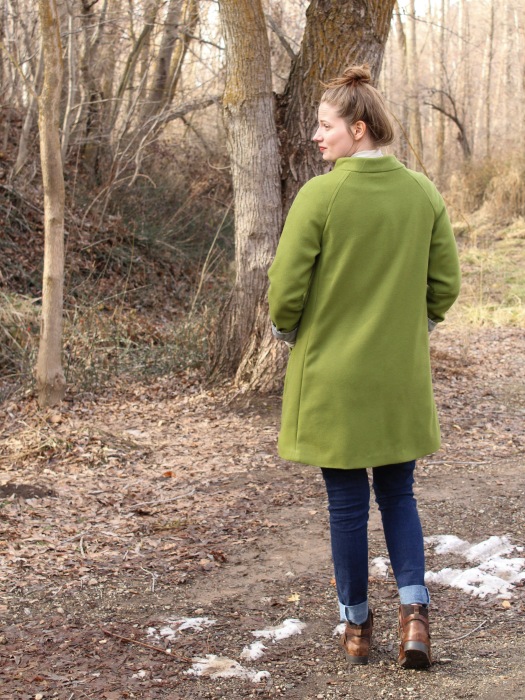
Can you believe it’s the first day of spring? I’m celebrating in unusual fashion by finally posting about my Clare Coat. Not unlike my Ginger Jeans, I’ve had the Clare Coat Pattern on my “to make” list for years. Luckily, my friends Rachel, Tiahna, and Jennifer wanted to make one as well. This last January we joined forces to host a Coat Making Party on Instagram. We were fortunate enough to work with a few generous sponsors, Riley Blake Designs, Raspberry Creek Fabrics, and Closet Case Files, who provided us with fabric and generous giveaways for participants. Without the motivation of sewing friends and our awesome sponsors, I’m not sure that I would’ve finished this coat, but I’m about to tell you why I’m so glad that I did.
IMG_2582

First, let’s talk about this olive green wool from Riley Blake Designs. Riley Blake was one of our sponsors and was gracious enough to provide each of us with wool to make the outer shell of our coats (see Rachel’s dark green one here, Tiahna’s pink one here, and Jennifer’s red one here). I chose this Olive colored wool and anxiously awaited its arrival. This wool is a mid-weight and seems similar to the weight of the fabric on my favorite ready to wear coat. I found working with it to be relatively easy and enjoyable. I did have a bit of trouble pressing, but this is likely due to the fact that I have a terribly cheap old iron and not an issue with the actual fabric.

IMG_2593

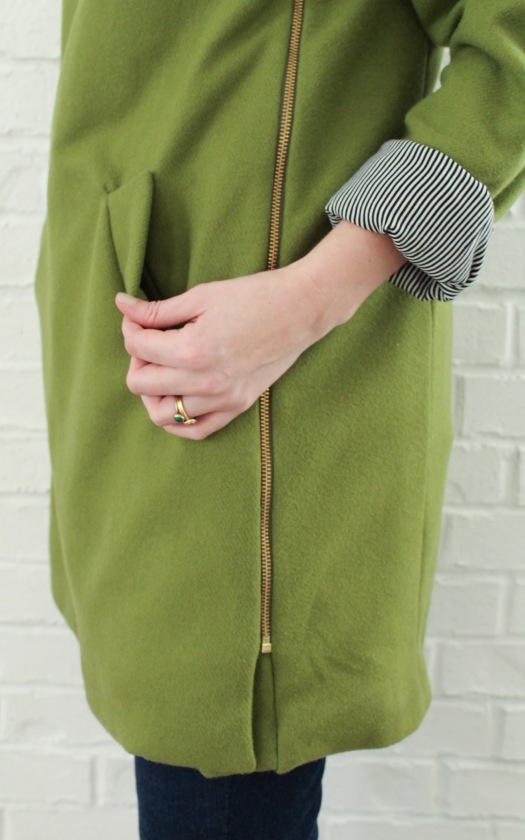
While the olive green shell of the coat is certainly striking, I think the lining is my very favorite part. Our other fabric sponsor, Raspberry Creek Fabrics, provided me with this Robert Kaufman Mammoth Flannel. I took a bit of a leap of faith selecting this without seeing it next to my wool and I’m so glad it turned out to be a perfect match. The flannel lining makes this coat extra cozy. It really feels like I’m wearing a secret blanket which is exactly how I want to feel in the winter. One aspect that I overlooked when planning this coat was the need for a sleeve lining that would be a bit more slippery to make the coat easier to put on and take off. I had already planned to use this black and white striped rayon challis as the lining for my Joy Jacket (see it here), so I simply added an extra yard to my order and used it to line my Clare Coat sleeves as well. I’ve found myself regularly wearing my sleeves rolled just to show off the fun striped lining.

IMG_2587

Now that I’ve talked your ear off regarding fabric choices, let’s talk about the actual process of making the coat. I spent four evenings preparing fabric, tiling the pdf pattern, and cutting out all the pieces to the coat. The amount of preparation that goes in to making a coat is something that I wasn’t wholly prepared for before I started this project. It likely would’ve only taken three evenings for the prep work if I hadn’t spent an entire evening tiling the pattern pieces for view b when I was supposed to be tiling the pieces for view a. How I assembled all the pieces before realizing it was the wrong view is beyond me. That is a mistake I plan to avoid in the future and a time-consuming lesson that I likely won’t forget.

IMG_2717

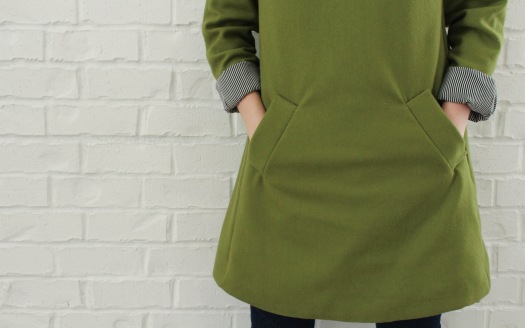
About halfway through January, I finally completed all the prep work and got down to business. These welt pockets on the front were the first and most time consuming aspect of the project. I spent my first evening focusing solely on them and despite a few minor imperfections, I think they turned out well. These perfectly-angled and flannel-lined pockets keep my hands nice and toasty when I forget my gloves (which happens almost every time I go out).

IMG_2719

Once the welt pockets were installed, the rest of the coat construction went rather smoothly. As a visual learner and first time coat maker, I found myself relying heavily on the sewalong (here) to understand each step. I was a bit nervous about the zipper installation, but soon found that I had no reason to worry. As it turns out, installing a separating zipper is even easier than a regular zipper. Who knew? I also got a bit confused about bagging the lining, but found it to be rather simple and magical once I followed the instructions and just went for it.

IMG_2722

Before I wrap this up, let’s talk for just a second about sizing and adjustments. I chose a size 10 for my Clare and because I wanted it large enough to fit over a bulky sweater. If I planned on only wearing thin layers underneath I could’ve possibly sized down to an 8, but I’m really happy with the fit of the coat as a 10. I only made one minor fit adjustment to the pattern and that was to use the full length (view b) sleeves and add 2 inches to their length.

IMG_2566IMG_2574

Honestly, January was a bit of a rough sewing month for me. I had a hard time getting back in the swing of things after the holidays and was seriously lacking in motivation. Most days I felt like sewing was more of a chore than a pleasure. This doesn’t happen regularly, but when it does I sometimes wonder why I sew. Looking back on January, I’m feeling grateful that I forced myself into the sewing room because I was able to accomplish two huge sewing goals , jeans (here) and this coat, that gave me the confidence boost needed to fall right back in love with sewing come February. Over the last few years of growth, parenting, and change, sewing has been the constant that reminds me I can do hard things, I can be proud of those things, and there’s always something to learn. In short, sometimes you won’t always love insert hobby or passion here, but that doesn’t mean it’s time to give up. It just might mean that it’s time to push through resistance because something great is on the horizon. It also might not mean anything, I’m not claiming any miracles here.

Joy Jacket by Chalk and Notch

IMG_8021

The Chalk and Notch Joy Jacket. Wow! What a pattern! I’m not entirely sure what I can say about it that hasn’t already been said. I’ve been anxiously awaiting its release since last October when Gabriela shared a preview on her IG (here). Following her post, I immediately set out to source my ideal fabrics. After a couple months of searching and indecision, I found this rayon/poly blend twill from Style Maker Fabrics. I’ve always been partial to jewel tones and this fabric was practically calling my name. It has a soft, lovely drape and smooth hand. It was fairly easy to work with as compared to a rayon challis and working with it was similar to the difficulty level of working with a lawn or voile. As someone who primarily works with prints, my only issue was differentiating between the right and wrong sides during assembly.

IMG_8015

As mentioned above, I regularly work with prints. While I wanted a solid colored outer shell, I wasn’t about to miss the opportunity to line my Joy with a print. I waffled back and forth between using a bold floral or a simple stripe and eventually decided on this black and white stripe rayon challis from Raspberry Creek Fabrics. Since I plan on regularly wearing this jacket unzipped, I wanted a lining that would be a complement to my somewhat bold wardrobe. I love this lining so much that I also used it to line the sleeves of my Clare Coat. I have nothing but good things to say about this fabric (and that amazing price). The only caveat is that I did have to take a few breaks when cutting the lining pieces because those tiny stripes were a bit hard on the eyes after too much concentration.

IMG_8032

While sourcing fabric was really only made difficult by my indecisiveness, sourcing the hardware  was a bit more difficult. I ordered my zipper from Zipperstop on Etsy (they also have their own website, I just had an Etsy gift card to use). I liked having the option to order a zipper in 1″ increments instead of being forced to buy the standard lengths available through most retailers. Find the specific listing I used here. I believe the color of this zipper is 530 which is not an exact match for this fabric, but certainly close enough.

When it came time to purchase grommets I just picked up these brass Dritz brand ones at my local JoAnn Fabrics. I can’t speak to the durability of these as I’ve only had this jacket for a couple of weeks at this point, but installation was quick and painless. I mean, really? Why did nobody tell me installing grommets was this simple? I would’ve started adding them to projects years ago.

Want to make sourcing hardware simpler? Gabriela will soon be offering a pre-order for hardware kits in several popular colors. I’ll be sure to update you when that’s available.

IMG_8030

Now let’s talk about the making of this jacket:

Since I had completed a Clare Coat one week before tackling the Joy, I wasn’t too nervous about making another piece of lined outerwear. I also have full faith in Gabriela’s drafting and instructions and knew I was in good hands. Don’t let the prospect of a lined jacket intimidate you though, the steps are clear and well written.

Honestly, cutting took me longer than the actual jacket construction. There are quite a few pieces to the Joy Jacket which contributed to the longer cutting time. Due to a bit of (manageable) chronic pain in my right hand, I had to take frequent breaks from cutting and took my time over the course of three evenings.

Once I got going, the jacket came together rather quickly. I did have some trouble with the pockets due to tension issues coupled with late-night sewing mistakes. While cutting took me three evenings, sewing only took two. I’m a very hands-on/visual learner and, because of this, sometimes have difficulty understanding written instructions. Thankfully, the pattern includes helpful diagrams all along the way. If you feel you need more help, Gabriela is also planning a detailed sew along set to begin next month.

IMG_8025

Now that I’ve pretty well said my piece, can I take a minute to mention a few of my lovely sewing friends? Several of us got together and pitched in to rent a photo studio for an hour for these photos. The photos in this post were taken by my friend Kim of Sweet Red Poppy and I really feel like she’s some sort of photo wizard.

IMG_8019

We were also able to get some photos of our Joy Jackets together. The photo below is one of my favorites and will probably end up on my bulletin board in my sewing room. My sewing friends have been a true joy and lifeline over the past year and I feel pretty dang lucky to have them in my life. If you want to read more about their Joy Jackets, read Tiahna’s post here, Tami’s post here, and Rachel’s post here.

joy-group-shot

Have you heard enough about the Joy Jacket yet? No? If you haven’t already, Head over to Leslie’s post (here) to read more about this patterns origins. Grab a tissue, you might need it.


My Son’s Jean Jacket and Tips for Working With Ottobre Patterns

Hello! I hope you’ve had a lovely holiday season. Today I’d like to share something that I made for my rambunctious four year old. You might recall that I made a Hampton Jean Jacket (here) back in October. My son almost immediately requested one of his own asking for “shiny buttons” just like mine. The boy was in luck because I had just a little over a yard of  Cone Mills denim (purchased from Threadbare Fabrics) left over from my jacket. Since my sewing queue was a bit full of Halloween sewing at the time, I promised him  a custom jacket for Christmas. I was able to pull it off just in time as I hammered the jeans buttons in place on Christmas Eve.

IMG_2481IMG_2486

I attempted convincing my son  to select some unique details for his jacket, (a different color of topstitching thread, different embroidery on the back, etc.) but he insisted that it be exactly like mine. I’m soaking in all these moments when he still thinks my style is cool because I’m sure those feelings are somewhat fleeting.

IMG_2491IMG_2507

You may notice, however, that there are a few details that vary from my jacket. These are all small details such as the absence of welt pockets, the jacket front pockets being sewn to the outside instead of the inside, and bias tape on the inside of the collar. These are all differences between Alina’s  Hampton Jean Jacket pattern and the Ottobre pattern used for my son’s jacket.

IMG_2502IMG_2503

Coming across the Ottobre pattern for my son’s jacket involves a bit of serendipity. I had been searching for a children’s jean jacket pattern, but hadn’t quite settled on one when my friend Lisa asked if I would like to have some of her old Ottobre magazines. I said yes and she brought them to our Modern Quilt Guild meeting the next day. I started to flip through them when I saw the back cover for issue 1/2011. This was exactly the pattern for which I had been searching.

IMG_4701

Ottobre is a well-known name in the sewing community so you may have heard of them. Ottobre is a Finnish company specializing in children’s wear patterns. They produce 5 magazines a year containing children’s clothing patterns as well as a special Ottobre Woman issue. In 2017 they also added an Ottobre Family issue bringing their grand total of issues to 7 each year. You can order both subscriptions or individual issues, although I’m not sure how easy it is to come by the older issues. Each issue is jam-packed with fun and stylish patterns. The specific one I’ve used here contains 40 different patterns. As you may have guessed, the sheer volume of patterns included comes with a few drawbacks.

First, in order to fit all the patterns on just a few pieces of paper, they are printed overlapping and on both  sides of each paper (see first photo below). I managed to make tracing bit more manageable by grabbing a permanent marker and my trusty Pattern-Ease (more about that here). I used the permanent marker to outline the correct size pattern pieces (see second photo below). This made tracing a bit easier on my eyes.

IMG_4697IMG_4700

Second, you have to add your own 3/8″ or 1 cm seam allowances. This isn’t a difficult step, just takes a bit of time.

Third, the instructions can be a bit sparse as each pattern only gets half a page of instructions. This specific limitation might be the most intimidating of the three. My recommendation for this is to select a project with techniques you have previously used. In my specific case, this worked out well because I had already made a jean jacket and was familiar with the top stitching, and other details associated with one. I actually used Alina’s Hampton Jean Jacket sewalong to help me clarify and understand some of the Ottobre instructions.

IMG_2490IMG_2522

Overall, these drawbacks added a bit more time to the project, but none of them would keep me from using another Ottobre pattern. The interesting style lines and endless variations on children’s basics mean I will likely turn to them again and again. I also love the fact that Ottobre makes a decent amount of patterns for boys. I’m sometimes discouraged when it comes to sewing for my son because the indie pattern world is largely dominated by patterns for women and girls.

IMG_2496

I’ll leave you with few more notes about my construction process. Every bit of my leftover yard of denim was used to make this jacket. This resulted in a serious game of pattern tetris as I worked to fit each and every piece. Cost-wise this was a relatively inexpensive project (less than $10) as I only purchased buttons and topstitching thread.  I sized up a couple of sizes in the hopes that my son will be able to get lots of wear out of this jacket. Another concession I made was to use mock flat-fell seams in order to save a bit of seam ripping and time.

I thoroughly enjoyed making this jacket as a present for my boy.  I do however, plan to wait a year or two before making another jean jacket because two within few months was a lot of work. Thanks for reading! Did you gift any handmade items this year? What did you make for the holidays?

Hampton Jean Jacket Blog Tour

HamptonBlogTourBlogs

Last month, I had the pleasure of meeting Alina of Alina Design Co. When she mentioned that she was hosting a Hampton Jean Jacket tour, I knew joining was my only option. I’d planned to make a Hampton after seeing Leslie’s version last spring (here). When it comes to sewing, I’m a big fan of deadlines. They keep me motivated, challenged, and accountable. This tour was just the deadline I needed to whip myself into shape and get sewing.

IMG_1906

I selected a lovely indigo denim from Threadbare Fabrics (this one) and chose not to bleach or distress it. I did, however, decide to add my own personal touch. I’ve always been drawn, to embroidery, but haven’t taken much time to practice and wasn’t quite up for anything too complicated. When searching for inspiration, I came across this fabric and knew that’s what I wanted to replicate on my jacket.

IMG_1922IMG_1911

I’ve hand-quilted a few small quilts and pillows before, and used the same supplies and method on my center back piece (minus the batting and backing, of course). I selected two colors of size 5 perle cotton, navy and ecru. The stitching lines are 1/2″ apart, with the stitches being about 1/4″ or less. I didn’t worry too much about the stitches being perfect. I love the uniqueness that these stitches bring to the jacket. That’s the beautiful thing about making your own clothing. Even if one were to make the exact same jacket, with the same details, each jacket would be just as unique as their maker.

IMG_1841IMG_1793

Making this jacket was certainly a labor of love. I lost track of the time I spent working on it, but spent at least 15+ hours. Part of those 15 hours were spent removing wonky top-stitching, and less than stellar buttonholes. Every minute spent with my seam ripper was 100% worth it in the end. My top-stitching still has its quirks, but it’s work of which I can be proud.

IMG_1830IMG_1813

Don’t let the sewing time or details scare you from trying this pattern. I found the drafting to be impeccable, and everything lined up just right. The instructions were also full of detail and I found Alina’s Hampton Sewalong posts (here) to be invaluable when finishing some of the trickier details like the welt pockets. Finishing this jacket made me feel a bit like a superhero. I keep staring at it hanging in my closet, because I can’t believe that I actually made it. It kind of feels like discovering a superpower. Really, I owe my thanks to Alina for making a pattern that pushed my sewing comfort zone and made me feel oddly powerful. I may also owe a bit of thanks to my college sewing teacher, Lu, who taught me how to sew flat fell seams and was always encouraging, despite my obvious lack of skill.

IMG_1919

Just a quick note on sizing: I sewed a size 4, with my only adjustments being 1″ of length to the body of the jacket and 1/2″ of length to the sleeves.

IMG_1865IMG_1853

Now, please take a minute to check out the talented ladies also sharing their jackets this week. Then, once you’ve had your fill of inspiration, get to work on a jacket of your own. Be sure to use coupon code “HAMPTONSFORALL” for 15% off  the pattern (purchase here). Until this one, I haven’t owned a denim jacket since middle school  and am now wondering how I’d gone so long without one. I’m now convinced they’re a closet staple.

Hampton Jean Jacket Fall 2017 Blog Tour
October 9: Helen’s Closet
October 13: Well Fibre