A Weekend Retreat and My Driftless Cardigan

image1

Way back in October of last year, I purchased this gray jersey knit from Suppose and cut out my Driftless Cardigan (find the pattern here). I was clearly getting ahead of myself because I had approximately one billion other deadlines at the time. April came around and I thought to myself, “Life has finally slowed down, I can now finish all of those other projects that I started last fall.” I was wrong. My husband ended up applying for and accepting an amazing new job which meant life was about to get crazy again.

image3

Meanwhile, I attended a blogger meet up in SLC and Sara and I came up with the idea for a small weekend sewing retreat. I spent the next few weeks stressing about my upcoming move and finally decided to pull the trigger on planning a retreat. This mama needed a break. Sara and I set a date, I got permission to use the family cabin, and we began counting the days.

image2

The weekend finally arrived and it turned out to be both rejuvenating and productive. My sewing weekend goal was finishing a pile of unfinished projects so that they would no longer clutter my sewing area. Each of my projects were only a few steps away from completion, but had been sitting unfinished for months. Sewing for an entire weekend allowed me to complete a couple of baby quilts, a quilted pillow cover, two simple baby dresses, and my Driftless Cardigan.

IMG_1888

While setting aside time to actually sew this took months; the actual time it took to sew this cardigan was roughly 3 hours. One of those hours was used to hand stitch the neckband. I have loved Grainline Studio patterns for years because of the clean lines and well-executed details. The Driftless Cardigan is a great example of this with its hidden pockets and optional split bottom band. This was completed a month ago and it’s gotten quite a bit of use despite the blazing summer temperatures. It’s perfect for an extra layer at the movie theater (ours is always freezing) or for wearing on chilly evenings.

IMG_1889

A quick note on sizing: I sewed up a size 4 and added 2.5 inches to the length at the lengthen/shorten line. I also added about 1.5 inches to the sleeve length because I like my sleeves extra long.

Special thanks goes to Kim of Sweet Red Poppy for taking these lovely photos.

Jumpy by Ready to Sew

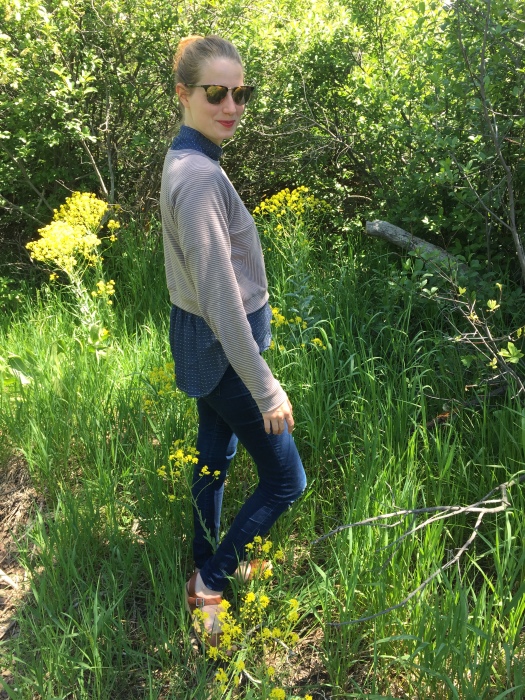
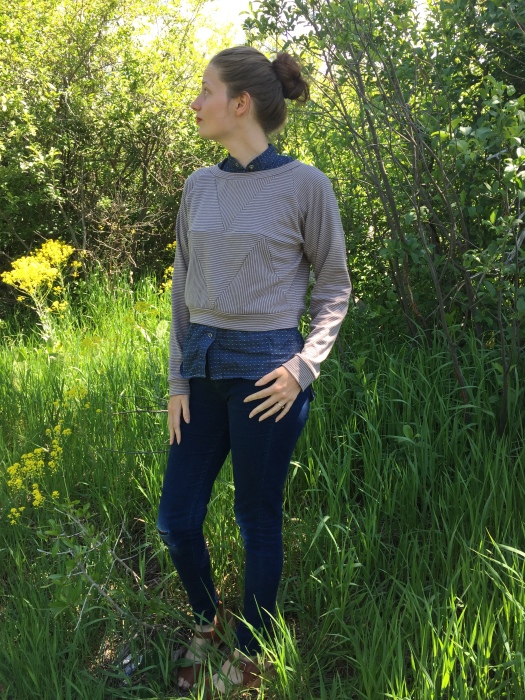
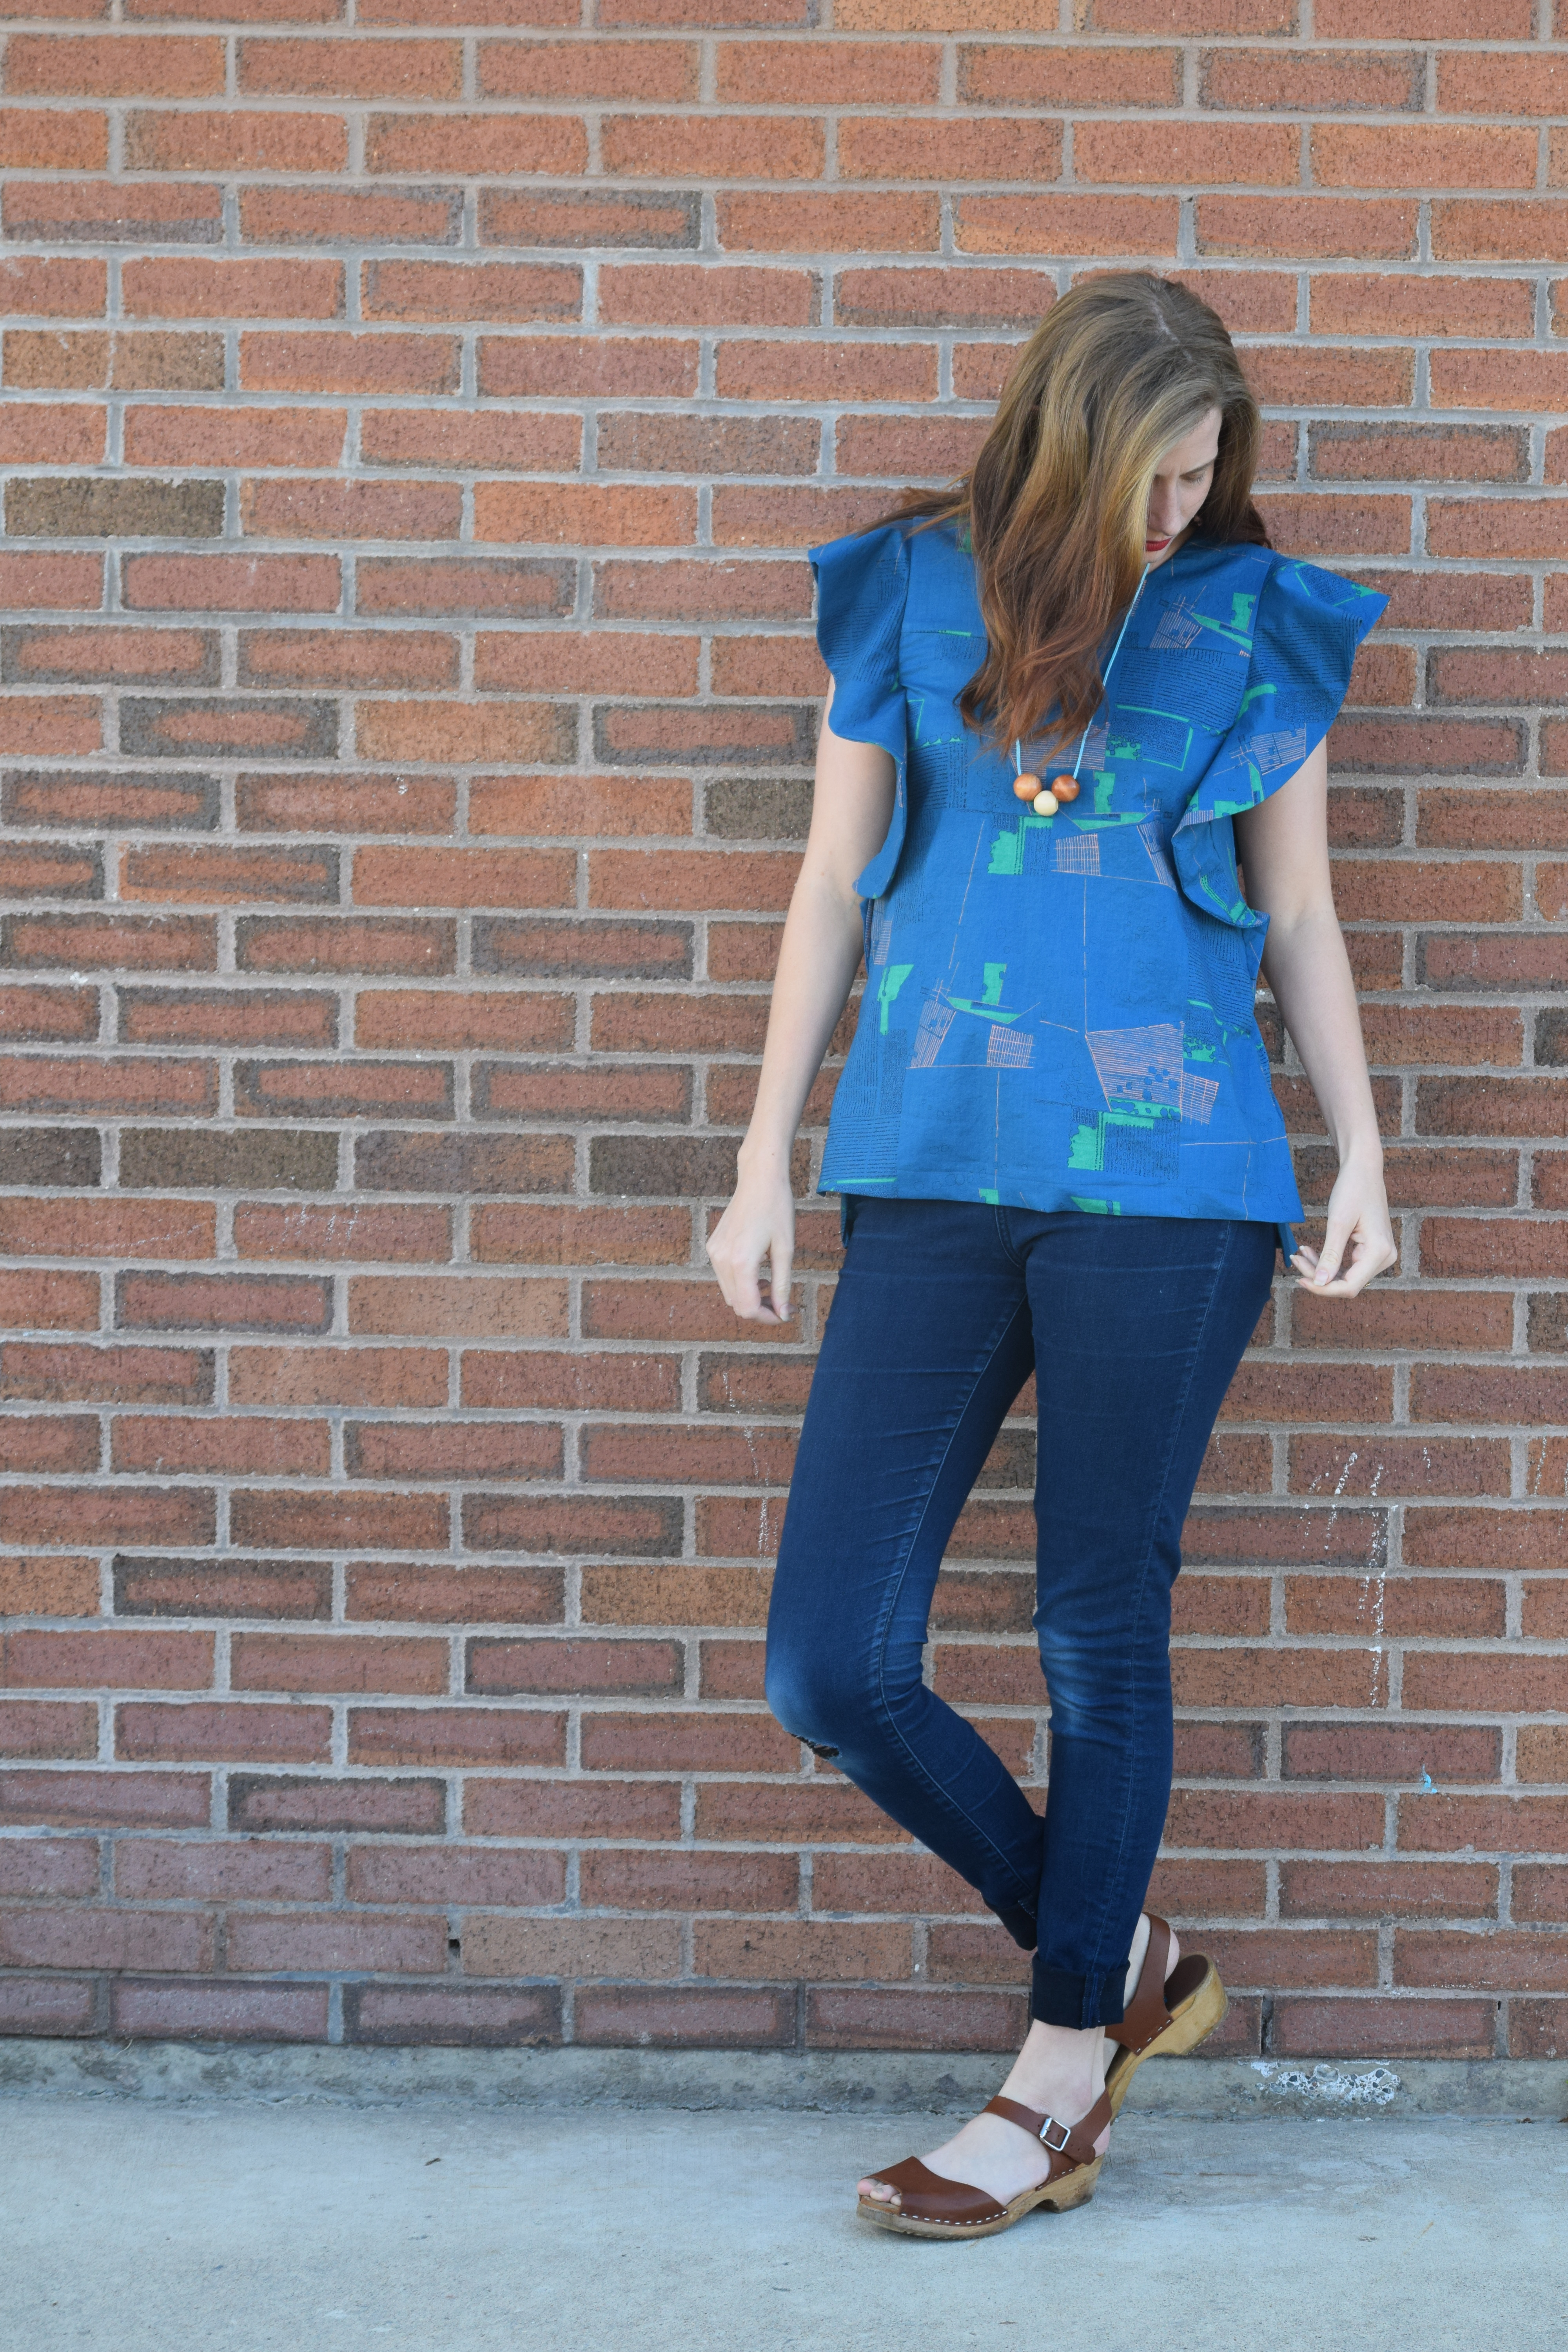
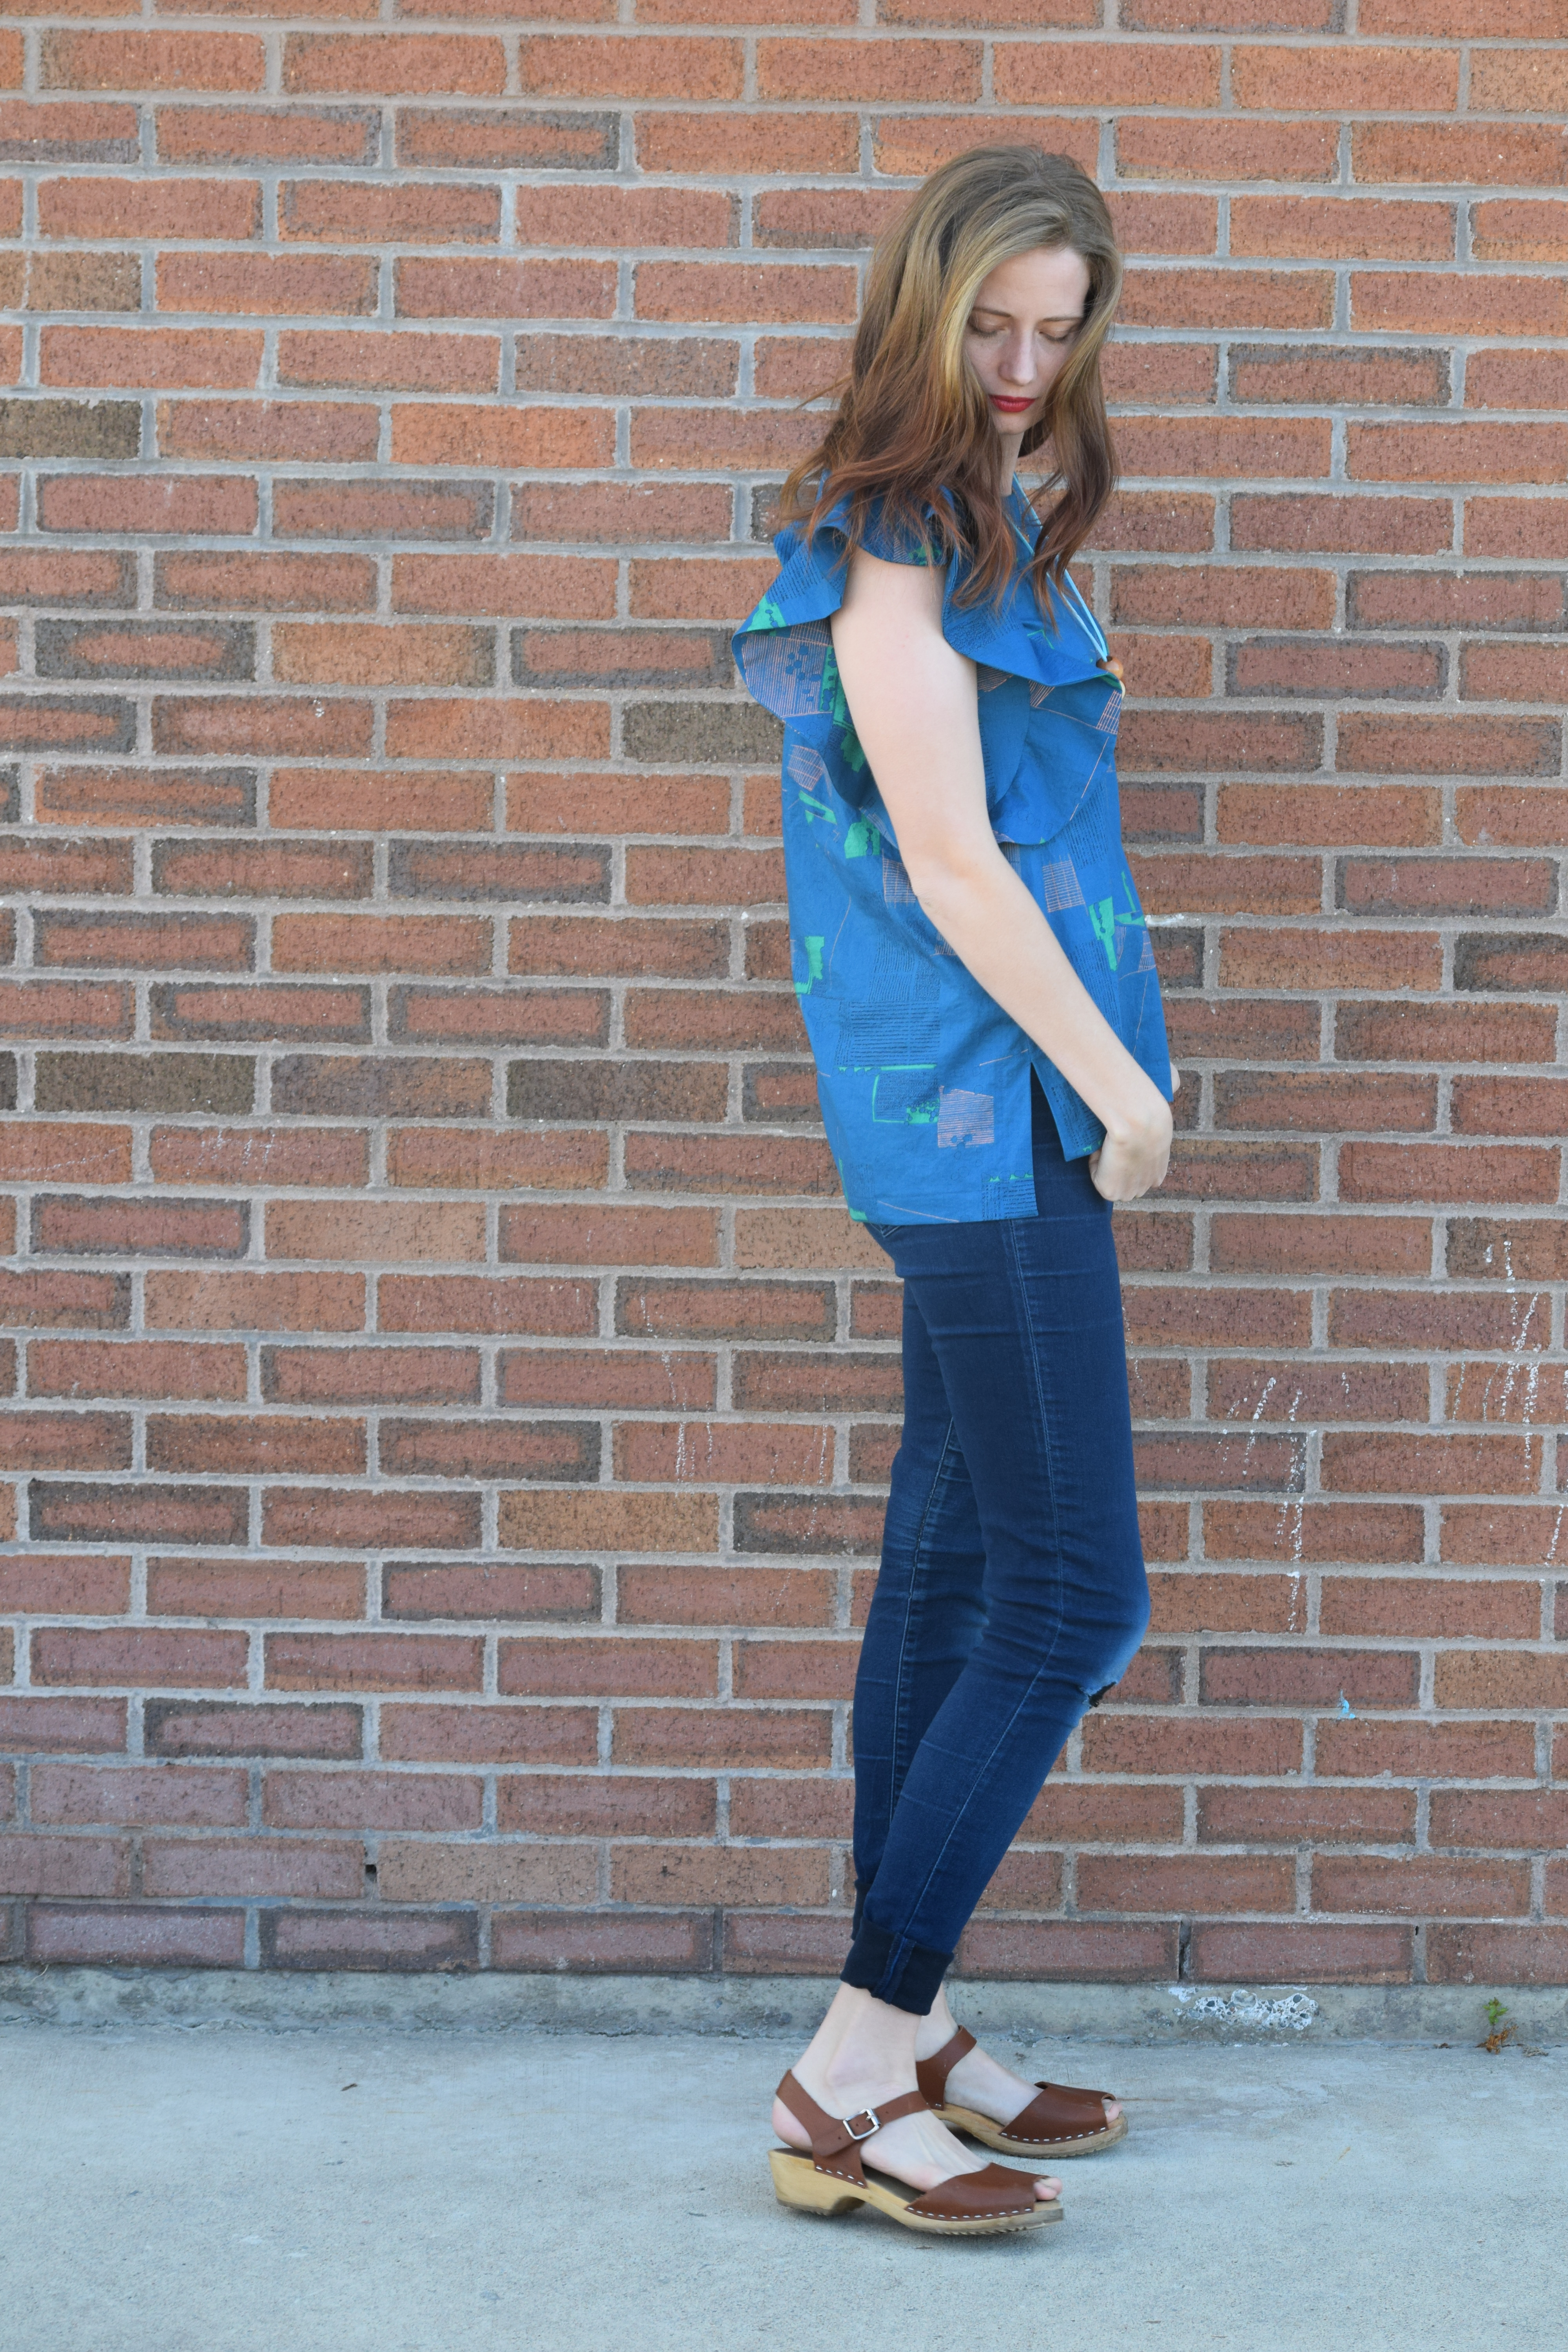
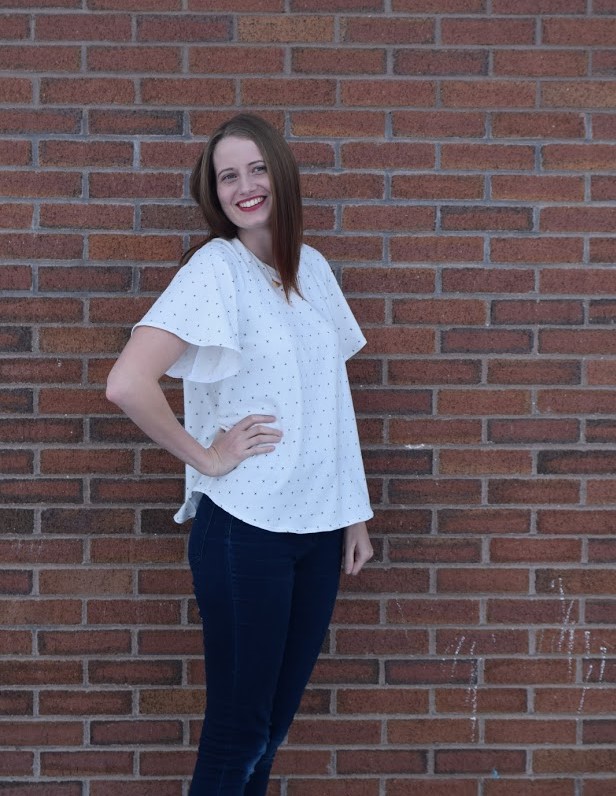
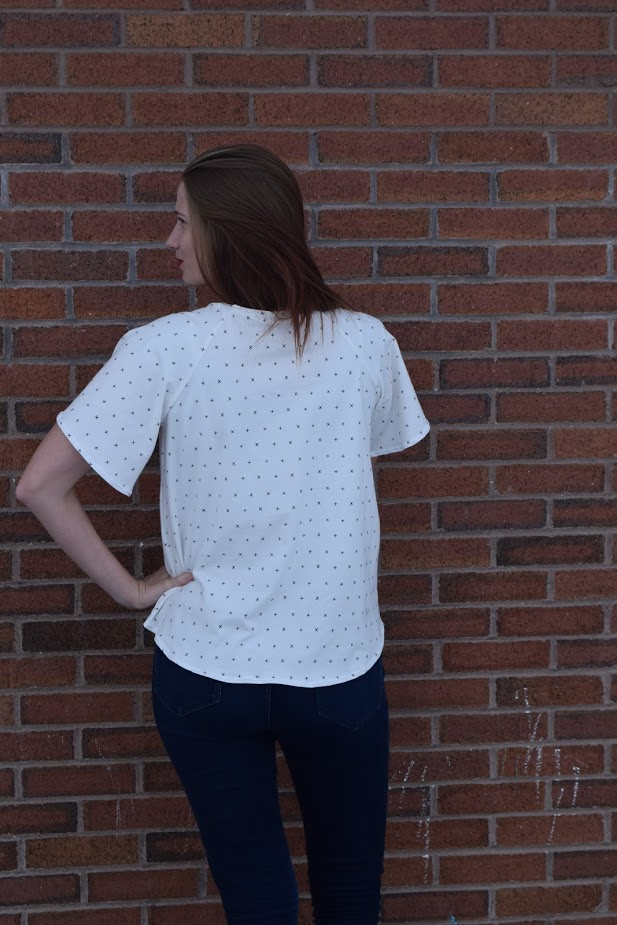
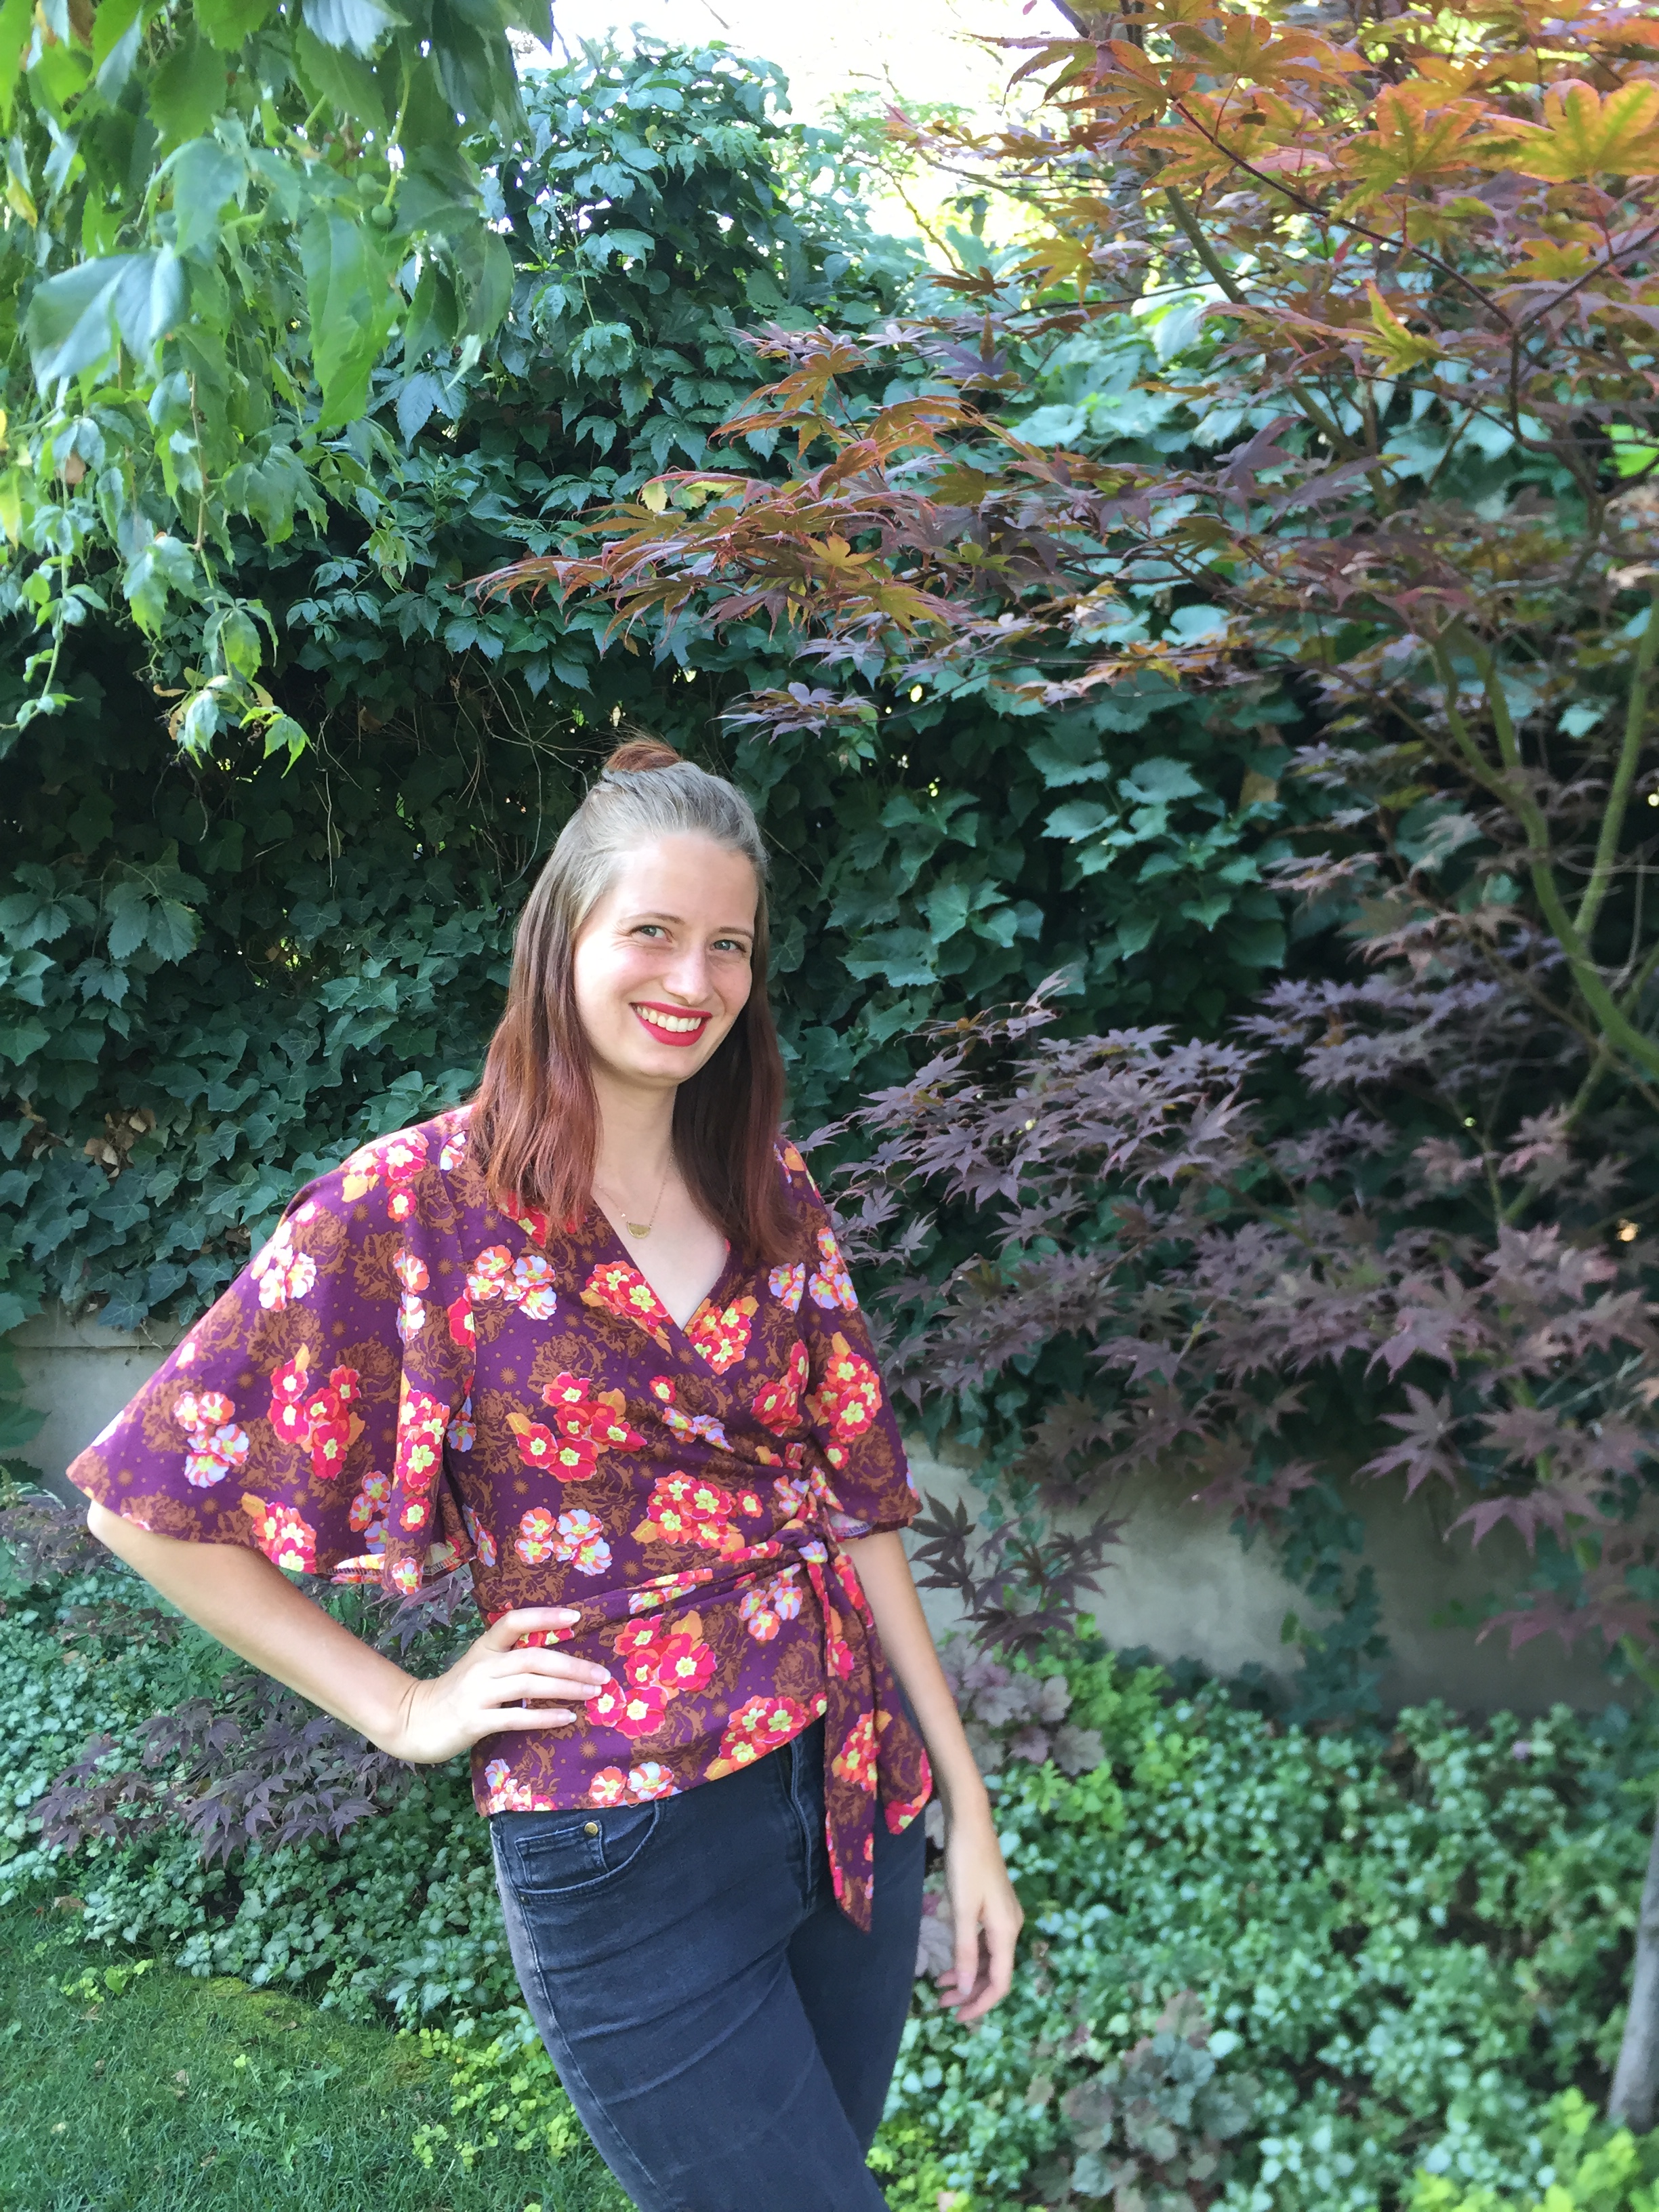
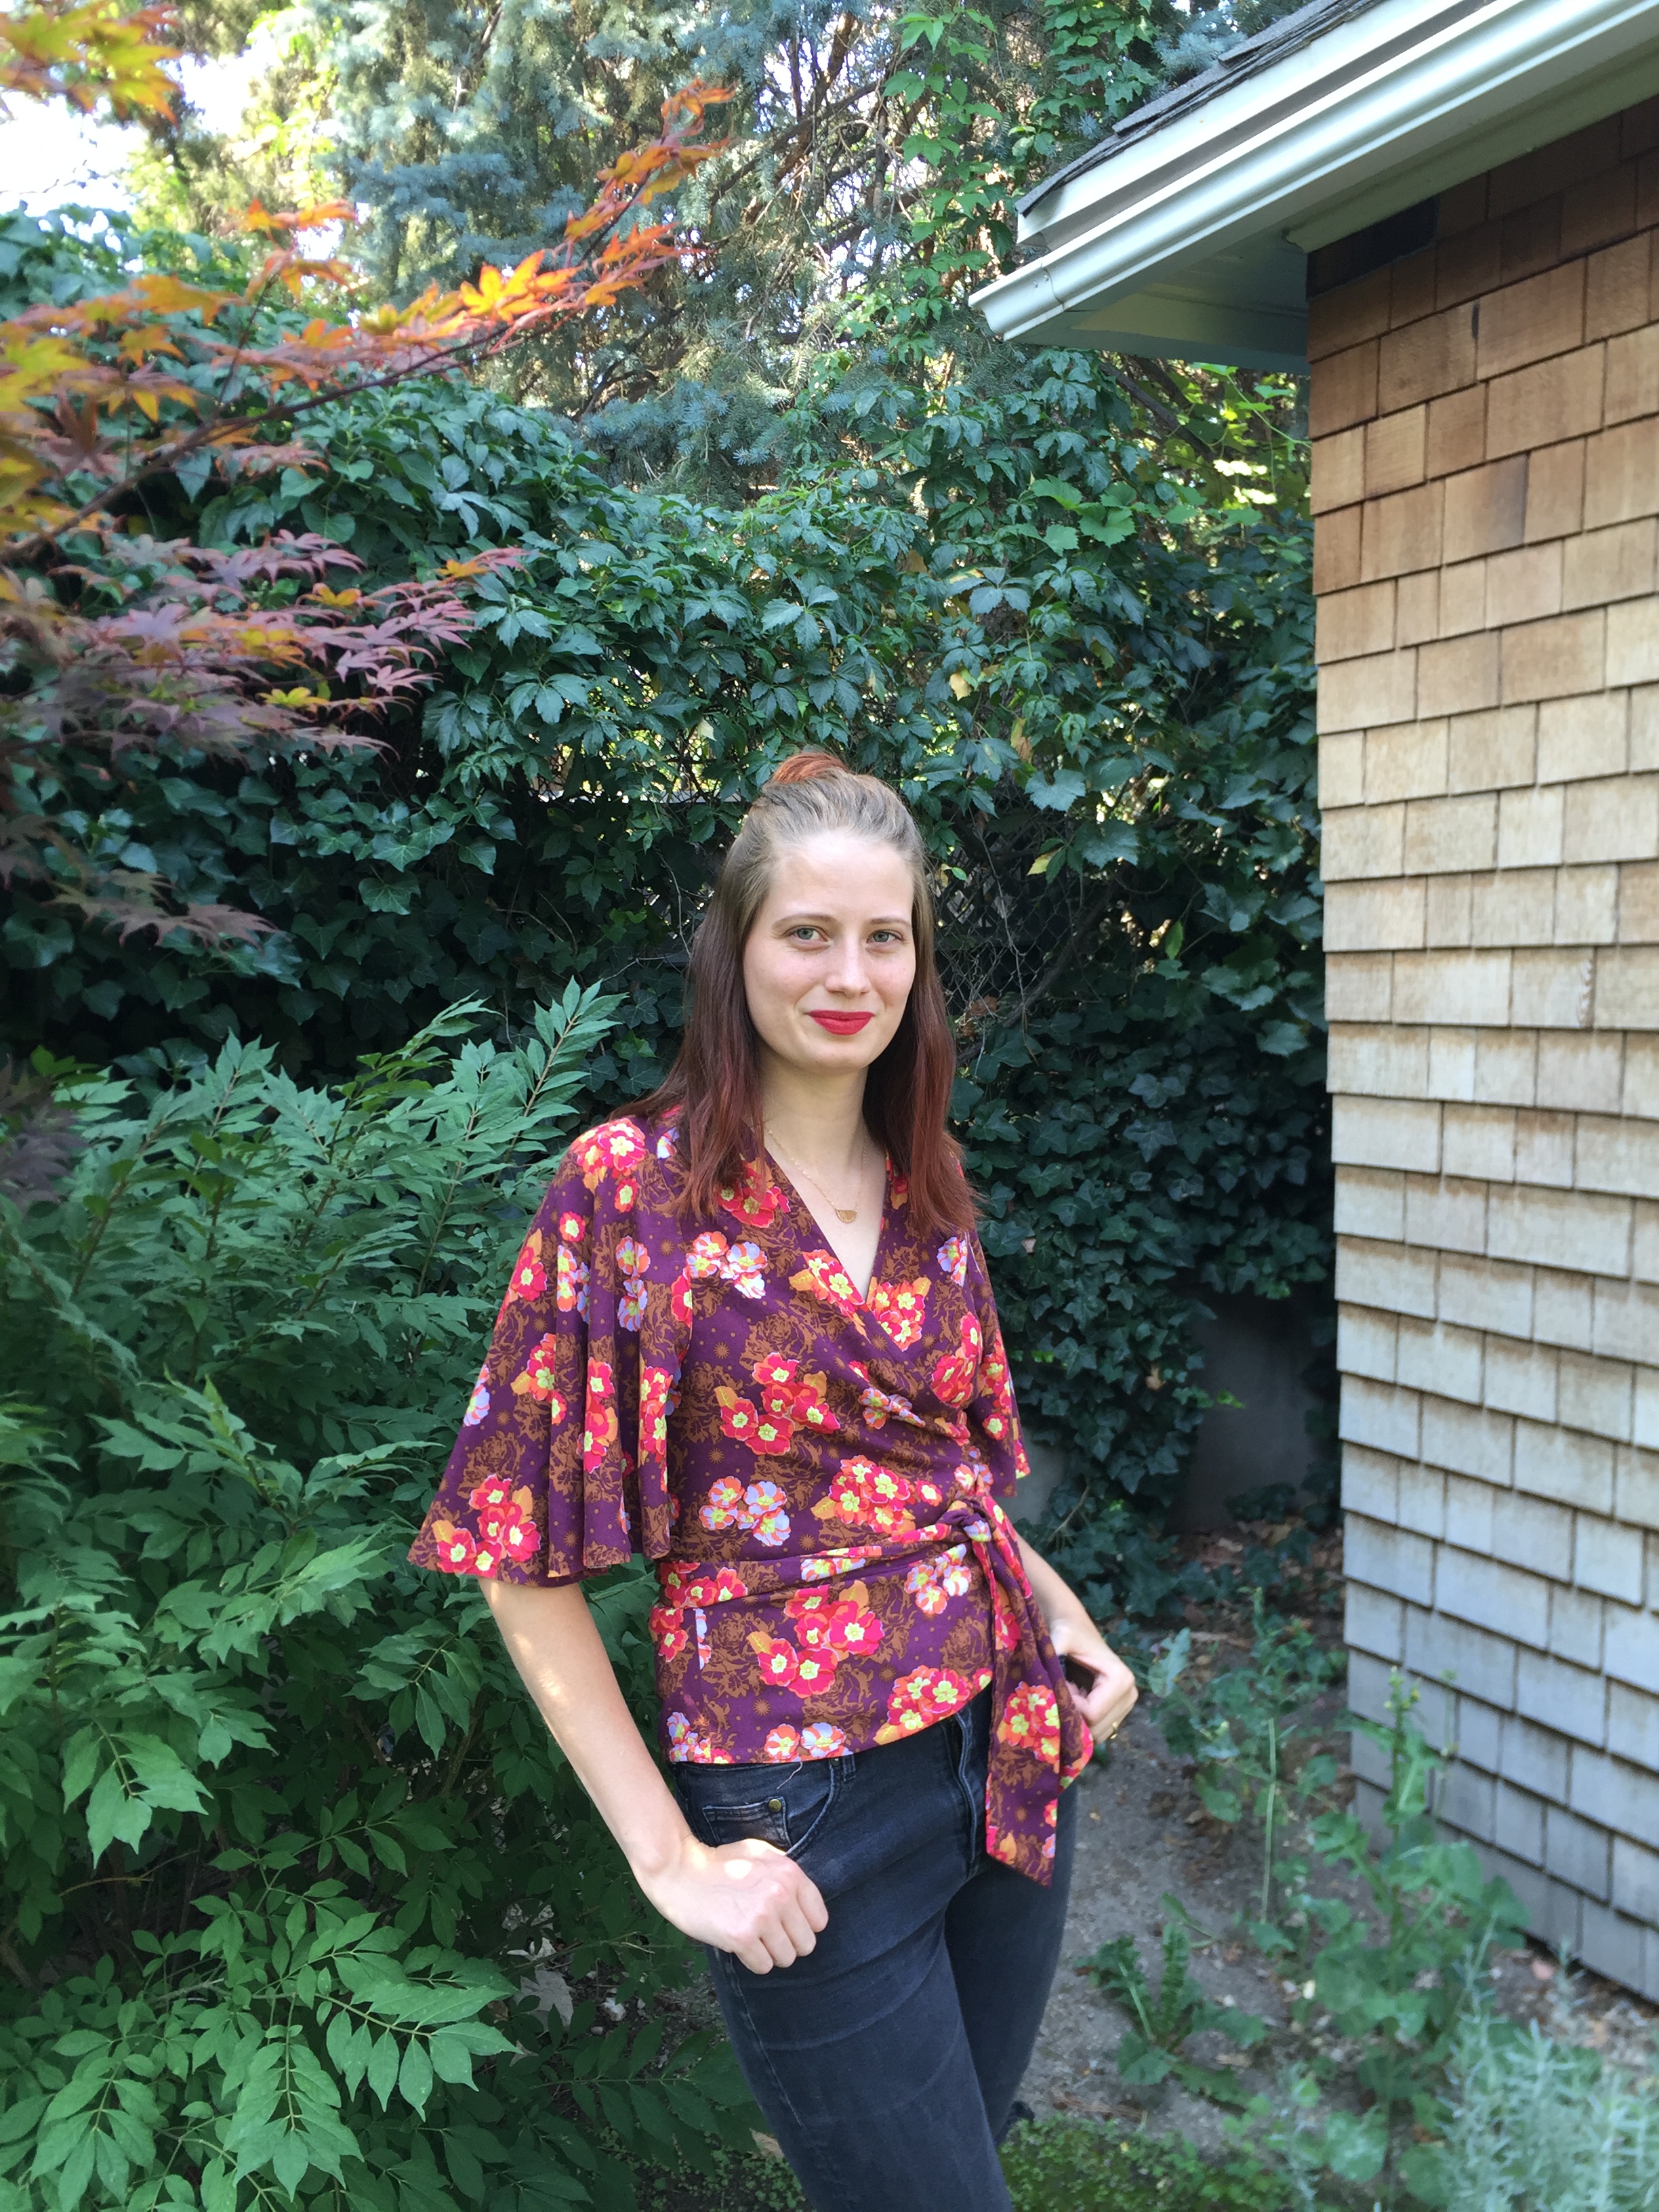
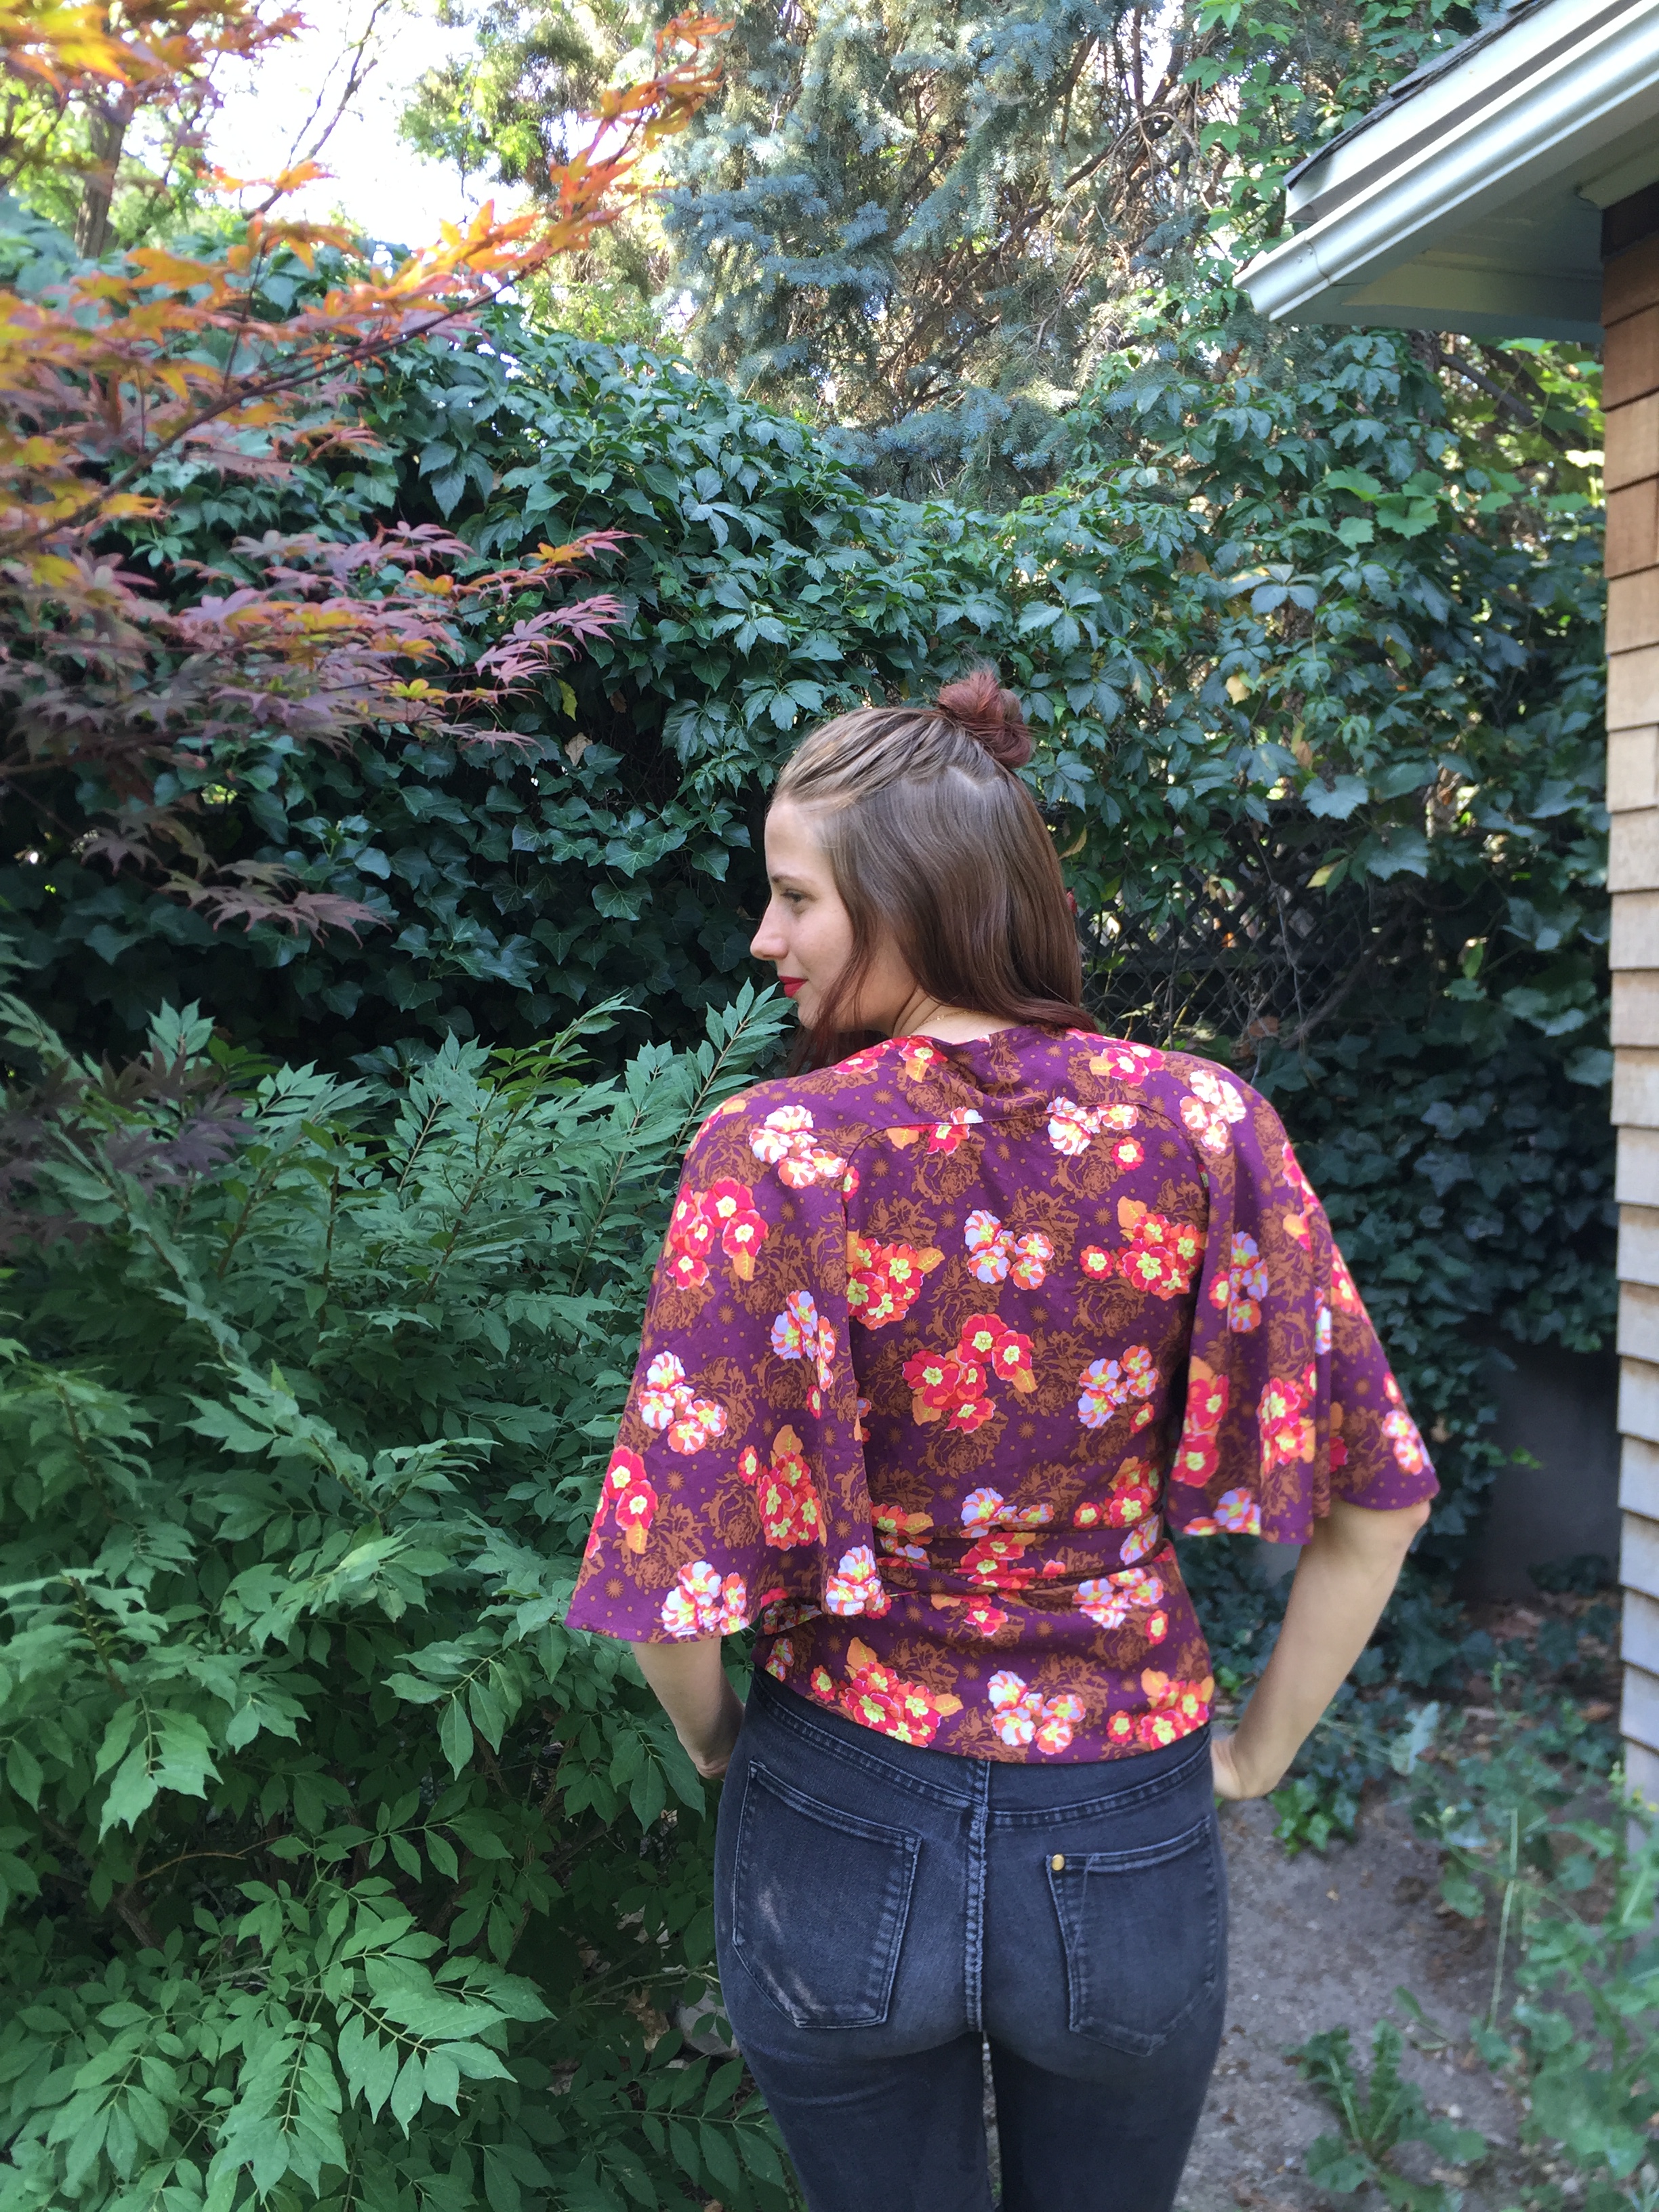
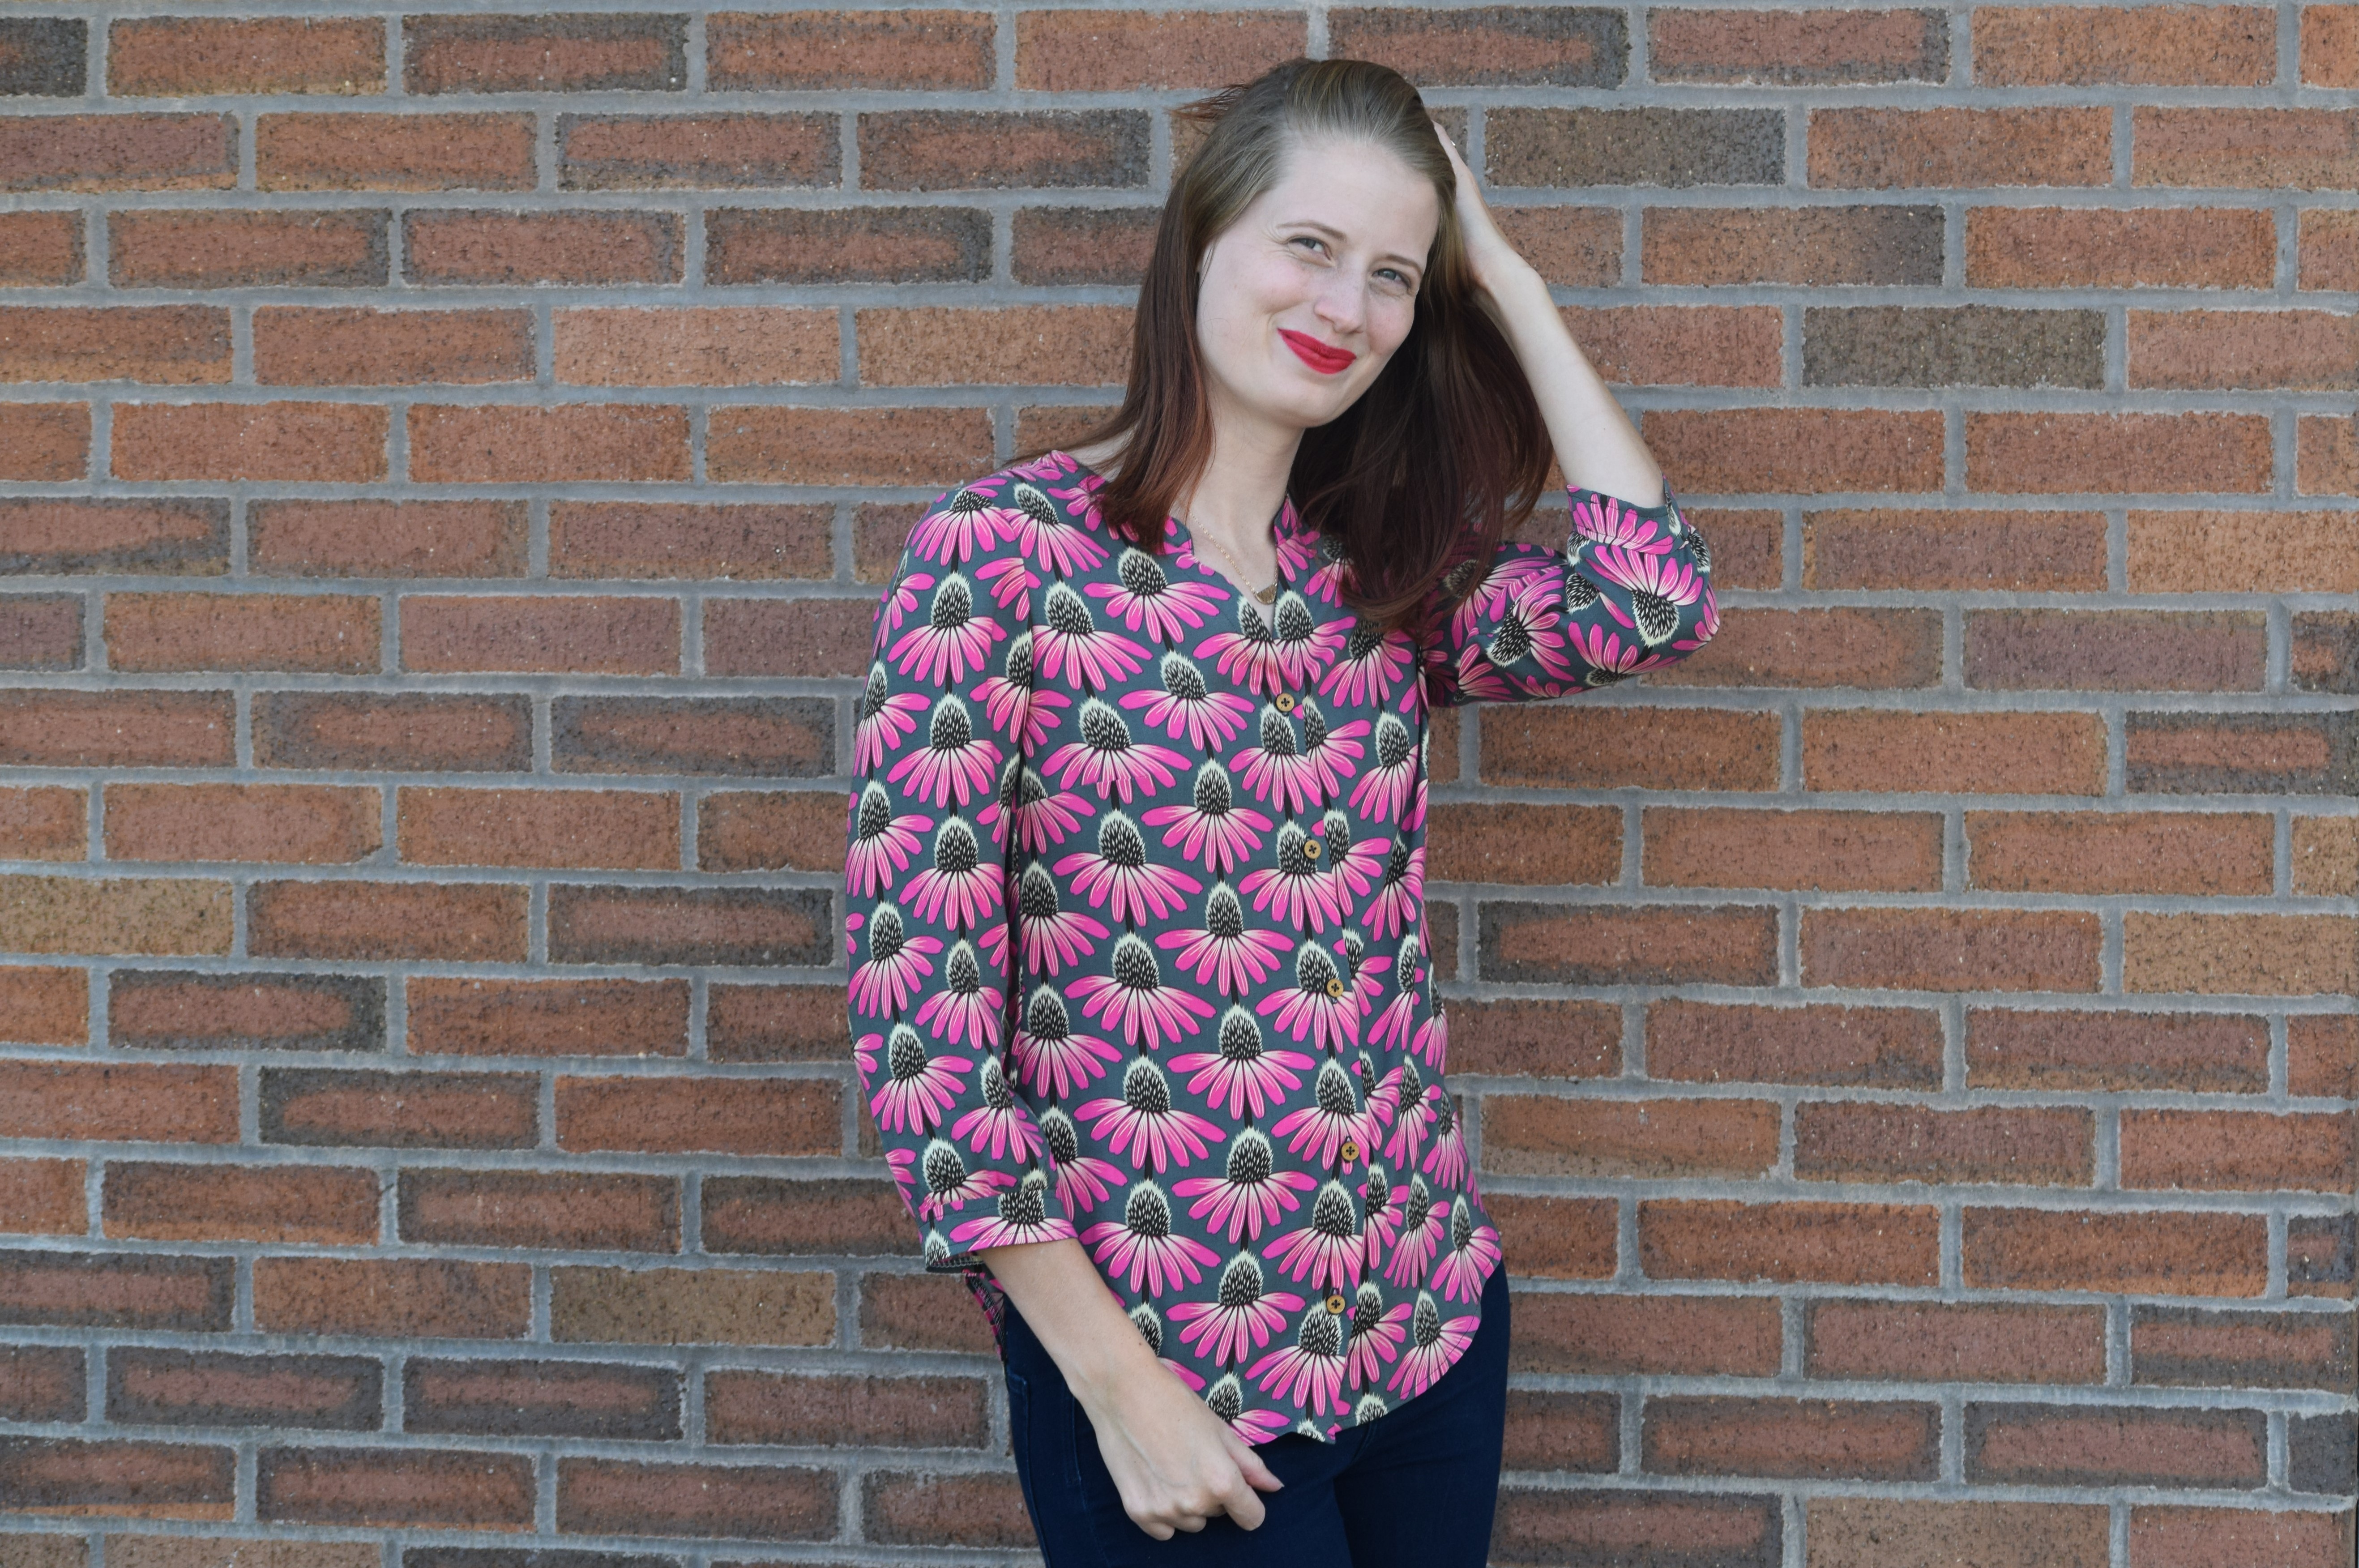
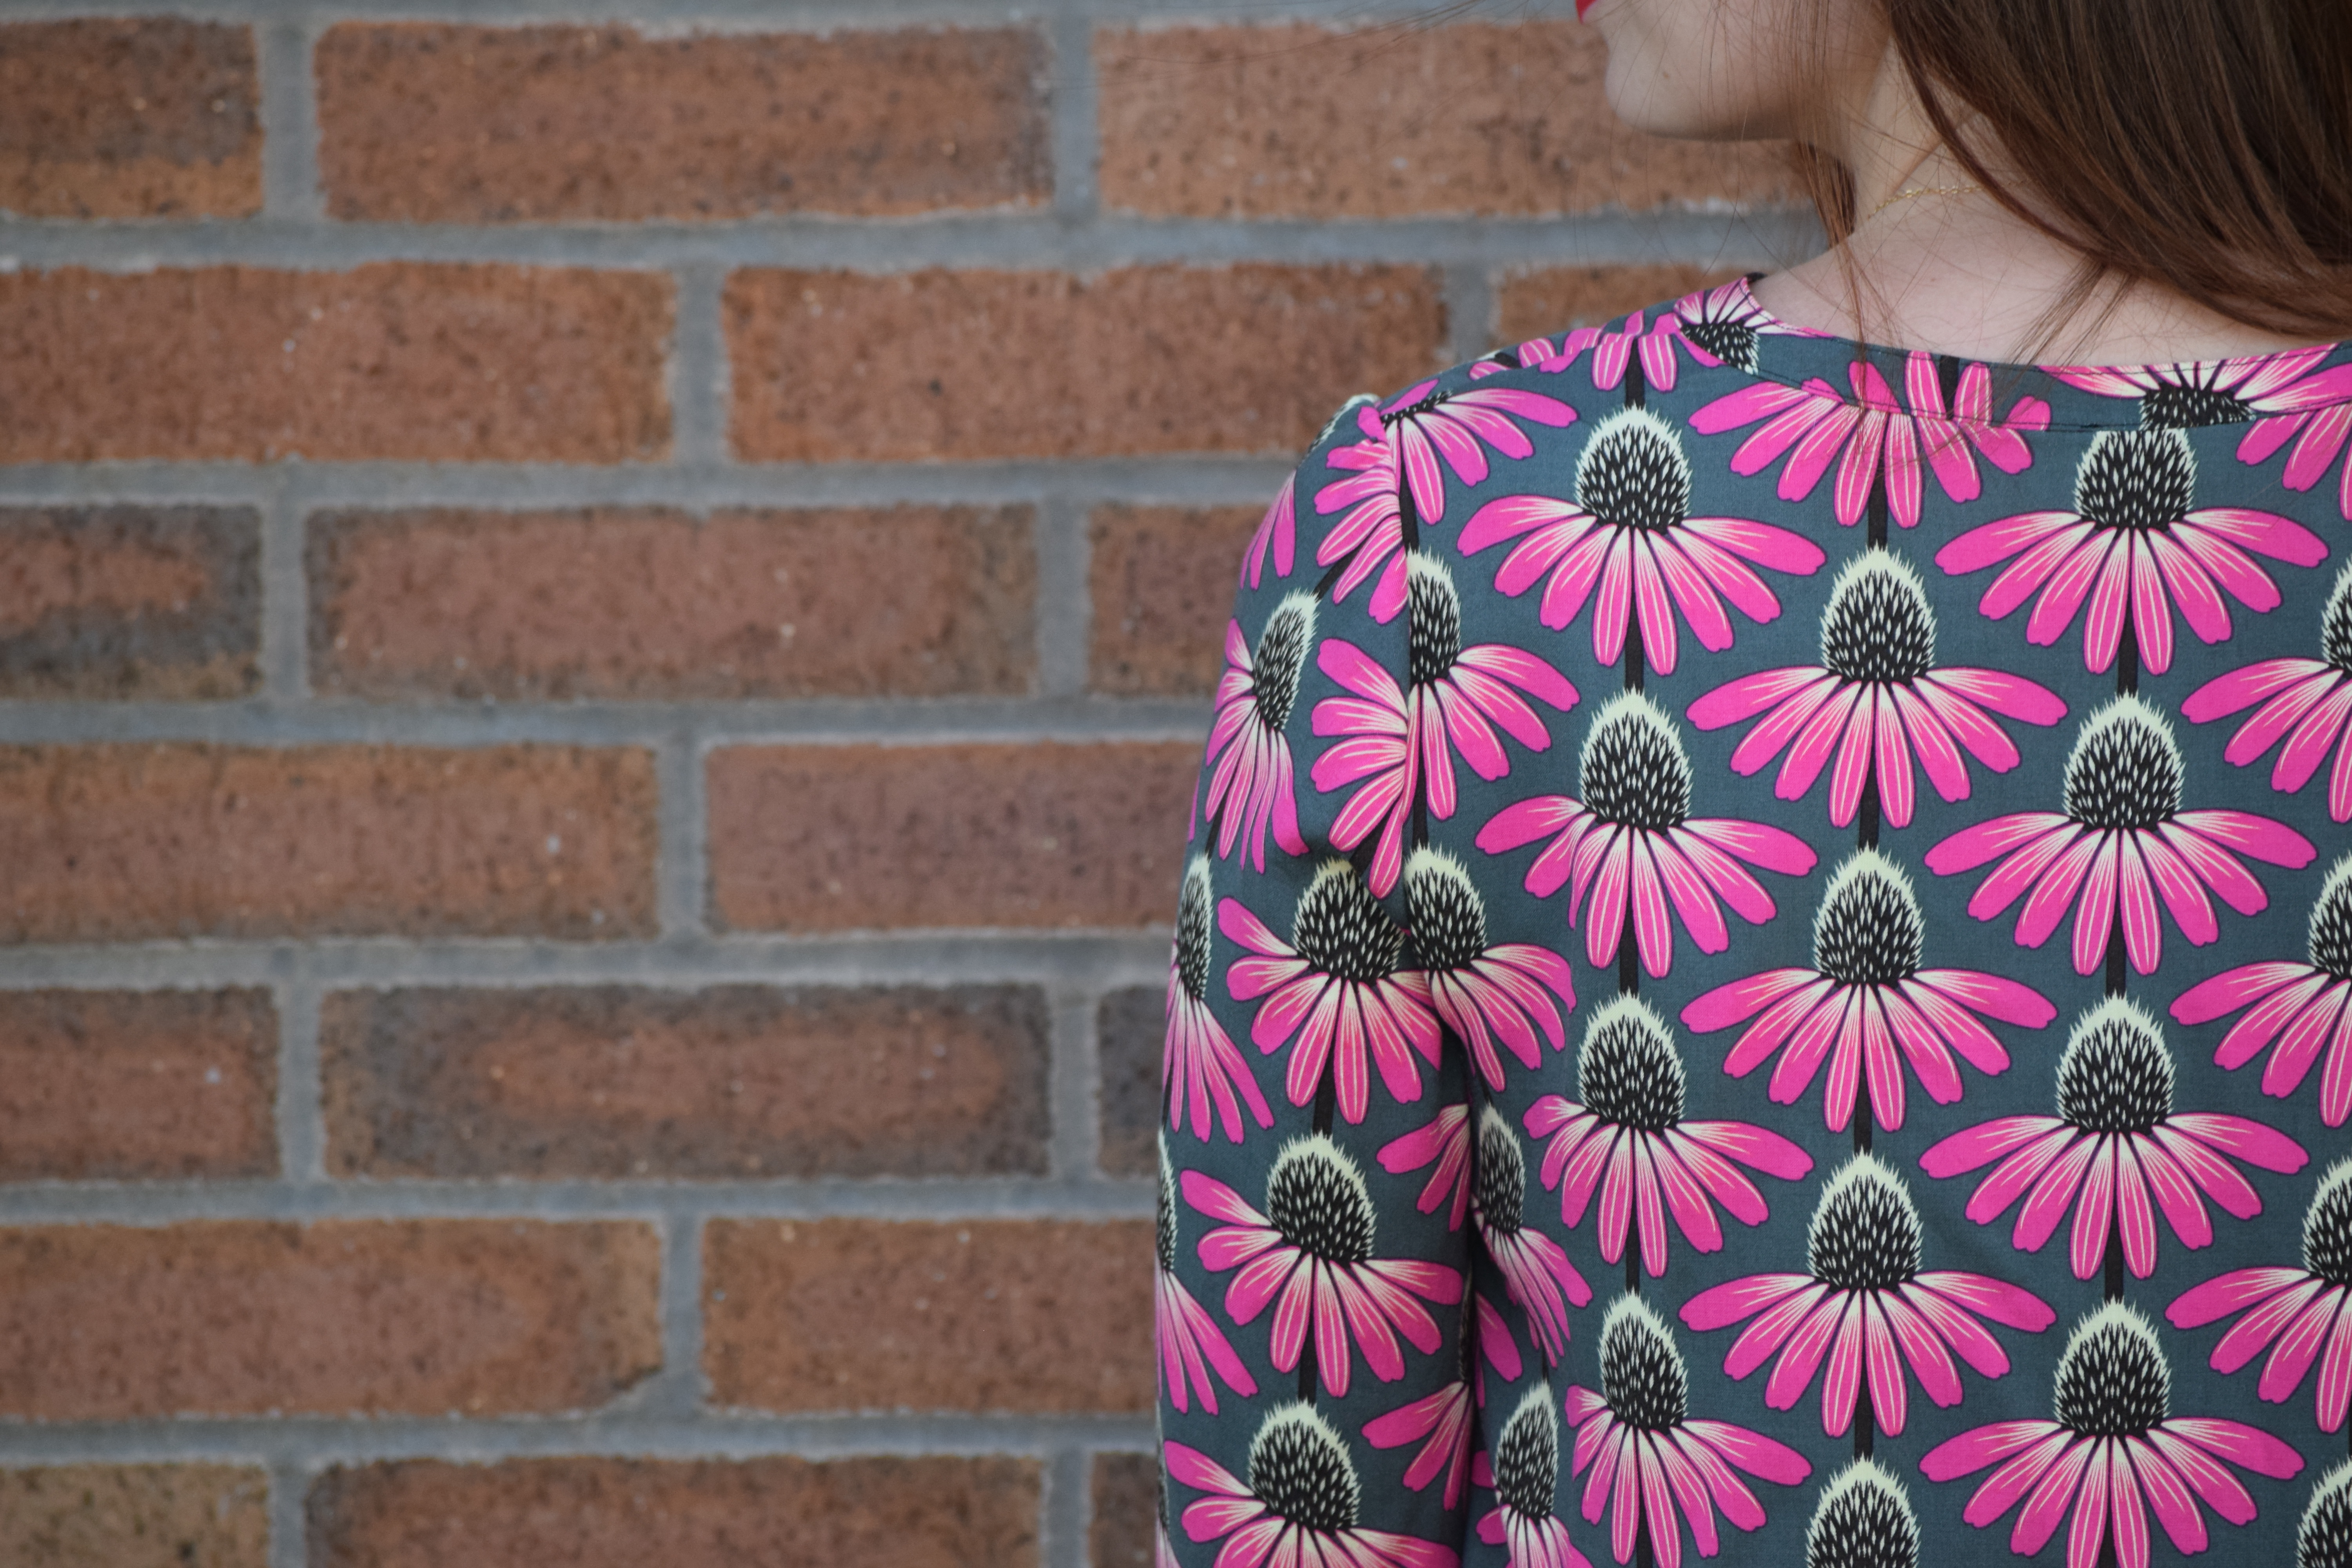
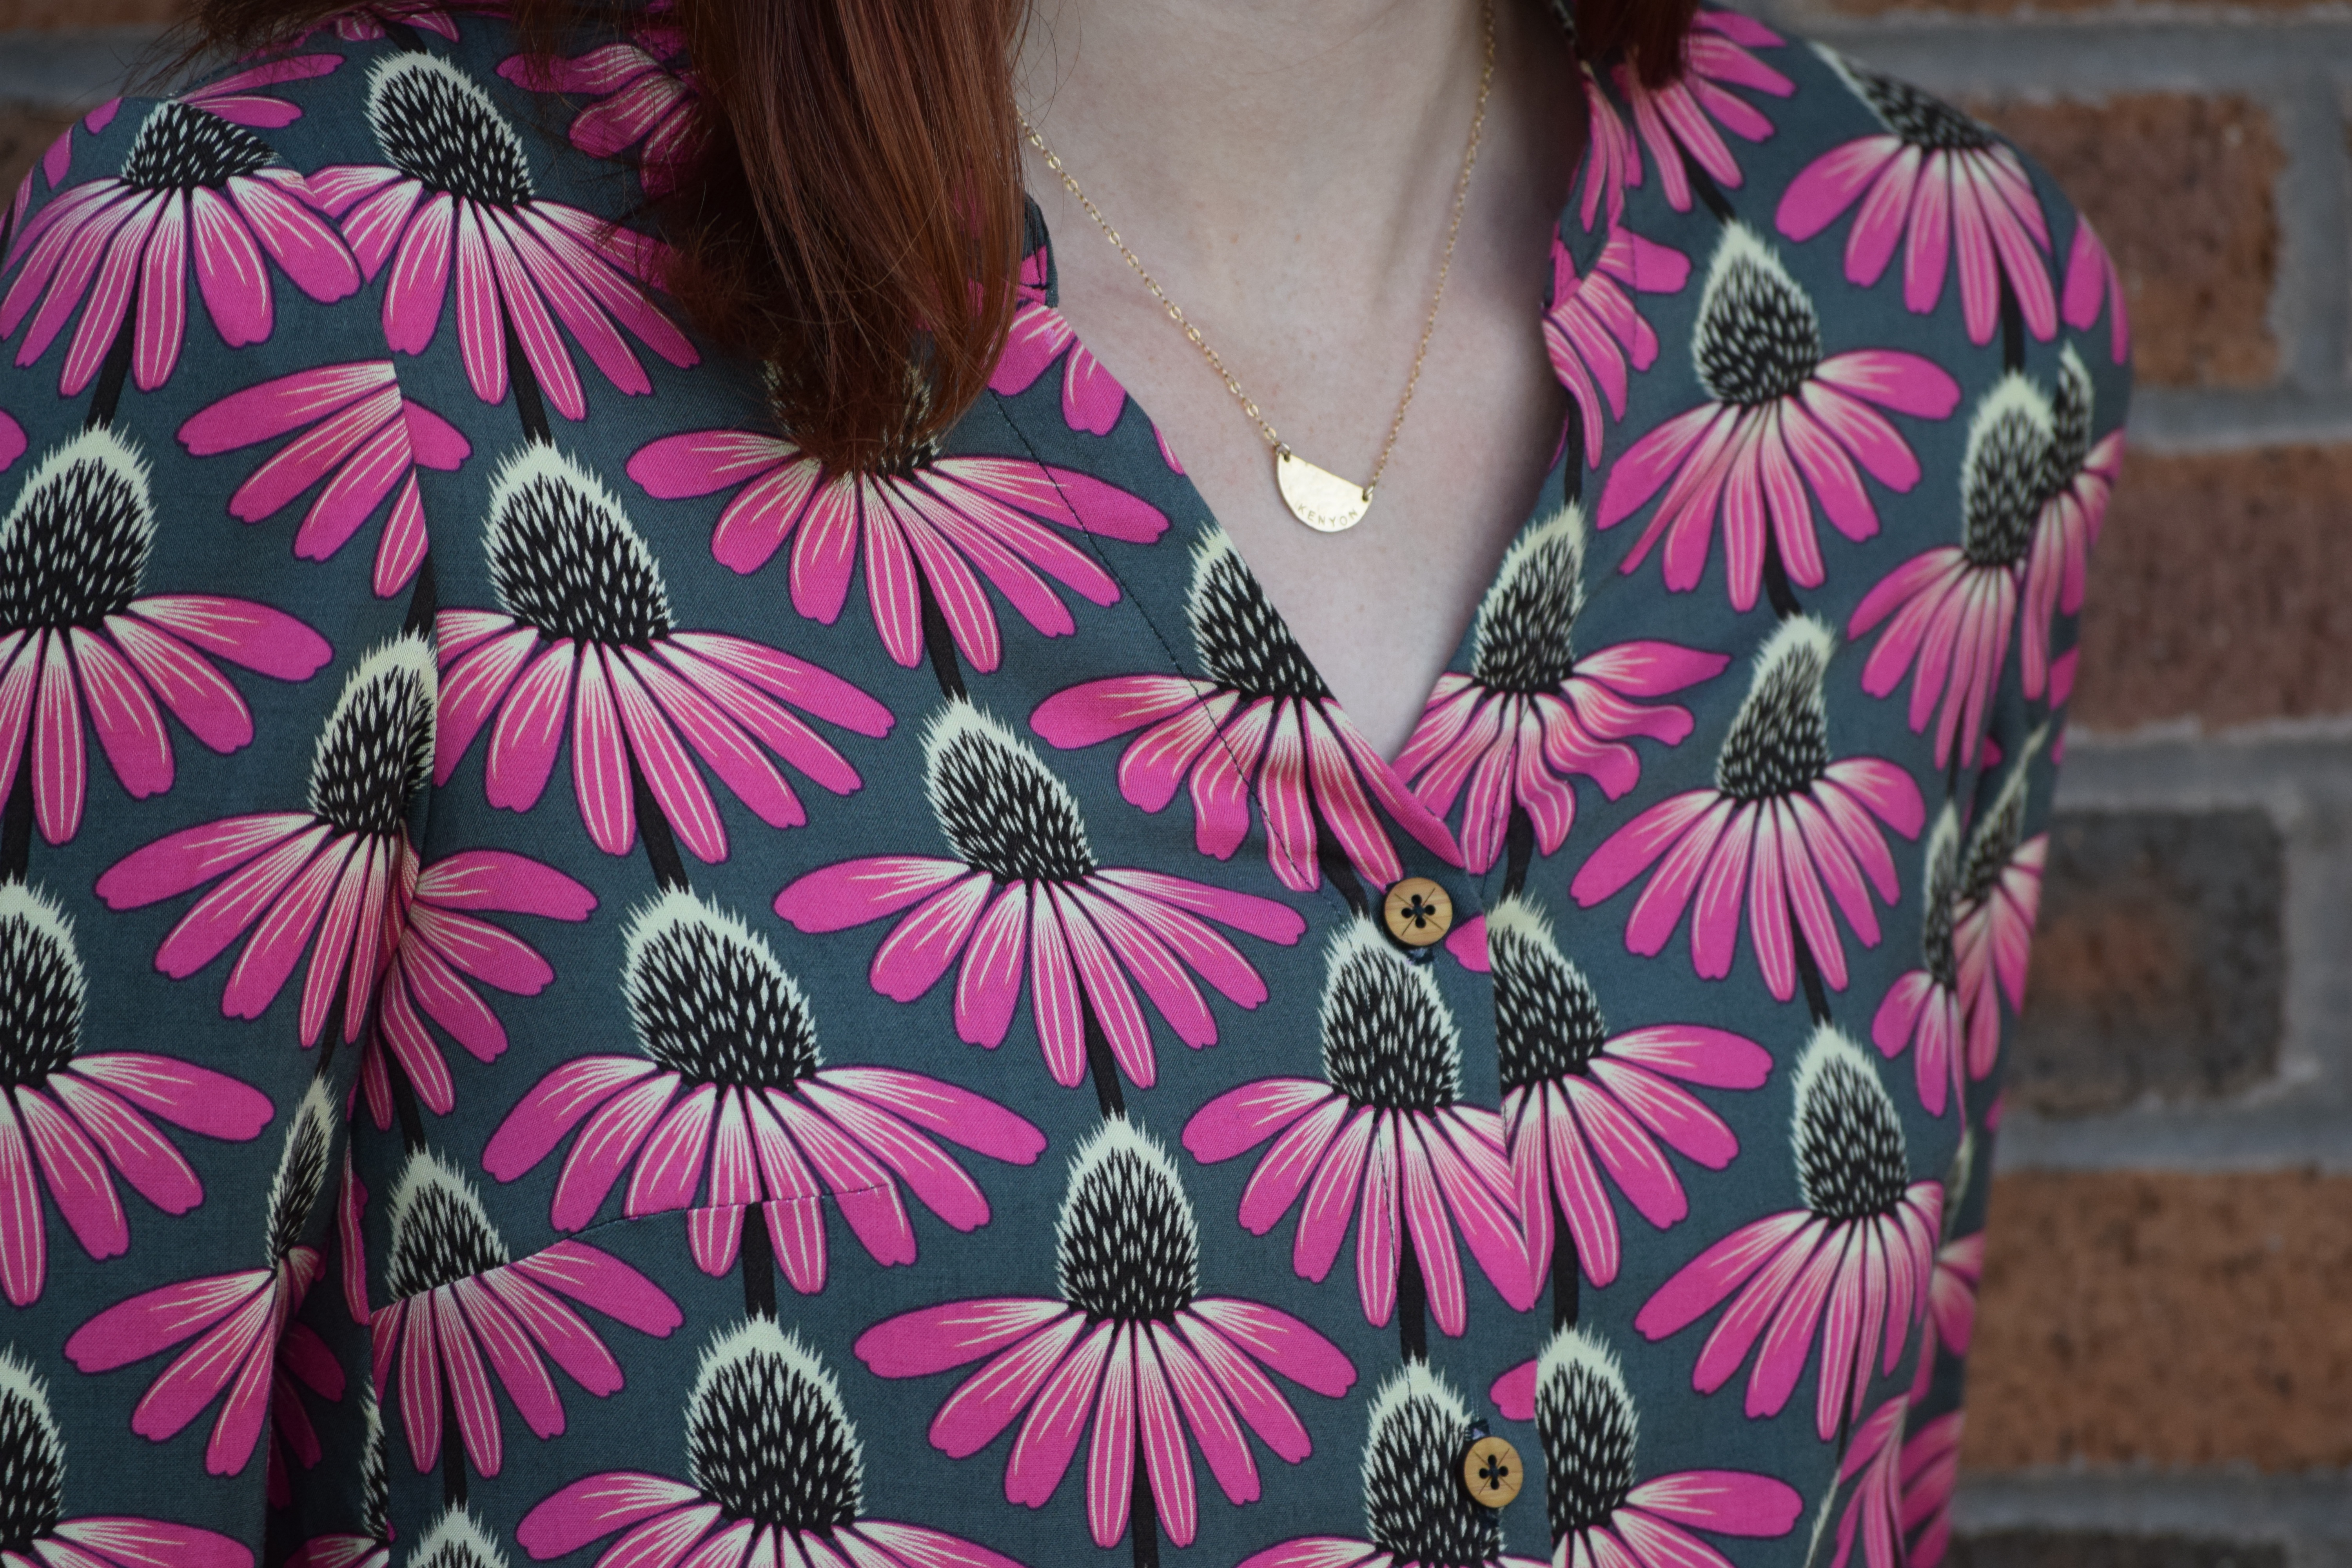
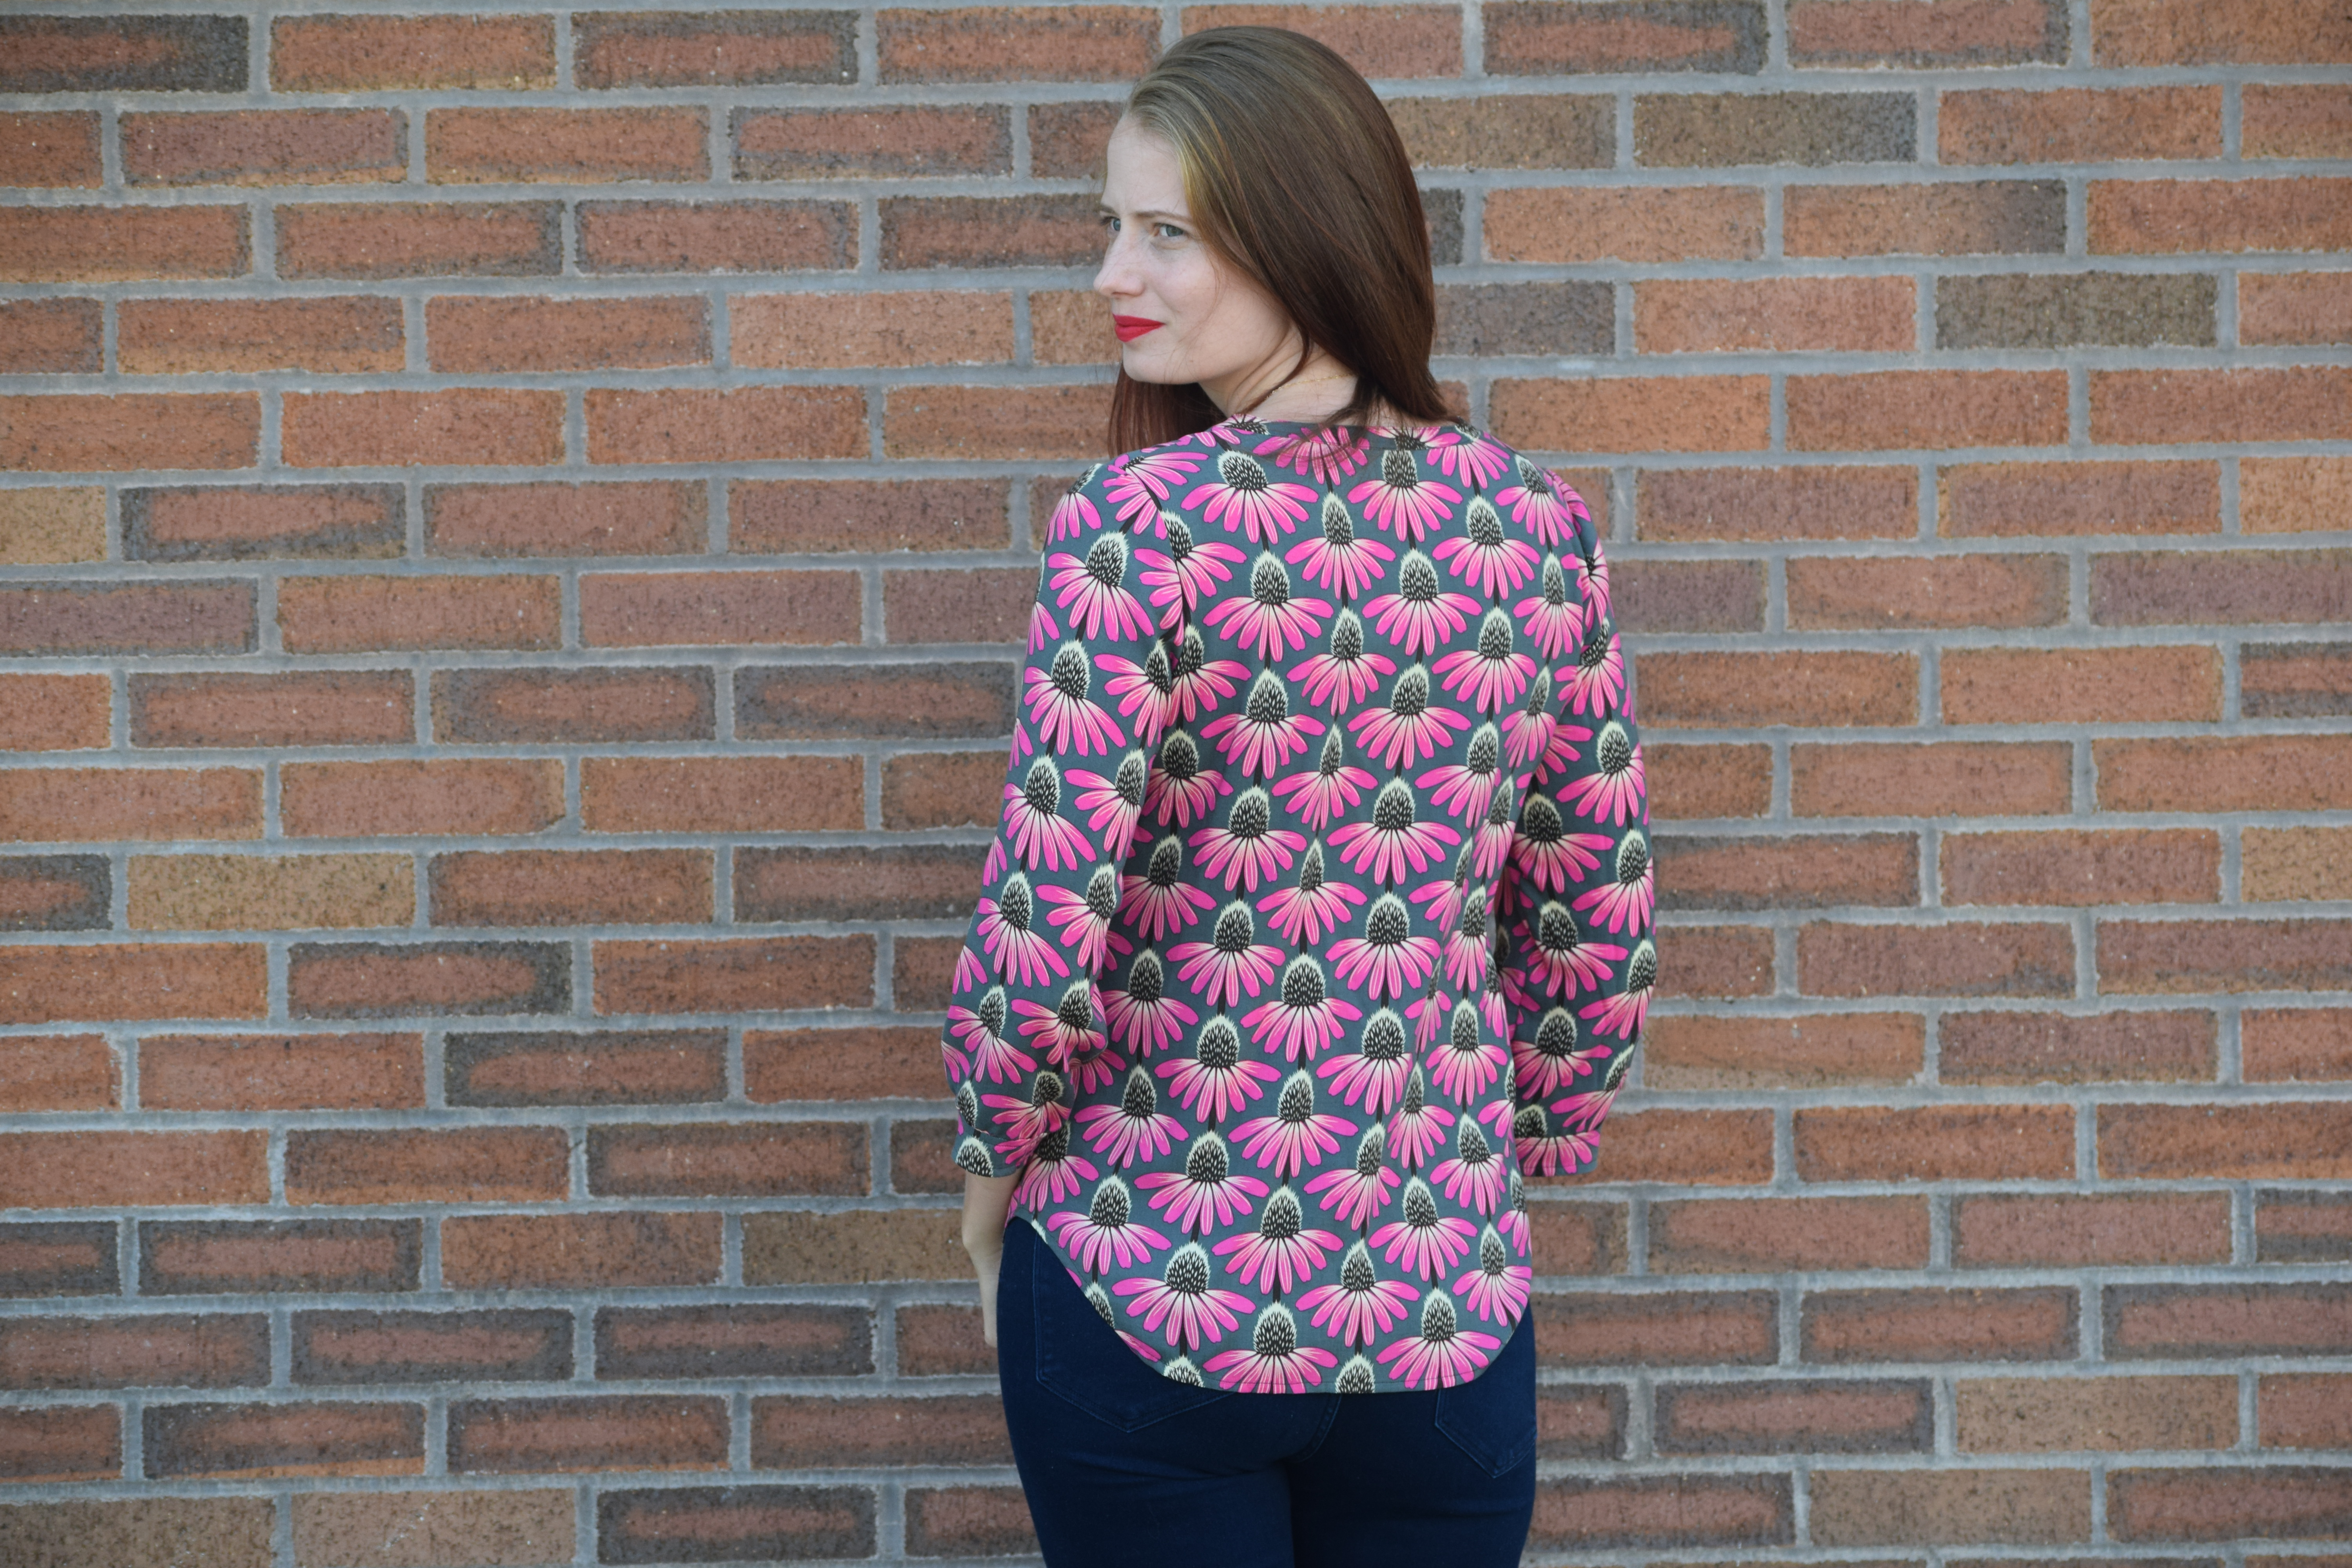
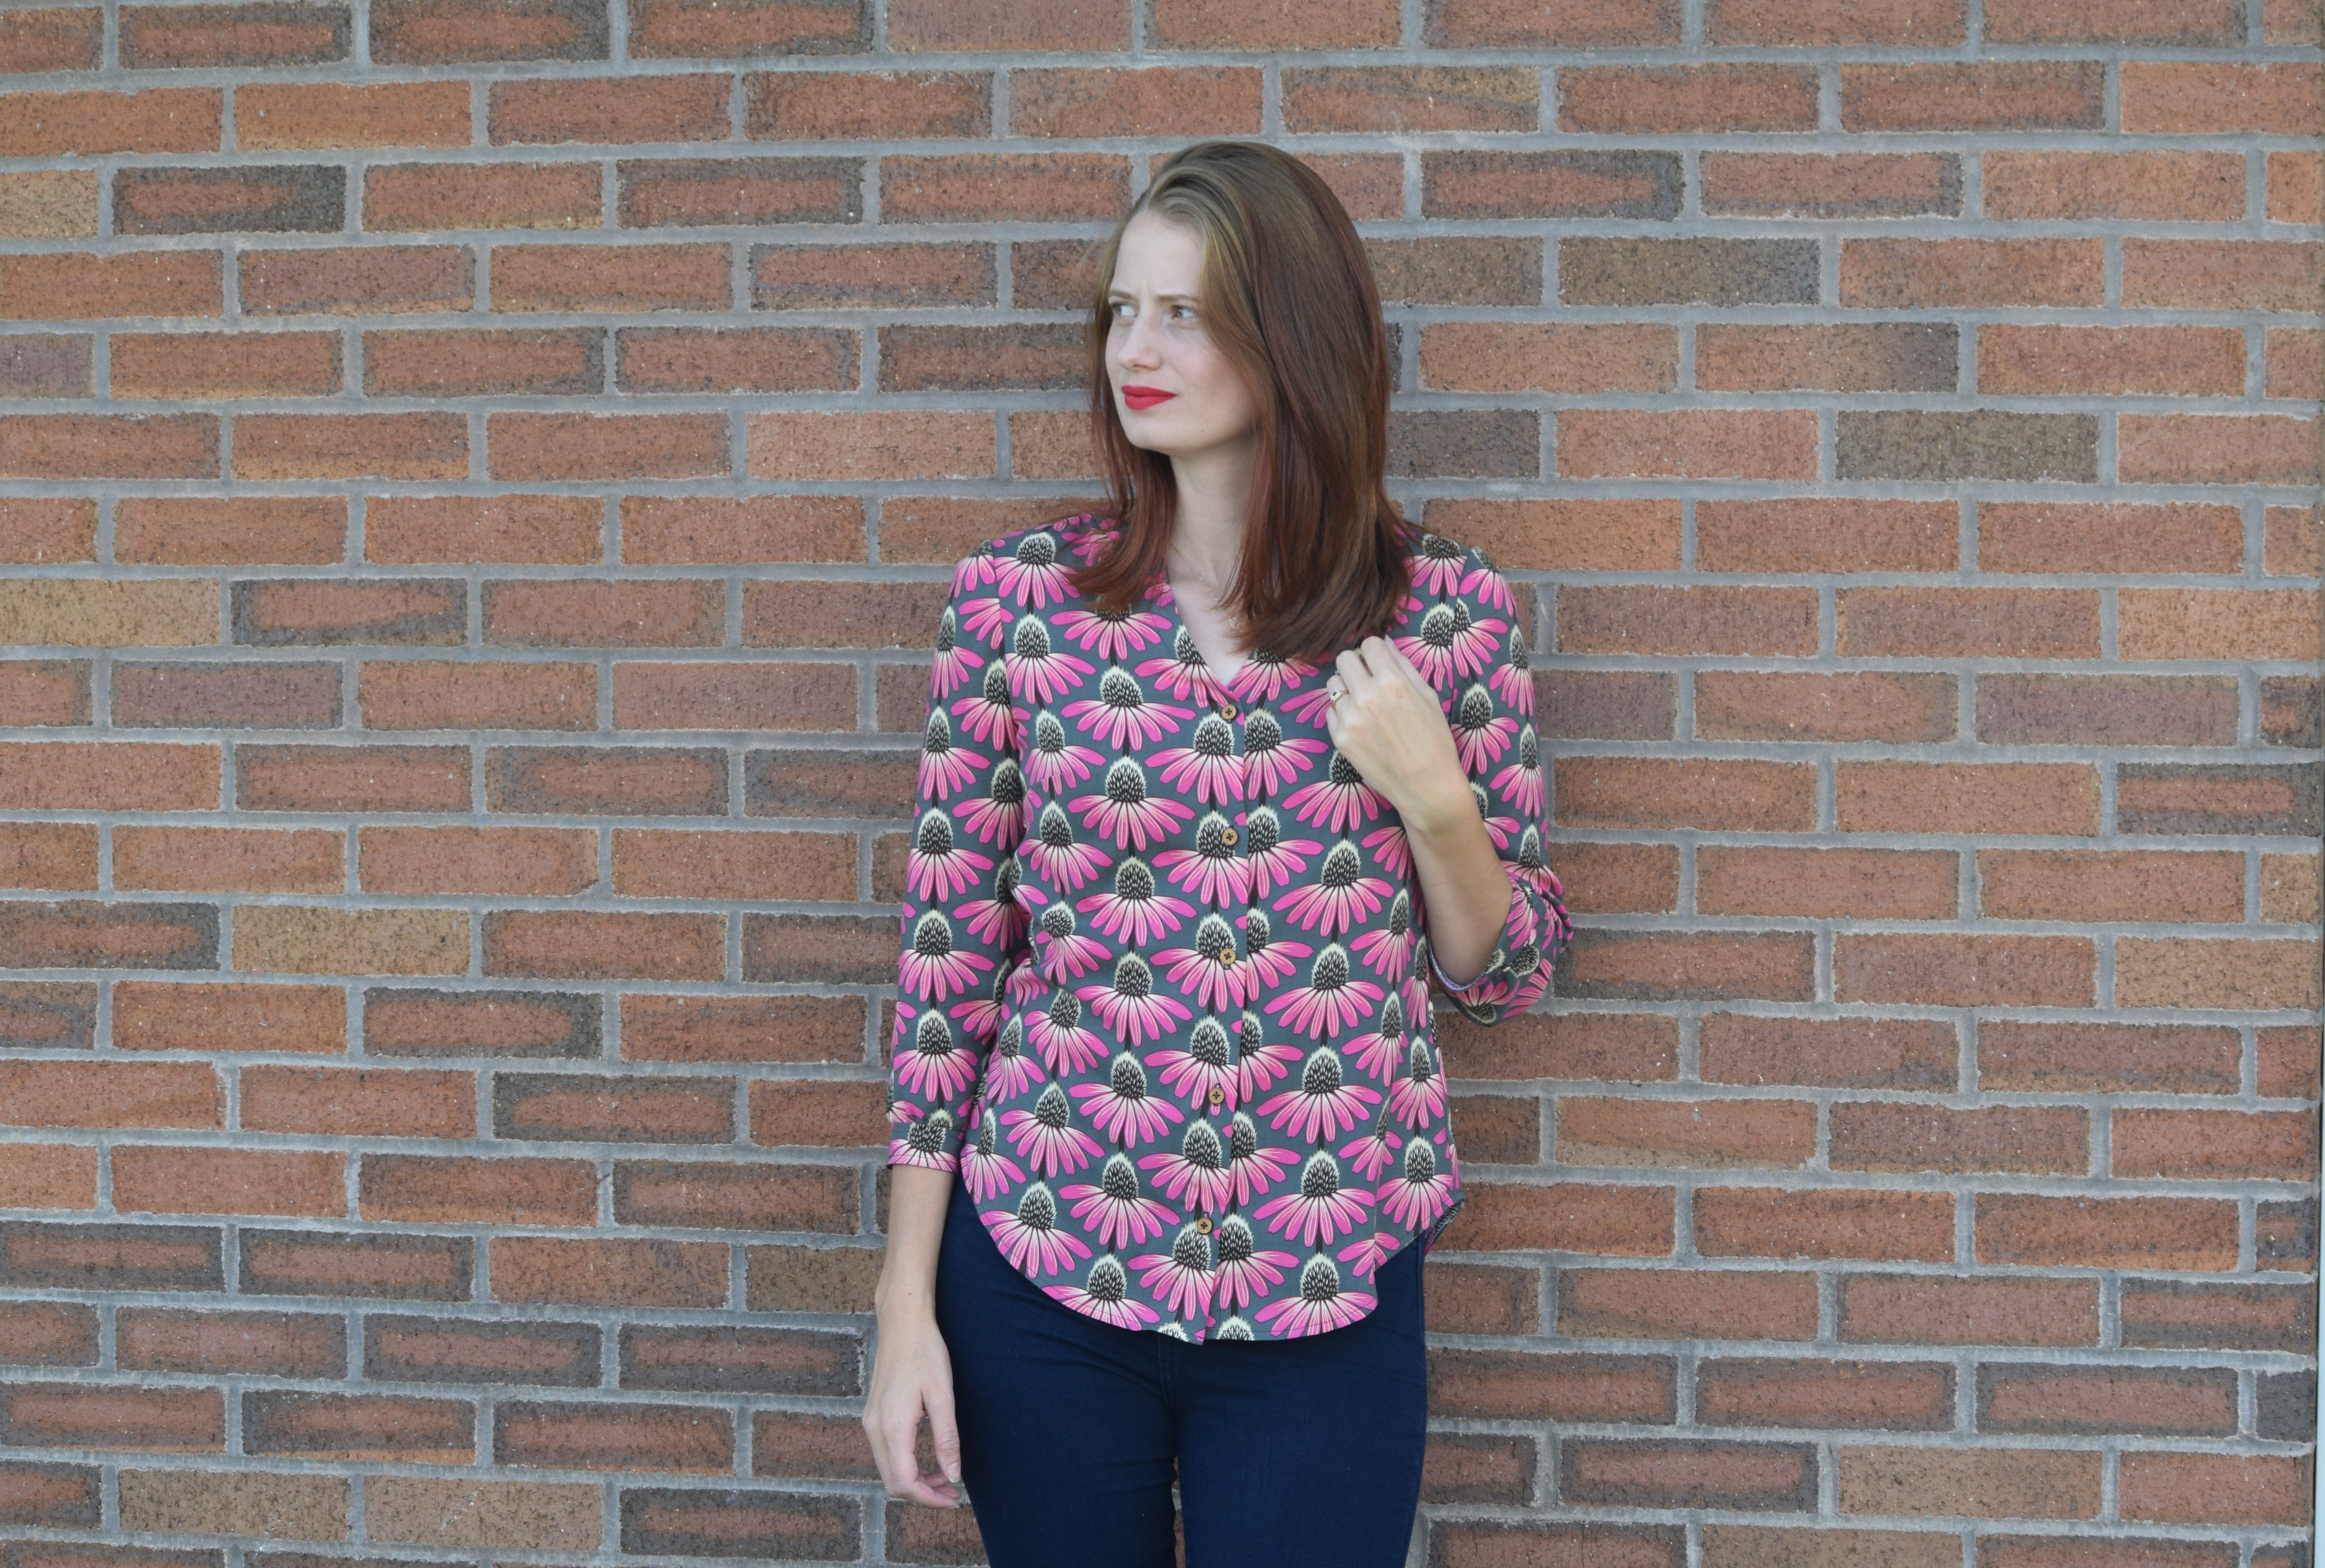
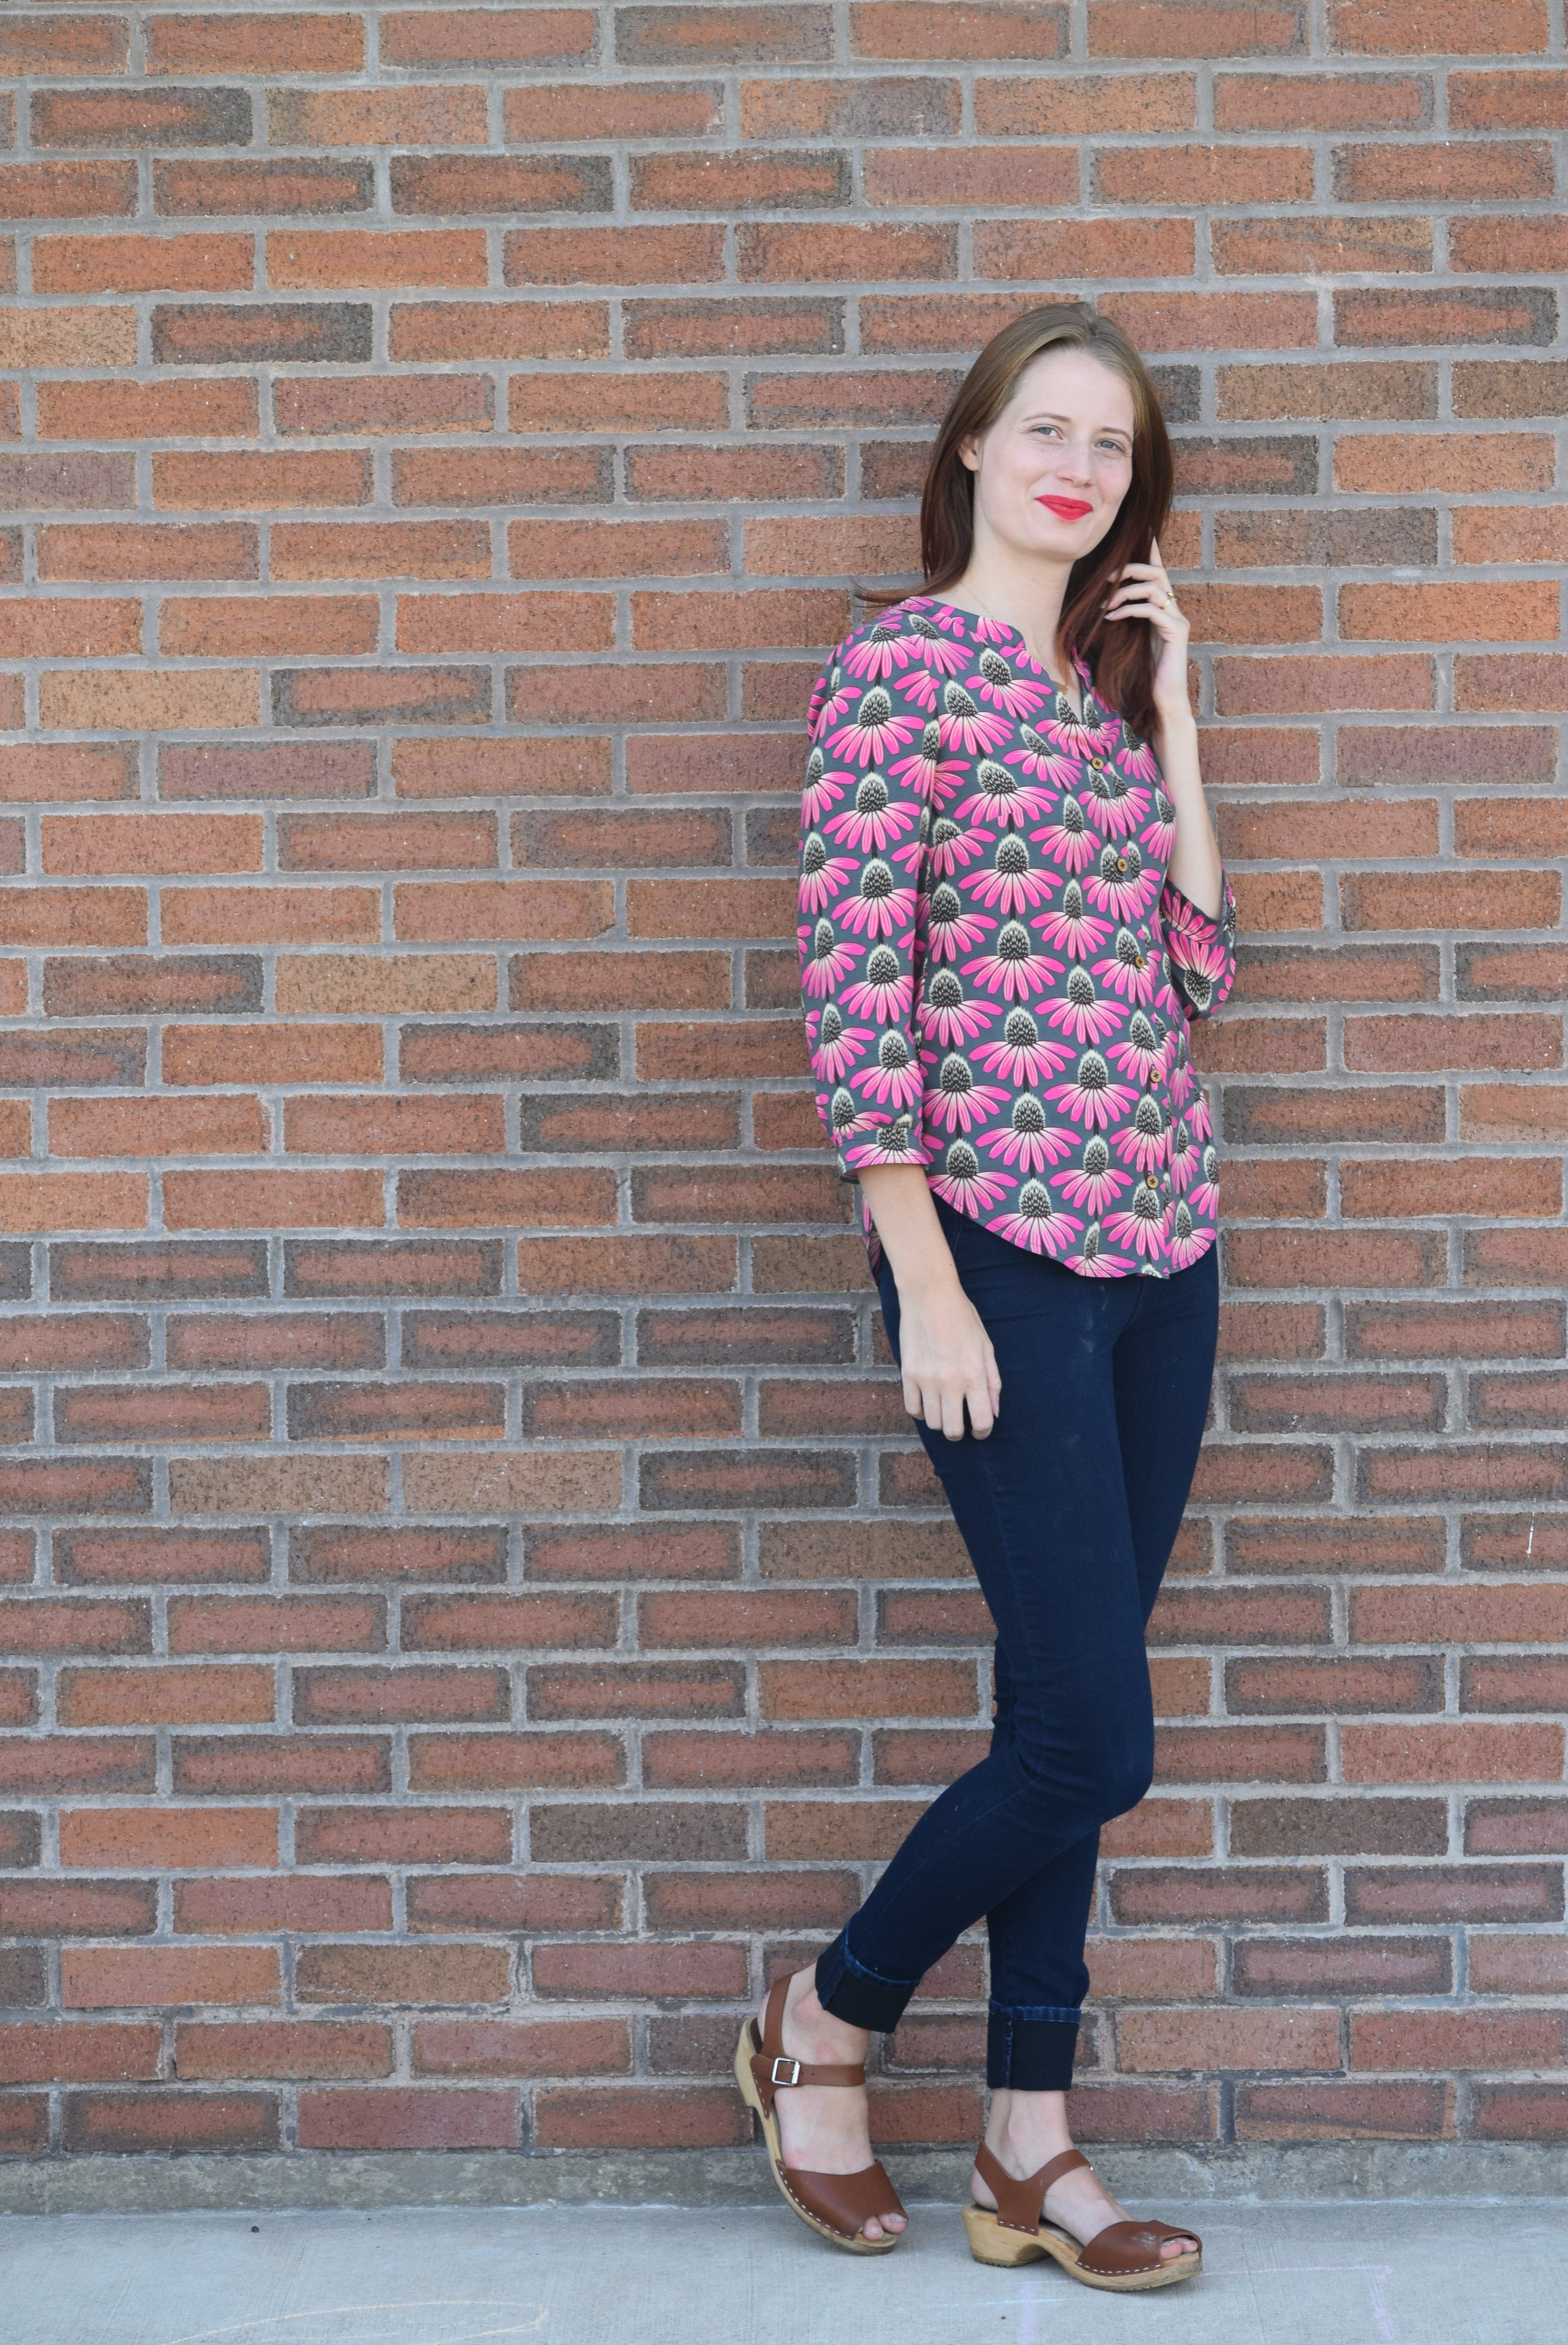
I’ve never been one to shy away from patterned pants or quirky details. Just ask the middle school girls who giggled when I showed up to school wearing cheetah print pants. With the tie front detail and bold 1″ gingham print these pants definitely make a statement. The pattern used for these pants is the Jumpy pants and shorts pattern by Ready to Sew. Find it here. Fabric used is Checkers fabric by Cotton and Steel. My top is a Grainline Studio Scout Tee made in rayon designed by Rifle Paper Co. for Cotton and Steel. Both fabrics were purchased from Suppose.
IMG_0510

Today I’d like to take little time to tell you about my style motto and a little story about how I developed it. I honestly can’t remember a time in my life when I wasn’t making somewhat bold or different fashion choices. I’ve always been drawn to prints and unique details, but I didn’t always wear them because I was fearful of what others may think or say. After hearing criticism about my style in middle school, I was fearful of being an outcast if I didn’t dress like everyone else. In 9th grade, I started regularly wearing the same American Eagle or Hollister jeans and tees that everyone else wore. I still had some bold things in my wardrobe, I just wore them more sparingly.

IMG_0523

The summer before I was to start 10th grade, my family moved from the tiny town of Spencer, Iowa to the slightly larger town of Brigham City, Utah. I was resistant to the move at first, but decided this was the time to become exactly who I wanted to be. My style motto became, ” Wear what makes you happy and to hell with what anyone else thinks.” I was going to be myself here from the very beginning. For most of my 10th and 11th grade years I did a decent job at wearing what brought me joy and dressing for myself vs. dressing for others.

IMG_0518

In the spring of my 11th grade year I purchased a pair of railroad stripe overall shorts which my then boyfriend (now husband) lovingly referred to as my train conductor overalls. I was ridiculously proud of those things and often wore them with a crisp white button up, navy or white tights/leggings, and heels. After wearing them three or four times, I overheard that some girls had been talking about crazy overall outfit and how silly it looked. At the time, I allowed their comments to get into my head. I stopped wearing those overalls for nearly a year.

Fast forward to the next spring, I was out playing four-square at lunch (believe me it was the cool thing to do in my high school) when my classmate Laney remarked that she liked how I used to style my overalls and asked why I never wore them anymore. I made up some lame excuse about weather, but this got me thinking. That night I went home and pulled my overall shorts out of my closet. I put them on, looked in the mirror, and asked myself why I had stopped wearing them. Did they fit? yes. Did wearing them bring me joy? yes. Did I care what other people thought about them? Kind of, sort of, maybe too much. The next day, I wore the heck out of those overalls and you know what? Some people gave me weird looks and others said nice things. I appreciated the nice things, but the thing I really remember about that day is how liberated I felt wearing something that I loved.

IMG_0544

The moral of my story? Be you. Wear what brings you joy whether it’s jeans, sweatpants, cocoon dresses, gingham pants, wild jumpsuits, all black, or train conductor overalls. Every morning when I get dressed I try my best to dress for myself, not for my friends, family, or strangers that I may encounter (although I do kind of dress for others because nudity isn’t quite socially acceptable). I’m not perfect in sticking to my “to hell with what others may think” style motto, but it does bring me infinitely more confidence and joy when I do.

IMG_0524

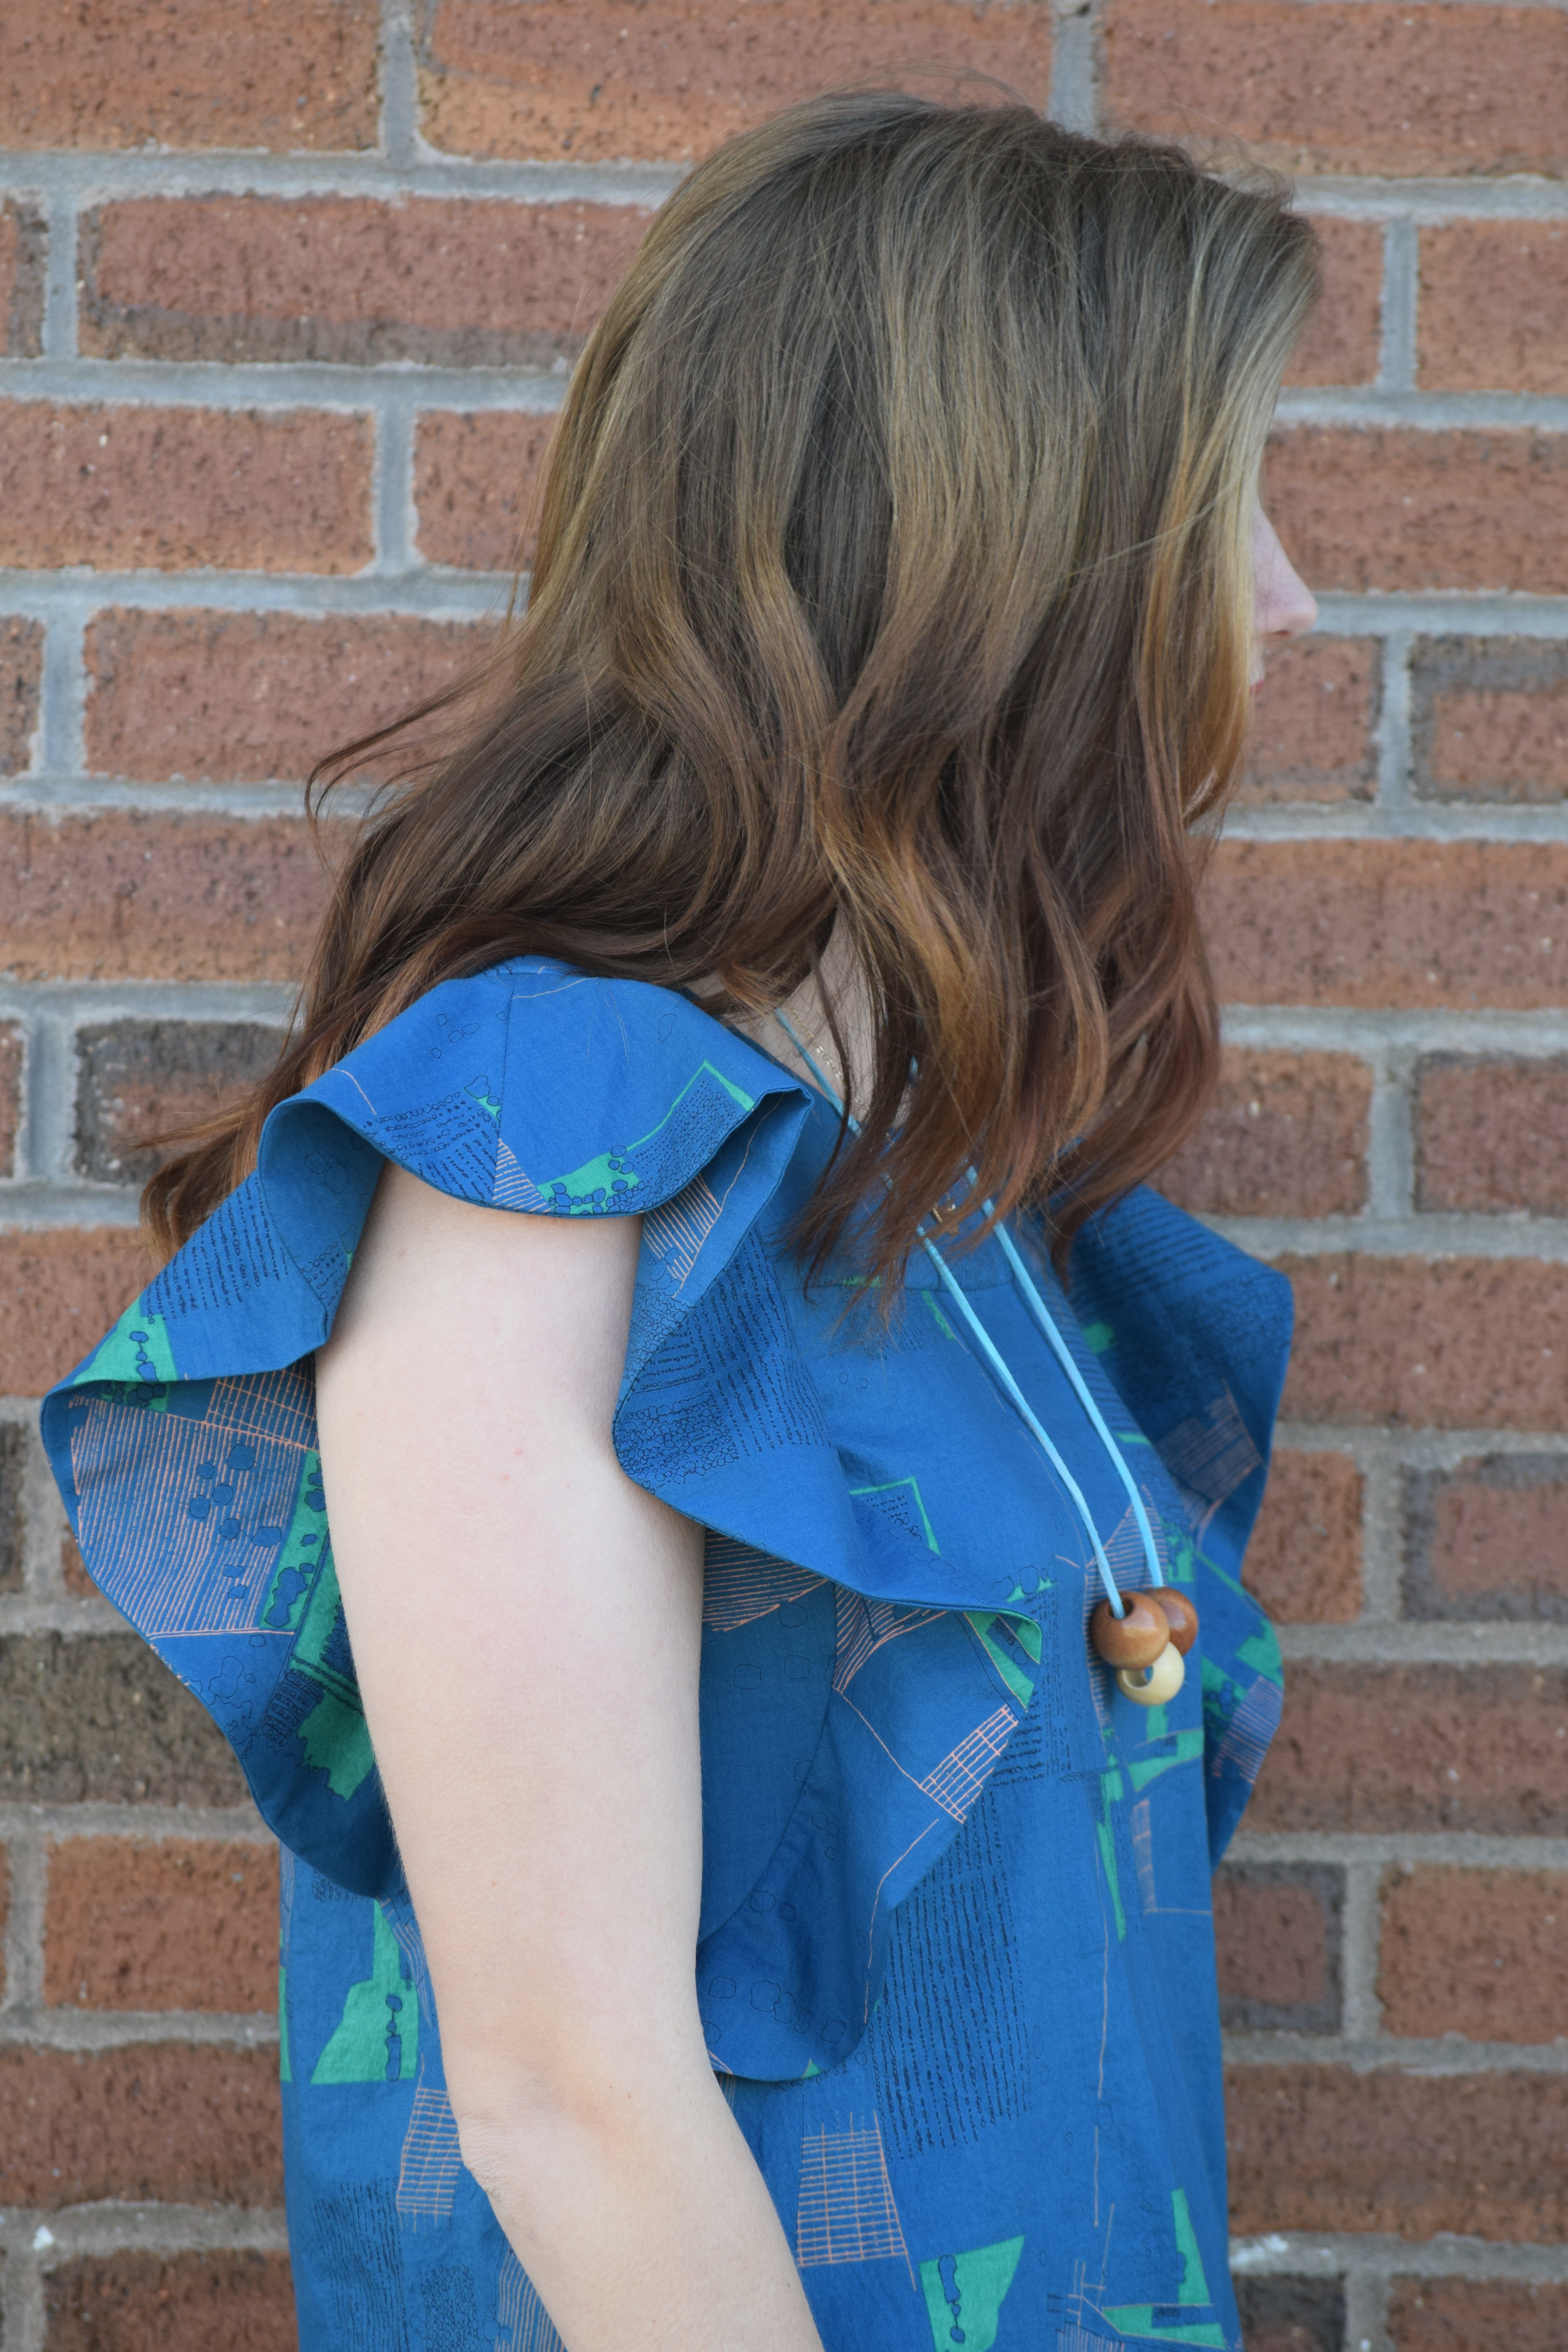
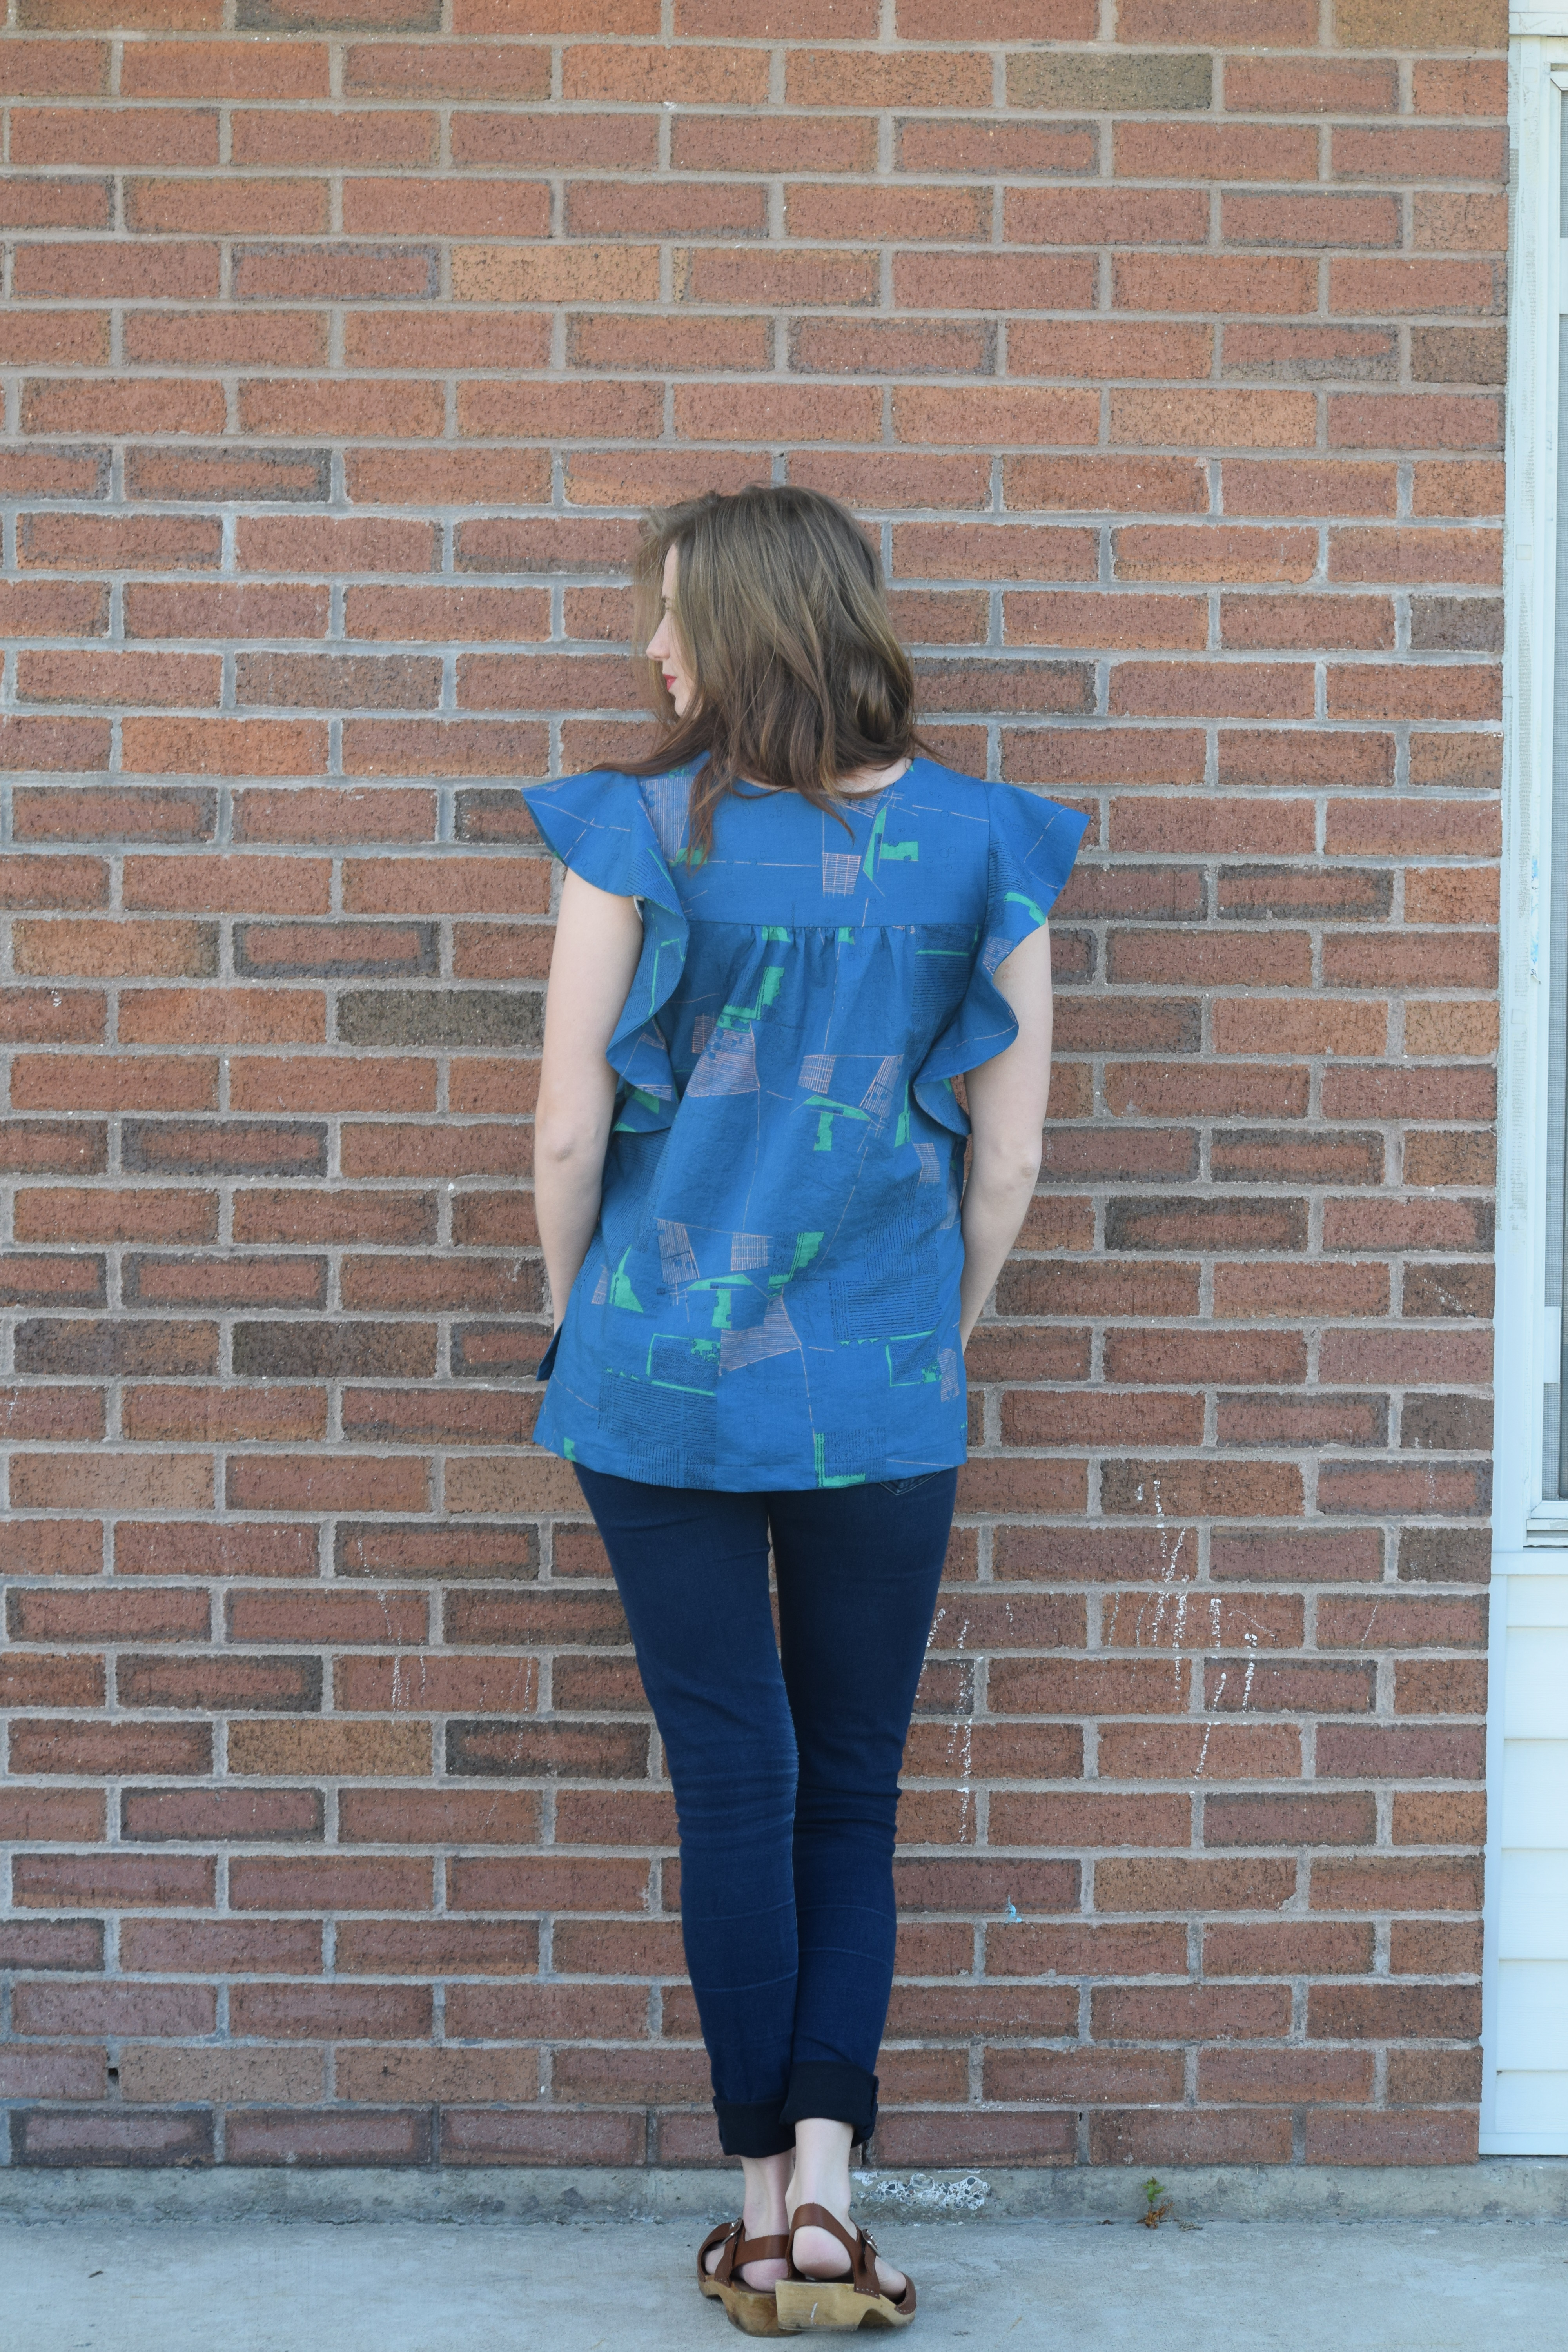
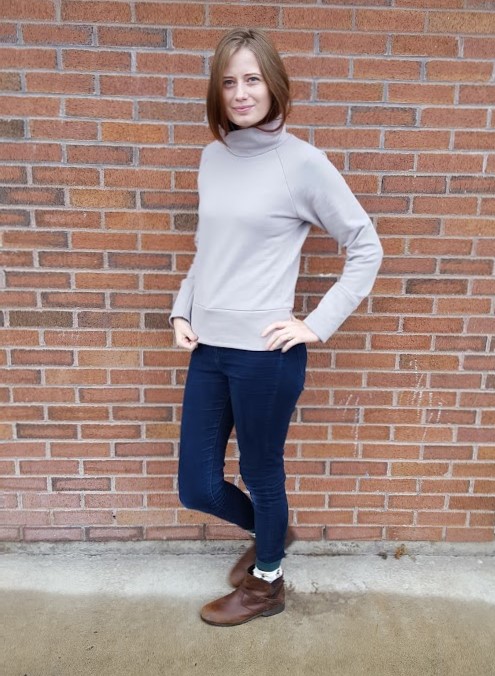
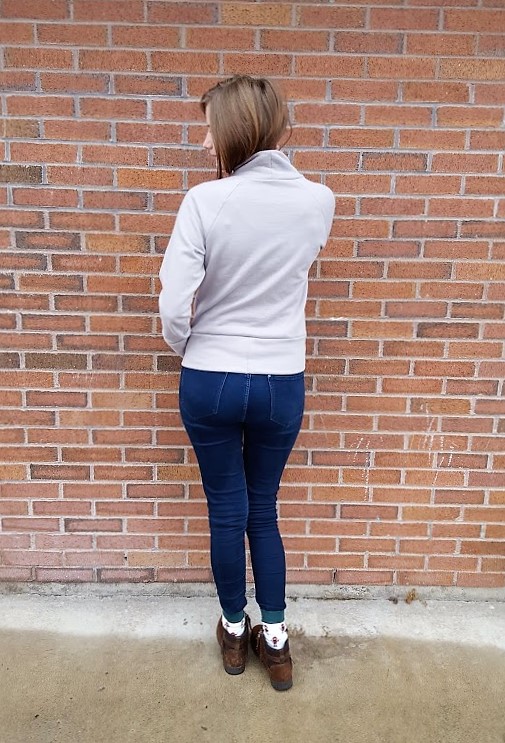
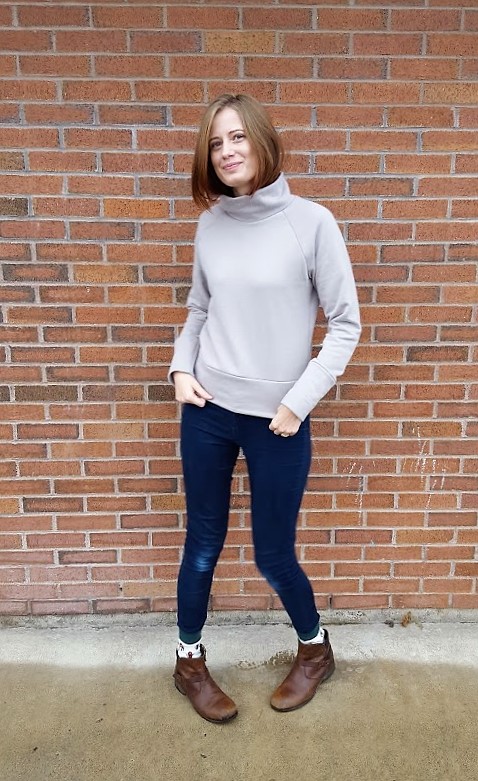
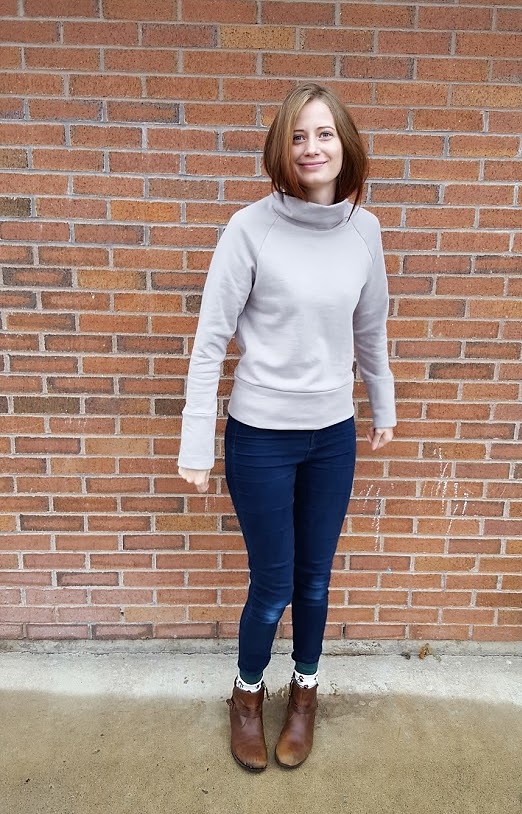
Thanks for sticking with me through that novel. A few quick notes on the sizing and pattern. I sewed up a size 38 and found the sizing to be just about spot on based on my measurements. The only adjustment I made was adding 2″ to the length. If I made the pattern again I think that I would add 1/2″ to 1″ to the rise so that the pants would sit just a bit higher above my hips. The construction of these pants is fairly simple and easy enough for a confident beginner to tackle. The only thing that might be difficult for a beginner is understanding the instructions. They are fairly clear, but are not as heavily detailed with illustrations as many other indie patterns. I’d compare the amount of instructions and illustrations to something you may find in a Simplicity or McCall’s pattern. Overall, I’m pretty happy with these bold pants and plan to make the pattern again with a few modifications.

Blueprints Geodesic and “Letting it Go”

I’ve been admiring the Blueprints for Sewing Geodesic Sweatshirt pattern for quite a while now. I just couldn’t get myself to pull the trigger on buying the PDF version, so I nearly jumped for joy when a printed version was announced. I purchased my pattern the day they arrived at Suppose and couldn’t wait to get started.

IMG_0970

I chose to to make a cropped version for easy layering on cool summer mornings/evenings. The fabric used is an organic cotton interlock made by Cloud 9 fabrics and purchased from Suppose. I would consider it a medium weight which is perfect for this pattern. It’s not quite as bright as the fabrics that I’d usually select, but I’m making a concerted effort to add more neutrals into my wardrobe.

IMG_0980

Let’s talk a bit about my construction process. This sweatshirt was sewn in small snippets of time over the course of about two weeks. The last month has been chaotic to say the least, and I needed a simple stress-free project. When cutting the triangles, I decided to alternate the stripe direction in order to add a bit more interest and eliminate the need for stripe matching.

You may notice that my version has a slightly different layout than the illustration on the pattern cover. Can you spot the difference? Look at this photo and see if you can find it. Found it? My version has the bottom row of triangles upside down. This was a blunder I found only after sewing up the side seams. Whenever I make a sewing mistake, I ask myself three questions: Does this ruin the fit? Can I live with it? Will I still wear it? If the answer to the first question is yes, then I immediately work to remedy the issue. If not, I move on to the other two questions. Often I can justify keeping the mistake if it doesn’t affect the actual fitting of the garment. This was one of  those times.

IMG_0960

Anxiety sometimes tries to get the best of me when I goof up. In order to calm myself, I repeat two phrases:

“Done is Fun”- Alison Faulkner (The Alison Show)

“Let it Go” (Can’t say that one without singing the “Frozen” theme)

These phrases remind me that my errors often aren’t as glaring as they may initially seem. Life is really too short to waste time fixing an error that doesn’t have to be seen as an error. It’s a design decision, right? It is likely that the only people who may notice the error are those who are familiar with the pattern. Overall, I’m happy with the look of my Geodesic and isn’t that what matters in the end?

IMG_0978

These photos were snapped during a short getaway to the cabin. My husband proposed to me in this place and our wedding reception was held on the property. I always leave wishing we could spend just a little more time here. My clothes are a bit wrinkly because my son and I woke up and walked the property while watching the sunrise. By the time my husband was available to help take pictures, I’d spent half the day wearing this outfit. I’ll leave you with a blurry, but lovely self-timer photo snapped during our sunrise walk.

IMG_0942

Itch to Stitch Anza Jumpsuit

Last spring, I purchased a gorgeous Anna Maria fabric fully intending to make a jumpsuit. Life got busy and many of my sewing plans got pushed aside. By the time summer ended, I had given up on finding and making my perfect jumpsuit and used the fabric to make a pattern hack of another Itch to Stitch pattern. You can find that dress here. Luckily, Kennis of Itch to Stitch is not only a talented and detailed pattern designer, she is also some sort of mind-reading wizard who is releasing the perfect jumpsuit pattern just when I needed it. Today I’m thrilled to show you my tester version of the Anza Jumpsuit.

DSC_0323

I was browsing the selection of fabrics at my local fabric store Suppose when Kennis annouced a tester call for the Anza Jumpsuit and dress. I immediately put down the bolts I had been carrying around the store, borrowed a measuring tape, took my exact measurements, and filled out the application form. I purchased 4 yards (only ended up needing 3) of this Lizzy House Printmaking lawn and crossed my fingers that I’d be chosen. The next morning when I received an email inviting me to the tester group, I excitedly told my husband that I’d be making myself a literal birthday suit as a gift to myself (my birthday was coming up the following week). Sometimes, I think that I’m hilarious until I remember that not even my  3 year old laughs at my jokes.

DSC_0408

Let’s bring it back to talking about the jumpsuit and pretend like I didn’t just write several sentences detailing my own lame joke. Now we’re going to talk details and features. Itch to Stitch patterns often include well thought out details that add interest without stealing the show and overwhelming the wearer. The Anza pattern is no exception. It includes cuffed sleeves, pleated chest pockets, drawstring waistband, elastic at the ankles, and pants pockets. Basically, this is the jumpsuit I was preparing to draft for myself until I saw that Itch to Stitch had made a pattern even better than what I’d imagined in my own mind.

DSC_0393DSC_0409DSC_0388

Speaking of details, can we talk about these amazing Arrow Mountain buttons? These are the Minimalist buttons in Arctic Ice. I used the wooden version of the Minimalist buttons on maxi dress also made from Lizzy House lawn that you can find here. In fact, If you’d like to see more of the Arrow Mountain buttons in my handmades, check out my Itch to Stitch Bonn Shirt and Bonn Shirt Turned Maxi Dress posts found here and here. I’ve ordered from Arrow Mountain several times now and only found great quality and excellent customer service.

DSC_0340

A quick note on alterations:

This pattern is drafted for the height of 5’6″ and may some require some lengthening or shortening if you are not  5’6″. Since I am somewhere between 5’9″ and 5’10” I ended up adding 1.5″ to both the bodice and the rise.

One great thing about Itch to Stitch patterns is that Kennis includes pieces for cup sizes A-DD. This means less alteration time and more sewing time. Which is always a good thing. Let’s all make sure to applaud Kennis for taking the extra time and effort to make our lives easier.

DSC_0337

Overall, I am 100% satisified with my Anza Jumpsuit and cannot wait to wear it again and again all summer long. Now, go grab your copy here.

Farrah Top by Chalk and Notch

Today I’m looking forward to showing you my version of the newest release by Gabriela of  Chalk and Notch. The Farrah Pattern has top and dress options for two different views. I opted to make the top in View A. I sewed a straight size 4 with no alterations. This is an intermediate level pattern with sleeve ruffles, underarm gusset, and a mitered split hem. I was unsure about whether or not this style would suit me, but now I’m thrilled to say it’s my new favorite.

DSC_0276

Let’s talk fabric for a minute. I selected a cotton lawn by Carolyn Friedlander. I’ve been anxiously awaiting the release of these lawns since they were announced last fall. I bought it almost immediately once it Arrived at Suppose. Lawn has a lightweight, almost silky hand. It doesn’t have the same graceful drape as a rayon, but it is much easier to sew. Lawn presses beautifully and I love the way it exaggerates the ruffles in this design.

DSC_0291

DSC_0301

The fact that this top slips over the head and has no closures, doesn’t make it any less interesting. It’s a great skill builder with the ruffles, gusset, and mitered hem. My favorite is the mitered high-low hem. I’ve only sewn a mitered hem once before this top, but I love it. It makes the finish look and feel professional. Gabriela’s clear pictures and tutorials make trying new techniques less intimidating and more satisfactory.

DSC_0285

The pattern releases exclusively on UpCraft Club today and will be available through Chalk and Notch later this week. Be sure to check out the #farrahpattern on Instagram for more inspiration and to see more of the fantastic tester versions.

DSC_0289

Make it Mine Tour: Waterfall Raglan Flutter Sleeve Hack and Tutorial

img_8379
Hello! Today I feel a bit nervous to be surrounded by so many talented makers and bloggers participating in the Make it Mine Waterfall Tour hosted by Gabriela of  Chalk and Notch. I’ve been a fan of the Waterfall Raglan pattern since the girls’ pattern was released last fall. I don’t have a daughter of my own, so I immediately commented and expressed my interest in a women’s version. To my delight, she quickly obliged and has just released the Women’s Waterfall Raglan pattern. There’s nothing I love more than a well-drafted basic pattern that can be made and hacked again and again.

dsc_0195

The moment I finished my first Waterfall dress, I knew that it was destined for a flutter sleeve version. I omitted the bottom ruffle as having both flutter sleeves and the ruffle seemed too girly for the desired end result. The pattern comes together so quickly that I couldn’t resist making both a dress and top version of this hack. The dress is made from Les Fleurs rayon by Rifle Paper Co. for Cotton and Steel and the top is made from a cotton/spandex knit by Art Gallery Fabrics. Both fabrics were purchased from my favorite local shop Suppose.

dsc_0100-2

Both my top and dress have been worn multiple times since their completion last week. I love the loose flowy fit of the top and the bit of style it adds to a relaxed day look. I’m sure it will get regular wear once the weather warms up a bit.

dsc_0111

My dress, however, is a new favorite and will likely be my go-to dress this summer. A few years ago, I used to commonly wear body-hugging fitted dresses and skirts. Then I had a child. I still love a good fitted dress, they’re just much less practical for chasing my son at church or the park and end up just sitting in my closet waiting for a special occasion. Last summer I made this dress and wore it to the zoo, park, weddings, church, etc. and loved the ease of movement and effortless style it provided. I’m looking forward to this new Les Fleurs dress providing me with the same style and ease this summer.

I’ve been putting my flat pattern drafting skills to work lately by designing a bit of children’s clothing, but was still nervous to redraft the sleeve as a flutter sleeve. It’s not something I’d attempted before and turned out to be easier than expected. Are you ready to give it a try? If so, continue reading for a tutorial on how to make your own flutter sleeve Waterfall Raglan.

dsc_0168

Head to the end of my post for details on a couple of great giveaways. If you’re not quite ready to make your flutter sleeve dress or top, check out these other talented Make it Mine Tour ladies and their pattern hacks.unnamed


Continue reading “Make it Mine Tour: Waterfall Raglan Flutter Sleeve Hack and Tutorial”

Toaster Sweater #1


November and December were hectic months in the Merritts household. My husband and I both had exciting interviews, he graduated college and started his career, my baby sister got married, and I finished up a decent amount of commission sewing work. I got far too little sleep and most of those months are a bit of a blur, but I’m proud of what we were able to accomplish and the lessons we learned in those challenging months. During especially busy weeks/months, I find that my sanity is restored with a bit of “just for fun” sewing. This Toaster Sweater #1 by Sew House Seven was one of my sanity saver projects in December.

20161216_092742

One morning I had just dropped off the last of my commission quilts at the quilter and was waiting for fabric to arrive for my next assignment. My husband and I were going on our first date in months that evening and I wanted something new to wear. I remembered that I had already traced and cut the pieces for a Toaster Sweater and assembly was the last step. Sewing it together took me about two hours including the time taken to feed my 3 year old and assist with potty breaks. The assembly could probably be finished in about an hour with no distractions.

20161216_092750

The fabric I used for my sweater is an organic cotton fleece made by Birch Fabrics. It feels even cozier than my favorite over sized sweatshirt, but looks a bit more stylish. After completion, I tried on my Toaster Sweater and basically didn’t take it off  for the next three days. It kept me warm in my freezing apartment, cozy while waiting for a train in a snowstorm, generally feeling much less sloppy when running errands. I honestly just feel like I need to make several more of the exact same sweater so that I can use it as my winter uniform. I always struggle with feeling stylish in winter because I only want to wear cozy sweats and my husband’s sweatshirts in the freezing weather. A Toaster Sweater uniform just may be the solution to my dilemma. Does anyone else find themselves wearing a “winter uniform?”

20161216_092746

Just a couple quick notes on sizing and alterations:

-I sewed up a size small and added 3 inches to the bodice length. When making this again, I would probably add another inch to the bodice to make a total of 4 inches added. The current length is great with my high waist jeans, but just a bit short for my lower rise jeans.

– I added 1.5 inches to the sleeve length and am very happy with the finished length because I like my sleeves extra long.

20161216_092752

img_8718


1930’s Butterfly Blouse

In July, I fell into a bit of a sewing rut. I felt like I’d been sewing the same few projects and needed something new and exciting. I convinced my husband to take a day trip to Provo, UT so that I could visit Harmony. Harmony turned out to be the perfect place to regain my sew-jo.
image

After spending at least 45 minutes admiring everything in store, I finally settled on this gorgeous Pretty Potent rayon by Anna Maria Horner and the 1930’s Butterfly Blouse pattern by Decades of Style. Until this top, I’d never actually made a wrap style blouse and thought it would be an unexpected addition to my wardrobe full of Scout Tees, sweatshirts, and button-ups. Upon returning home, I immediately pre-washed my fabric and started cutting.

image

Tracing and cutting went pretty quickly as there are only 4 different pattern pieces (left and right front bodice pieces are mirror images). Sewing was not terribly difficult, but did take a little concentration because of the rayon’s drape and the top-stitching technique used to attach the sleeve pieces to the bodice. I’ve top-stitched plenty of times, but using top-stitching as a way to attach pieces was new to me. This technique combined with the shape of the pattern creating these gorgeous style lines you see on the back. The curves took a bit of patience, but the final product was worth it.

image

image

Now that I’ve had this blouse for nearly four months, I can say that it’s become somewhat of a staple. I find myself reaching for it every time I want to feel especially feminine or pretty. The wrap neckline is just low enough to feel a bit sexy without being overly revealing which also makes it very practical for most occasions. It’s been worn for multiple date nights and it’s even comfortable enough to wear while chasing my son at the park.

image

I’m hoping one day I’ll find time to hack this pattern into a dress because it’s basically begging to be one. Don’t you think?

Bonn Shirt Turned Maxi Dress

Back in September, I had the opportunity to test the Bonn Shirt pattern by Itch to Stitch Designs. Read about it here. I fell in love with the fit of the top, but wanted to do something a bit more dramatic. After making Simplicity 8084 and seeing this dress, the idea for a Bonn maxi dress was born.

dsc_0479
Wooden buttons purchased from Arrow Mountain.

dsc_0485

While I love a good curve hugging dress, they often aren’t practical for me to wear outside of special occasions.  I wanted this dress to be a bit fitted around the bust and fall straight down from the hips. With that silhouette in mind, modifying the Bonn Shirt to a maxi was really quite simple.The Bonn pattern actually includes a knee-length dress option, but modifying the shirt pattern pieces worked better for my specific fit goals.  At the hips, I widened the front pattern pieces by 1″ and the back pieces by 1.5″ to give a comfortable amount of ease. I made notches in the pattern to match the front and back pieces at the hips. Once the notches were made, I added about 40″ to the length ( I measured my desired length at the center back and at the underarm seams to determine this). I added the length straight down from the hip line on front and back, continuing the front button placket all the way to the hem. I added the same amount of length to the placket interfacing piece. I love the way my Simplicity 8084 maxi buttons to the knee and used a total of 12 buttons to copy that look.

dsc_0581

Modifying the Bonn Shirt pattern turned out to be the least challenging aspect of making this dress. I’ve been working with lots of deadlines and only allowed myself to work on this for an hour or two after meeting my productivity goals for other projects. This led to a lot of late night sewing mistakes.

First, The back dress piece on a loose pin and created a  0.5″ hole right in the middle. Solution number 1: I sliced a 1″ strip out of the back and pieced in a new strip. The wild print is great at hiding my Frankenstein style strip and it’s really not noticeable unless you’re within 10 inches of my back.

Second, I cut the left sleeve completely crooked. Honestly, I don’t even know how it got so crooked. it was off by inches. Solution number 2: This one was easy. I had just enough leftover fabric so I re-cut the sleeve. While this was a simple solution it still added about a half hour to my limited sewing time.

Third,  I hemmed the dress in the middle of the night and didn’t have anyone to help me mark the hem. I usually don’t have too much trouble with this, but the maxi length combined with the drape of the fabric made it complicated. It ended up taking about three times as long after I cut the hem at a slight angle. Solution number 3: Keep trying.

dsc_0472
Fabric is Helios rayon by Anna Maria Horner

This dress turned out to be such a rewarding project and I’m delighted that I decided to stick with it through the frustrations.It’s the perfect cross between an evening dress and comfortable nightgown, which is exactly what I’d envisioned. I’ve been anxious while considering so many facets of the future and this dress was therapeutic for me. Taking something and making it my own while working through the imperfections was just what I needed. It was a good reminder that mistakes and difficulties can still combine to make something wonderful. Was that too much? Thanks for sticking with me. Here are a few more photos and a sneak peek at my goofy family.

img_7673

dsc_0465


Bonn Shirt

I had already agreed to another pattern testing commitment when Kennis Wong of Itch to Stitch sent out a call for Bonn Shirt and Dress testers. I knew immediately that I had to apply even if it meant staying up a little later to sew each evening. It was all worth it for this beautifully designed top.

DSC_0711

The Bonn Shirt pattern has a dress and top option along with four different sleeve variations. Sizes 00-20 are included in the PDF pattern (purchase here) which is on sale for 20% off (regularly $12). Also included in the pattern are separate bodice pieces for A-DD cup sizes. I sewed the shirt version with 3/4 sleeves in size 2 with an A cup and graded to a 4 at the hips.

I chose to sew my final top in this Echinacea print rayon by Anna Maria Horner; which is really no surprise if you’ve seen my current handmade wardrobe. The rayon was a little trickier to sew than the mystery poly-cotton blend used for my muslin, but the way the shirt drapes is well worth the extra effort. Let’s just take a moment to appreciate the grandeur of this print.

DSC_0719

My top came together fairly quick and was a satisfying sew. The impeccable drafting on this top made setting in the sleeves simple and stress free. I had the most difficulty when attaching the collar, which was still made simpler by Kennis’s detailed instructions and diagrams. There are also several skill tutorials on the Itch to Stitch blog that make things like setting in sleeves and attaching collars much easier. Even if you’re not planning on sewing up a Bonn Shirt or Dress you should plan on visiting her blog to find well-written tutorials on commonly used techniques. I’ll leave you with a few more photos of my Bonn Shirt so you see more angles and more fully appreciate the lovely drape of this rayon.

DSC_0726
I’ve become a wooden button convert after ordering these round shirt buttons from Arrow Mountain. I’ve already got another Etsy cart full of them and cannot wait to order more for use on some exciting future projects.


DSC_0690DSC_0714DSC_0738

Thanks for reading!