Itch To Stitch Blog Tour: Mila Shirt

Happy Tuesday all! It’s been a while since I sewed something that wasn’t a cropped top or wide-leg pants. Today I’m mixing it up as part of the Itch to Stitch Blog Tour. This blog tour is one of the largest of which I’ve been a part. There are several talented bloggers and generous sponsors participating. Be sure to read all the way to the bottom for info on winning one of the amazing prizes. Kennis of Itch to Stitch has an impressive pattern library so narrowing down an idea took me a bit of time. Eventually I settled on the idea of sewing a Mila Shirt as I thought it would be a great transitional piece as the weather changes from blazing heat to cooler fall weather.  Bonus: Kennis has agreed to put the pattern on a special sale just for the tour.  Today only snag it for just $9.

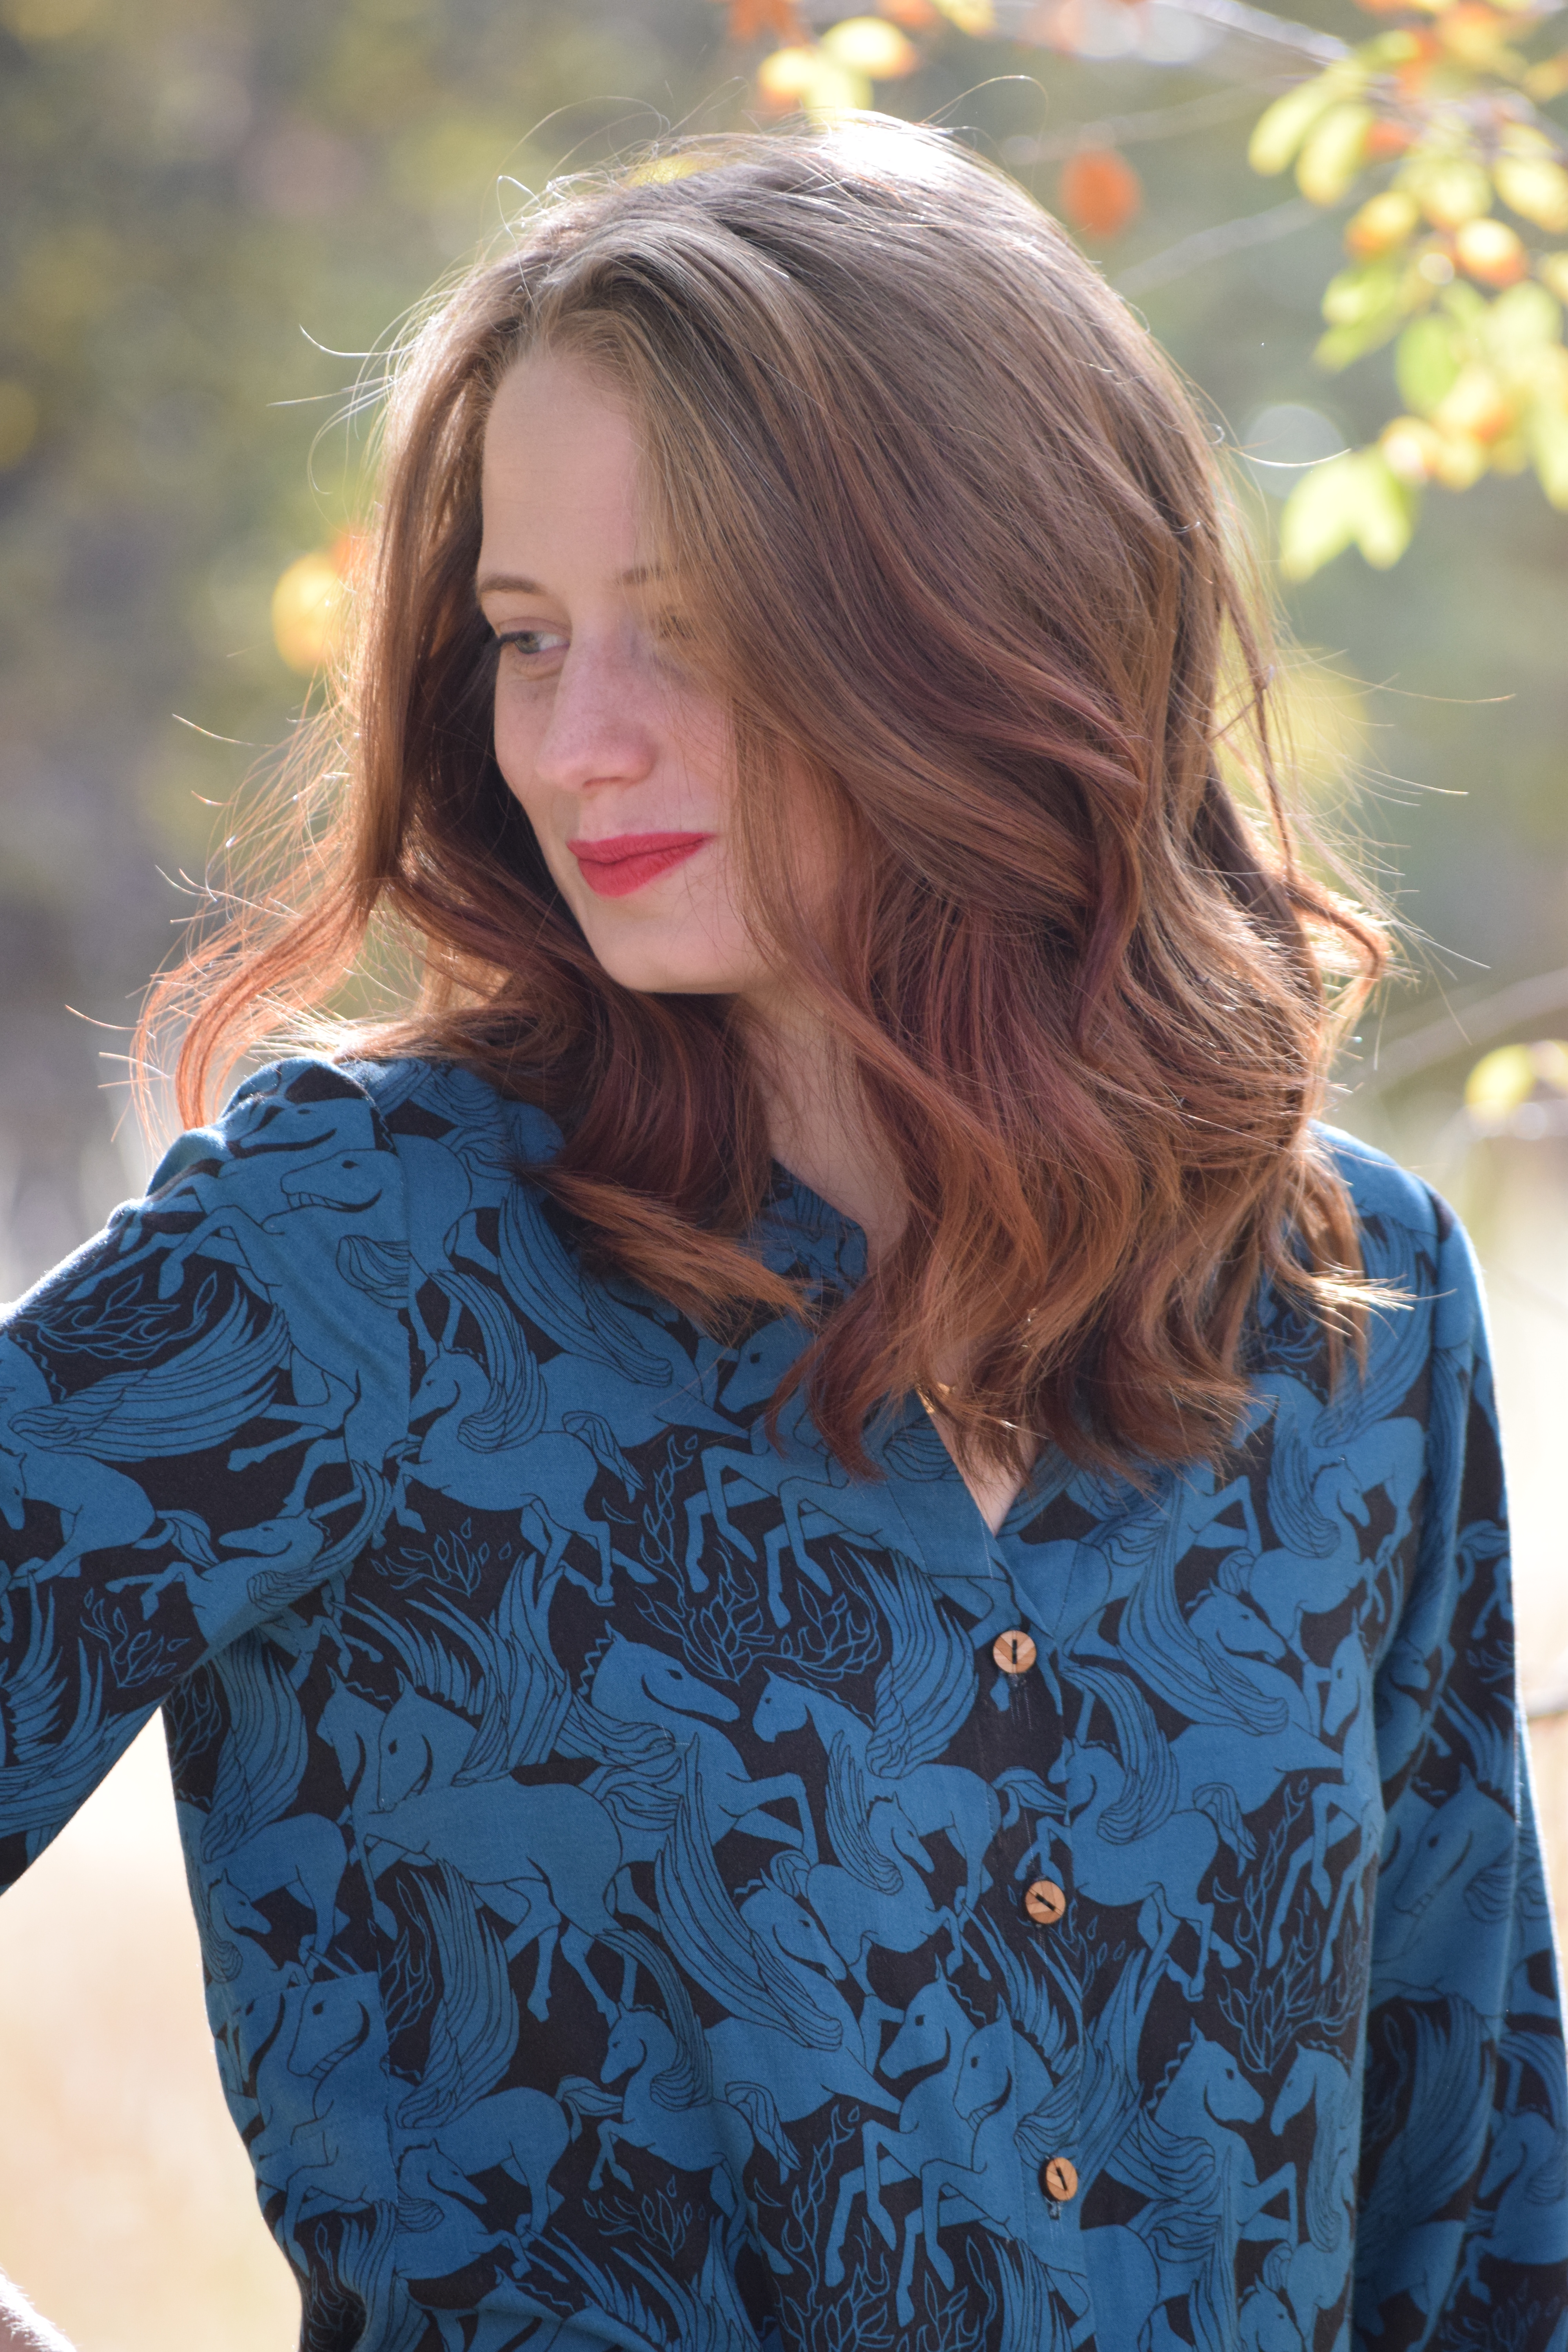
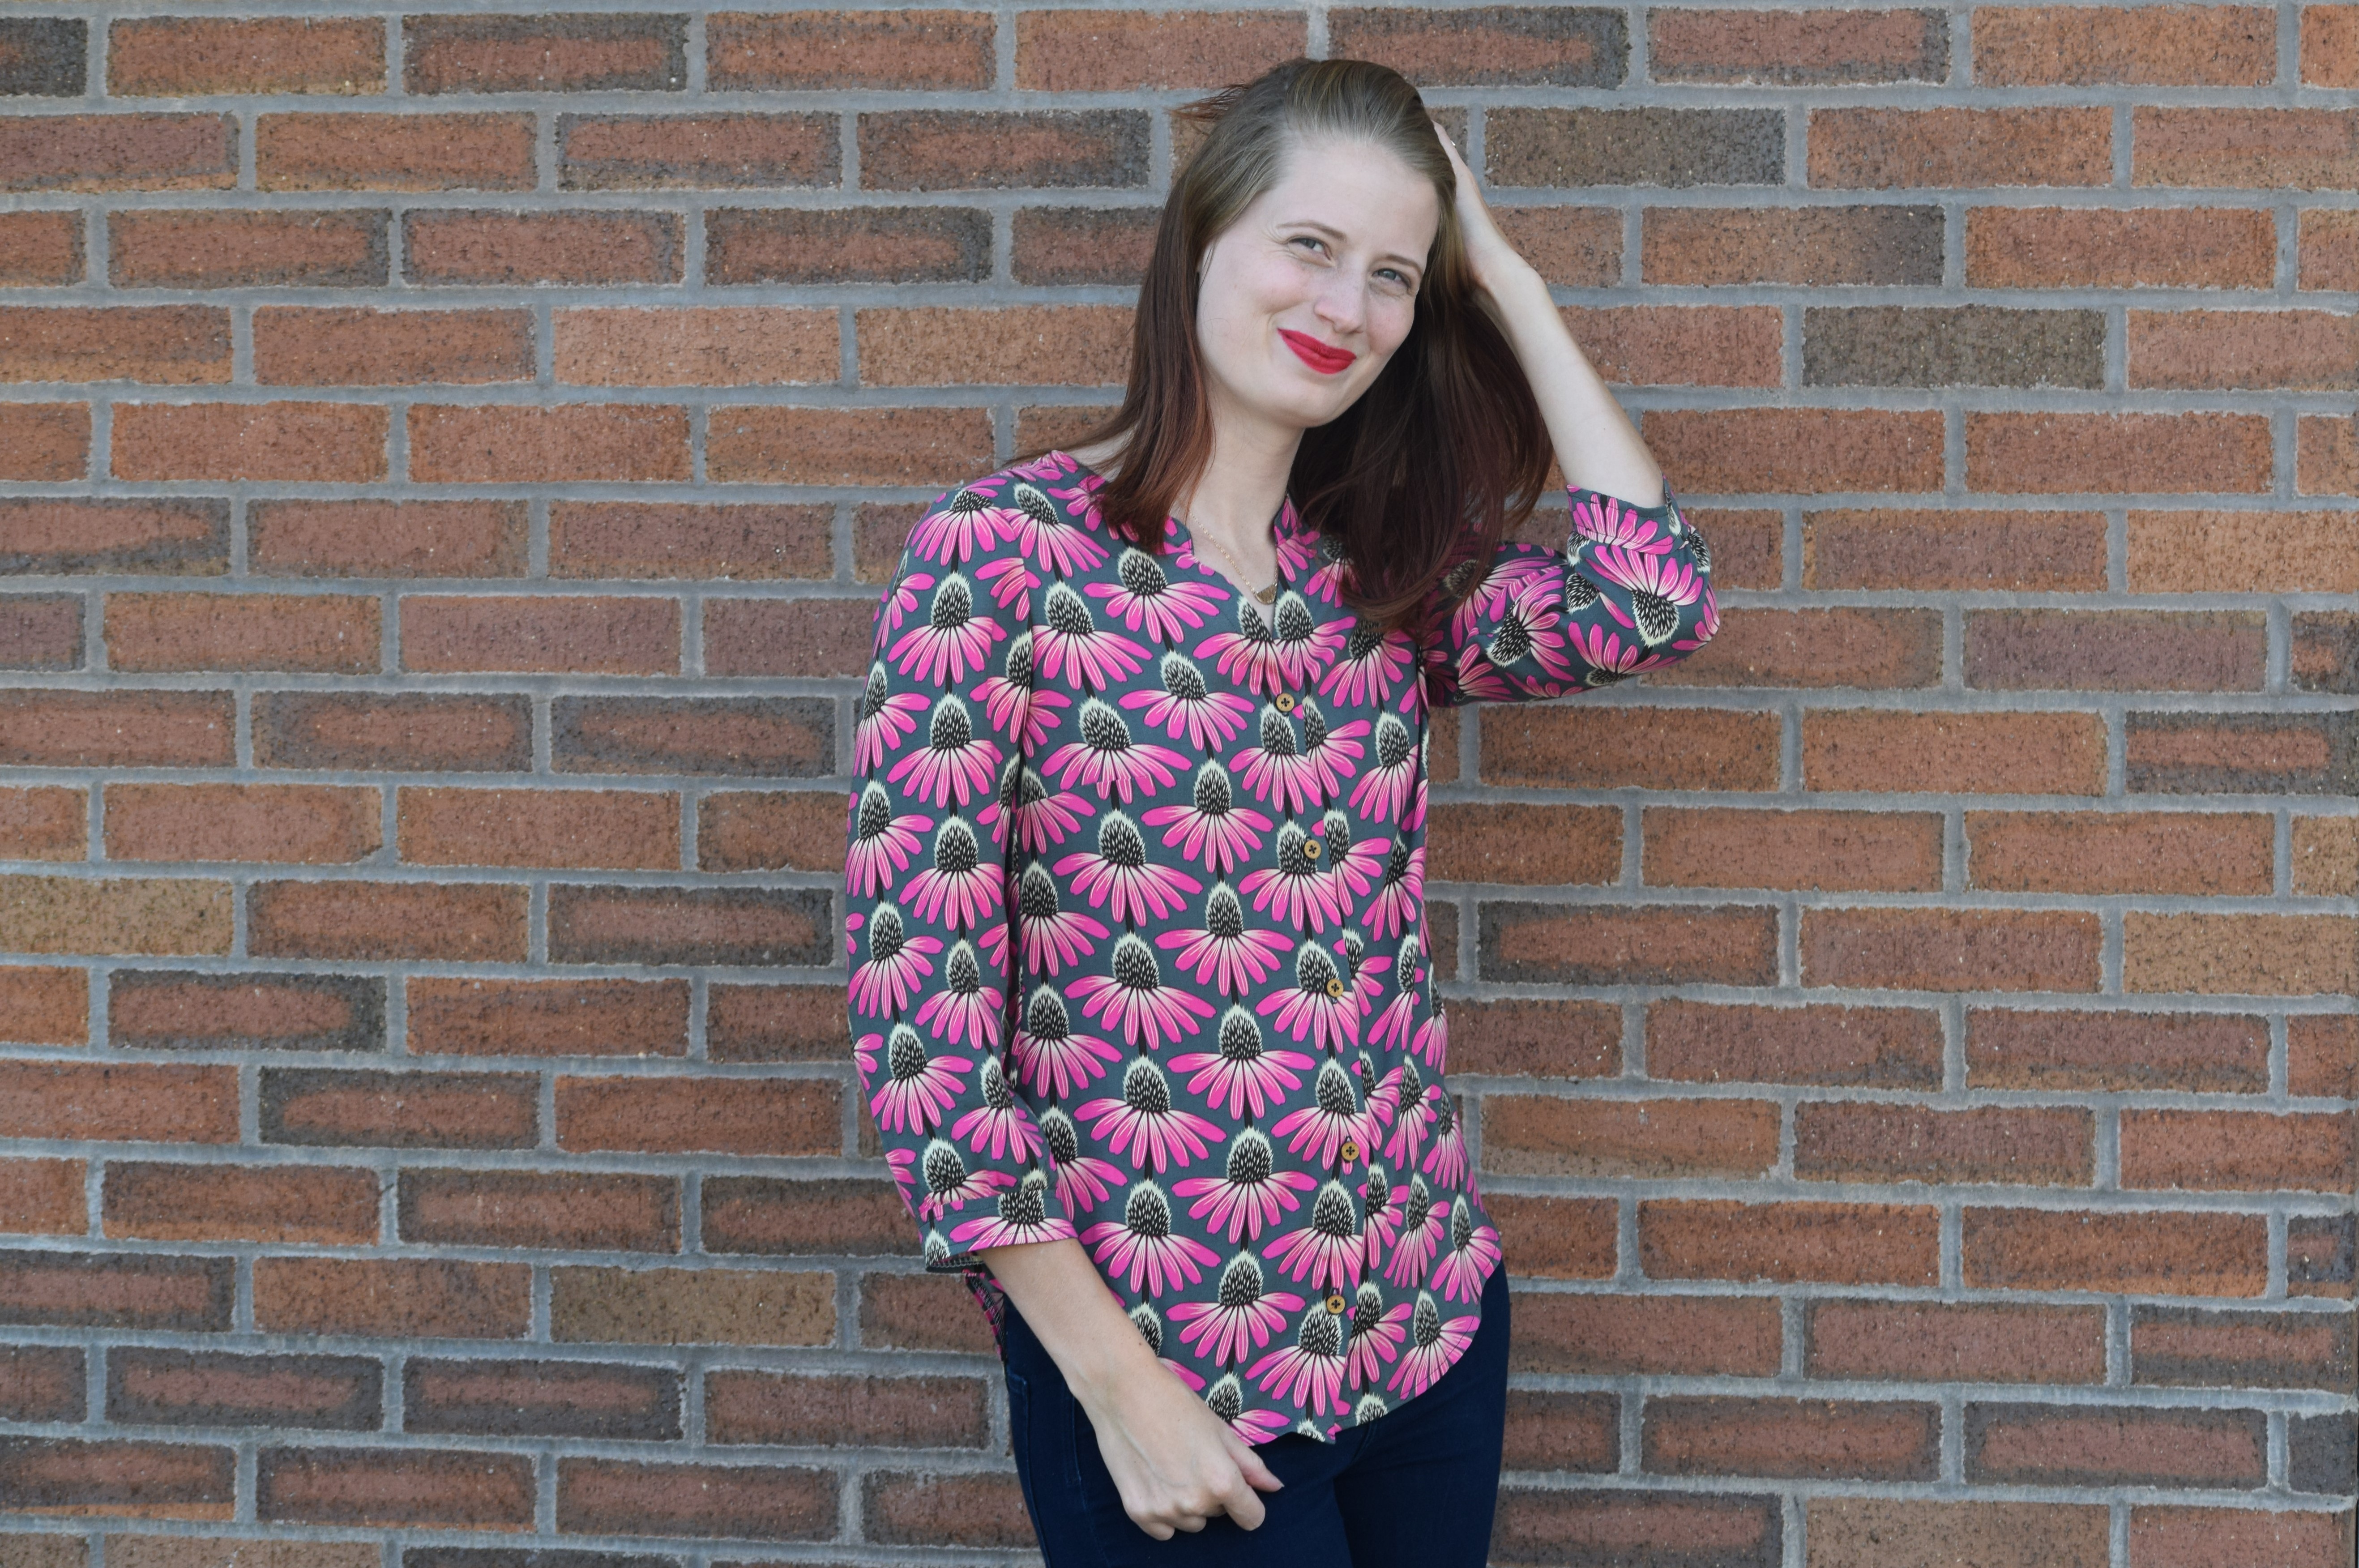
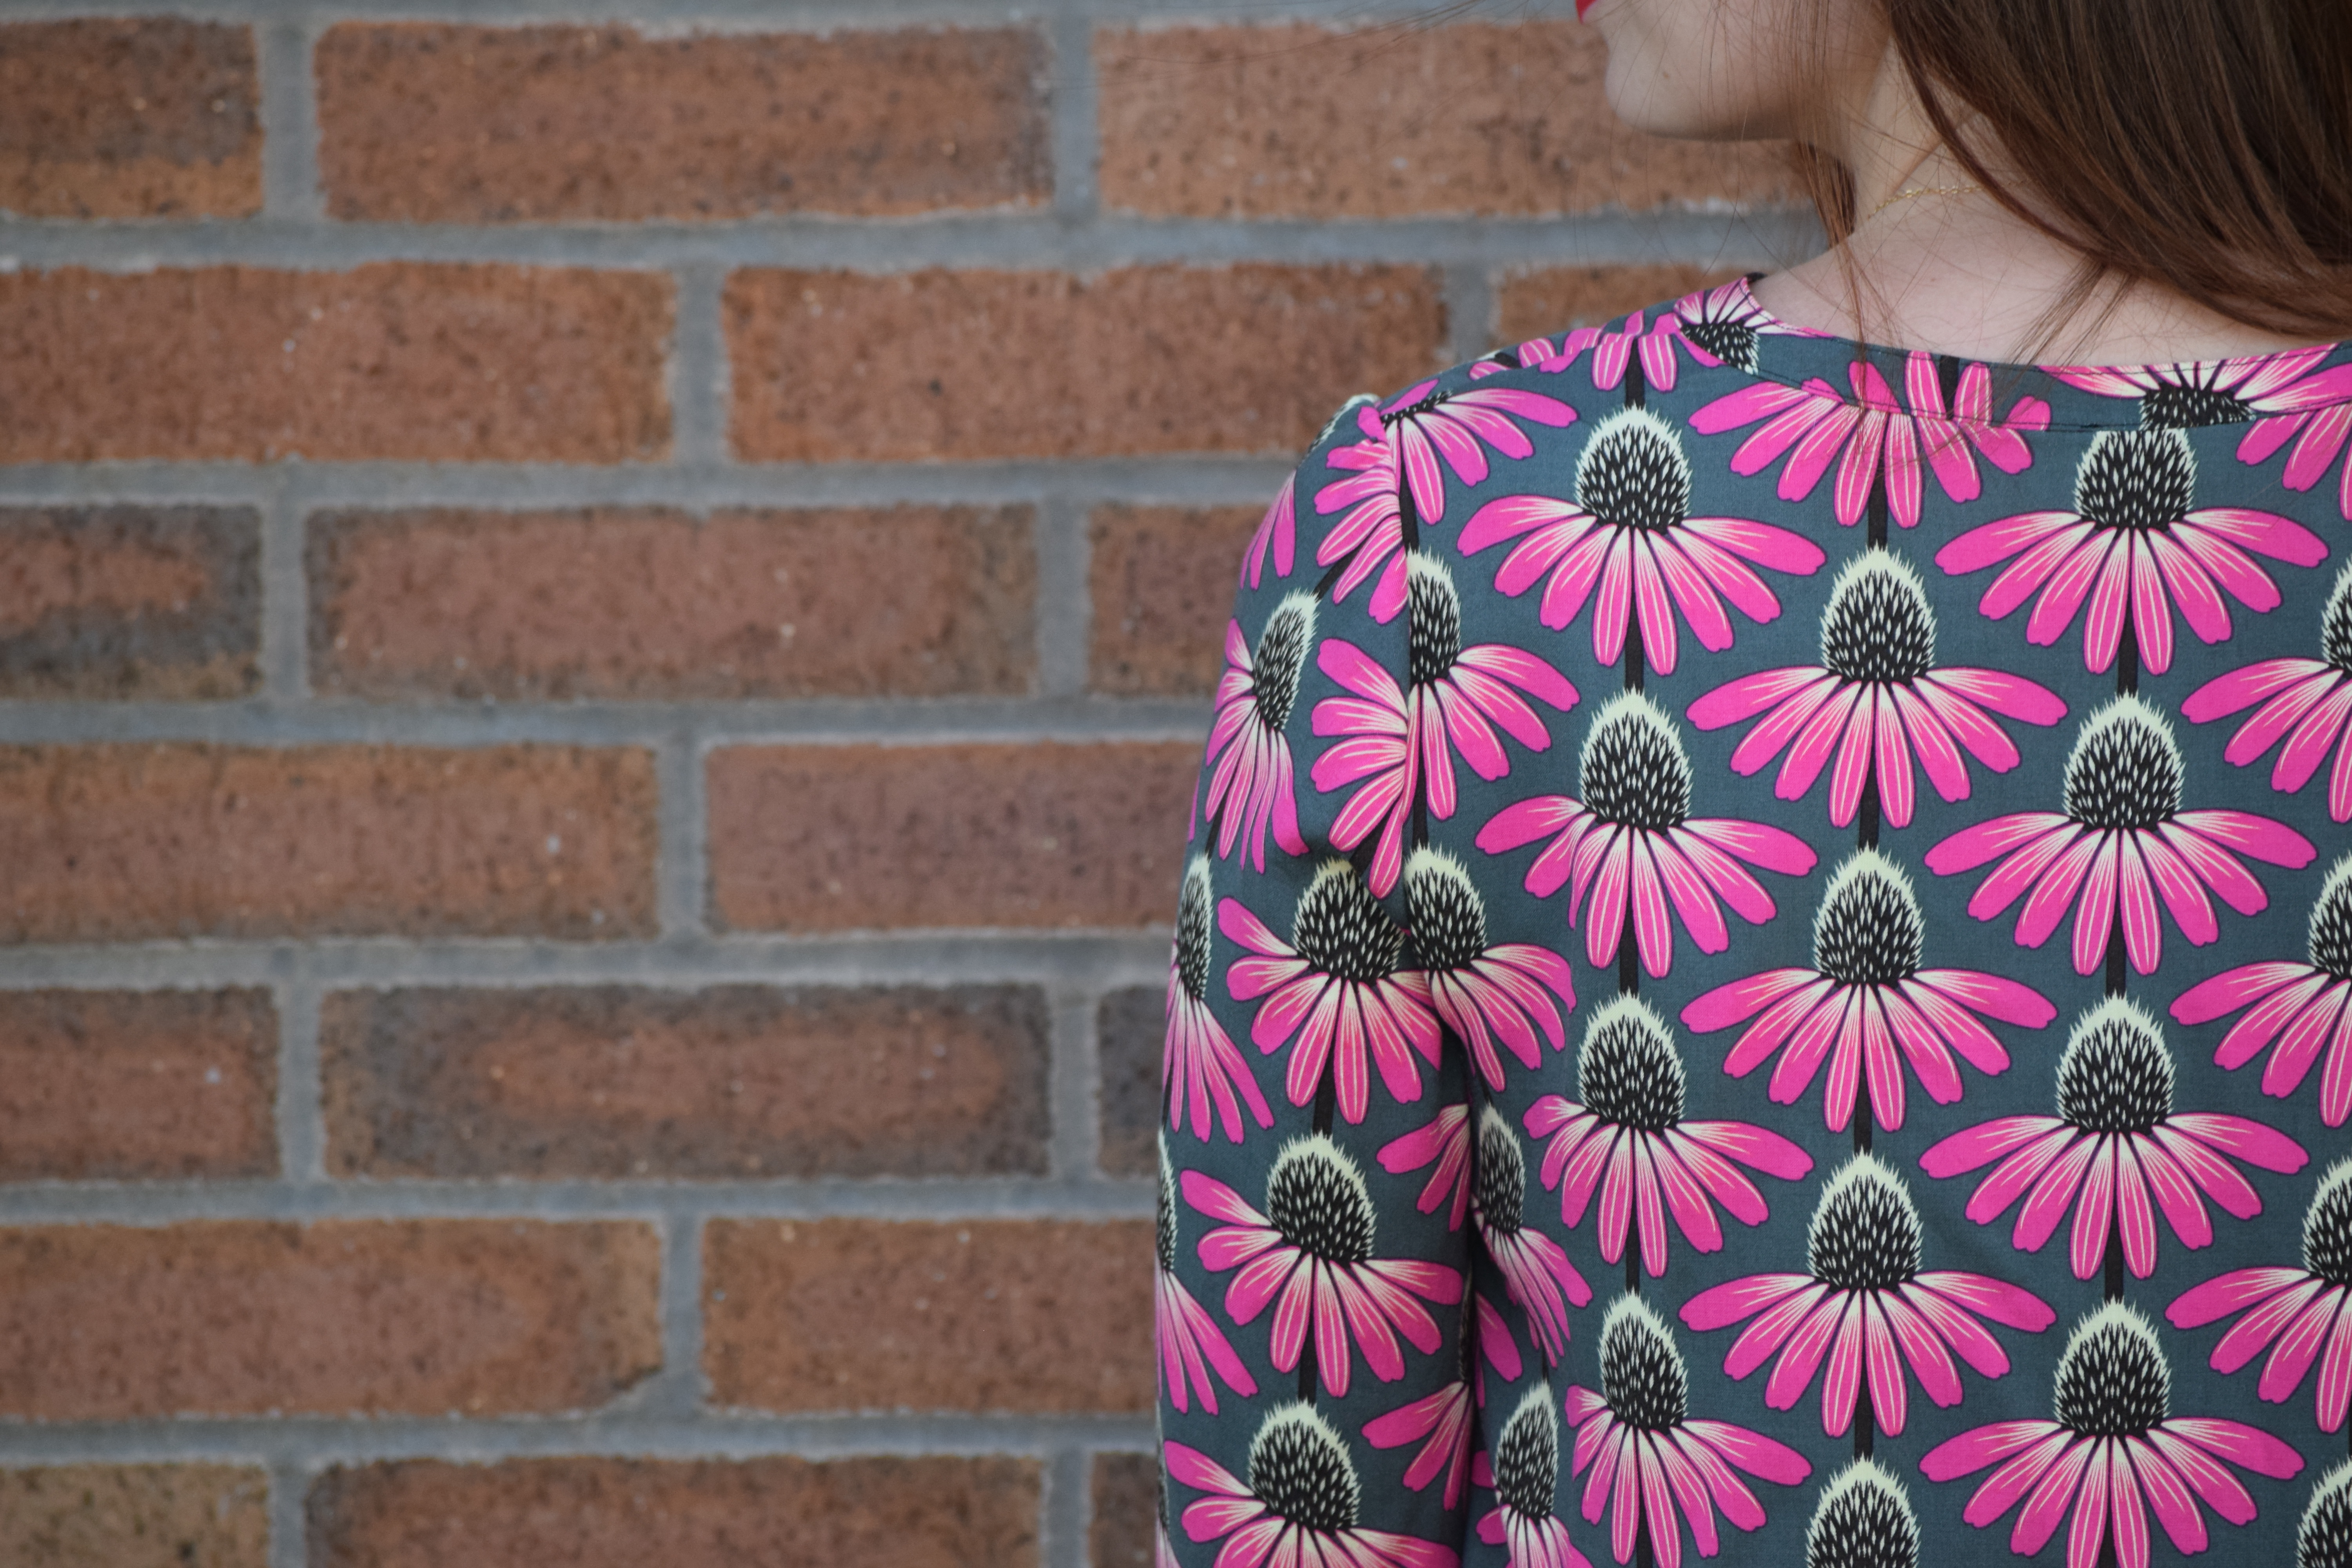
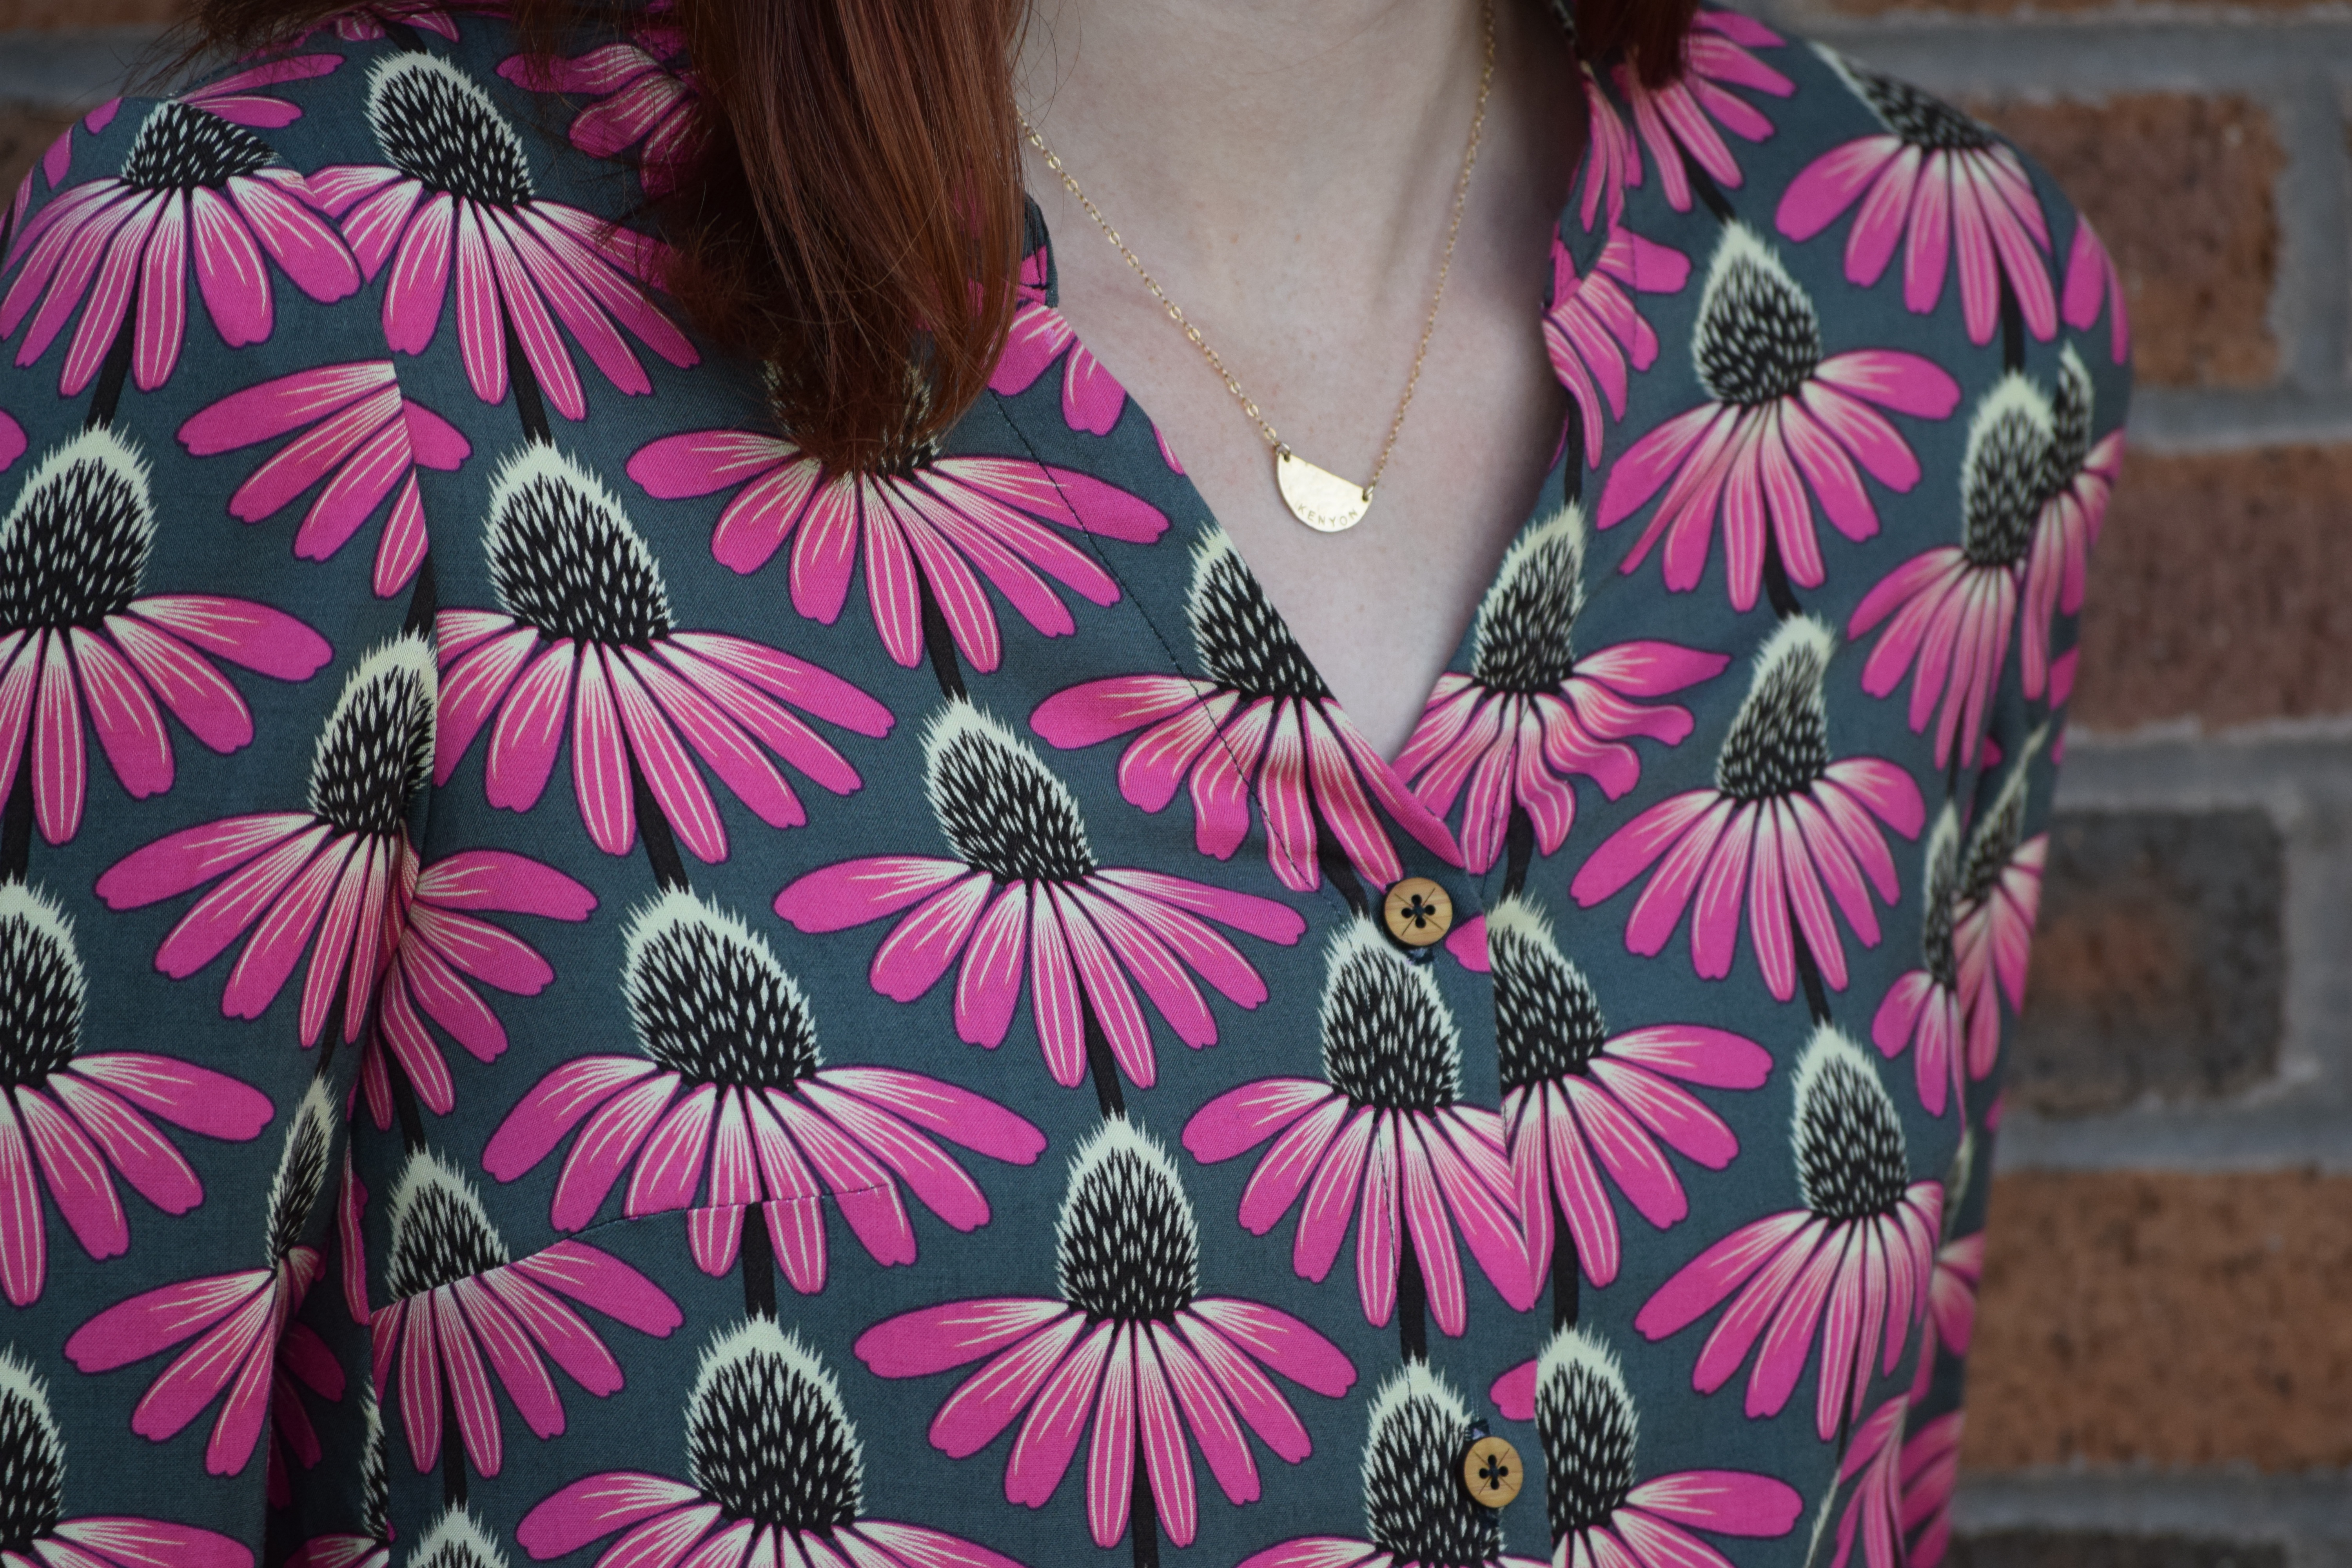
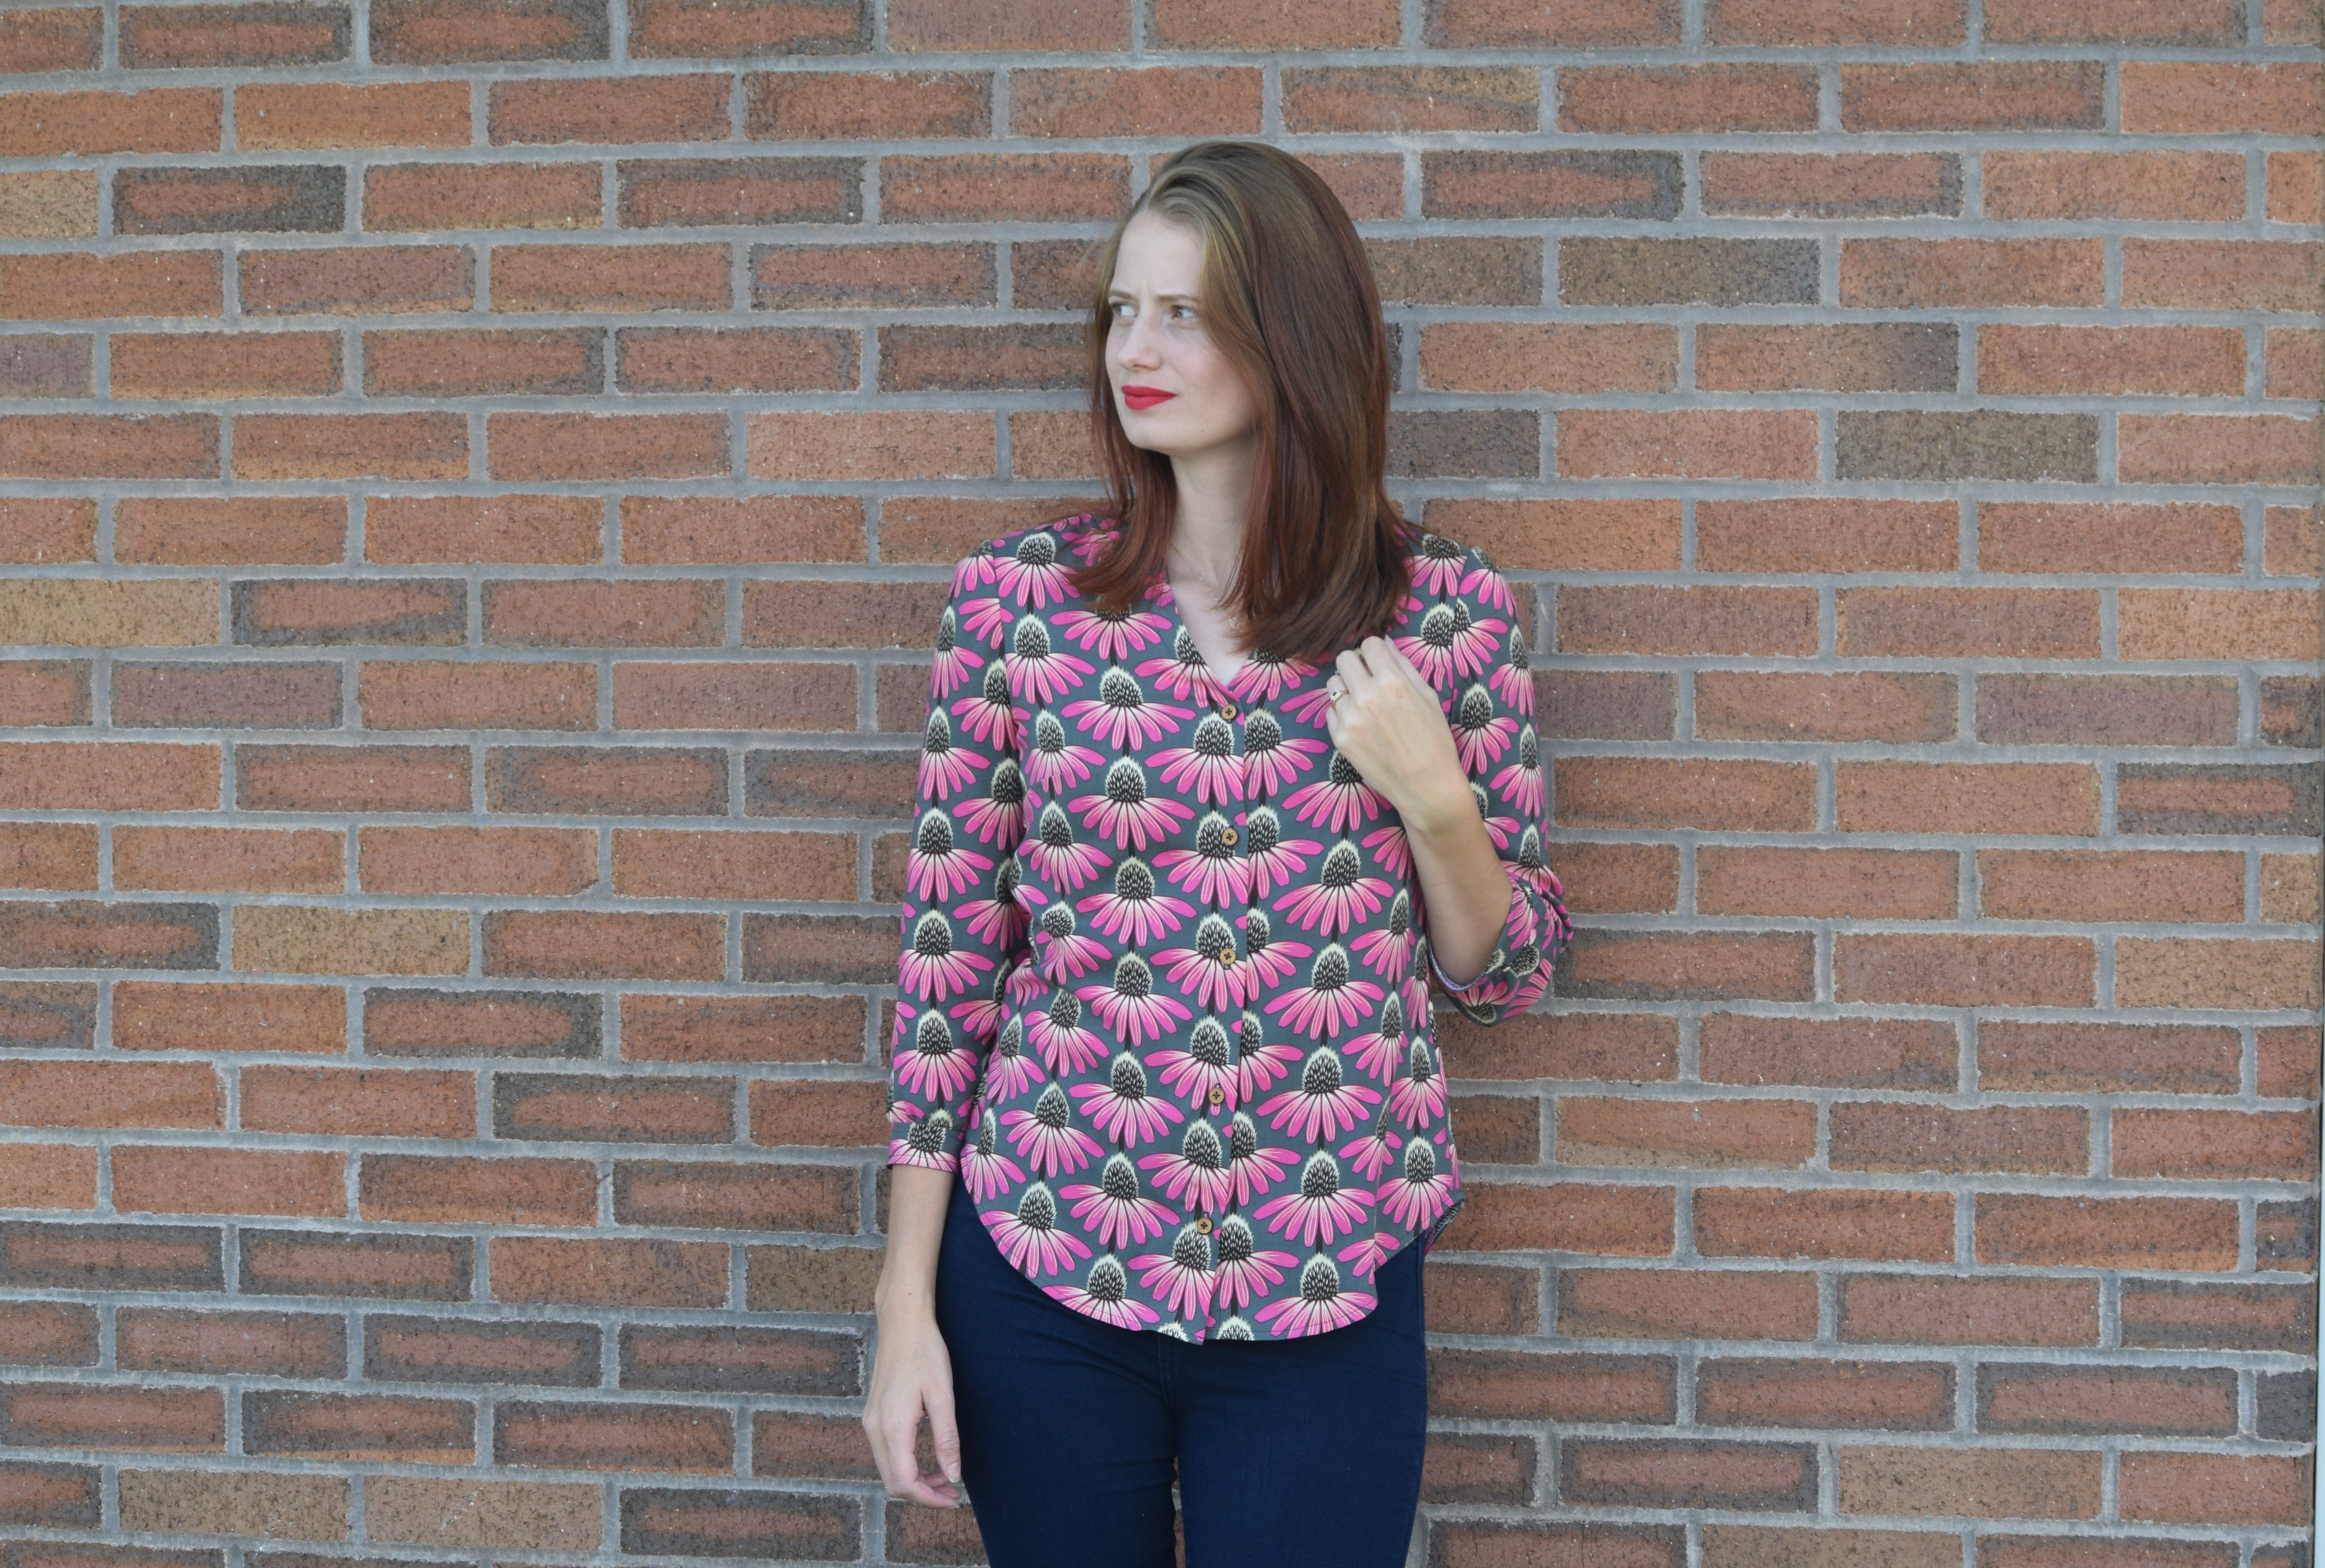
One of our wonderful sponsors Tammy of  D+H Fabrics Co was kind enough to send me this beautiful rayon designed by See You at Six fabrics. She had this fabric imported from Belgium in order to carry it in her shop. In my opinion it was 100% worth it because this stuff is glorious. I cut this project out at a sewing night last week and nearly everyone there was “oohing” and “ahhing” over it. It’s that good.

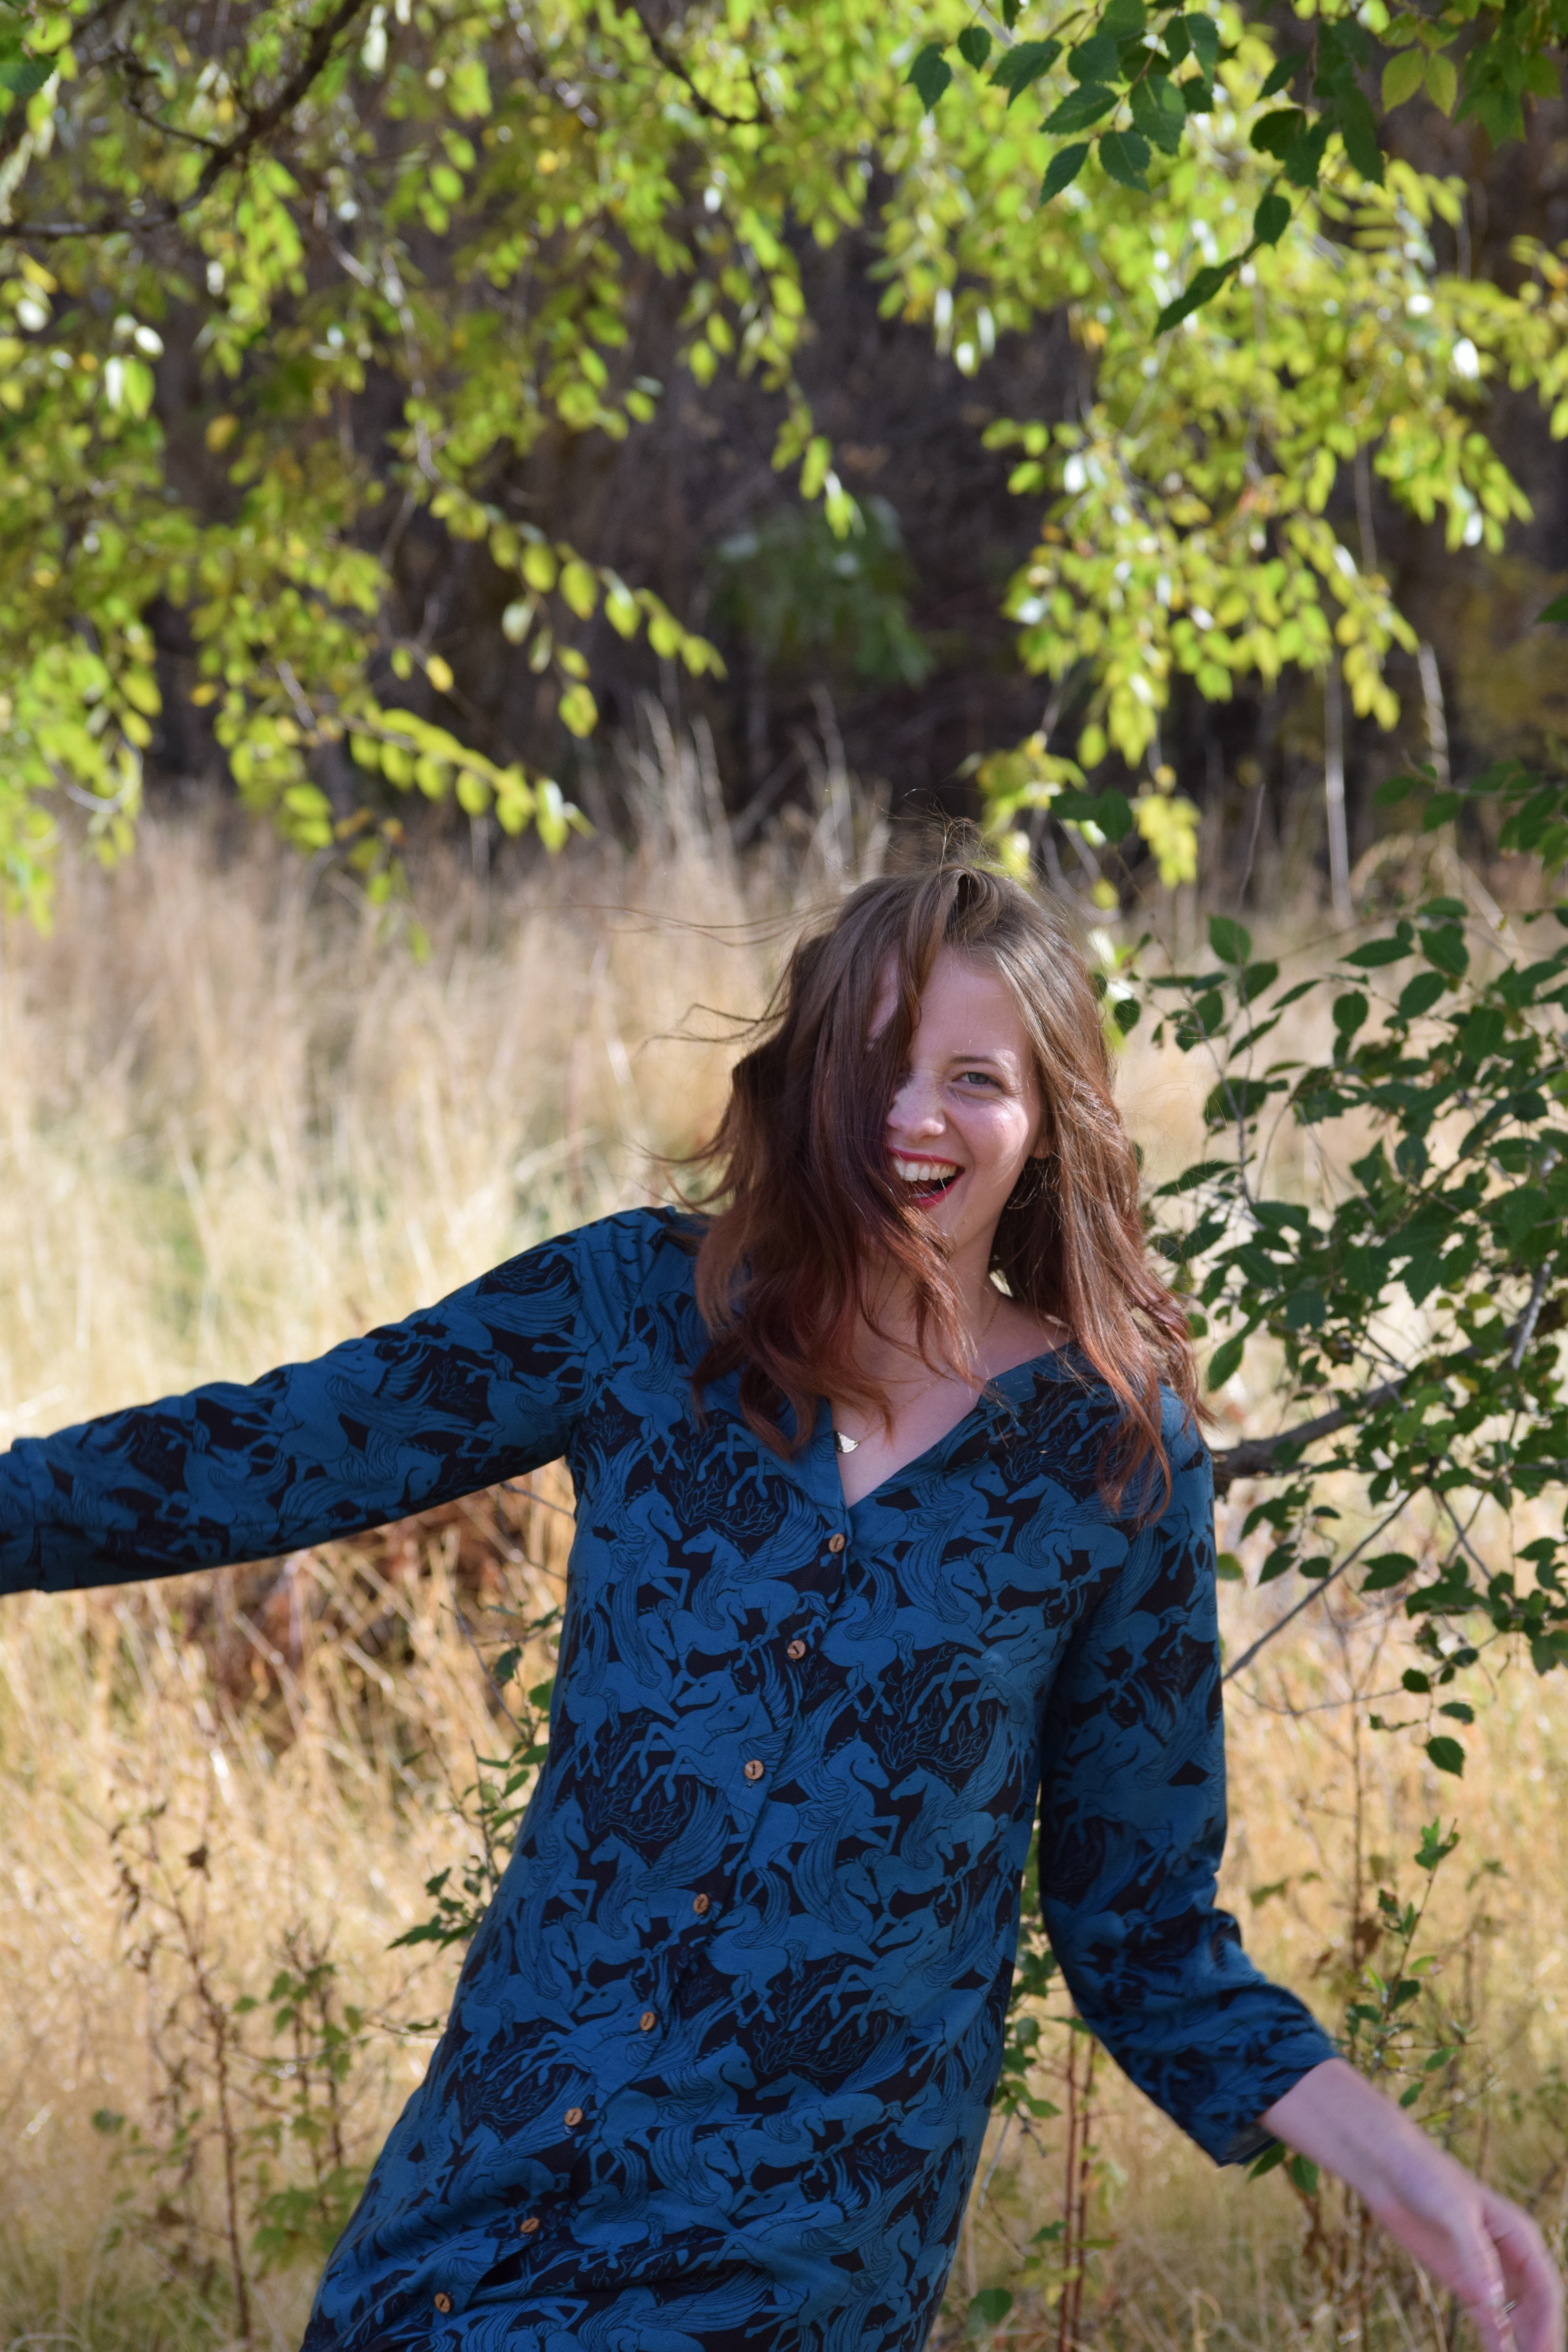
The colors in this fabric will fit into my wardrobe year-round while the print is busy enough to hide any minor construction flaws and food stains. In fact, immediately before these photos were taken, my son tripped and fell on the cement. He was fine, but a little shaken up. Naturally, however, he wiped his tears and snot directly on my shirt. You’d never know it though, because this print hides it all. Moral of the story: if you have children, work with children, or are just a messy eater (also me) you need this print in your wardrobe.

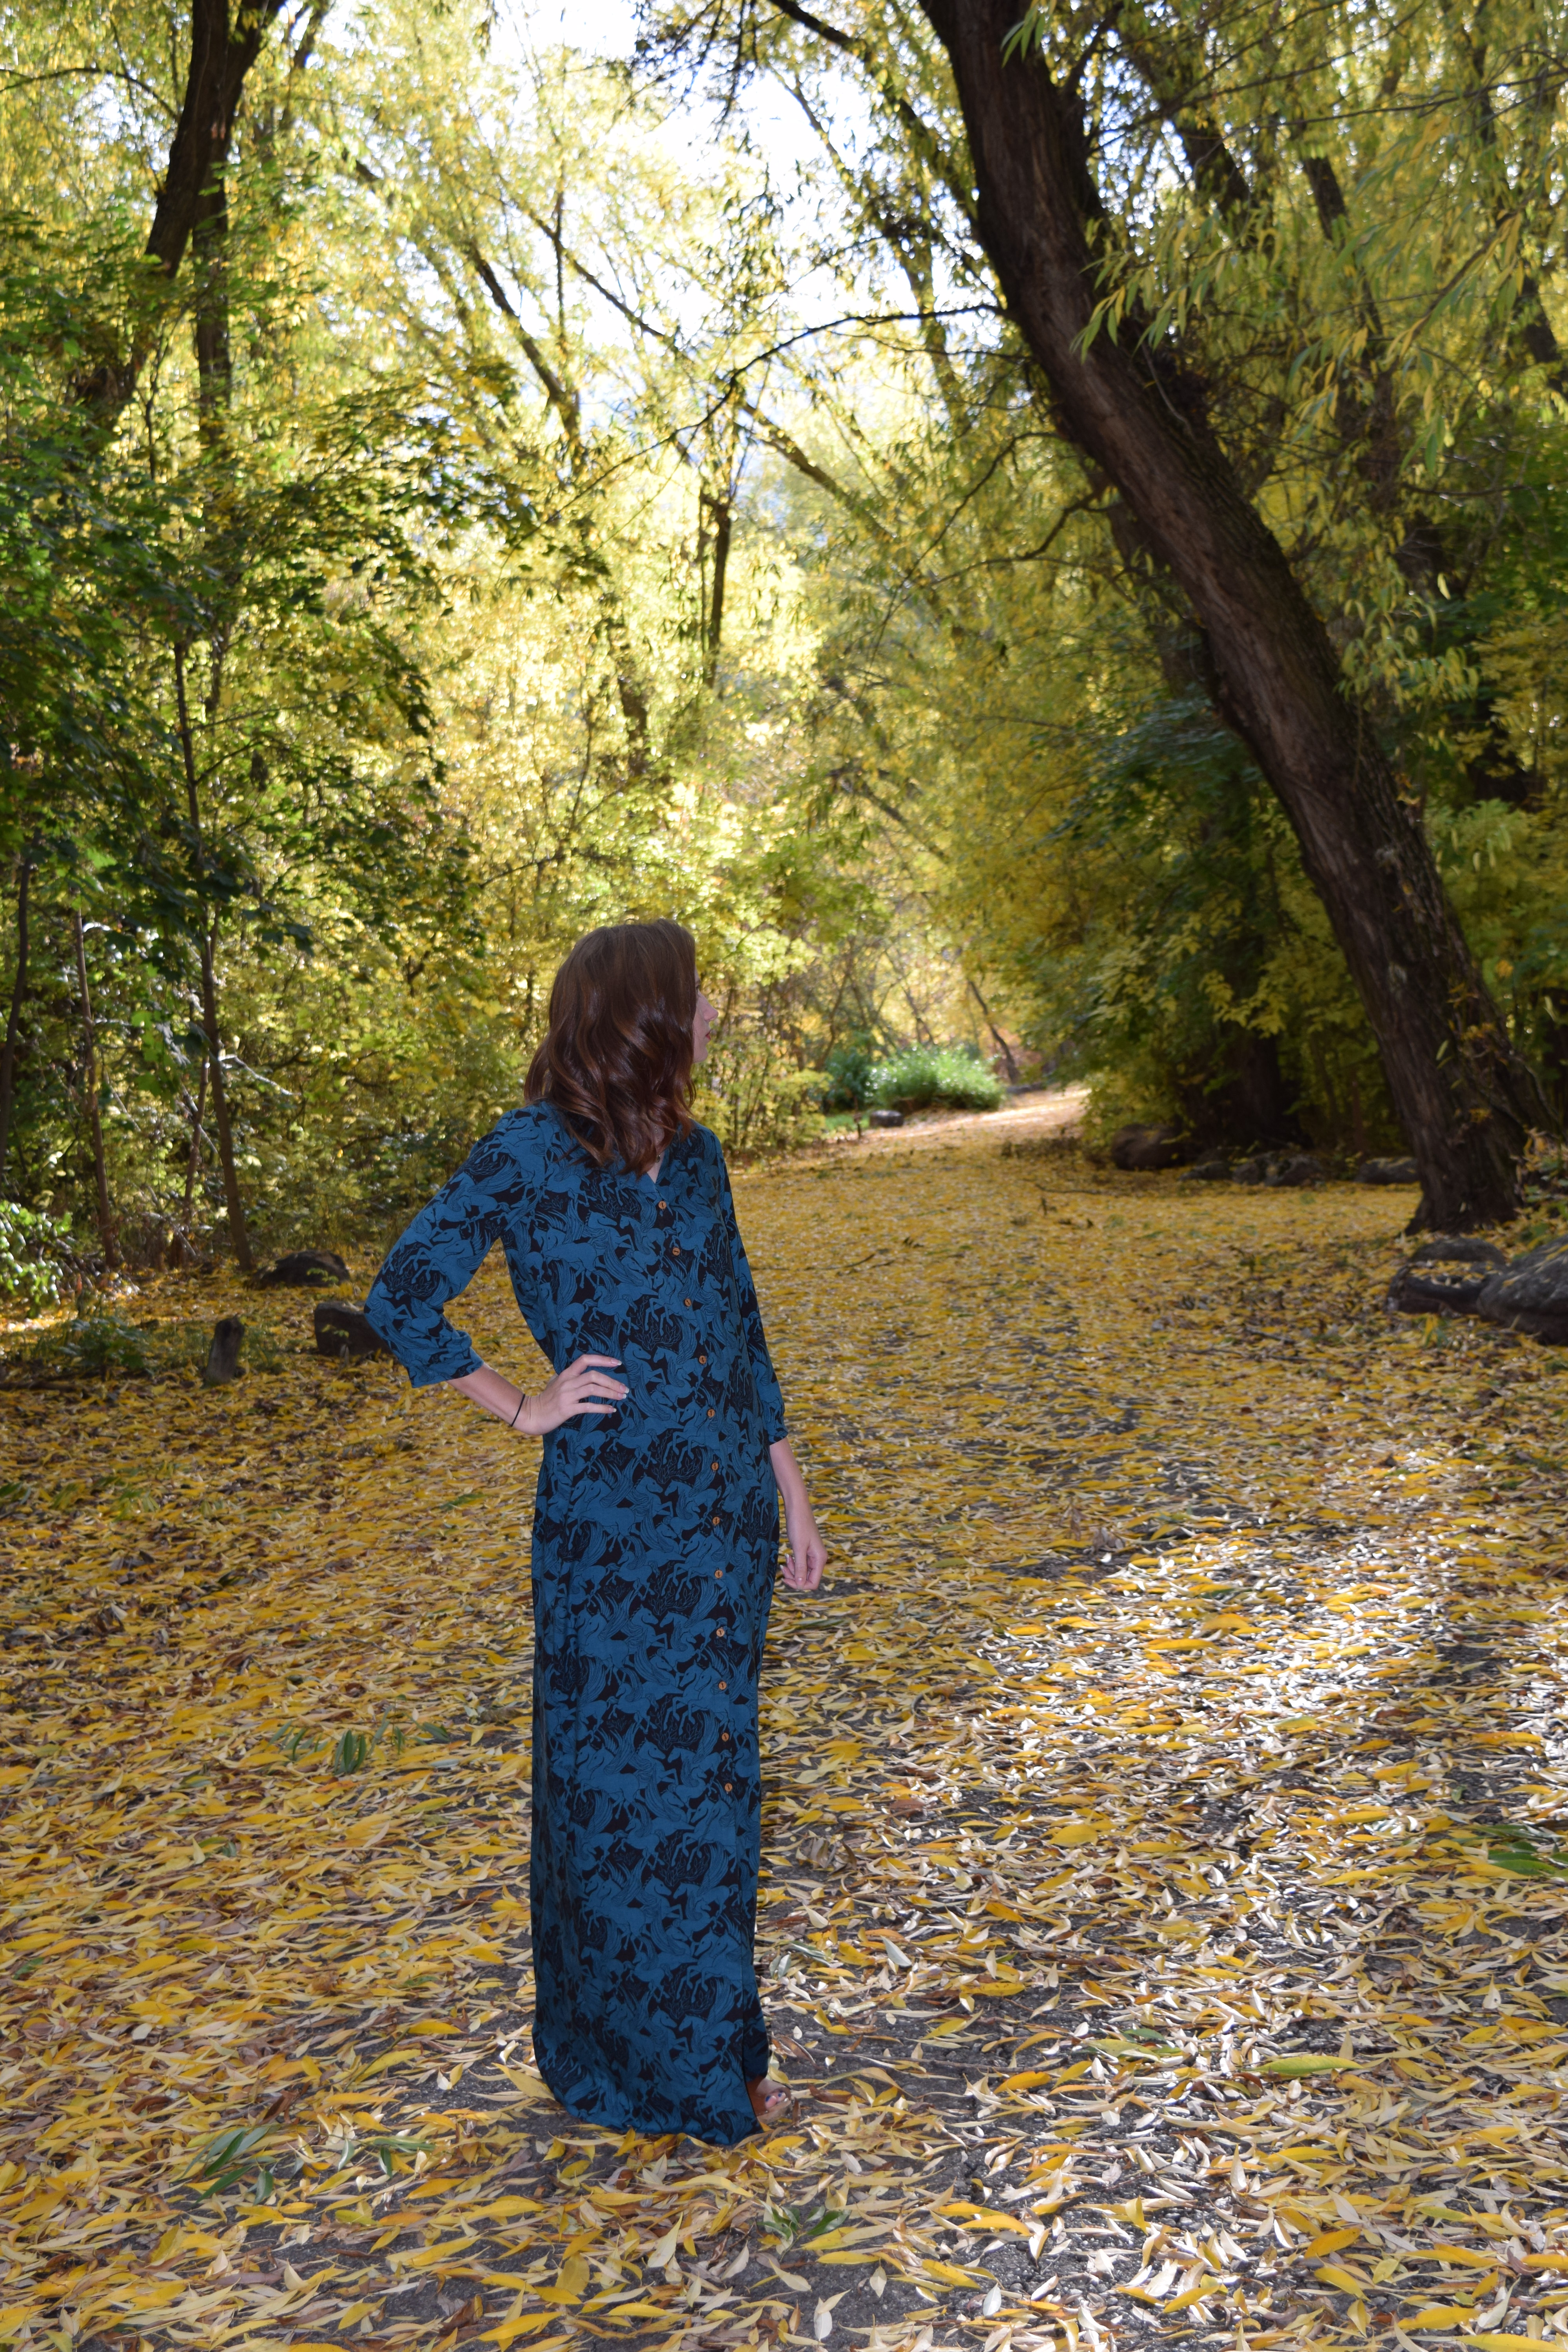
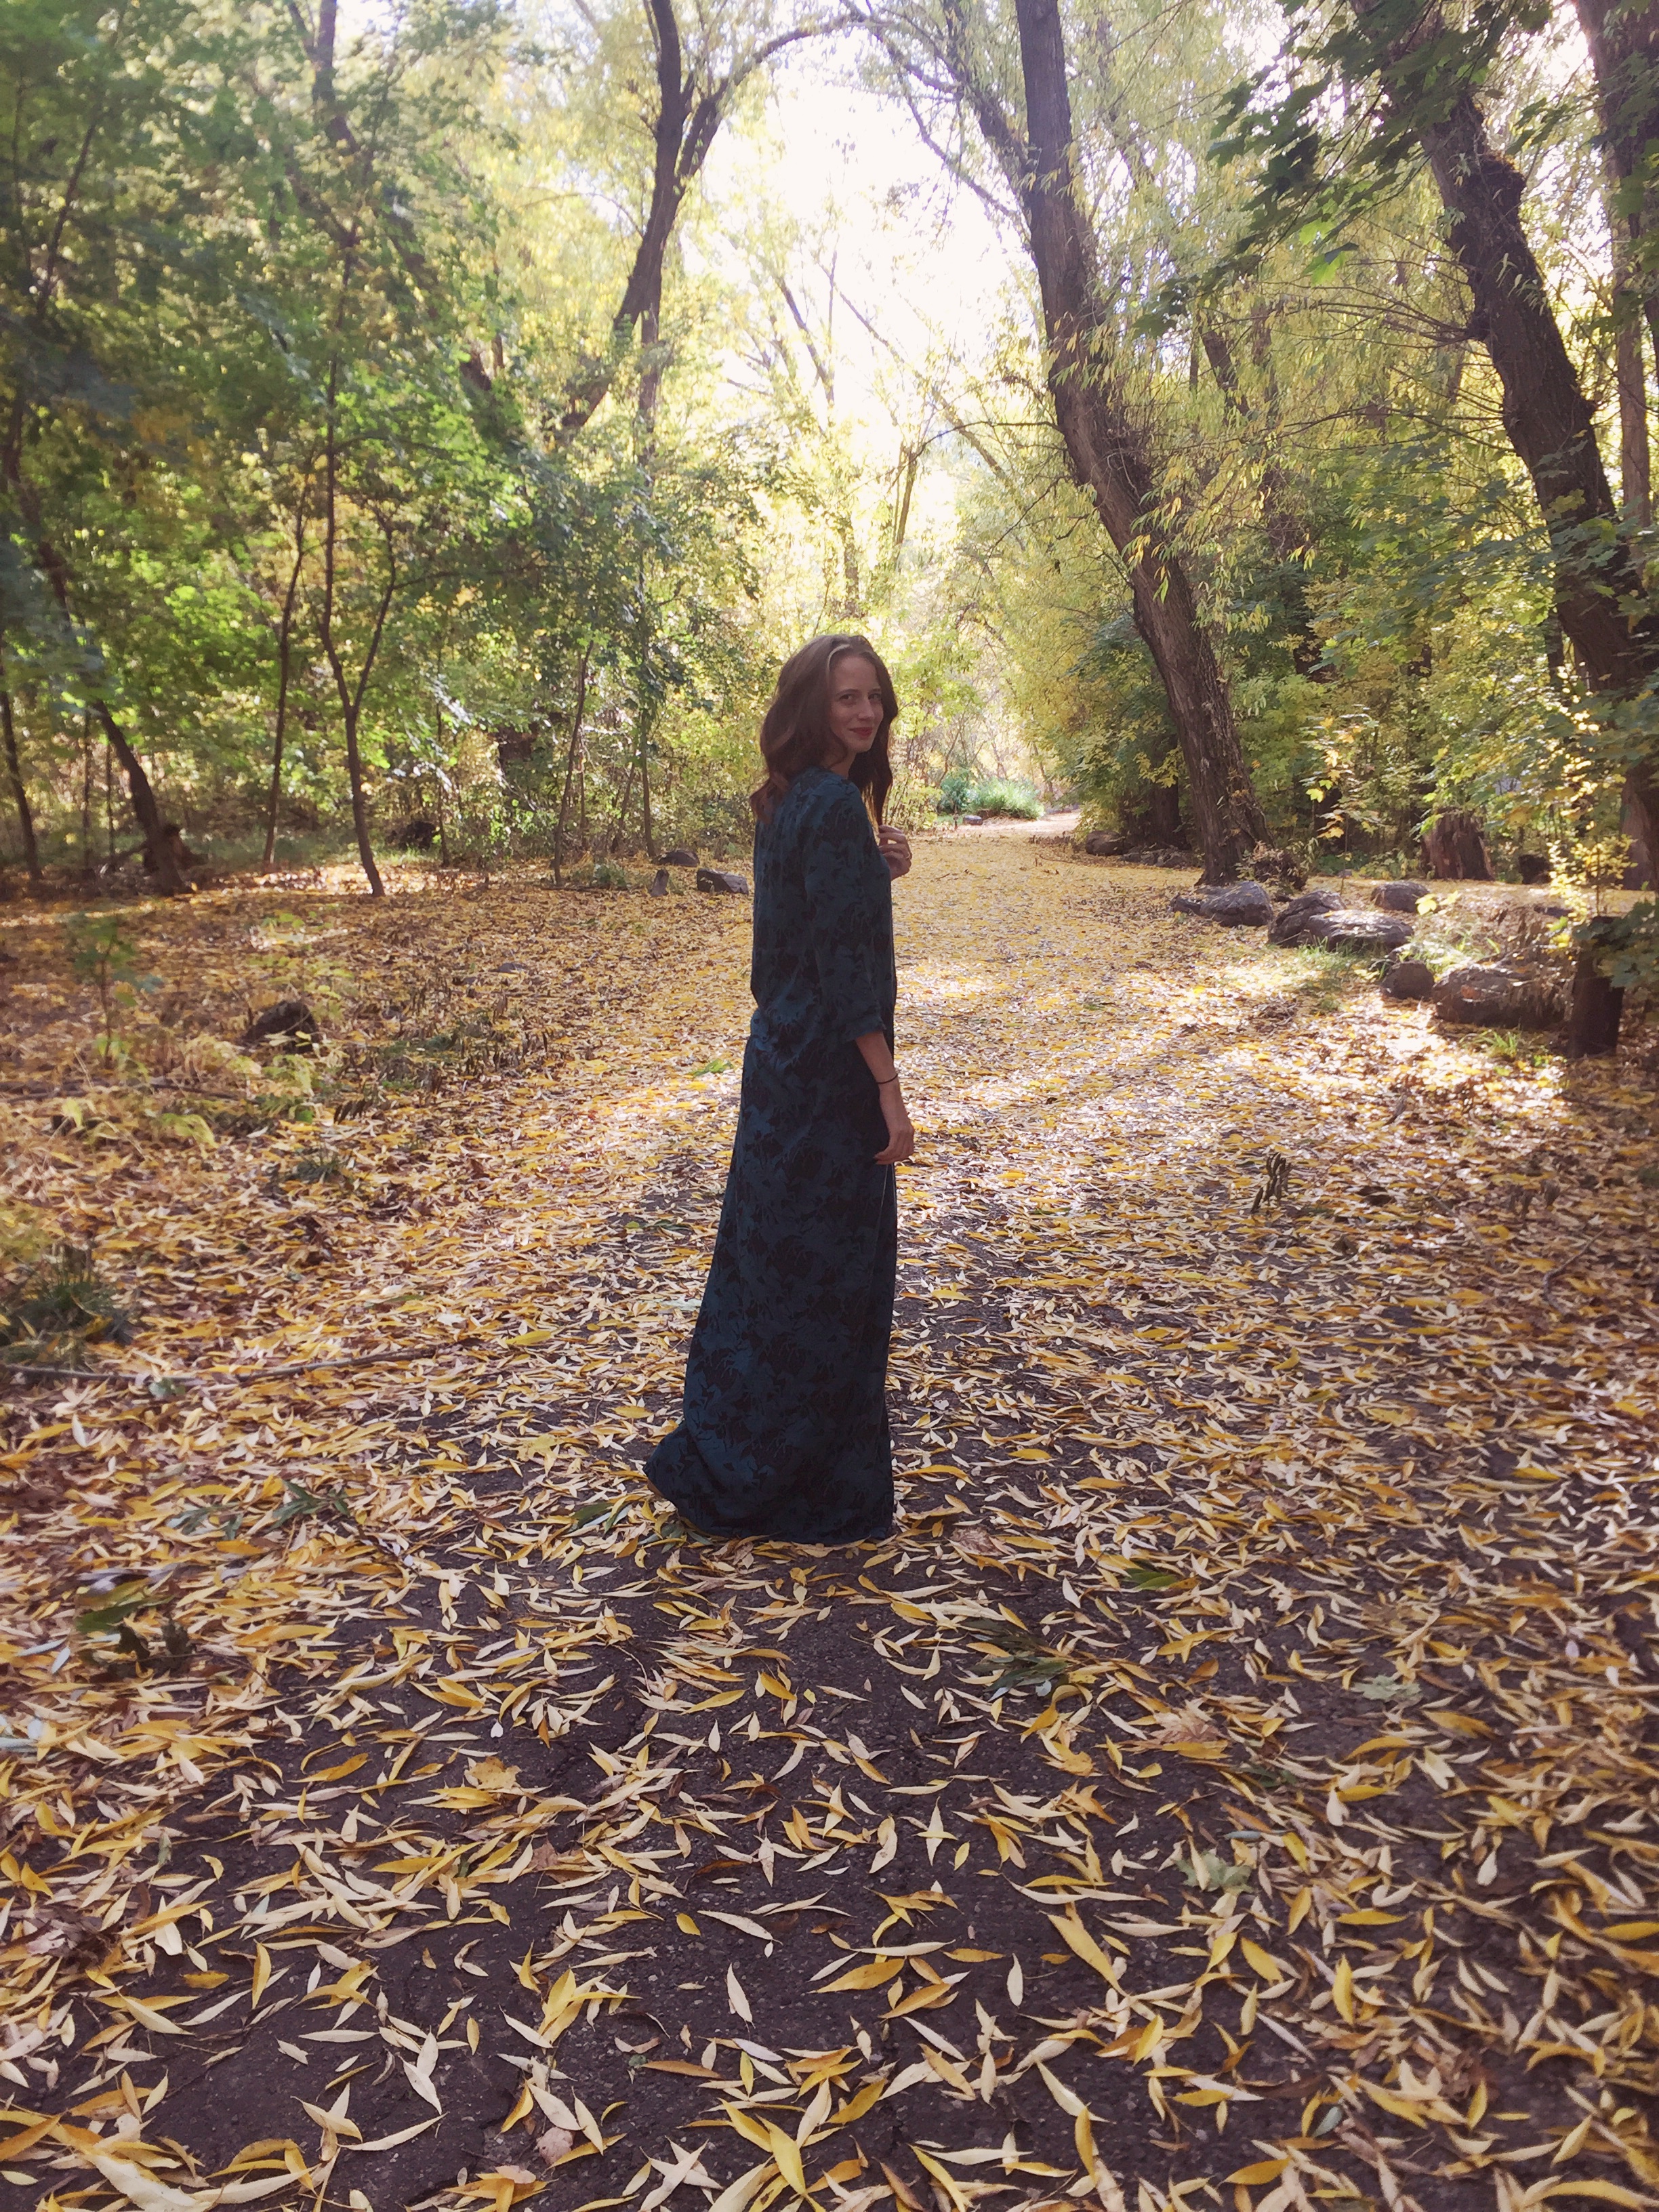
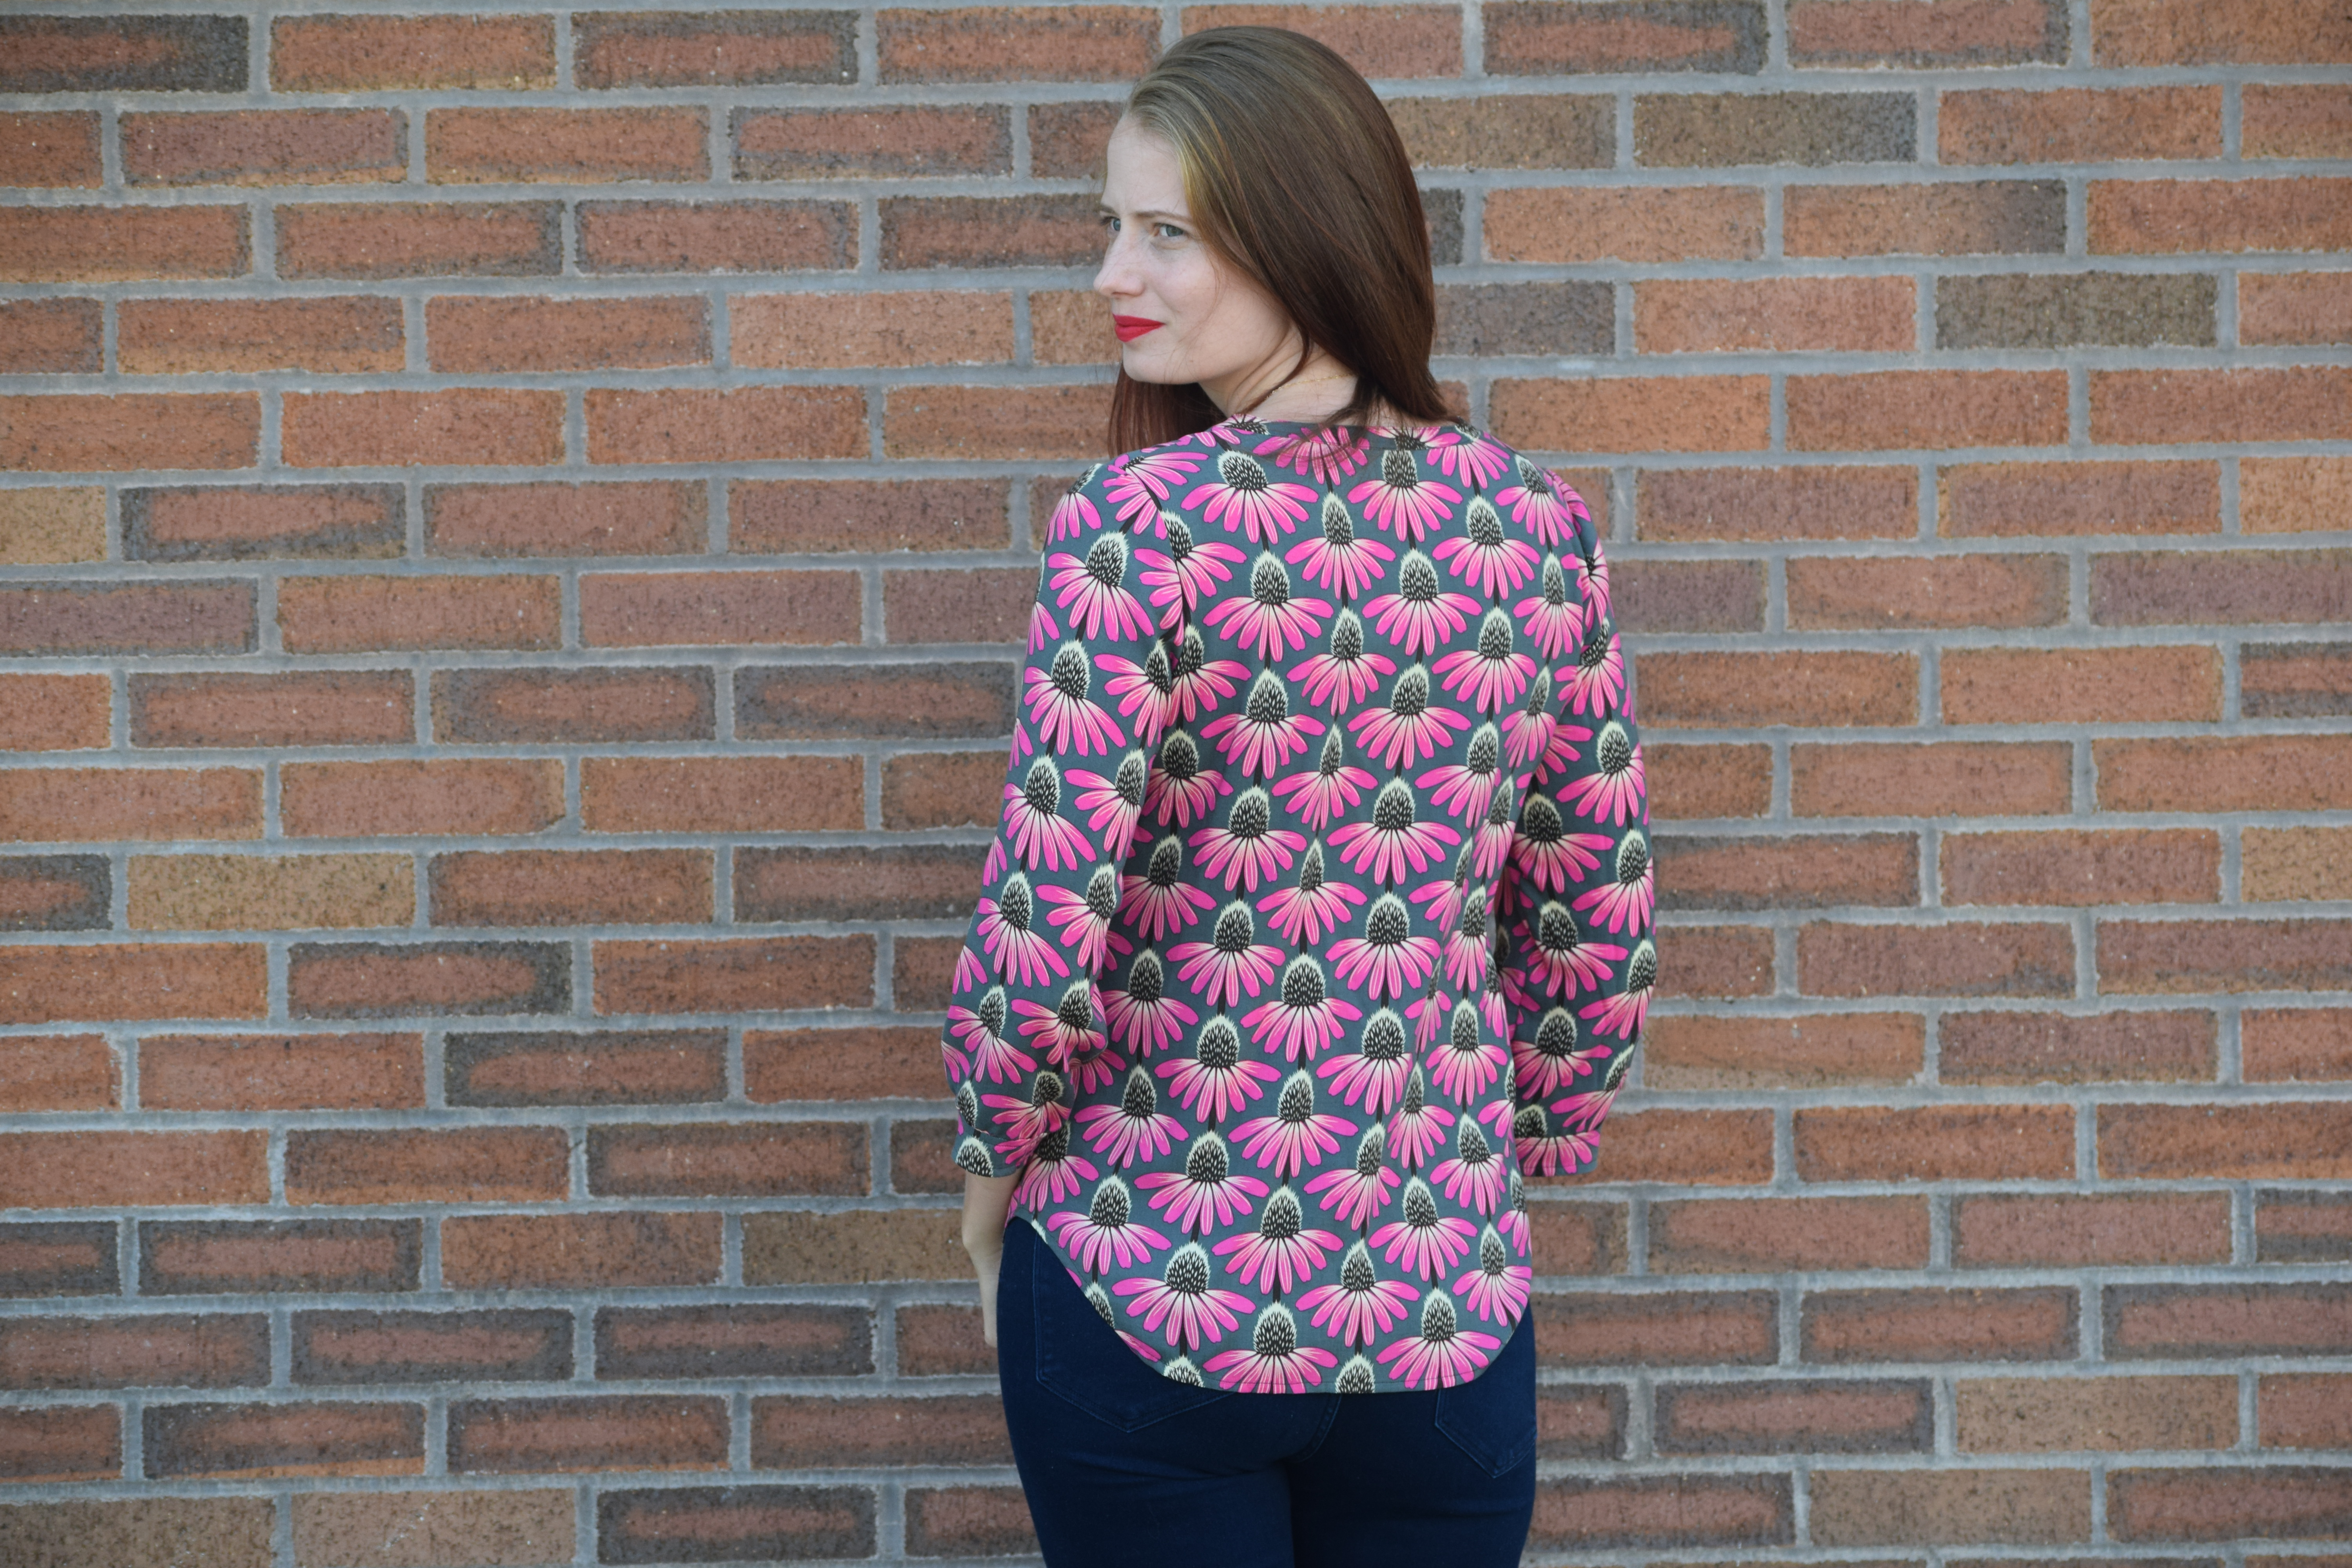
Now that I’ve given you the low down on this fabric; let’s talk about this pattern and the modifications I made to the Mila in order to better fit my style. I have this quirk about long-sleeved woven tops like the Mila. I just don’t really like them unless they’re made in flannel. I find that fabrics like rayon challis don’t actually provide much warmth when layering and I’d rather just have short sleeves so they can be worn year-round. I also like that there won’t be added bulk when I choose to wear a cardigan over this shirt. In order to achieve this, I made an extremely simple modification. The sleeves are cut 2 inches above the sleeve lengthen/shorten line. I sewed a 1″ hem and then rolled it twice for the cuffed look. Simple, right? This change made the Mila shoot to the top of my favorite patterns pretty quickly. 

I did make one other straightforward modification to my Mila. Since the print on this fabric is rather busy, I knew the back pleat detail wouldn’t be noticeable and decided to do away with it. Instead, I gathered the back to fit the yoke and the result is simple and fuss-free. Just the way I like it. 

Let’s talk sizing: One reason I love sewing Itch to Stitch patterns is that the sizing always seems to be spot on. I also love that Kennis provides separate cup sizes. As someone who should probably be making a small bust adjustment on clothing (I never do), I appreciate that the work is basically done for me here. For this top I sewed a size 4 with the A cup. I graded to an 8 at the hips, but probably could’ve gotten away with just grading to a 6. Since I am  5’10” I also added 1″ to the length of this shirt.

On to the construction. About 70% of the sewing process went nice and smooth. The other 30% was a different story.  I had a sick child while sewing this so I was sleep deprived which likely contributed to my mistakes. My missteps while sewing all revolved around the placket. Itch to Stitch patterns always have great detailed instructions which are extremely helpful if you actually read them. My first mistake was simply glancing at the diagram and sewing without reading. I sewed the placket to the right side of the fabric instead of the wrong side and had cut the placket opening before realizing my faux pas. Thanks to fray check and a steady hand with the seam ripper, I was able to remedy my mistake without too much time or effort lost. 

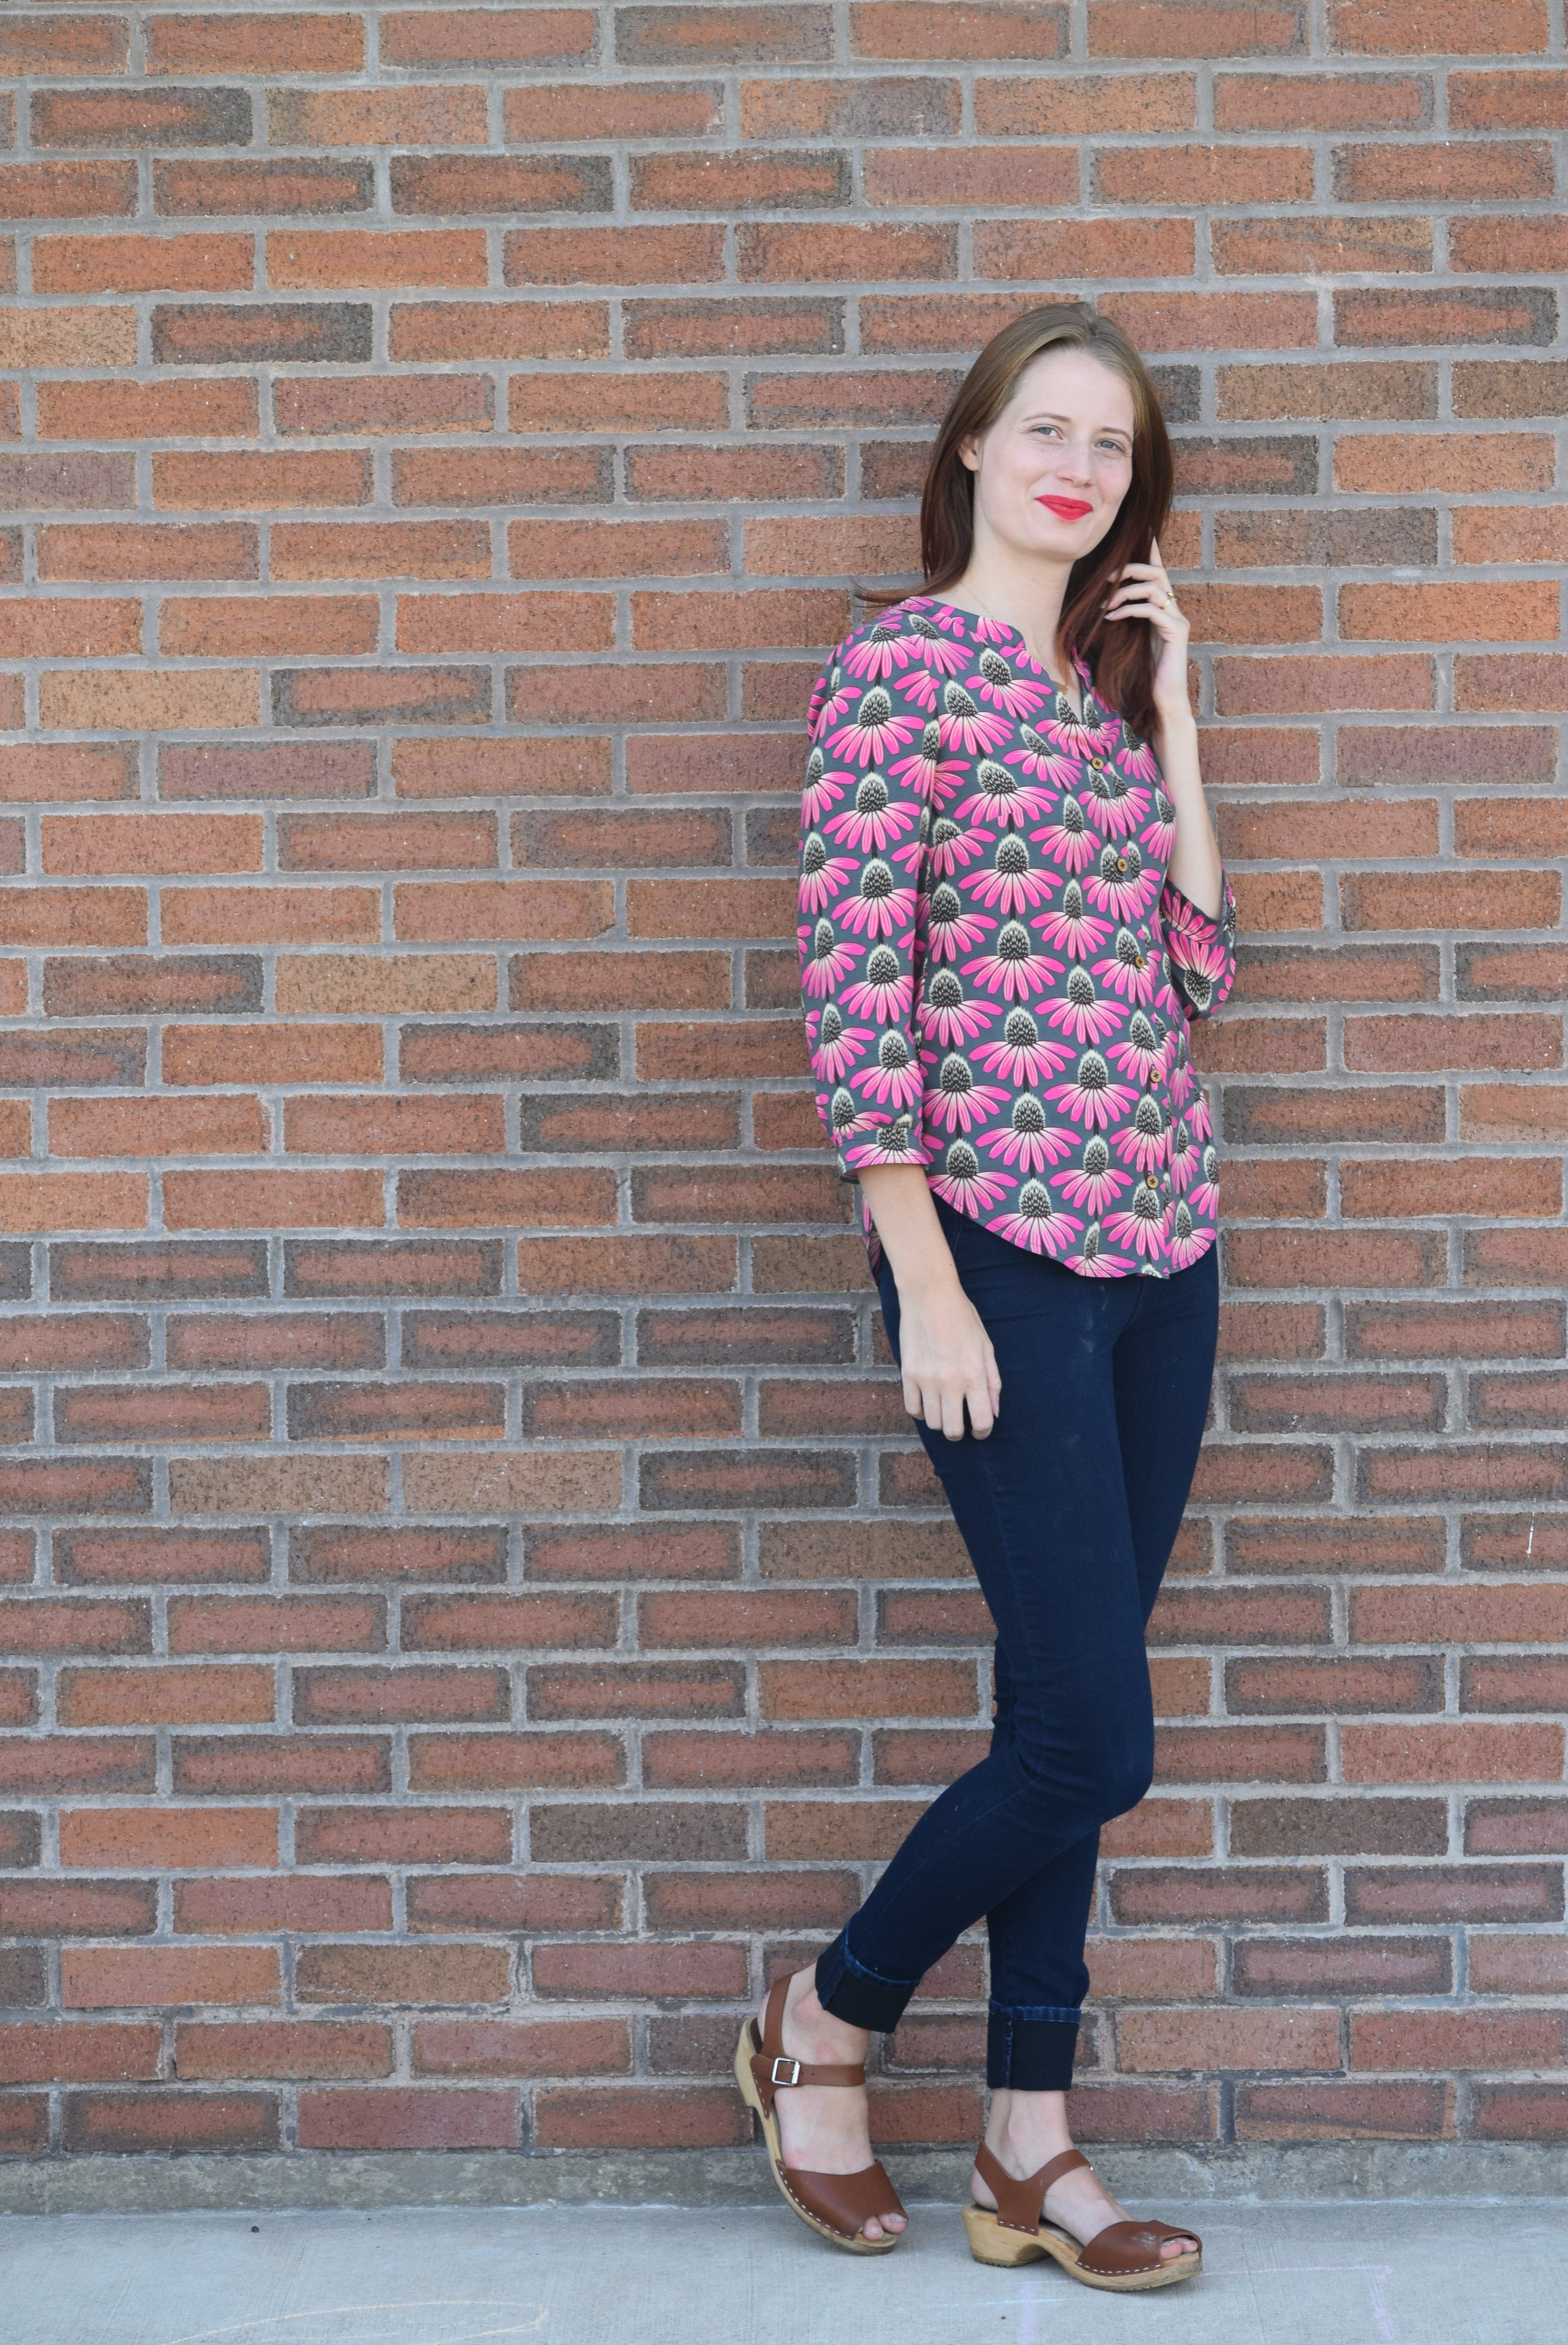
One thing I must admit is that it almost felt weird sewing something tunic length after going through a cropped shirt phase. I almost didn’t know how to style this top, but decided to keep it simple and pair it with these Ginger Jeans. Once cooler weather hits I can see this top easily paired with leggings and a cozy cardigan or Wiksten Kimono. In spring and summer, it would be equally lovely tucked into a skirt. I’m thinking a black Lawley Skirt? Overall, I’m giddy about this make. I think it will make a great transition piece and I’m obsessed with this fabric. Now my question is how much of this fabric is too much? I just might need more of it. 

Thanks for reading all about my Mila. Are you ready for some more Itch to Stitch inspiration? Read below and follow the links to check out all of this week’s bloggers. 

September 17th 
September 18th 
September 19th 
September 20th 
September 21st 
 

Need some fabric inspiration? Be sure to check out all of our sponsors and follow the Rafflecopter instructions below if you’d like to enter to win a prize package.

Itch to Stitch: 2 PDF patterns of choice
Simply By Ti: Prize of $20 GC
So Sew English Fabrics: Prize of $30 GC
Mabel Madison Modern Makers: Prize of 3 yard coordinated bundle
Sly Fox Fabrics: $25GC
Raspberry Creek Fabrics: $50 GC
Surge Fabric Shop: $20 GC
Organic Cotton Plus: $25 GC
WarmCrochet: Pair of scissors

a Rafflecopter giveaway

Itch to Stitch Blog Tour: Hepburn Turtleneck

I’m thrilled today to be part of the Itch to Stitch Love Blog Tour.  Kennis of Itch to Stitch has quite the repertoire of well-drafted patterns under her belt and I’ve enjoyed sewing her patterns in the past (see those here, here, and here).  Recently, Kennis was on vacation and came home to find that her home had been burglarized. Thieves took her computers, machines, and many other things essential to her and her husband’s businesses. This tour came about because the sewing community joined together to support one of our own. Read to the end of the post for information on all the generous sponsors and talented bloggers joining together this week.

When I was invited to join, I searched the website to find inspiration and decide on a project. Upon seeing and buying the Hepburn Turtleneck pattern, I knew I had the perfect fabric/pattern combination.  I purchased this soft striped rayon french terry from Indiesew and it’s been sitting in my stash for months waiting for inspiration to strike.
IMG_2182

IMG_2199

Today I’m sharing my Hepburn Turtleneck styled two different ways. It’s been several years since I owned a fitted turtleneck and I wasn’t quite sure how to style it. The first look is a slightly dressed up classic look that I envision wearing for a night out or even to Thanksgiving dinner. I pulled my hair into a low bun, painted on red lipstick, and paired my new top with these denim Lander Pants (more about those here).

IMG_2183IMG_2193

This first look seemed like a simple and natural styling choice. I love the understated elegance of this outfit, but likely won’t dress up quite this much on a regular basis. My second look is a casual one that is less classic and more trendy. When styling this outfit, I pulled my hair into a top knot, applied minimal makeup, grabbed my Rifle Paper Co. Keds, and pulled out my vintage Levi’s 550 jeans.

IMG_2149IMG_2155

These jeans are my literal mom jeans because I took them from my mom’s closet. I’m pretty picky about jeans and only own one pair besides these. My mom wore these jeans when I was younger, and it seems only natural that I would wear them now that I’m a mother. They’re worn to comfortable perfection and have completely sold me on the mom jeans trend. I wasn’t sure how to feel about this outfit until I put it on and realized that it’s likely to become my winter momiform.

IMG_2173IMG_2175

My Hepburn Turtleneck has been worn at every opportunity since it was finished a few days ago. It’s the perfect fit and weight for winter layering and wearing as a transition piece in late fall and early spring. I’m already envisioning new ways to style this top and keep it in constant rotation. How would you style a fitted turtleneck? Which look do you prefer?

IMG_2195IMG_2166

A quick note on sizing: My bust measurement fell between the size 2 and size 4 with my hip measurement being a size 6. I opted to make a size 4 and grade to a 6 at the hips. I’m 5’10” and added 2″ to the body length and 1.5″ to the arm length.

Read below for more inspiration and instructions on entering a couple of great giveaways. 

Your ITS Love bloggers are:

Monday: Sew Sophie Lynn, Merritts Makes, Sewing with Sarah, Sewing with D

Tuesday: Shalini’s Blog, Auschicksews, Rebel and Malice, Sewing Vortex

Wednesday: Replicate Then Deviate, mahlicadesigns, Sewing with D, The Petite Sewist, kreamino

Thursday: Sewing Curves, Creative Counselor, Sew Mariefleur, Fairies, Bubbles & Co, Sewing by Ti

Friday: Harper+Lu, MeMade, On Wednesdays We Sew, Heather Handmade, Bellevi, and visit by mooglii on IG

The ITS Love Tour sponsors have been so generous in support of Kennis of Itch to Stitch that we’ve been able to put together several prize packages to share with you.
First, you may enter our giveaway to win one of three prize packs:

Prize Pack #1 includes:

5 Itch to Stitch patterns

$25GC to Simply By Ti

$50 Raspberry Creek Gift Card

$50 Bella Sunshine gift card

                  Prize Pack #2 includes:

$50 Knit Pop GC

$25 Designer Stitch GC

$25 Chalk and Notch GC

3 patterns of choice from Coffee And Thread

Prize Pack #3 Includes:

$15 Thread & Grain store credit

$25 Maker Mountain Fabrics GC

3 patterns from Halla Patterns

A Rafflecopter Giveaway

Your second way to win is to share with us your recent Itch to Stitch creations (made between October and November 2017). Add your creations to our Link Up Party before Nov. 20th for a chance to win one of two prize packs.

LinkUp Prize Pack #1 includes:

5 Itch to Stitch patterns

A $40 value PFRE Sly Fox Fabrics.

$25 Maker Mountain Fabrics GC

$50 Love Notions GC

LinkUp Prize Pack #2 includes:

$25 Stylish Fabric GC & sewing box kit

$25 Chalk and Notch GC

5 patterns from Rad Patterns

Pattern of choice from DG Patterns

Click here to view and add your links.

Itch to Stitch Anza Jumpsuit

Last spring, I purchased a gorgeous Anna Maria fabric fully intending to make a jumpsuit. Life got busy and many of my sewing plans got pushed aside. By the time summer ended, I had given up on finding and making my perfect jumpsuit and used the fabric to make a pattern hack of another Itch to Stitch pattern. You can find that dress here. Luckily, Kennis of Itch to Stitch is not only a talented and detailed pattern designer, she is also some sort of mind-reading wizard who is releasing the perfect jumpsuit pattern just when I needed it. Today I’m thrilled to show you my tester version of the Anza Jumpsuit.

DSC_0323

I was browsing the selection of fabrics at my local fabric store Suppose when Kennis annouced a tester call for the Anza Jumpsuit and dress. I immediately put down the bolts I had been carrying around the store, borrowed a measuring tape, took my exact measurements, and filled out the application form. I purchased 4 yards (only ended up needing 3) of this Lizzy House Printmaking lawn and crossed my fingers that I’d be chosen. The next morning when I received an email inviting me to the tester group, I excitedly told my husband that I’d be making myself a literal birthday suit as a gift to myself (my birthday was coming up the following week). Sometimes, I think that I’m hilarious until I remember that not even my  3 year old laughs at my jokes.

DSC_0408

Let’s bring it back to talking about the jumpsuit and pretend like I didn’t just write several sentences detailing my own lame joke. Now we’re going to talk details and features. Itch to Stitch patterns often include well thought out details that add interest without stealing the show and overwhelming the wearer. The Anza pattern is no exception. It includes cuffed sleeves, pleated chest pockets, drawstring waistband, elastic at the ankles, and pants pockets. Basically, this is the jumpsuit I was preparing to draft for myself until I saw that Itch to Stitch had made a pattern even better than what I’d imagined in my own mind.

DSC_0393DSC_0409DSC_0388

Speaking of details, can we talk about these amazing Arrow Mountain buttons? These are the Minimalist buttons in Arctic Ice. I used the wooden version of the Minimalist buttons on maxi dress also made from Lizzy House lawn that you can find here. In fact, If you’d like to see more of the Arrow Mountain buttons in my handmades, check out my Itch to Stitch Bonn Shirt and Bonn Shirt Turned Maxi Dress posts found here and here. I’ve ordered from Arrow Mountain several times now and only found great quality and excellent customer service.

DSC_0340

A quick note on alterations:

This pattern is drafted for the height of 5’6″ and may some require some lengthening or shortening if you are not  5’6″. Since I am somewhere between 5’9″ and 5’10” I ended up adding 1.5″ to both the bodice and the rise.

One great thing about Itch to Stitch patterns is that Kennis includes pieces for cup sizes A-DD. This means less alteration time and more sewing time. Which is always a good thing. Let’s all make sure to applaud Kennis for taking the extra time and effort to make our lives easier.

DSC_0337

Overall, I am 100% satisified with my Anza Jumpsuit and cannot wait to wear it again and again all summer long. Now, go grab your copy here.

Bonn Shirt Turned Maxi Dress

Back in September, I had the opportunity to test the Bonn Shirt pattern by Itch to Stitch Designs. Read about it here. I fell in love with the fit of the top, but wanted to do something a bit more dramatic. After making Simplicity 8084 and seeing this dress, the idea for a Bonn maxi dress was born.

dsc_0479
Wooden buttons purchased from Arrow Mountain.

dsc_0485

While I love a good curve hugging dress, they often aren’t practical for me to wear outside of special occasions.  I wanted this dress to be a bit fitted around the bust and fall straight down from the hips. With that silhouette in mind, modifying the Bonn Shirt to a maxi was really quite simple.The Bonn pattern actually includes a knee-length dress option, but modifying the shirt pattern pieces worked better for my specific fit goals.  At the hips, I widened the front pattern pieces by 1″ and the back pieces by 1.5″ to give a comfortable amount of ease. I made notches in the pattern to match the front and back pieces at the hips. Once the notches were made, I added about 40″ to the length ( I measured my desired length at the center back and at the underarm seams to determine this). I added the length straight down from the hip line on front and back, continuing the front button placket all the way to the hem. I added the same amount of length to the placket interfacing piece. I love the way my Simplicity 8084 maxi buttons to the knee and used a total of 12 buttons to copy that look.

dsc_0581

Modifying the Bonn Shirt pattern turned out to be the least challenging aspect of making this dress. I’ve been working with lots of deadlines and only allowed myself to work on this for an hour or two after meeting my productivity goals for other projects. This led to a lot of late night sewing mistakes.

First, The back dress piece on a loose pin and created a  0.5″ hole right in the middle. Solution number 1: I sliced a 1″ strip out of the back and pieced in a new strip. The wild print is great at hiding my Frankenstein style strip and it’s really not noticeable unless you’re within 10 inches of my back.

Second, I cut the left sleeve completely crooked. Honestly, I don’t even know how it got so crooked. it was off by inches. Solution number 2: This one was easy. I had just enough leftover fabric so I re-cut the sleeve. While this was a simple solution it still added about a half hour to my limited sewing time.

Third,  I hemmed the dress in the middle of the night and didn’t have anyone to help me mark the hem. I usually don’t have too much trouble with this, but the maxi length combined with the drape of the fabric made it complicated. It ended up taking about three times as long after I cut the hem at a slight angle. Solution number 3: Keep trying.

dsc_0472
Fabric is Helios rayon by Anna Maria Horner

This dress turned out to be such a rewarding project and I’m delighted that I decided to stick with it through the frustrations.It’s the perfect cross between an evening dress and comfortable nightgown, which is exactly what I’d envisioned. I’ve been anxious while considering so many facets of the future and this dress was therapeutic for me. Taking something and making it my own while working through the imperfections was just what I needed. It was a good reminder that mistakes and difficulties can still combine to make something wonderful. Was that too much? Thanks for sticking with me. Here are a few more photos and a sneak peek at my goofy family.

img_7673

dsc_0465


Bonn Shirt

I had already agreed to another pattern testing commitment when Kennis Wong of Itch to Stitch sent out a call for Bonn Shirt and Dress testers. I knew immediately that I had to apply even if it meant staying up a little later to sew each evening. It was all worth it for this beautifully designed top.

DSC_0711

The Bonn Shirt pattern has a dress and top option along with four different sleeve variations. Sizes 00-20 are included in the PDF pattern (purchase here) which is on sale for 20% off (regularly $12). Also included in the pattern are separate bodice pieces for A-DD cup sizes. I sewed the shirt version with 3/4 sleeves in size 2 with an A cup and graded to a 4 at the hips.

I chose to sew my final top in this Echinacea print rayon by Anna Maria Horner; which is really no surprise if you’ve seen my current handmade wardrobe. The rayon was a little trickier to sew than the mystery poly-cotton blend used for my muslin, but the way the shirt drapes is well worth the extra effort. Let’s just take a moment to appreciate the grandeur of this print.

DSC_0719

My top came together fairly quick and was a satisfying sew. The impeccable drafting on this top made setting in the sleeves simple and stress free. I had the most difficulty when attaching the collar, which was still made simpler by Kennis’s detailed instructions and diagrams. There are also several skill tutorials on the Itch to Stitch blog that make things like setting in sleeves and attaching collars much easier. Even if you’re not planning on sewing up a Bonn Shirt or Dress you should plan on visiting her blog to find well-written tutorials on commonly used techniques. I’ll leave you with a few more photos of my Bonn Shirt so you see more angles and more fully appreciate the lovely drape of this rayon.

DSC_0726
I’ve become a wooden button convert after ordering these round shirt buttons from Arrow Mountain. I’ve already got another Etsy cart full of them and cannot wait to order more for use on some exciting future projects.


DSC_0690DSC_0714DSC_0738

Thanks for reading!