Make it Mine Tour: Waterfall Raglan Flutter Sleeve Hack and Tutorial

img_8379
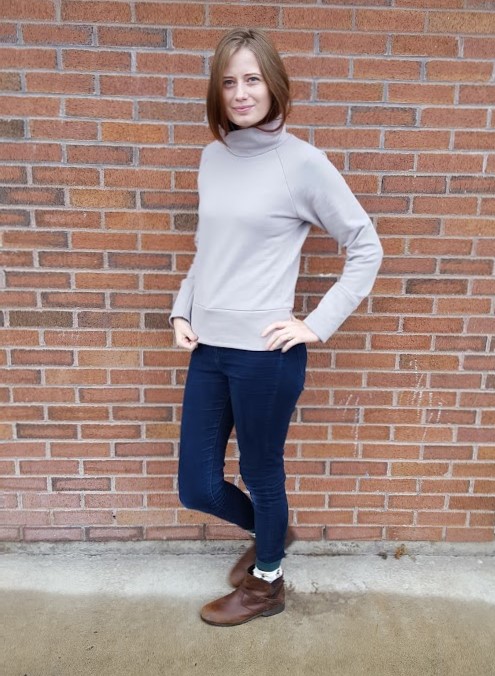
Hello! Today I feel a bit nervous to be surrounded by so many talented makers and bloggers participating in the Make it Mine Waterfall Tour hosted by Gabriela of  Chalk and Notch. I’ve been a fan of the Waterfall Raglan pattern since the girls’ pattern was released last fall. I don’t have a daughter of my own, so I immediately commented and expressed my interest in a women’s version. To my delight, she quickly obliged and has just released the Women’s Waterfall Raglan pattern. There’s nothing I love more than a well-drafted basic pattern that can be made and hacked again and again.

dsc_0195

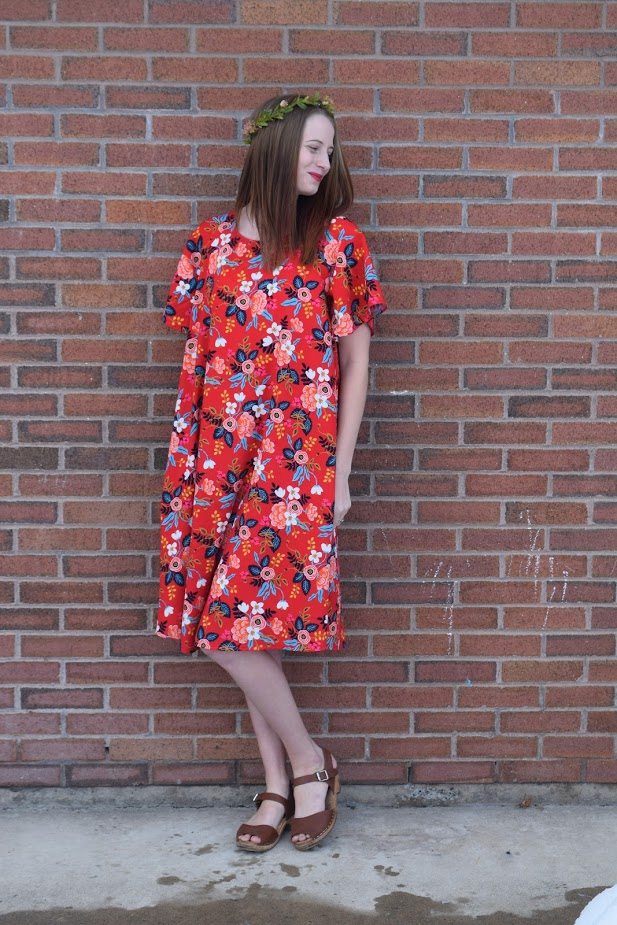
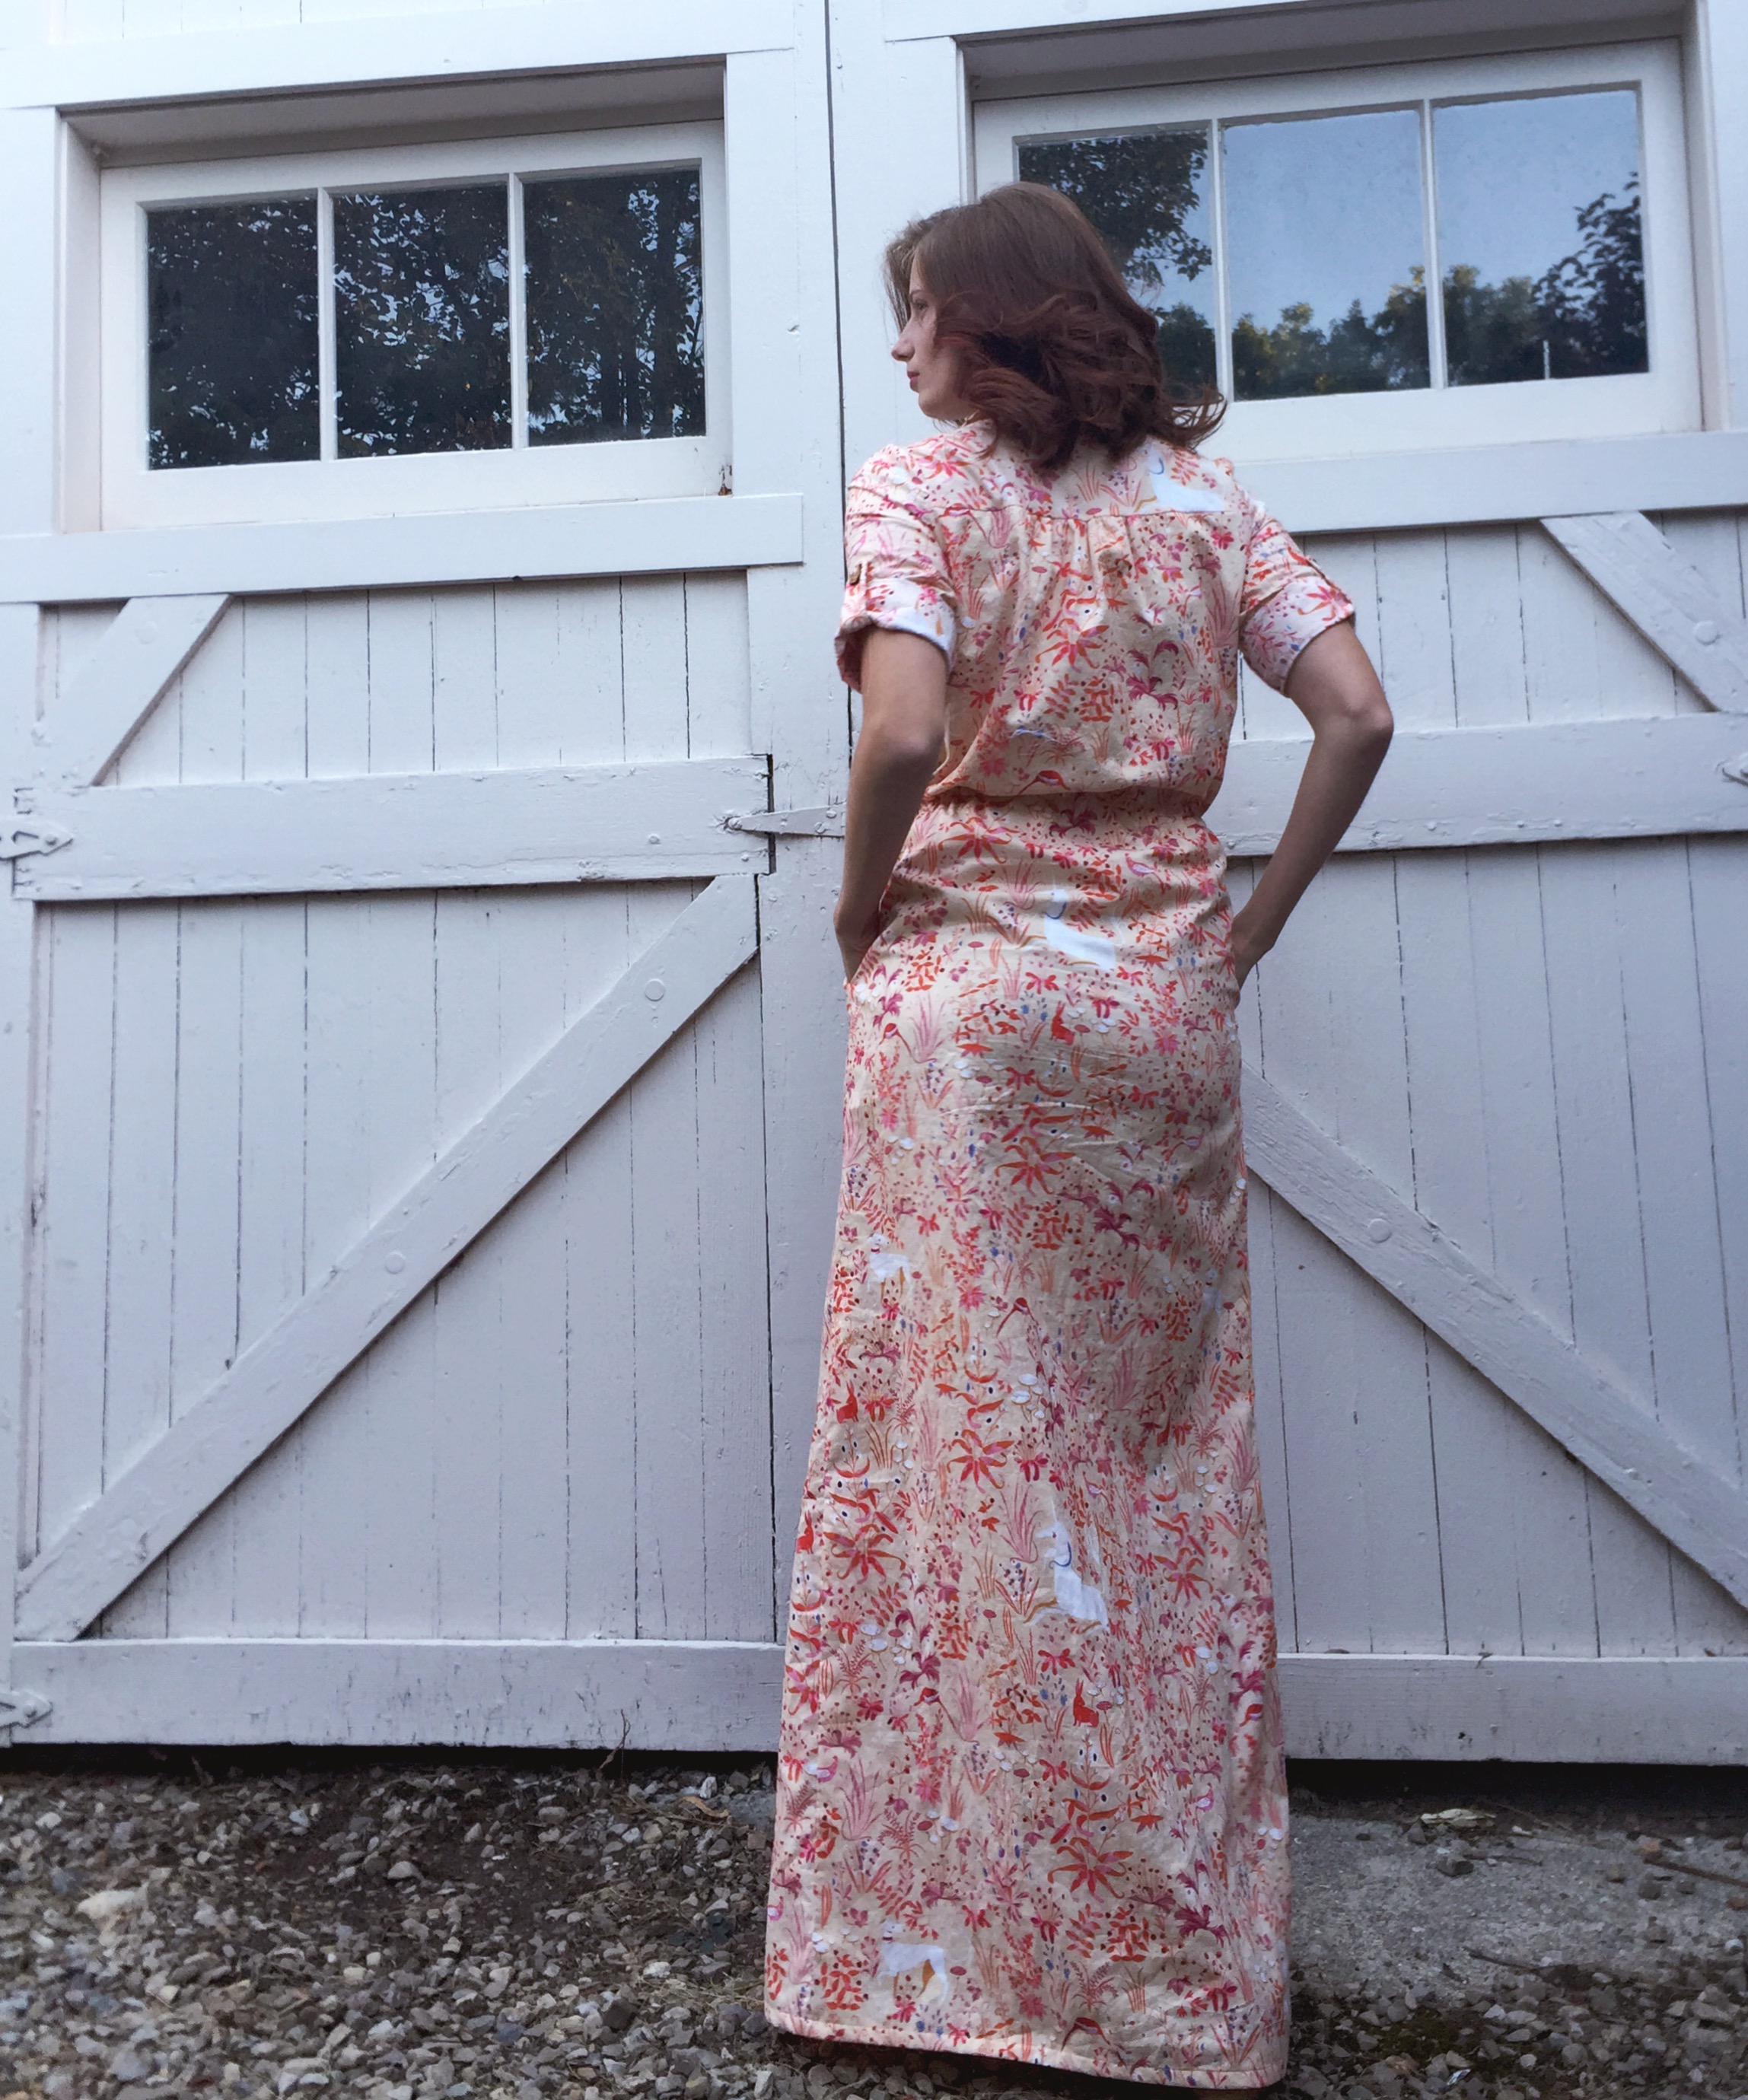
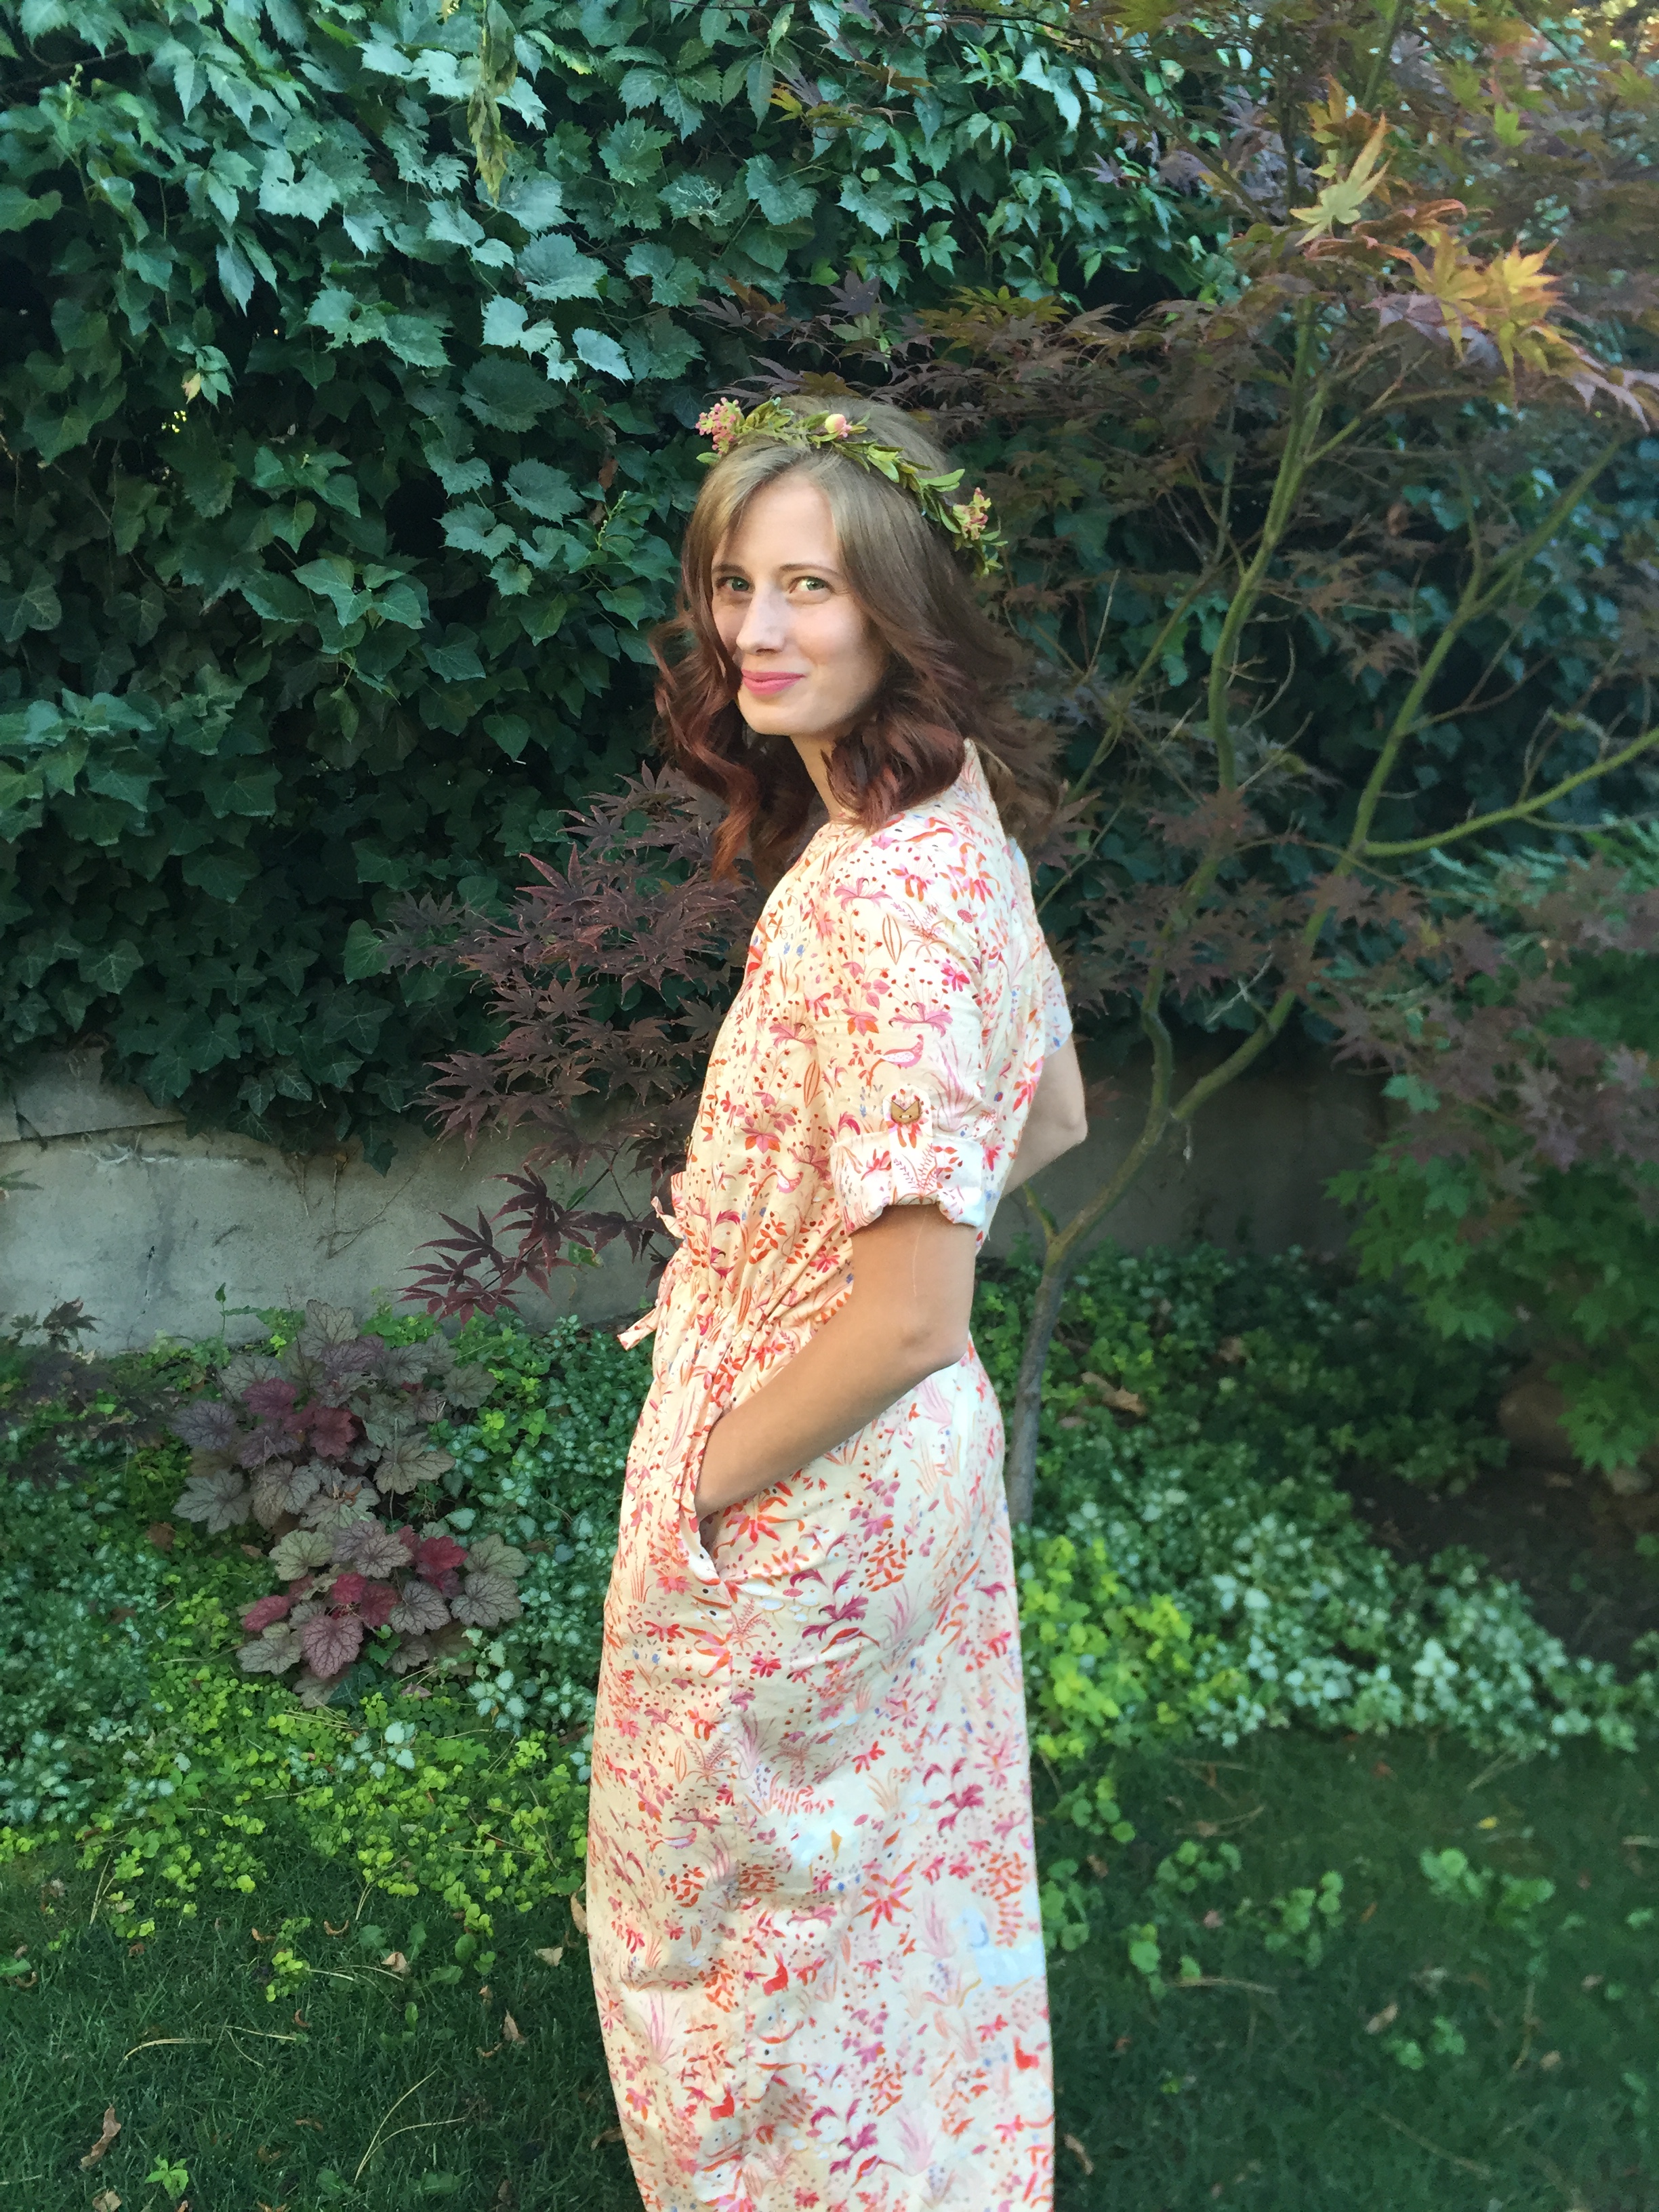
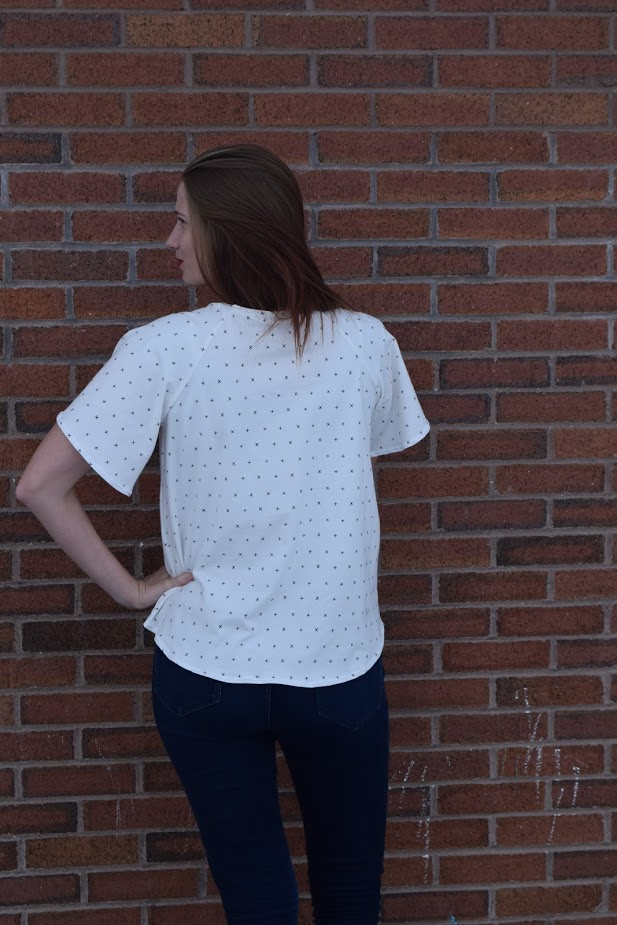
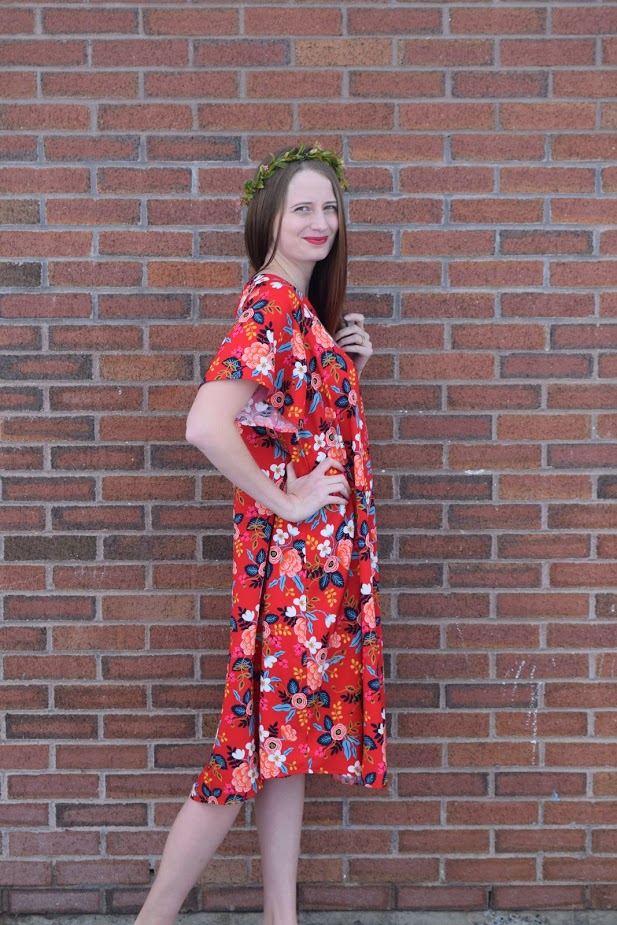
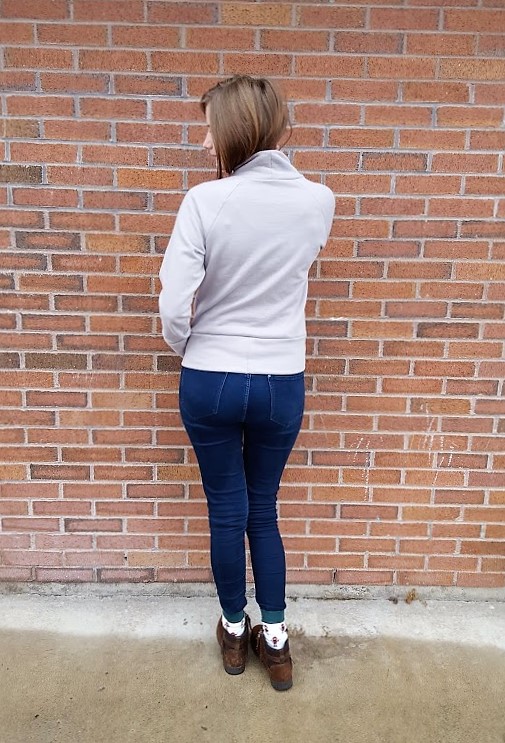
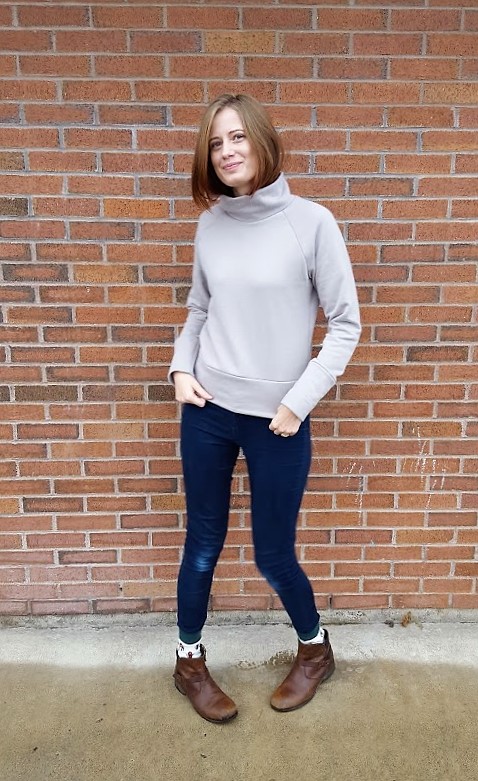
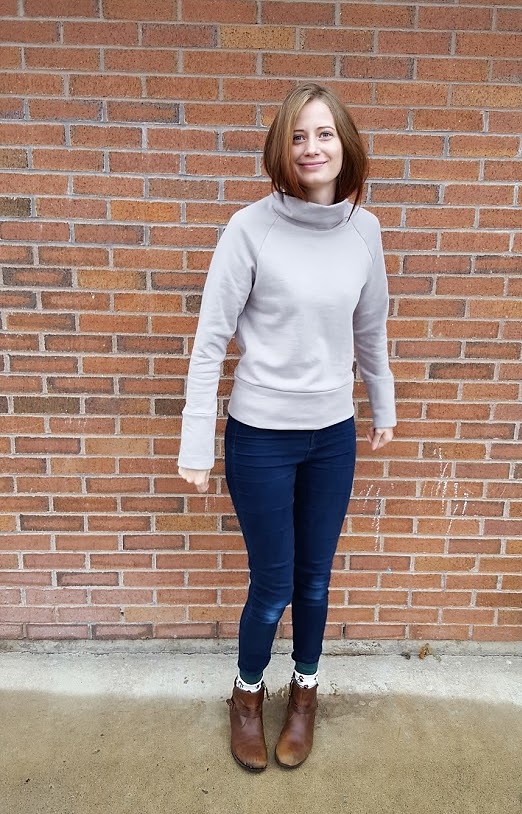
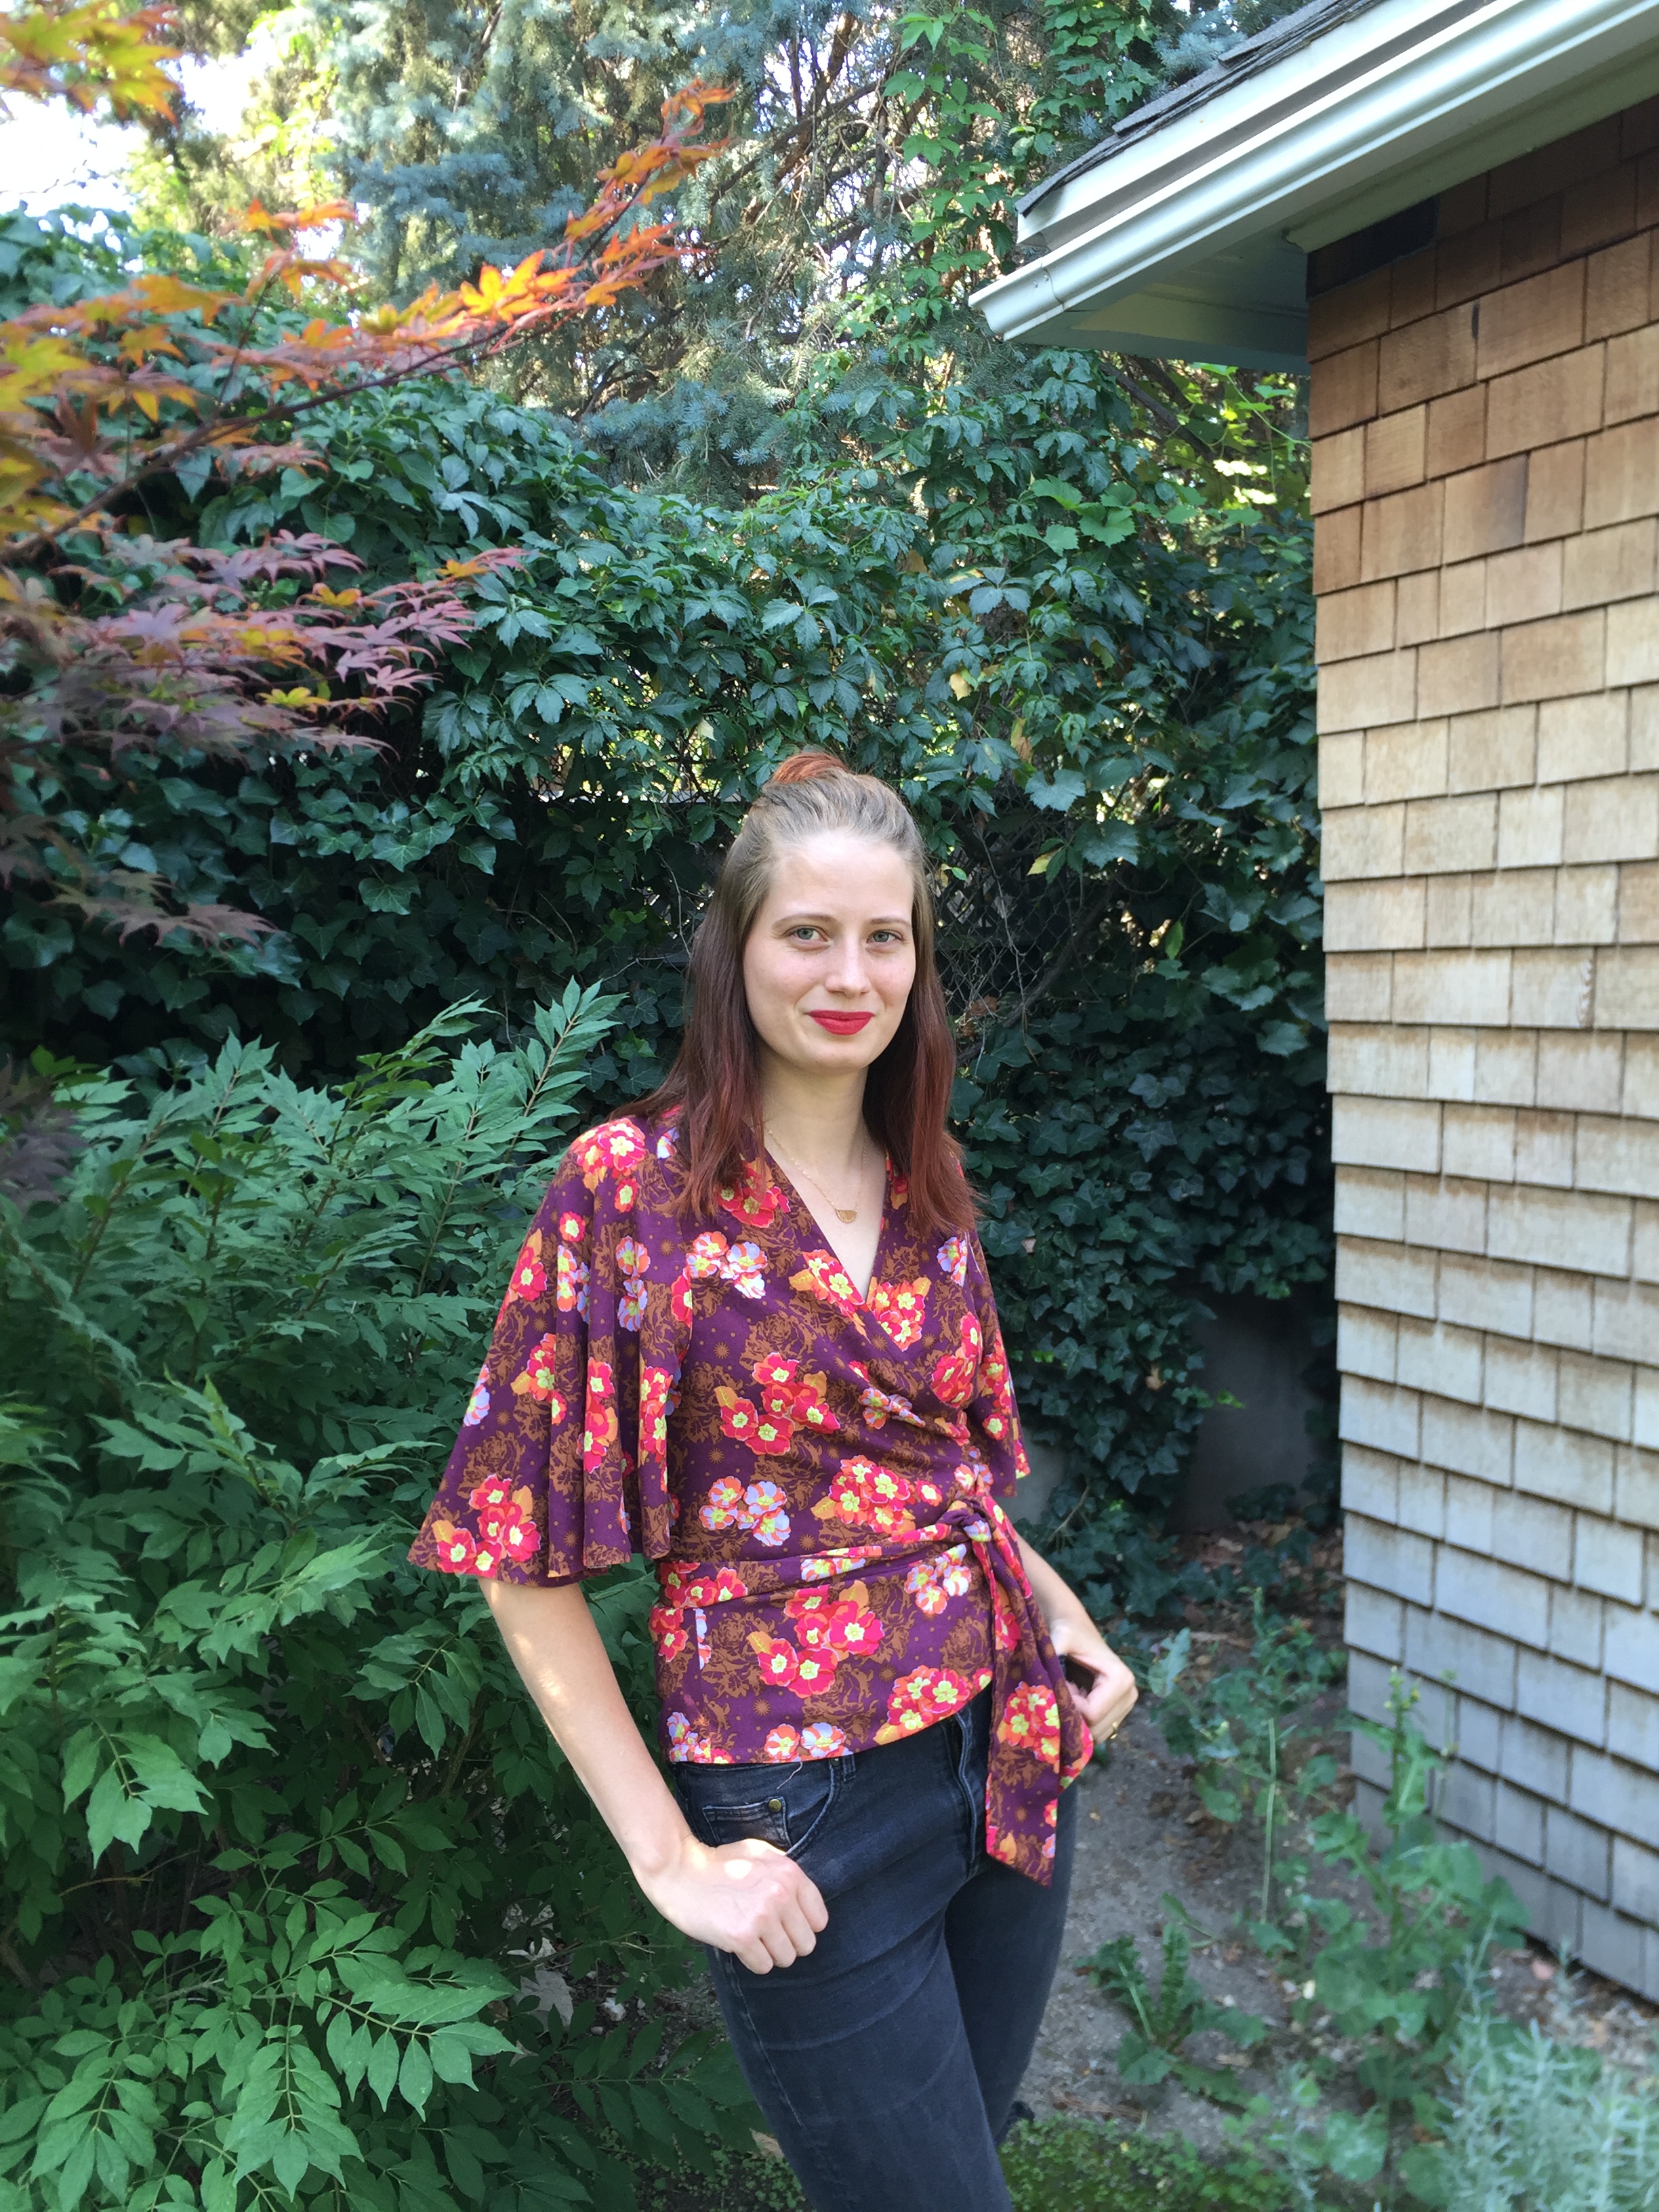
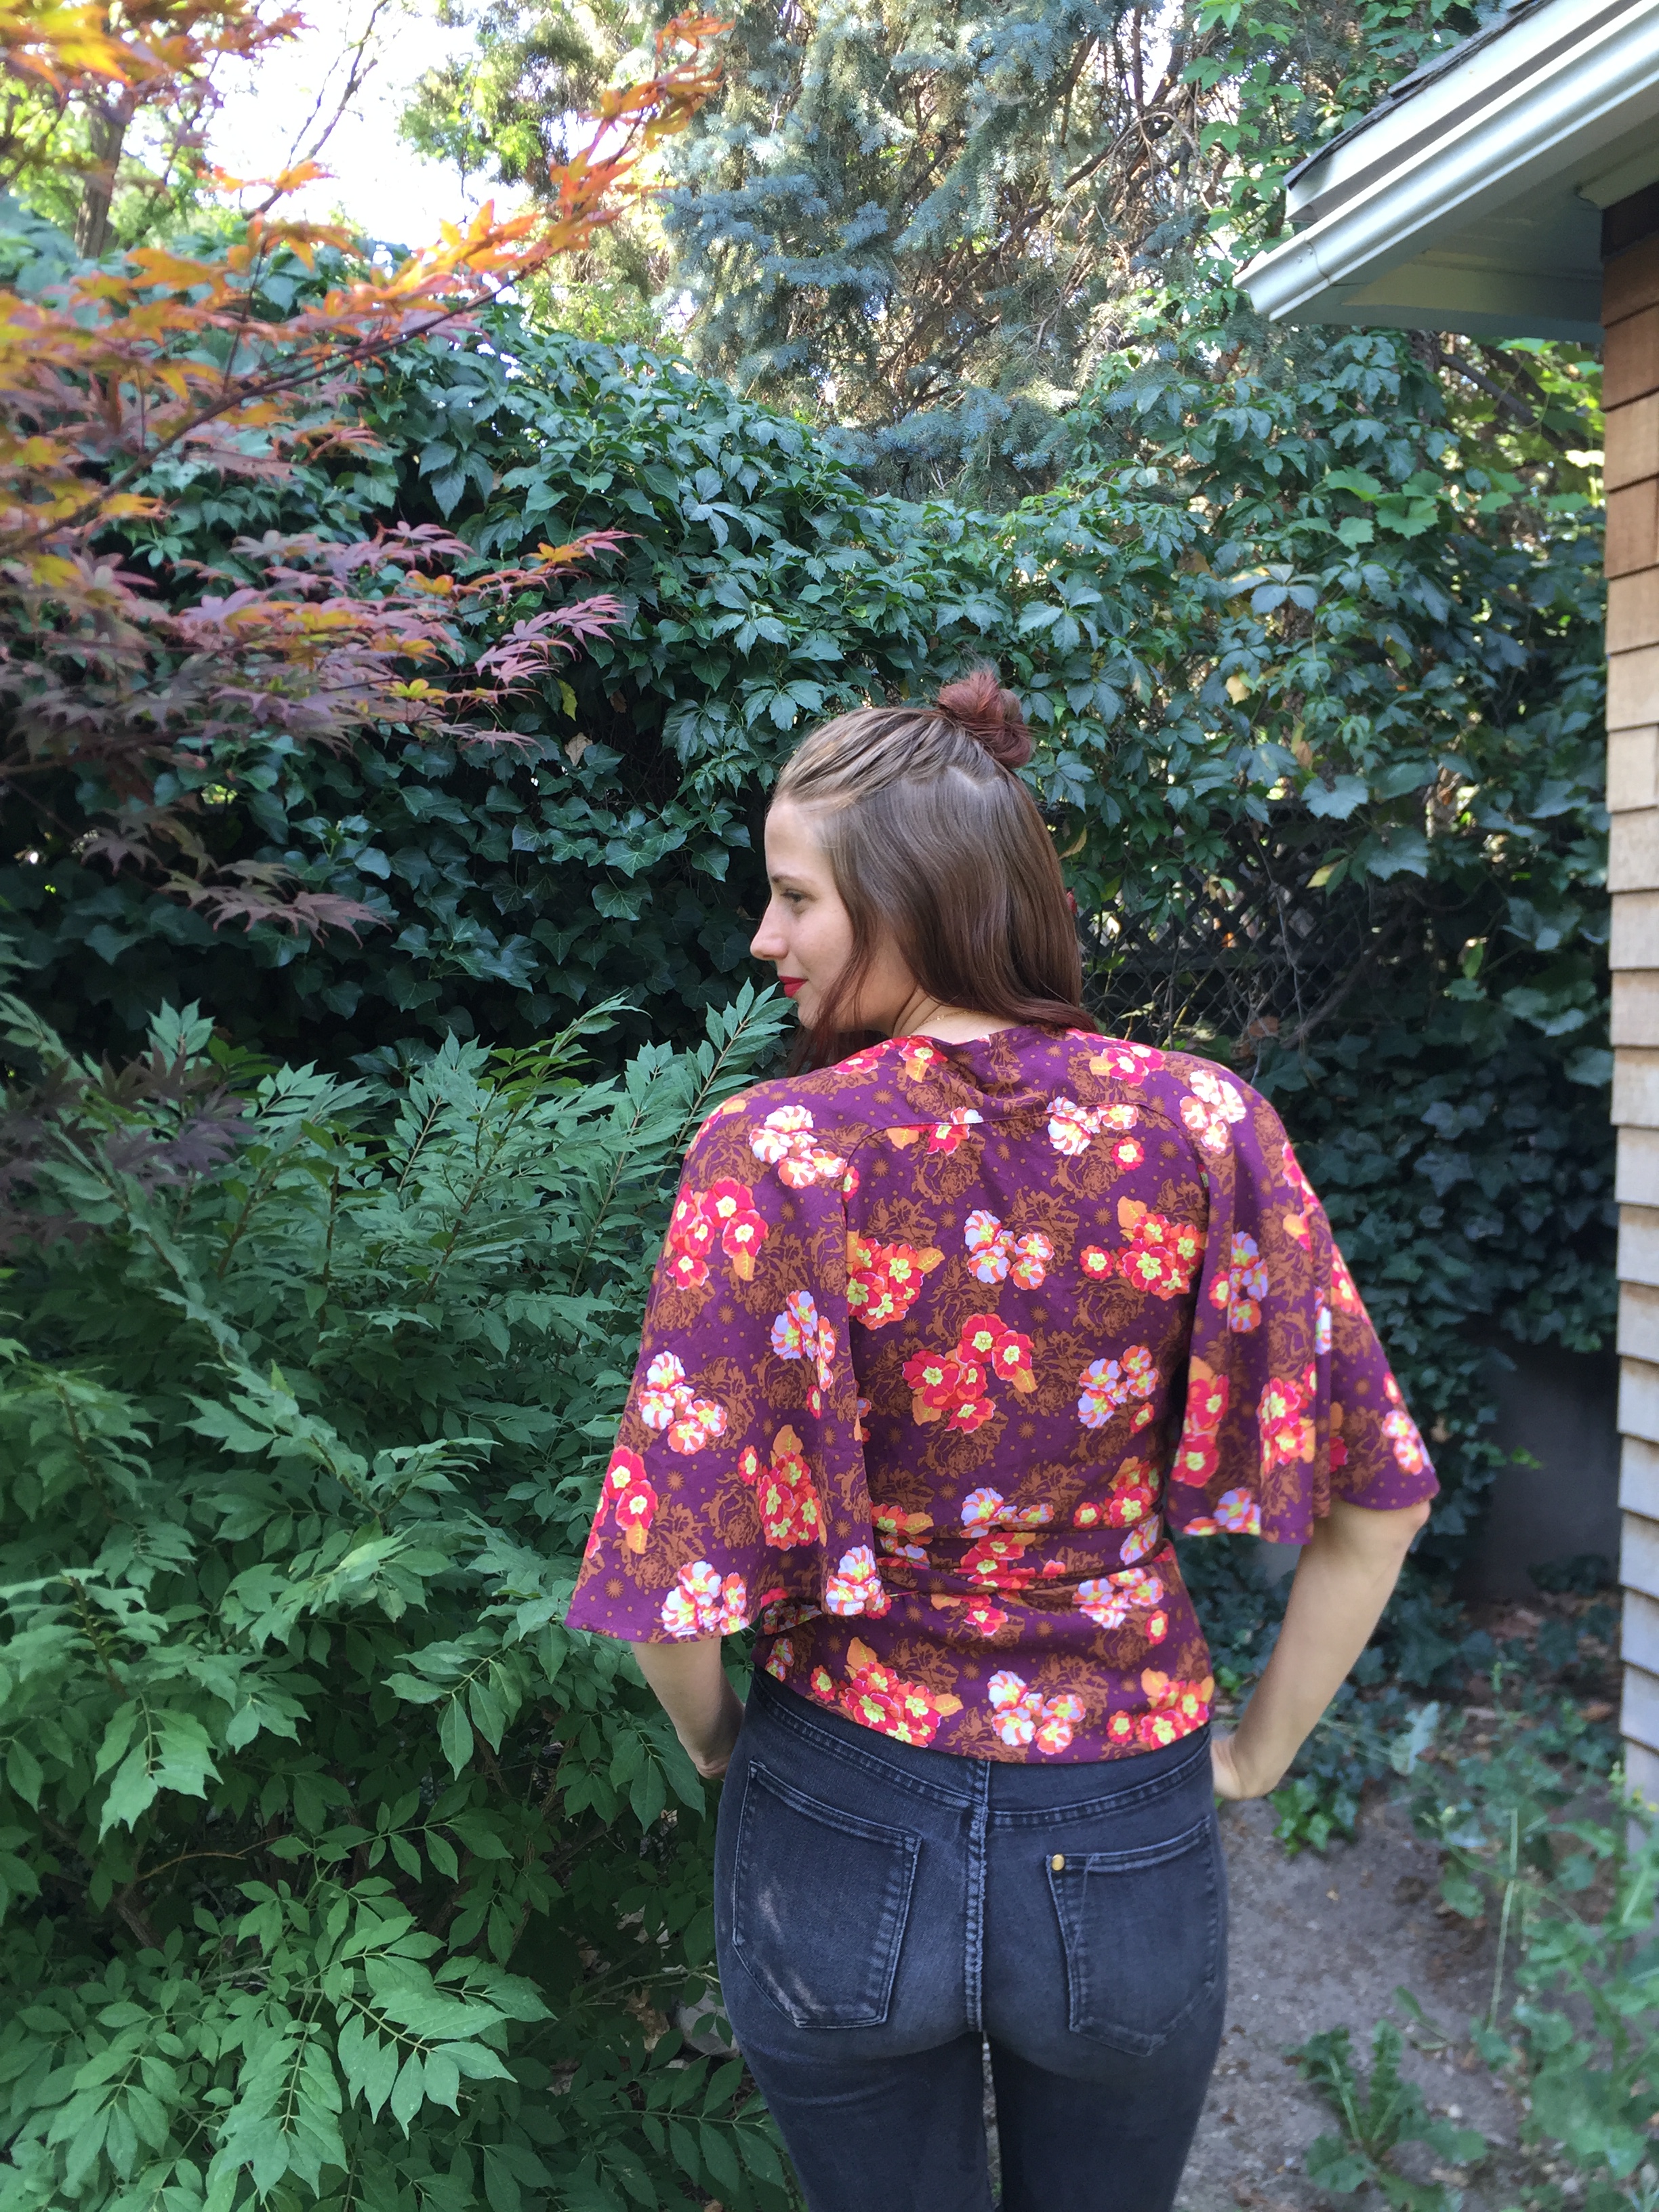
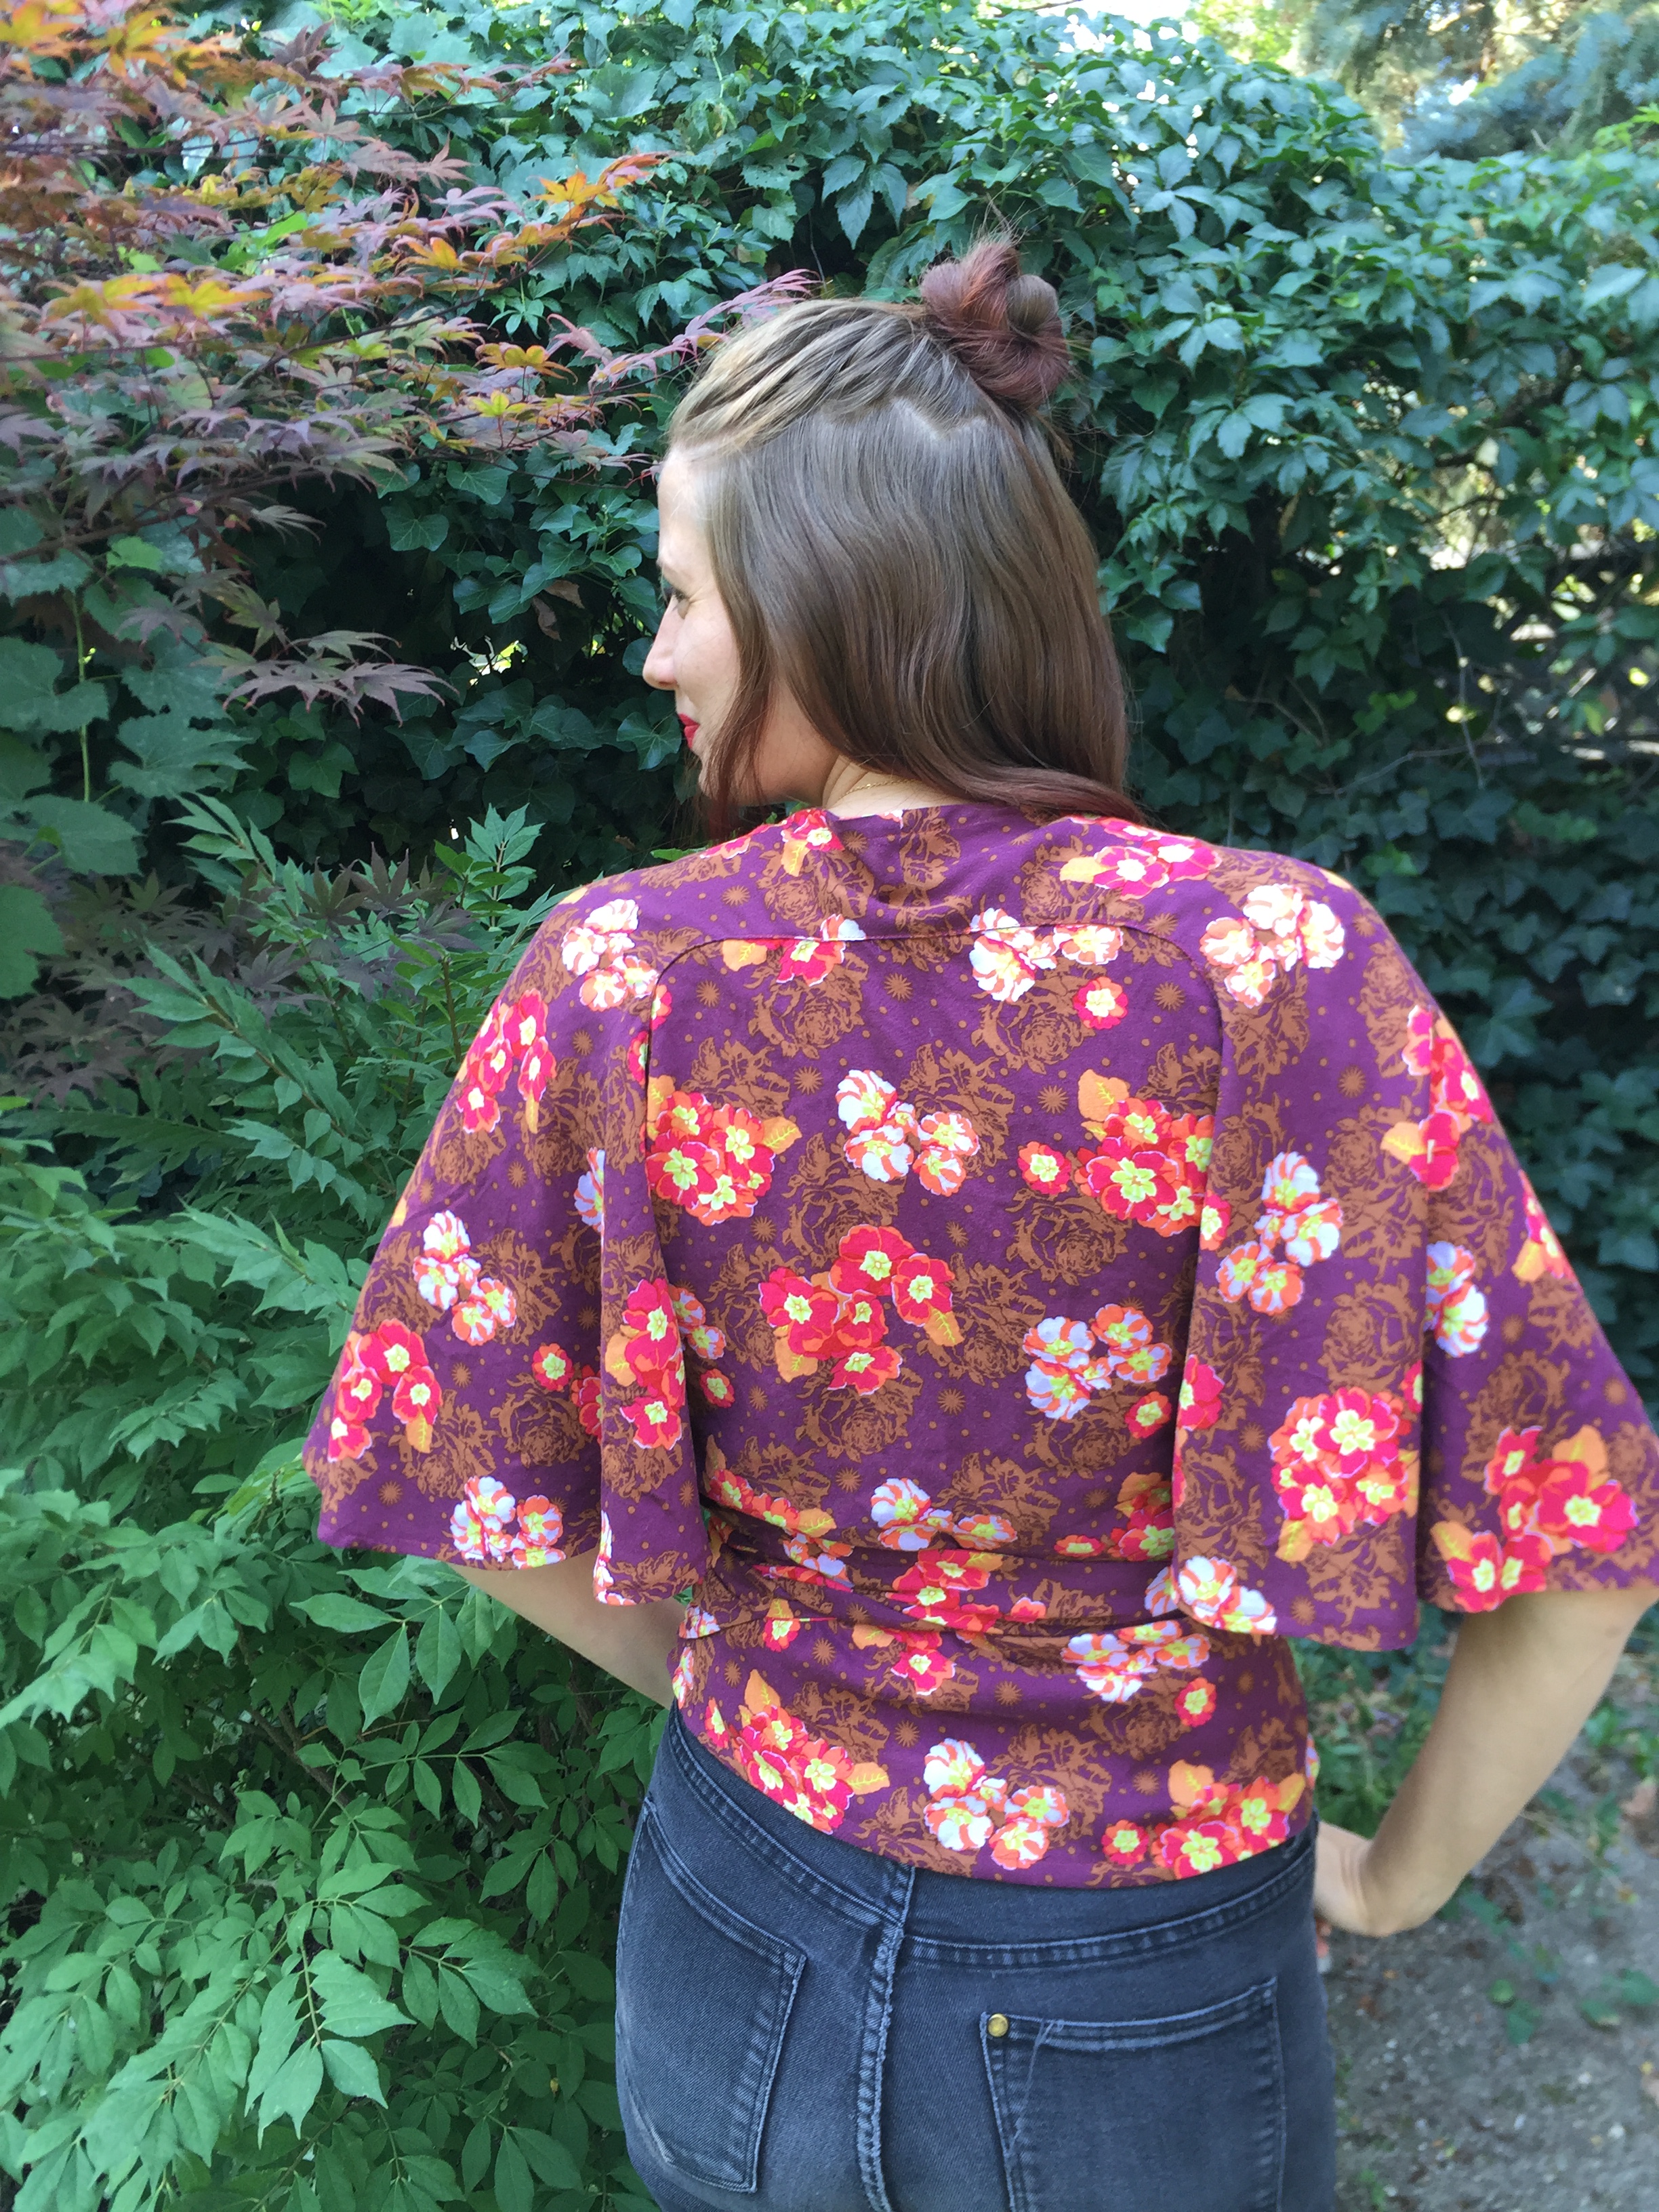
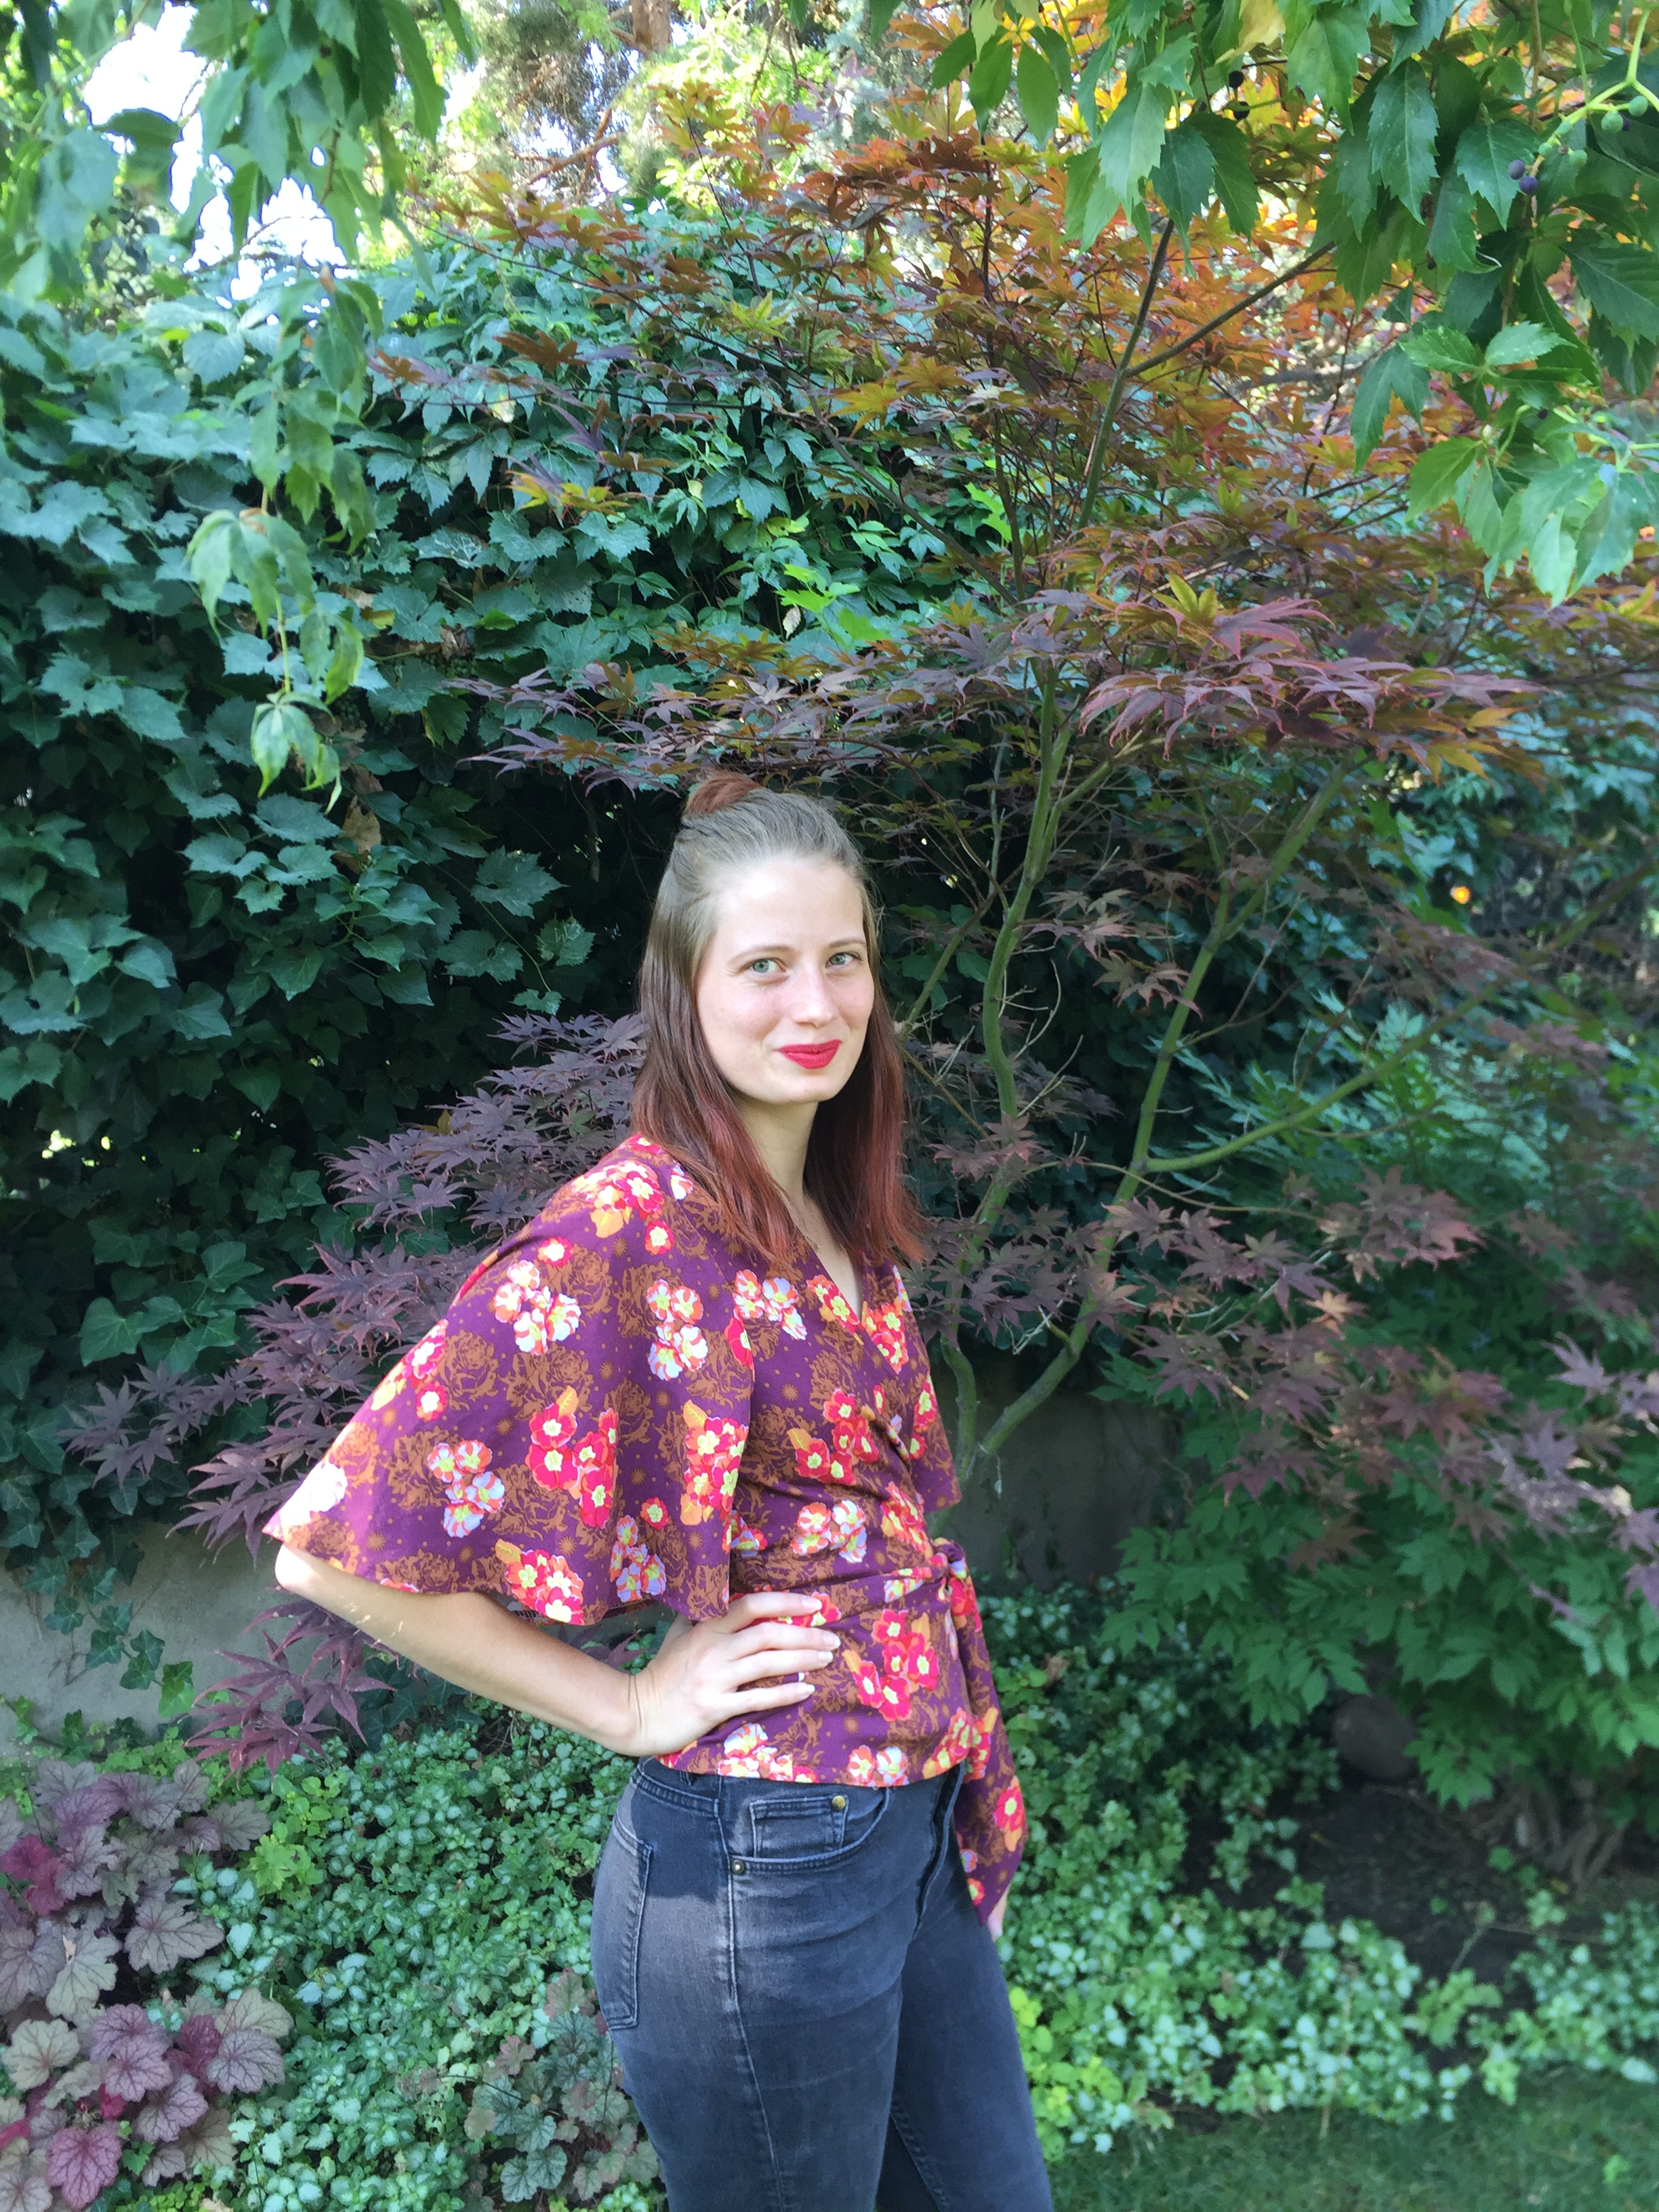
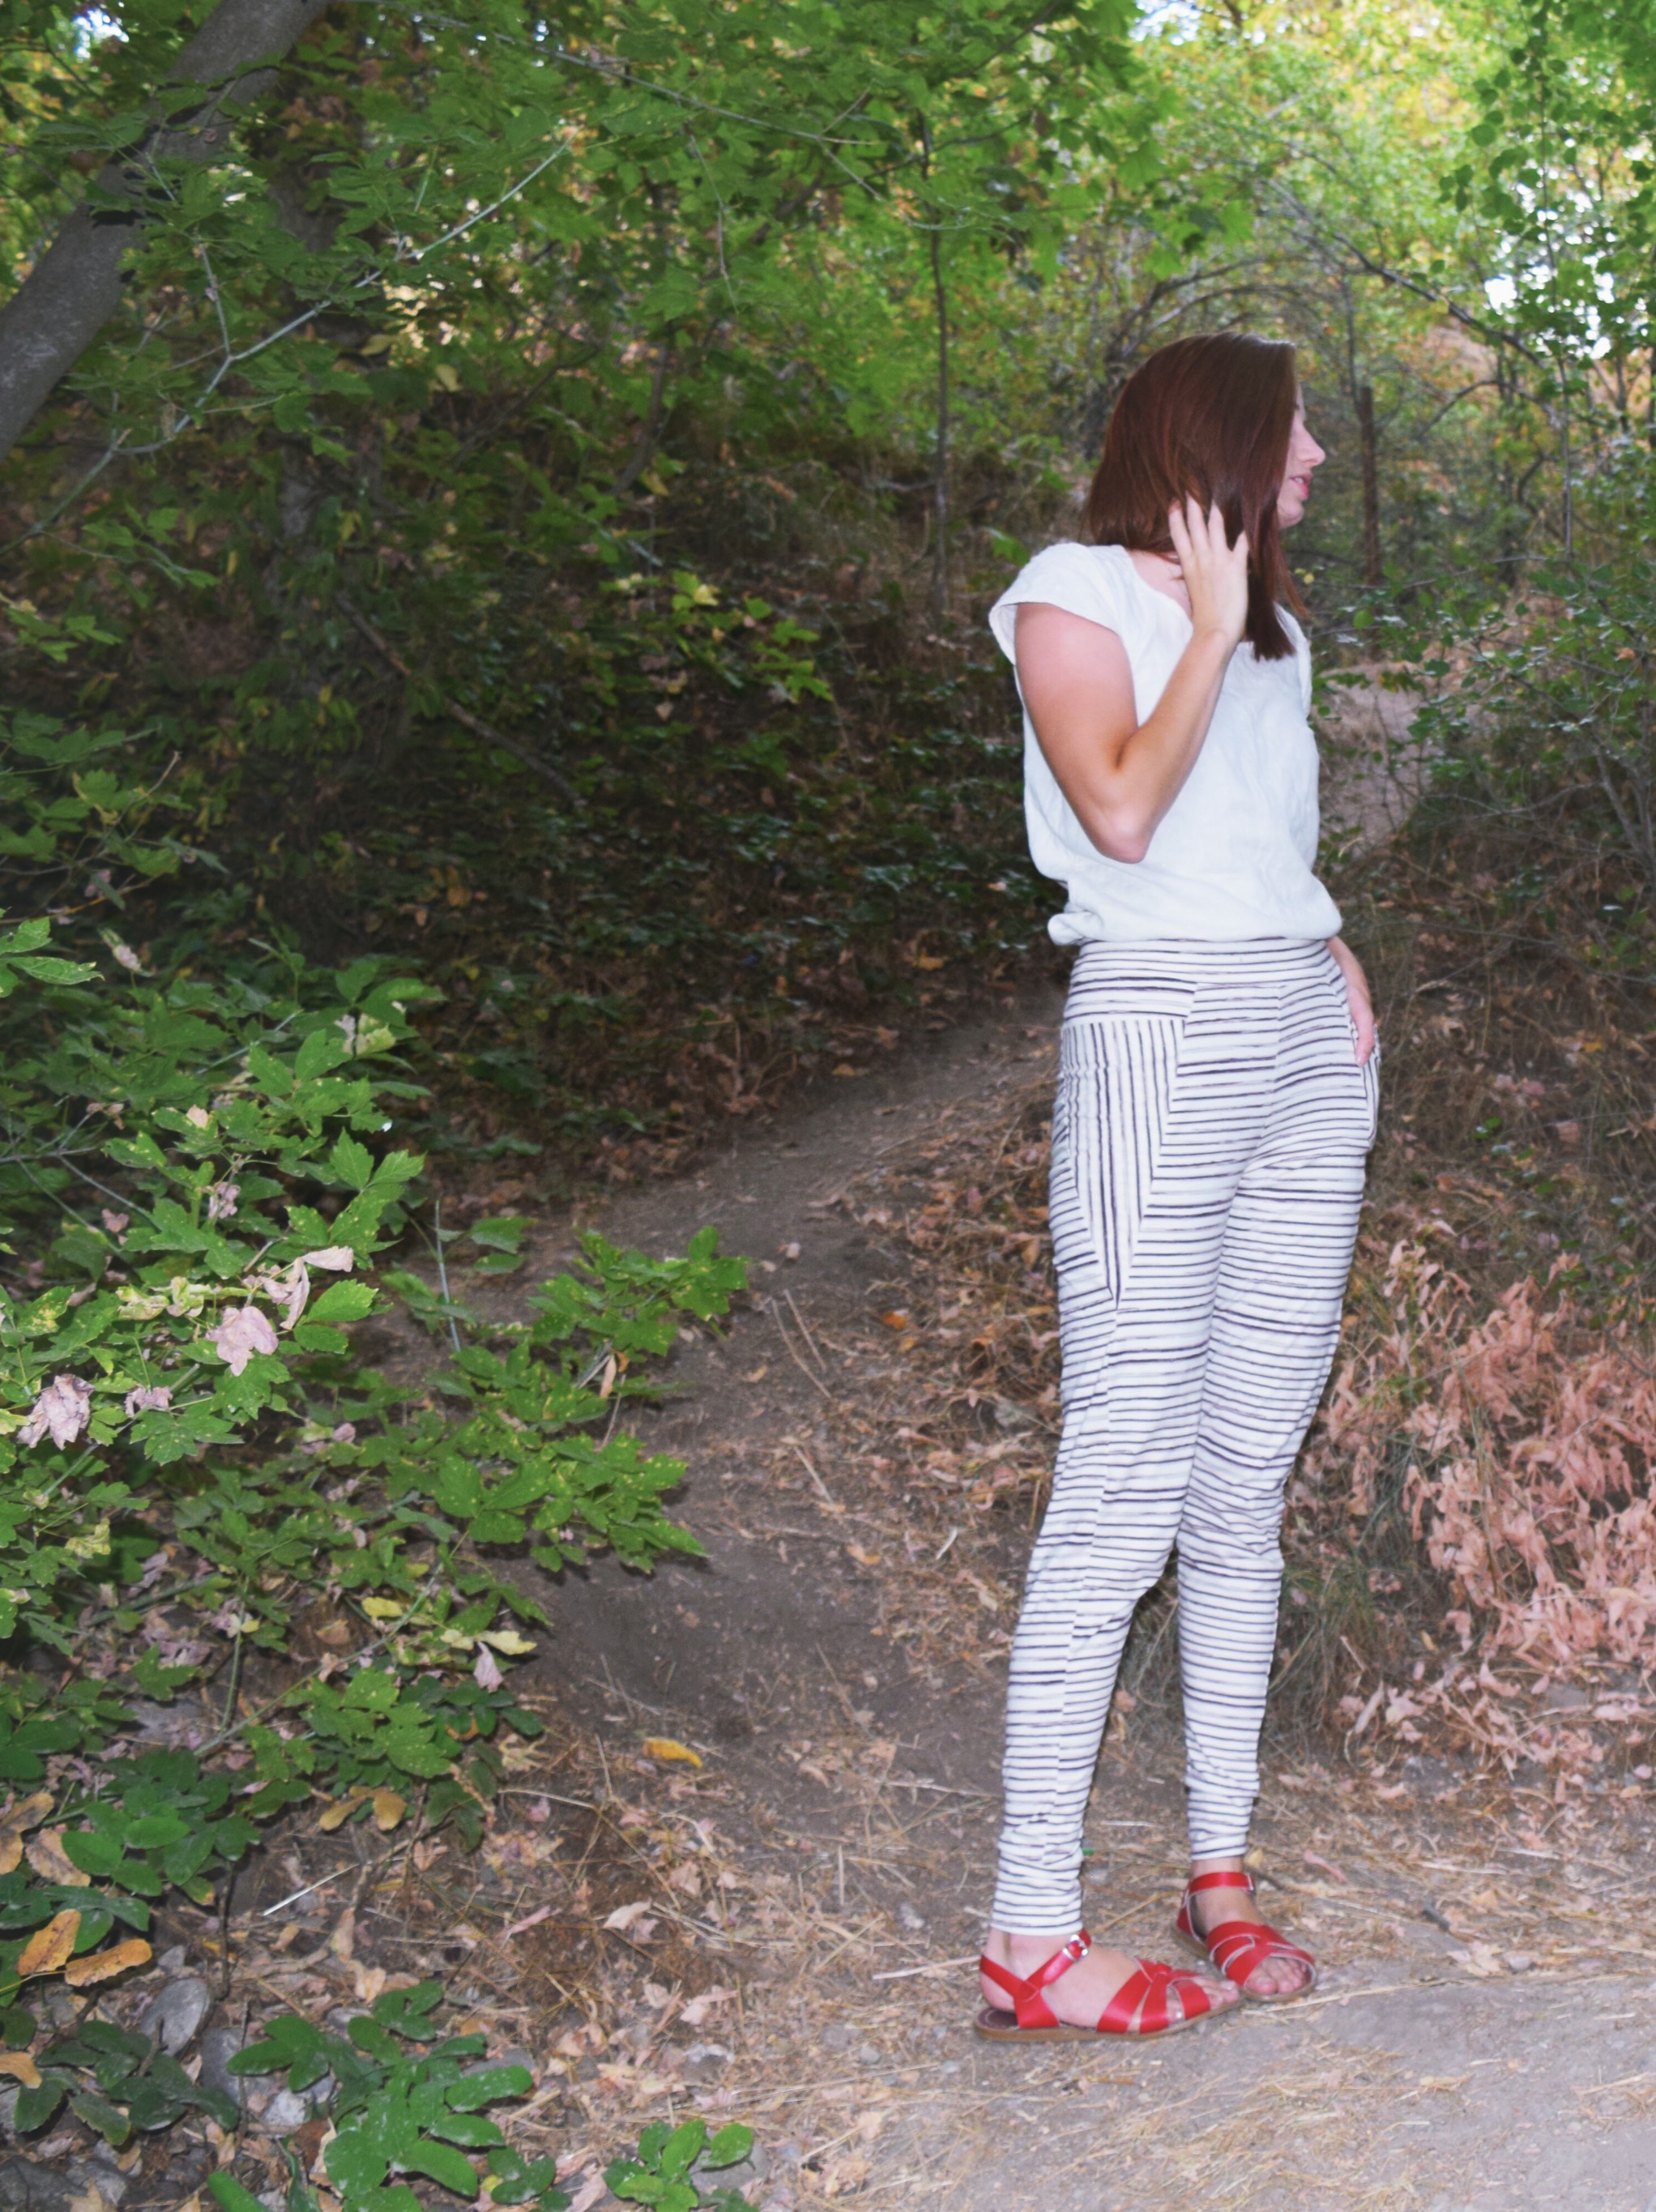
The moment I finished my first Waterfall dress, I knew that it was destined for a flutter sleeve version. I omitted the bottom ruffle as having both flutter sleeves and the ruffle seemed too girly for the desired end result. The pattern comes together so quickly that I couldn’t resist making both a dress and top version of this hack. The dress is made from Les Fleurs rayon by Rifle Paper Co. for Cotton and Steel and the top is made from a cotton/spandex knit by Art Gallery Fabrics. Both fabrics were purchased from my favorite local shop Suppose.

dsc_0100-2

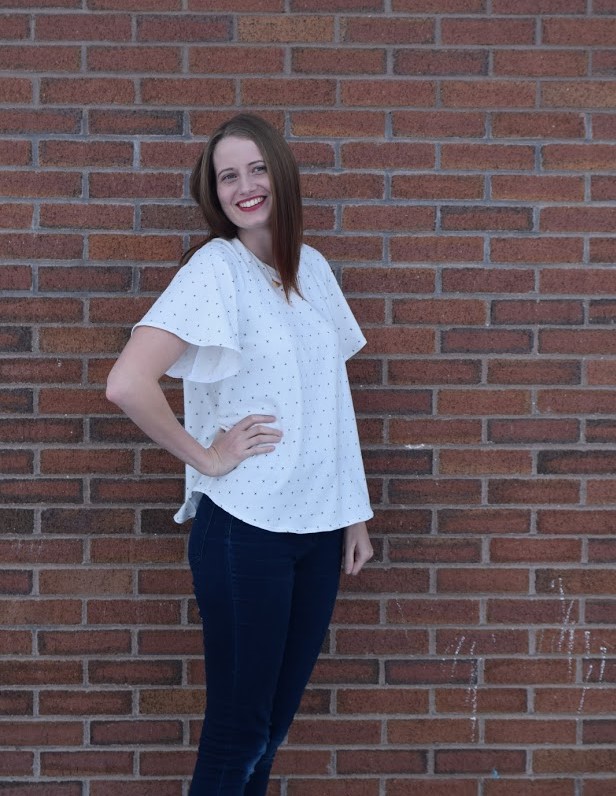
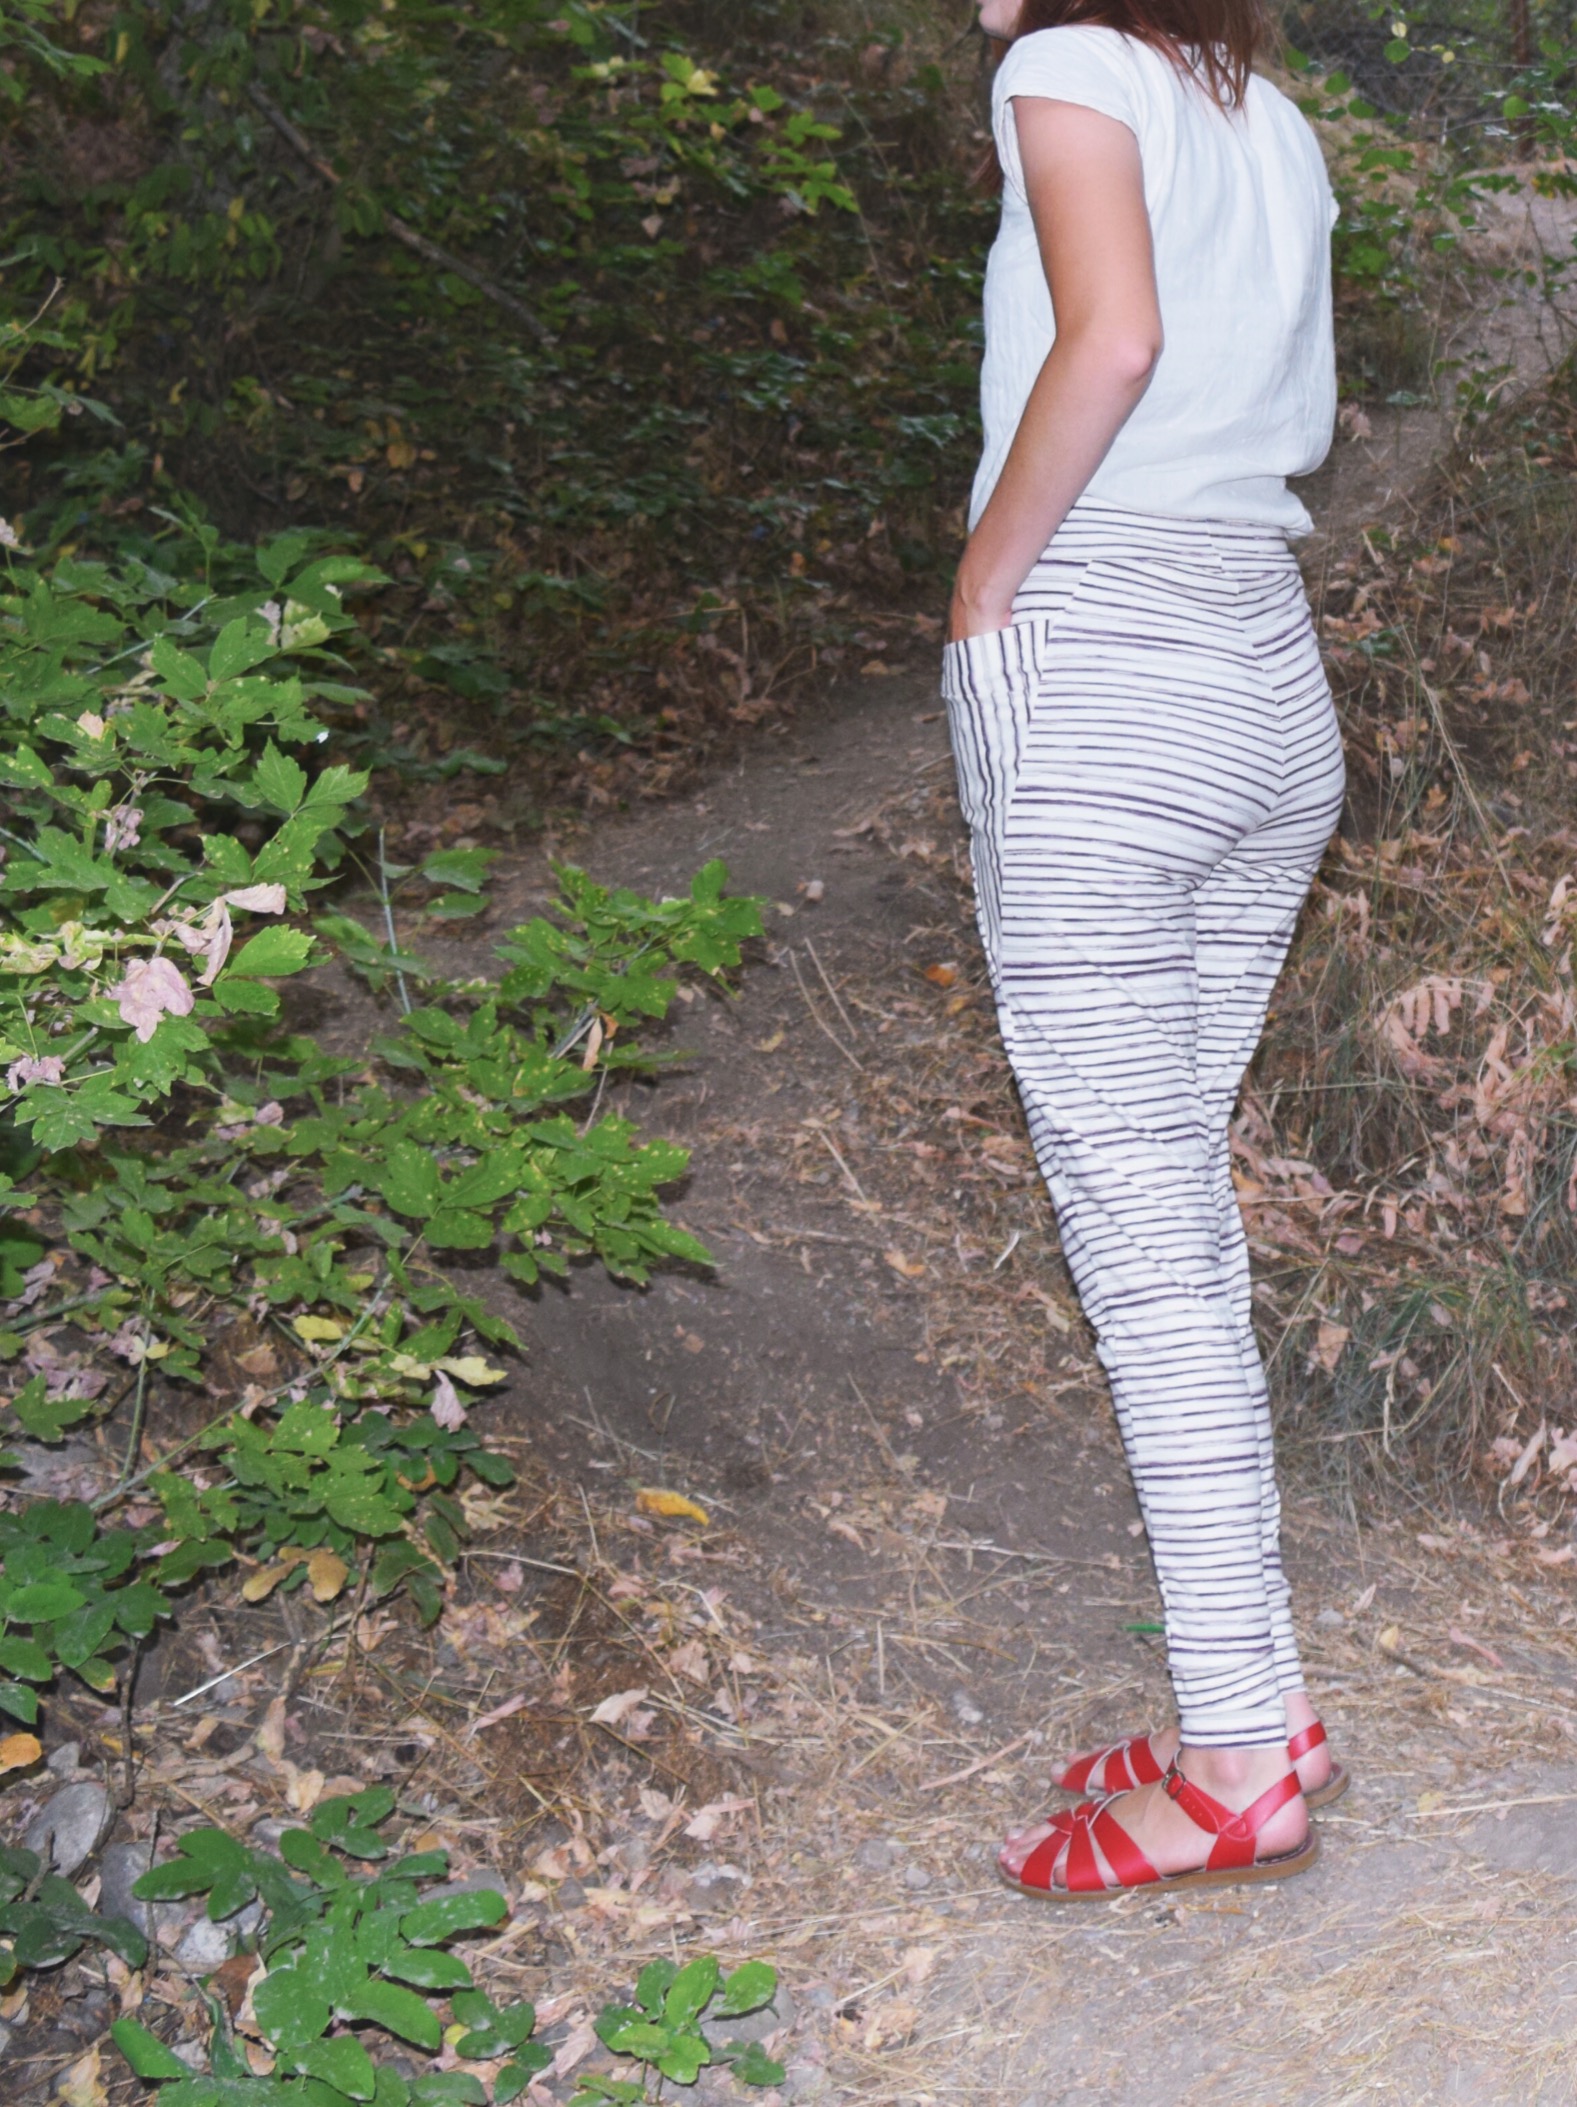
Both my top and dress have been worn multiple times since their completion last week. I love the loose flowy fit of the top and the bit of style it adds to a relaxed day look. I’m sure it will get regular wear once the weather warms up a bit.

dsc_0111

My dress, however, is a new favorite and will likely be my go-to dress this summer. A few years ago, I used to commonly wear body-hugging fitted dresses and skirts. Then I had a child. I still love a good fitted dress, they’re just much less practical for chasing my son at church or the park and end up just sitting in my closet waiting for a special occasion. Last summer I made this dress and wore it to the zoo, park, weddings, church, etc. and loved the ease of movement and effortless style it provided. I’m looking forward to this new Les Fleurs dress providing me with the same style and ease this summer.

I’ve been putting my flat pattern drafting skills to work lately by designing a bit of children’s clothing, but was still nervous to redraft the sleeve as a flutter sleeve. It’s not something I’d attempted before and turned out to be easier than expected. Are you ready to give it a try? If so, continue reading for a tutorial on how to make your own flutter sleeve Waterfall Raglan.

dsc_0168

Head to the end of my post for details on a couple of great giveaways. If you’re not quite ready to make your flutter sleeve dress or top, check out these other talented Make it Mine Tour ladies and their pattern hacks.unnamed


Continue reading “Make it Mine Tour: Waterfall Raglan Flutter Sleeve Hack and Tutorial”

Toaster Sweater #1


November and December were hectic months in the Merritts household. My husband and I both had exciting interviews, he graduated college and started his career, my baby sister got married, and I finished up a decent amount of commission sewing work. I got far too little sleep and most of those months are a bit of a blur, but I’m proud of what we were able to accomplish and the lessons we learned in those challenging months. During especially busy weeks/months, I find that my sanity is restored with a bit of “just for fun” sewing. This Toaster Sweater #1 by Sew House Seven was one of my sanity saver projects in December.

20161216_092742

One morning I had just dropped off the last of my commission quilts at the quilter and was waiting for fabric to arrive for my next assignment. My husband and I were going on our first date in months that evening and I wanted something new to wear. I remembered that I had already traced and cut the pieces for a Toaster Sweater and assembly was the last step. Sewing it together took me about two hours including the time taken to feed my 3 year old and assist with potty breaks. The assembly could probably be finished in about an hour with no distractions.

20161216_092750

The fabric I used for my sweater is an organic cotton fleece made by Birch Fabrics. It feels even cozier than my favorite over sized sweatshirt, but looks a bit more stylish. After completion, I tried on my Toaster Sweater and basically didn’t take it off  for the next three days. It kept me warm in my freezing apartment, cozy while waiting for a train in a snowstorm, generally feeling much less sloppy when running errands. I honestly just feel like I need to make several more of the exact same sweater so that I can use it as my winter uniform. I always struggle with feeling stylish in winter because I only want to wear cozy sweats and my husband’s sweatshirts in the freezing weather. A Toaster Sweater uniform just may be the solution to my dilemma. Does anyone else find themselves wearing a “winter uniform?”

20161216_092746

Just a couple quick notes on sizing and alterations:

-I sewed up a size small and added 3 inches to the bodice length. When making this again, I would probably add another inch to the bodice to make a total of 4 inches added. The current length is great with my high waist jeans, but just a bit short for my lower rise jeans.

– I added 1.5 inches to the sleeve length and am very happy with the finished length because I like my sleeves extra long.

20161216_092752

img_8718


1930’s Butterfly Blouse

In July, I fell into a bit of a sewing rut. I felt like I’d been sewing the same few projects and needed something new and exciting. I convinced my husband to take a day trip to Provo, UT so that I could visit Harmony. Harmony turned out to be the perfect place to regain my sew-jo.
image

After spending at least 45 minutes admiring everything in store, I finally settled on this gorgeous Pretty Potent rayon by Anna Maria Horner and the 1930’s Butterfly Blouse pattern by Decades of Style. Until this top, I’d never actually made a wrap style blouse and thought it would be an unexpected addition to my wardrobe full of Scout Tees, sweatshirts, and button-ups. Upon returning home, I immediately pre-washed my fabric and started cutting.

image

Tracing and cutting went pretty quickly as there are only 4 different pattern pieces (left and right front bodice pieces are mirror images). Sewing was not terribly difficult, but did take a little concentration because of the rayon’s drape and the top-stitching technique used to attach the sleeve pieces to the bodice. I’ve top-stitched plenty of times, but using top-stitching as a way to attach pieces was new to me. This technique combined with the shape of the pattern creating these gorgeous style lines you see on the back. The curves took a bit of patience, but the final product was worth it.

image

image

Now that I’ve had this blouse for nearly four months, I can say that it’s become somewhat of a staple. I find myself reaching for it every time I want to feel especially feminine or pretty. The wrap neckline is just low enough to feel a bit sexy without being overly revealing which also makes it very practical for most occasions. It’s been worn for multiple date nights and it’s even comfortable enough to wear while chasing my son at the park.

image

I’m hoping one day I’ll find time to hack this pattern into a dress because it’s basically begging to be one. Don’t you think?

Bonn Shirt Turned Maxi Dress

Back in September, I had the opportunity to test the Bonn Shirt pattern by Itch to Stitch Designs. Read about it here. I fell in love with the fit of the top, but wanted to do something a bit more dramatic. After making Simplicity 8084 and seeing this dress, the idea for a Bonn maxi dress was born.

dsc_0479
Wooden buttons purchased from Arrow Mountain.

dsc_0485

While I love a good curve hugging dress, they often aren’t practical for me to wear outside of special occasions.  I wanted this dress to be a bit fitted around the bust and fall straight down from the hips. With that silhouette in mind, modifying the Bonn Shirt to a maxi was really quite simple.The Bonn pattern actually includes a knee-length dress option, but modifying the shirt pattern pieces worked better for my specific fit goals.  At the hips, I widened the front pattern pieces by 1″ and the back pieces by 1.5″ to give a comfortable amount of ease. I made notches in the pattern to match the front and back pieces at the hips. Once the notches were made, I added about 40″ to the length ( I measured my desired length at the center back and at the underarm seams to determine this). I added the length straight down from the hip line on front and back, continuing the front button placket all the way to the hem. I added the same amount of length to the placket interfacing piece. I love the way my Simplicity 8084 maxi buttons to the knee and used a total of 12 buttons to copy that look.

dsc_0581

Modifying the Bonn Shirt pattern turned out to be the least challenging aspect of making this dress. I’ve been working with lots of deadlines and only allowed myself to work on this for an hour or two after meeting my productivity goals for other projects. This led to a lot of late night sewing mistakes.

First, The back dress piece on a loose pin and created a  0.5″ hole right in the middle. Solution number 1: I sliced a 1″ strip out of the back and pieced in a new strip. The wild print is great at hiding my Frankenstein style strip and it’s really not noticeable unless you’re within 10 inches of my back.

Second, I cut the left sleeve completely crooked. Honestly, I don’t even know how it got so crooked. it was off by inches. Solution number 2: This one was easy. I had just enough leftover fabric so I re-cut the sleeve. While this was a simple solution it still added about a half hour to my limited sewing time.

Third,  I hemmed the dress in the middle of the night and didn’t have anyone to help me mark the hem. I usually don’t have too much trouble with this, but the maxi length combined with the drape of the fabric made it complicated. It ended up taking about three times as long after I cut the hem at a slight angle. Solution number 3: Keep trying.

dsc_0472
Fabric is Helios rayon by Anna Maria Horner

This dress turned out to be such a rewarding project and I’m delighted that I decided to stick with it through the frustrations.It’s the perfect cross between an evening dress and comfortable nightgown, which is exactly what I’d envisioned. I’ve been anxious while considering so many facets of the future and this dress was therapeutic for me. Taking something and making it my own while working through the imperfections was just what I needed. It was a good reminder that mistakes and difficulties can still combine to make something wonderful. Was that too much? Thanks for sticking with me. Here are a few more photos and a sneak peek at my goofy family.

img_7673

dsc_0465


Redwood Joggers


Melissa of Sew Like My Mom just released her newest pattern the Redwood Joggers. You can find the pattern for sale in her Etsy shop here. I had the opportunity to test this pattern and I’m thrilled that I did because I’ve been living in these pants.

IMG_6912

Included in the pattern are 3 different lengths: shorts, cropped, and pants. I chose to sew up the pants in this fantastic jersey knit from the Cultivate line by Bonnie Christine for Art Gallery Fabrics. I’ve never been one to shy away from a print, but this time I wanted to make something a bit calmer than usual and opted for neutral colored stripes. The weight of this jersey feels perfect for the current season and I plan on making a second pair in french terry once cooler weather arrives.

IMG_6913

The overall fit of the Redwood Joggers is fantastic! Melissa obviously took extra care to make sure she got the fit just right. Only two small adjustments were needed to make sure mine fit just right. First, I added two inches to the length of the pants which is an adjustment I make to nearly every pants pattern. Second, I made a size medium pant and used the elastic measurement for the size small since my waist was closer to that measurement. They’re a great alternative to my baggier sweatpants and tight fitting leggings. I feel like the fit makes them much more acceptable to wear in public than some of my other active wear type clothing.

IMG_6914

My very favorite detail on these pants are the triangle pockets. Originally, I just thought they were a fun design detail that may or may not be functional. After wearing them for two days in a row, however, I found that they are completely functional and in many cases better than the regular patch or inseam pockets in most of my joggers or sweatpants. The placement and depth of the pockets helped to keep my phone secure when sitting and while chasing my wild toddler. Many of my jogger pants have shallow pockets which means my phone will randomly fall out when I bend or or sit down.

IMG_6968

Next up: I plan to sew a pair of Sew Like My Mom Boxwood Joggers for my son. I am most definitely that mom who dresses my child to match. I figure it will make him easier to find if he’s ever lost in a crowd, right?


Simplicity 8084: My Dream Maxi Dress

I’ve been meaning to restart my blog for a couple of years now, but kept finding excuses or other ways to fill my time. After a summer filled with fun and inspiration, I’ve decided to quit making excuses and start blogging again. I’ve got some fun posts planned and cannot wait to share them with you. Today I’m sharing my Simplicity 8084 maxi dress.

IMG_6737
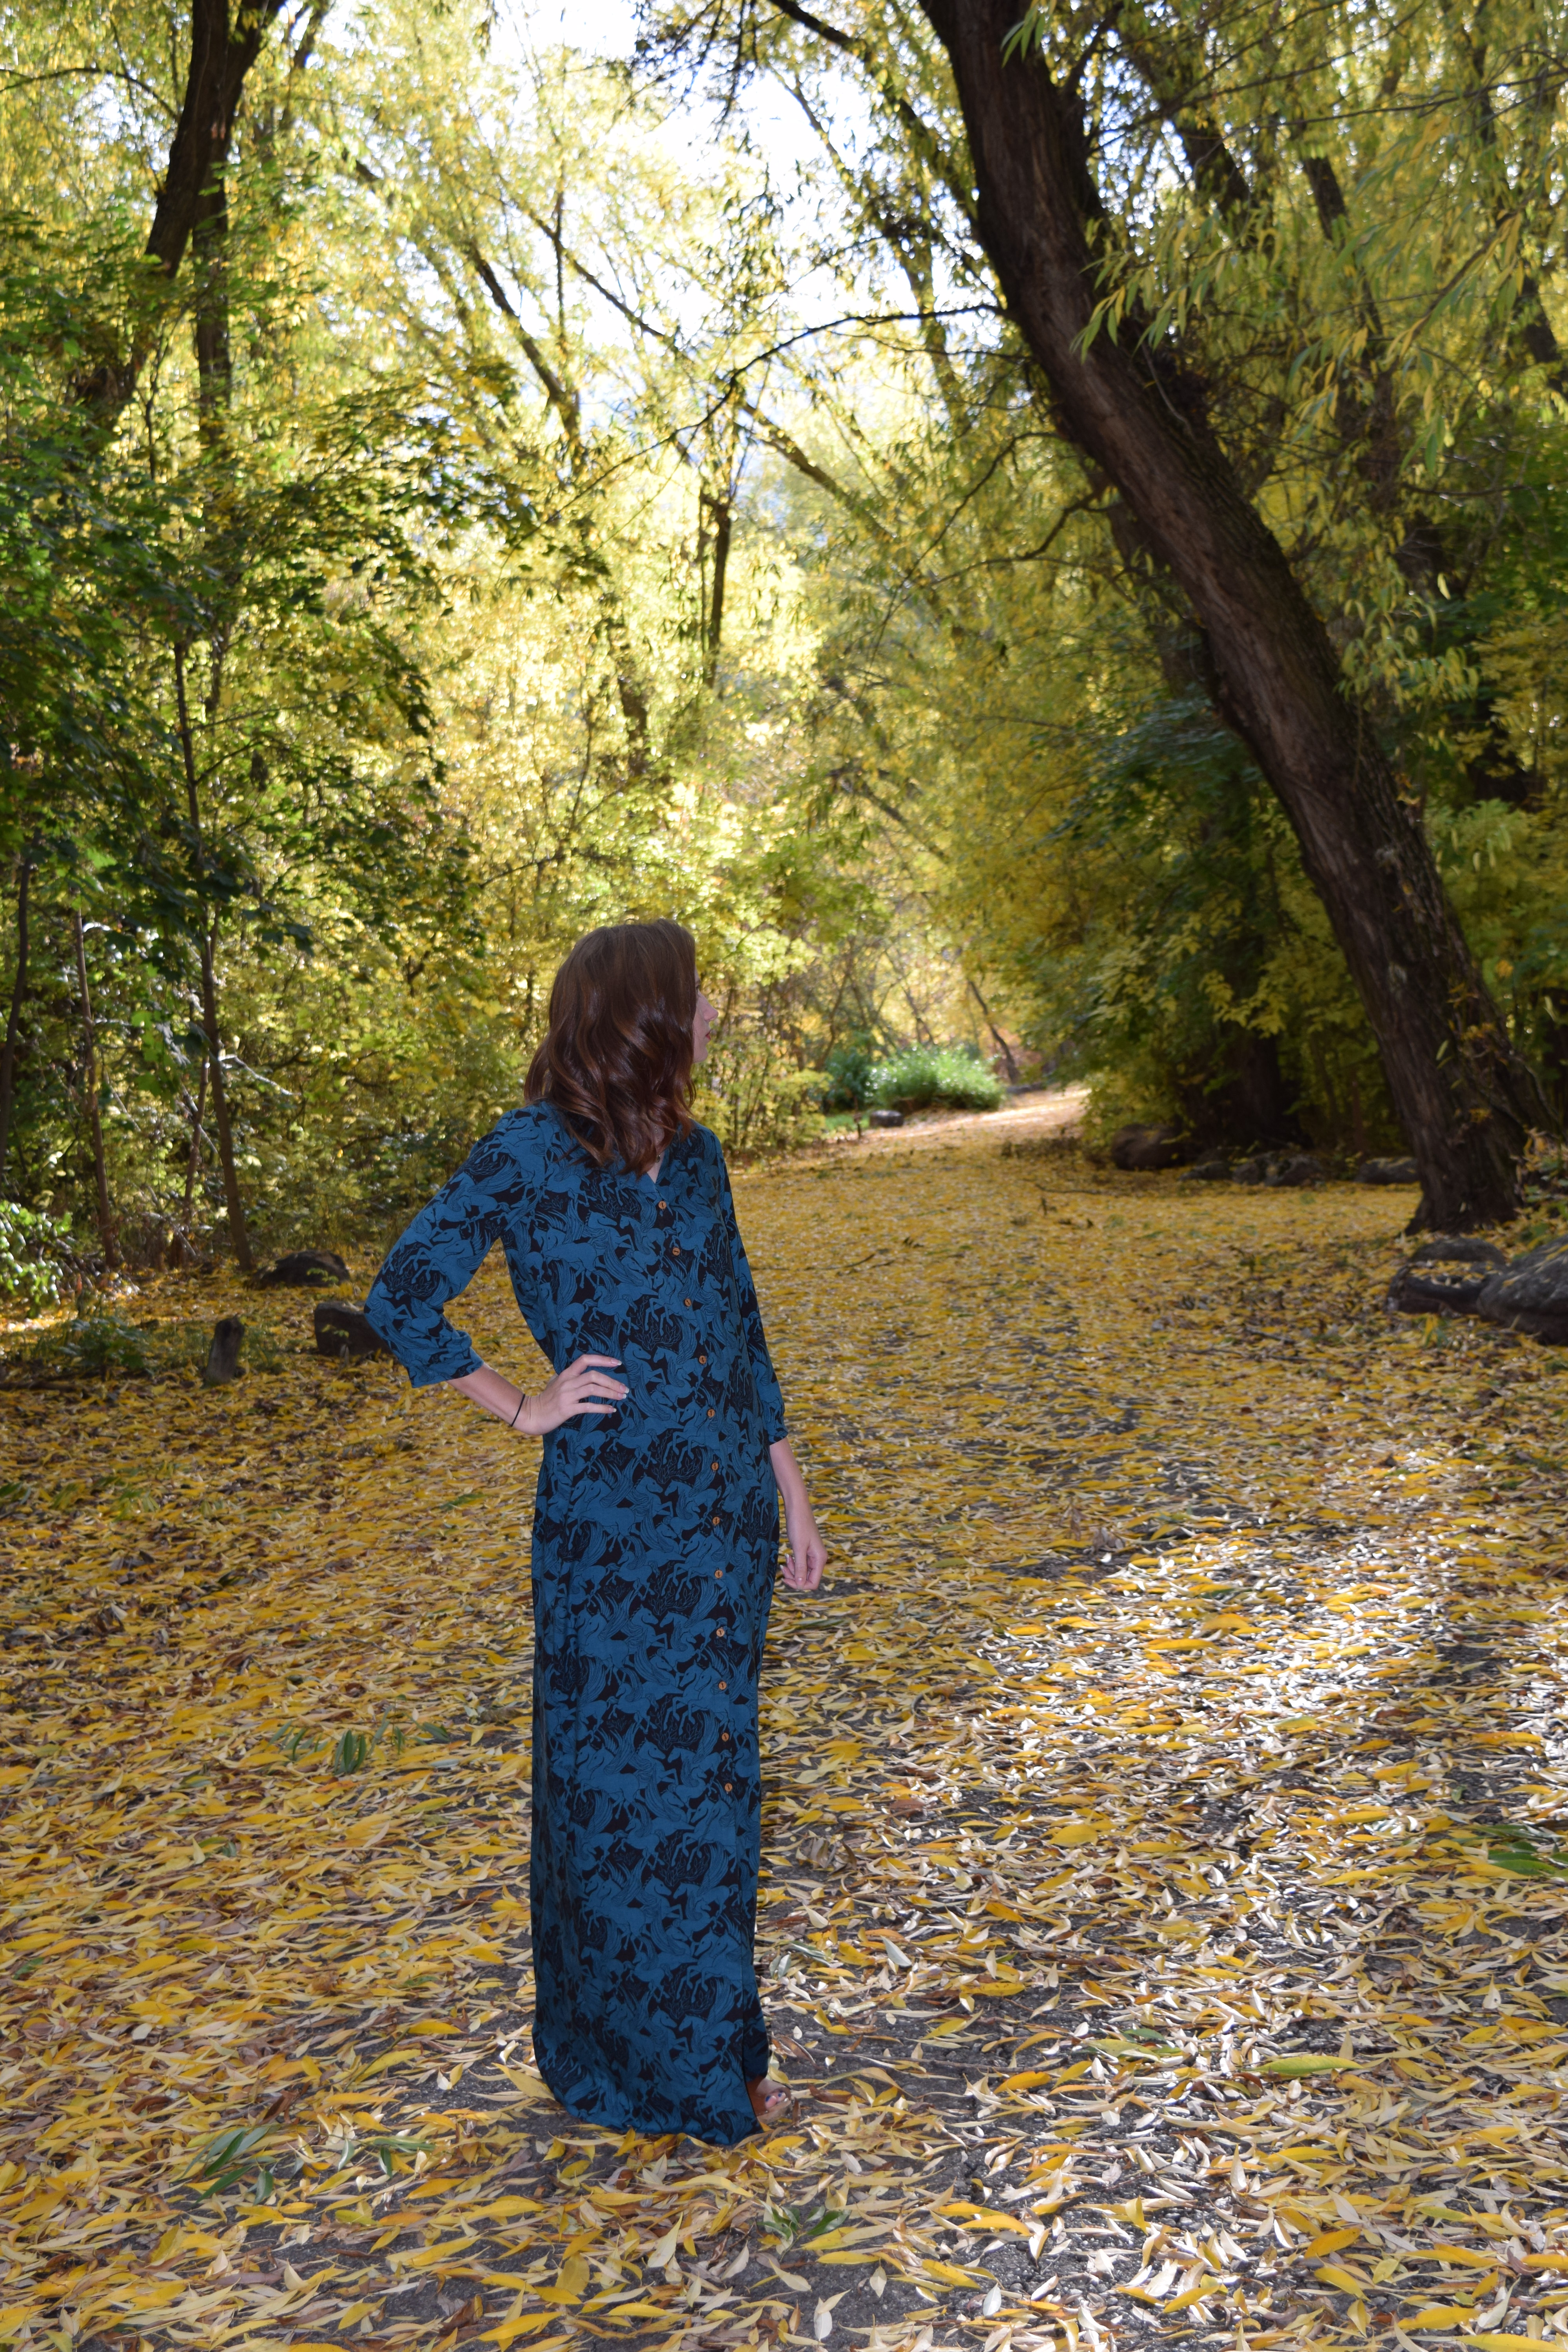
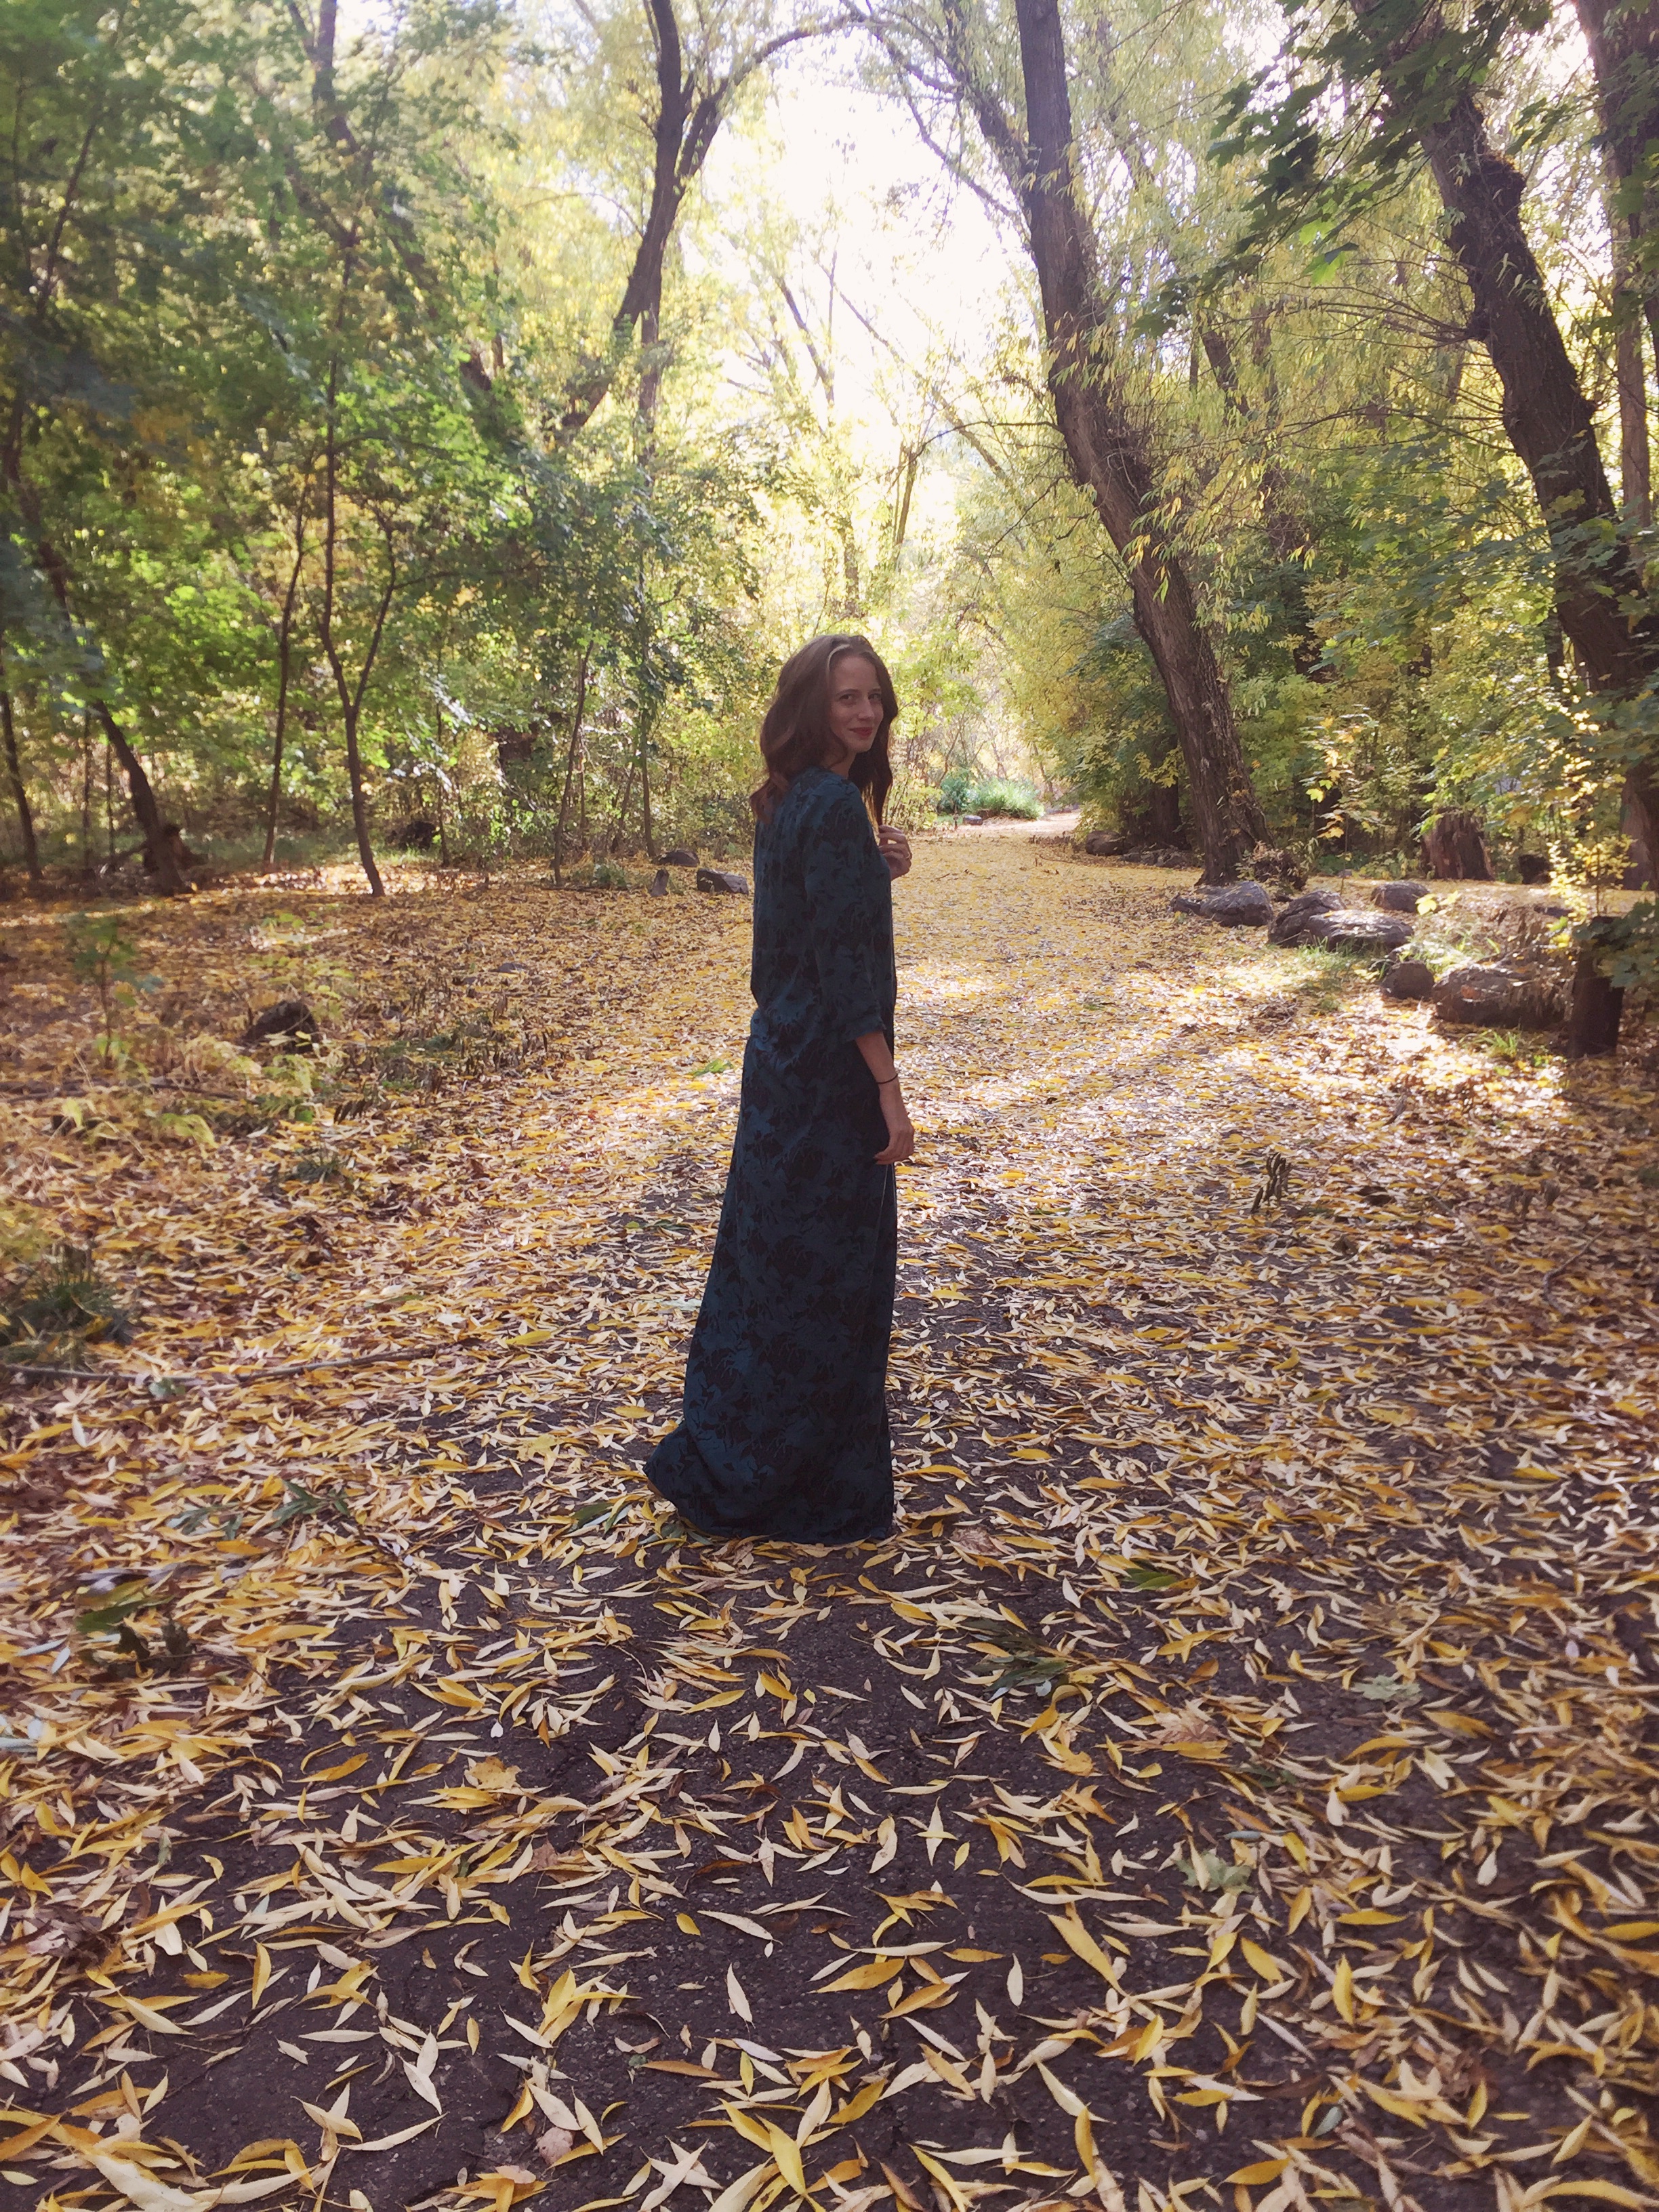
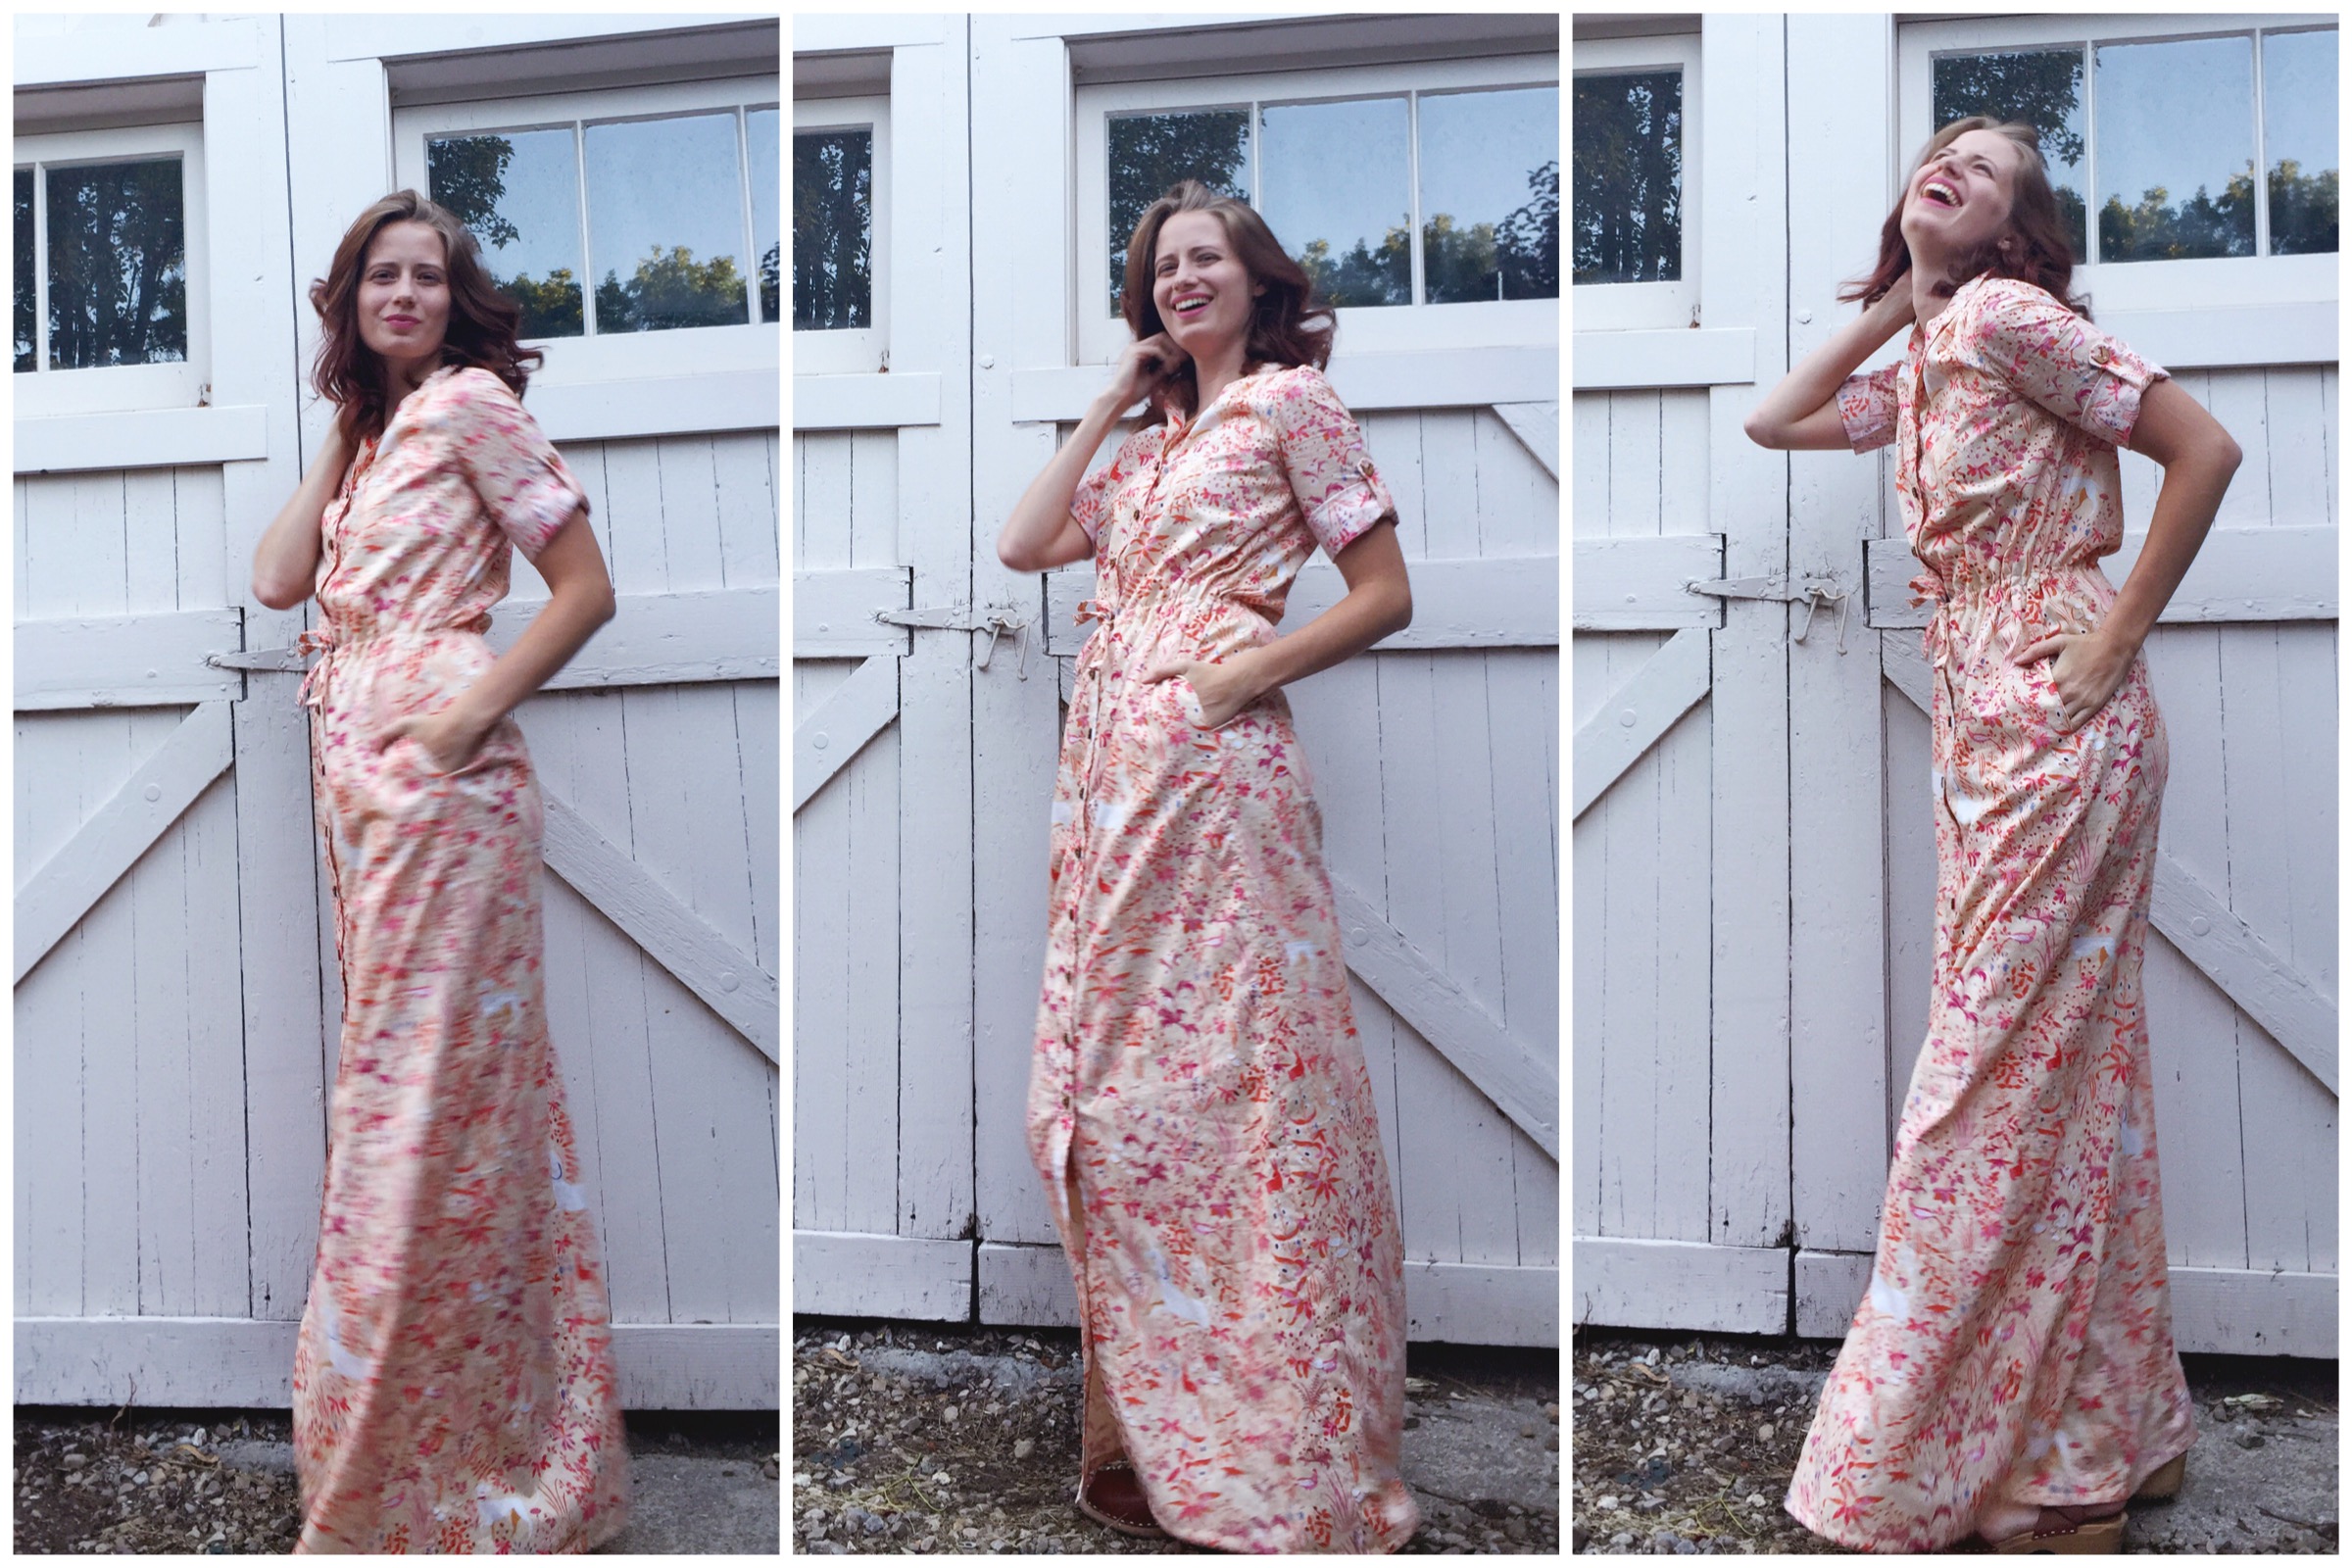
The photos above were taken using my self-timer so they’re a little blurry, but I love the way they show the movement of this dress.

I worked on this dress a little bit each month this summer and finishing it was the perfect way to celebrate a fantastic season. I selected this Lizzy House lawn from Suppose back in May and couldn’t wait to use it. Life got in the way so cutting the fabric wasn’t started until June. I sewed a step here and there throughout July, but really got to work in August when my wooden buttons arrived from Arrow Mountain.

image
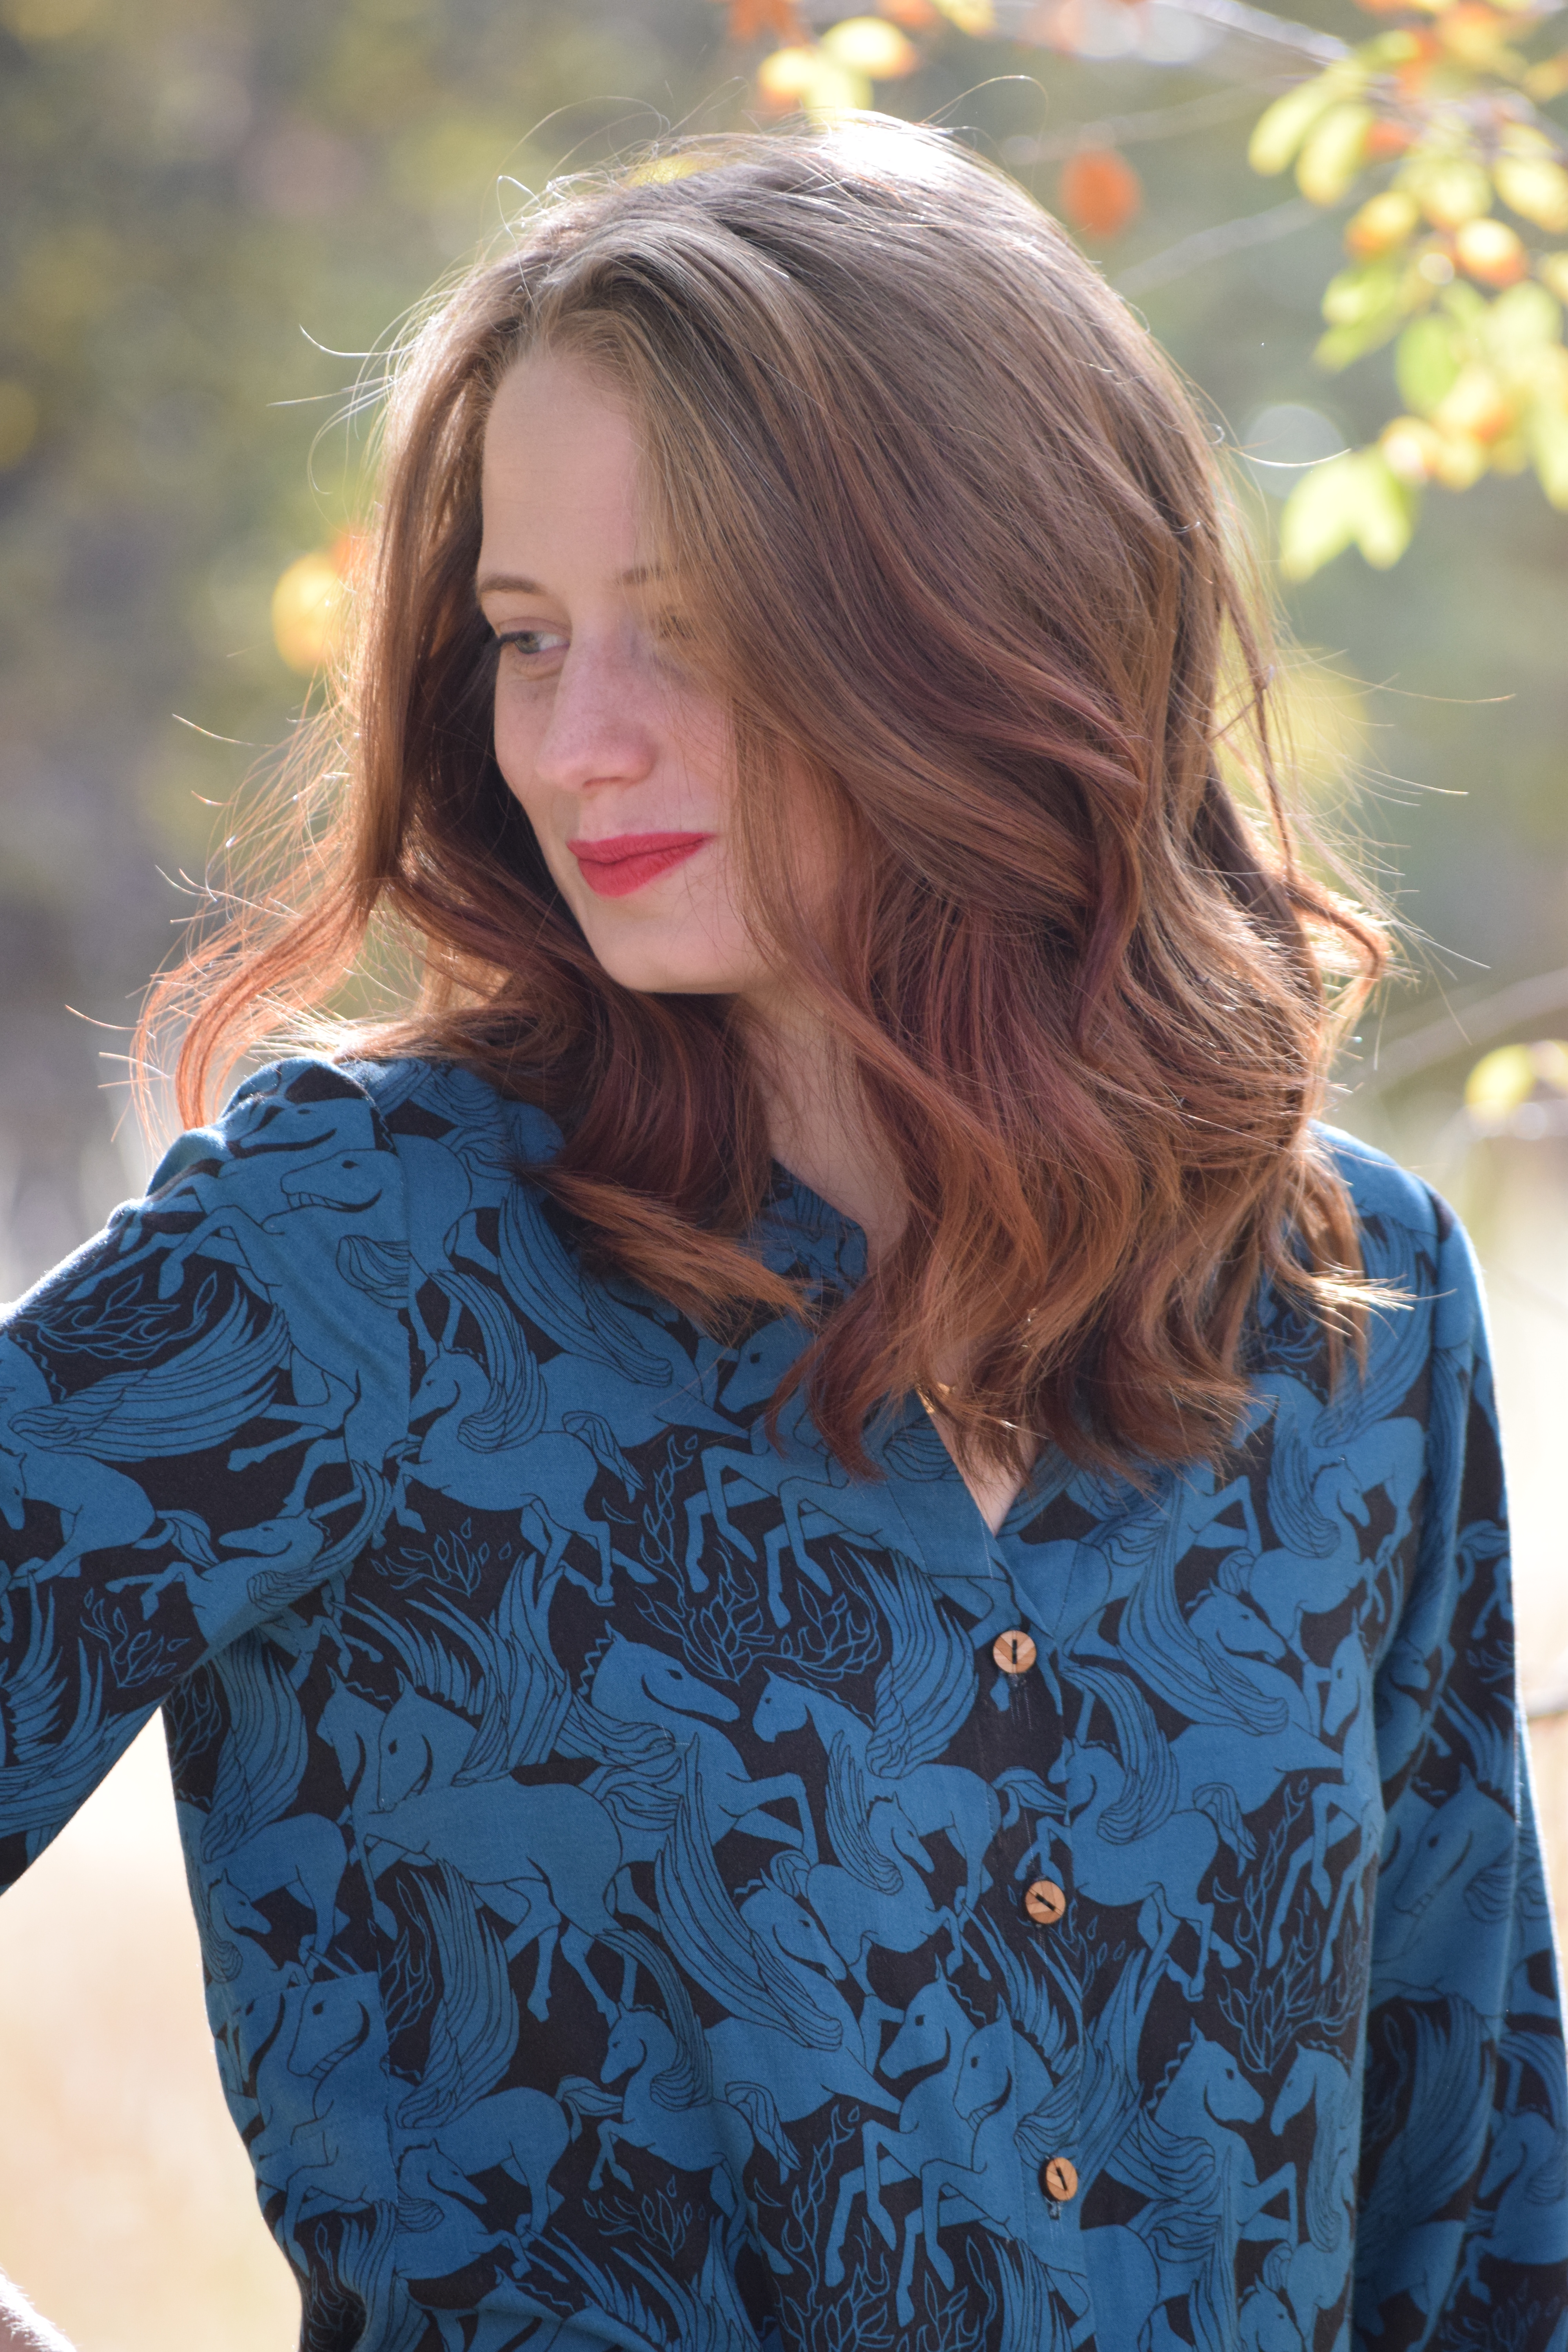
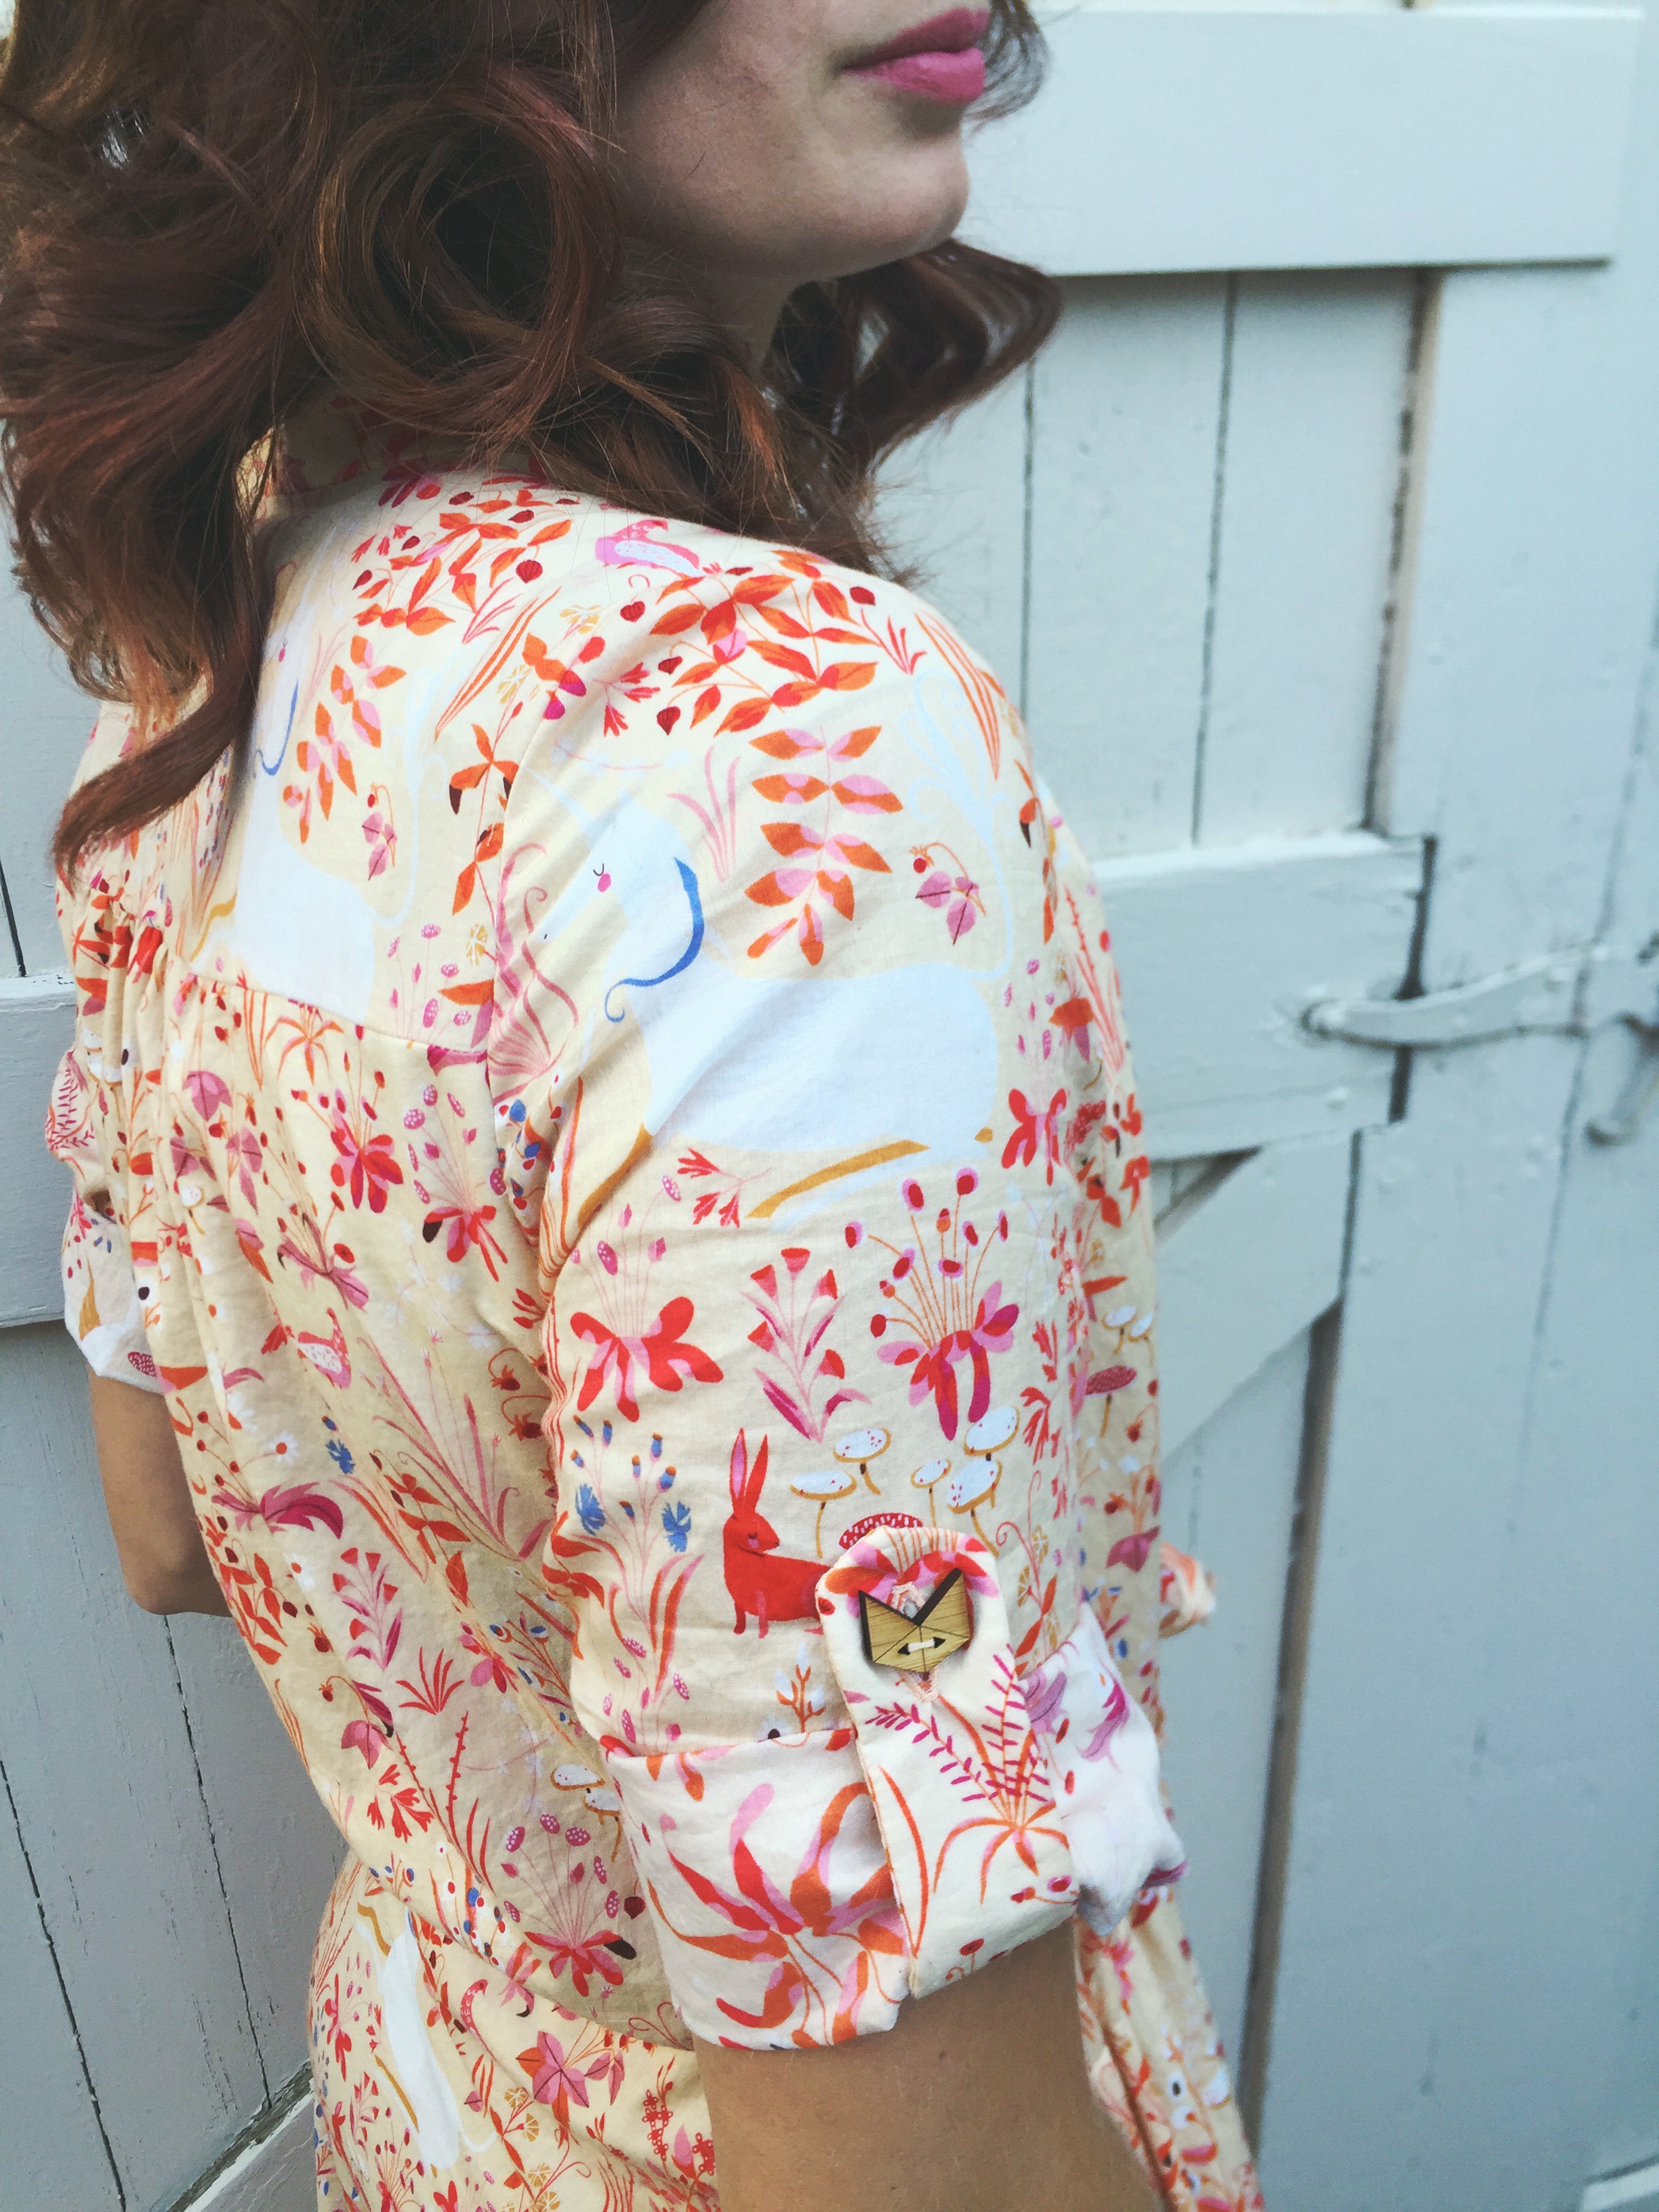
Here is a close-up view of the fox buttons I added to the sleeve tabs. The front of the dress uses the minimalist buttons also from Arrow Mountain.

My biggest challenge with the dress was sewing the waistline casing. When looking through all my handmade clothing, I was surprised to realize that I had never actually sewn a garment with a casing like the one in this dress. It really wasn’t too difficult, I was just too lazy to mark the waistline when I first sewed the casing. This resulted in a late-night Netflix binge while seam ripping my first attempt. On my second attempt I made sure to mark the waistline and sewing the casing was a breeze.

I’ve now worn this dress three times since finishing it in early August. The pockets have made it more functional and wearable than any other maxi dress I have owned.They’re just the right size for my phone and keys so I don’t have to carry a bag every time I leave the house.

image1 (2)image

I look forward to wearing this dress again and again. It will be a great transitional dress for fall and it’s sure to get a lot of wear. I’d love to hear about your favorite summer project. Did you make anything you absolutely adore this summer?