Sewing for Spring with Raspberry Creek Fabrics

Here in Utah, winter is showing no signs of stopping soon, but that hasn’t stopped Raspberry Creek Fabrics from brightening the season with their Spring 2019 Club release. If you’re unfamiliar with the Club line, it’s printed in house by Raspberry Creek and only available through them. This release has 8 collections and over 50 prints total. A majority of the prints are available on cotton jersey and french terry with a few options available on ponte and rayon challis. As part of the Raspberry Creek Fabrics promotional team, I was able to choose a couple of my favorite prints to sew up and share. Let’s get to it!

My Son’s Cardigan

Upon seeing the spring preview, my son saw this Giraffe Print French Terry (also available in cotton jersey) and said, “Mom! I want to look like a giraffe.” I’m a big believer in using fashion as a form of self-expression so I happily obliged. I chose the cotton french terry as it’s my preferred substrate for my son’s joggers and sweatshirts. It’s got enough weight to hold up to the abuses of a 5 year old, while also being light enough for year-round wear.

His wardrobe contains plenty of pants and tees but is sometimes lacking when it comes to jackets and sweaters. With his input, I settled on making a Petit a Petit Goodall Cardigan (find it free in the Petit a Petit Facebook group). I chose a size 6 which was right in line with my son’s measurements. The intended fit is oversized and I love that my son will likely get at least a year or more of wear out of this cardigan before he grows out of it. If you prefer a more fitted look, I would suggest sizing down. Sewing was straightforward and took somewhere around 2 hours start to finish.

My Perkins Shirt

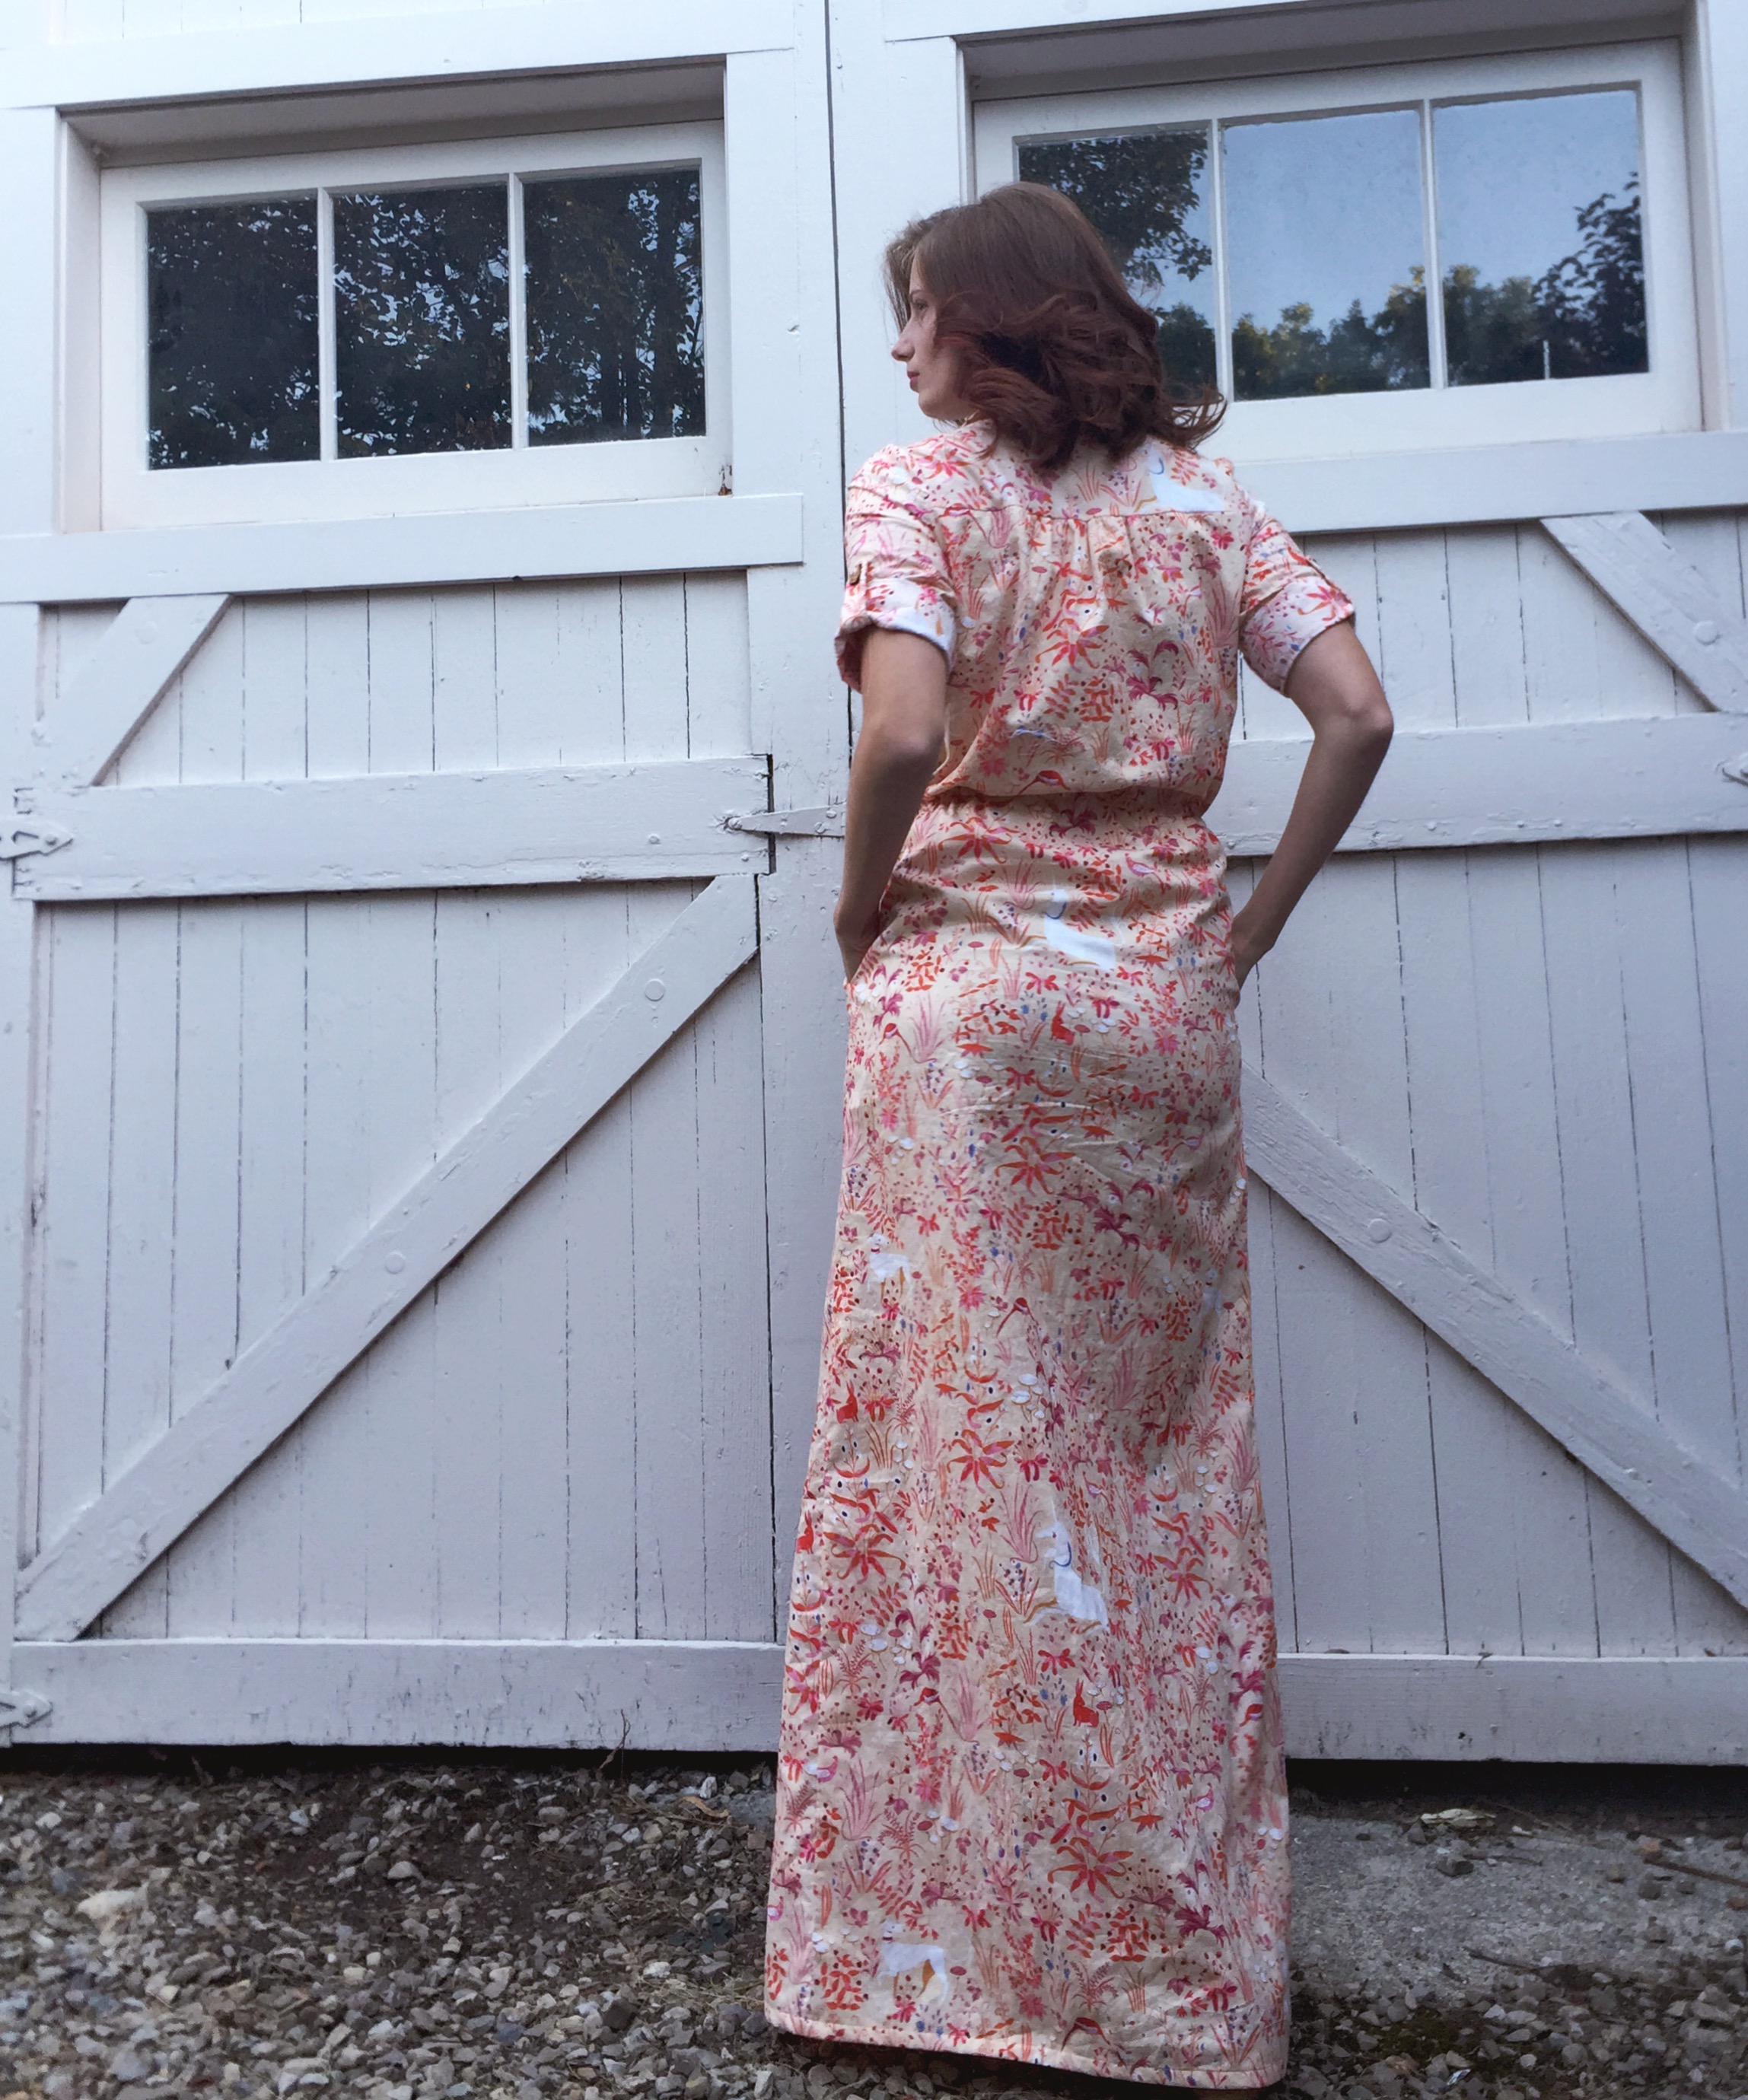
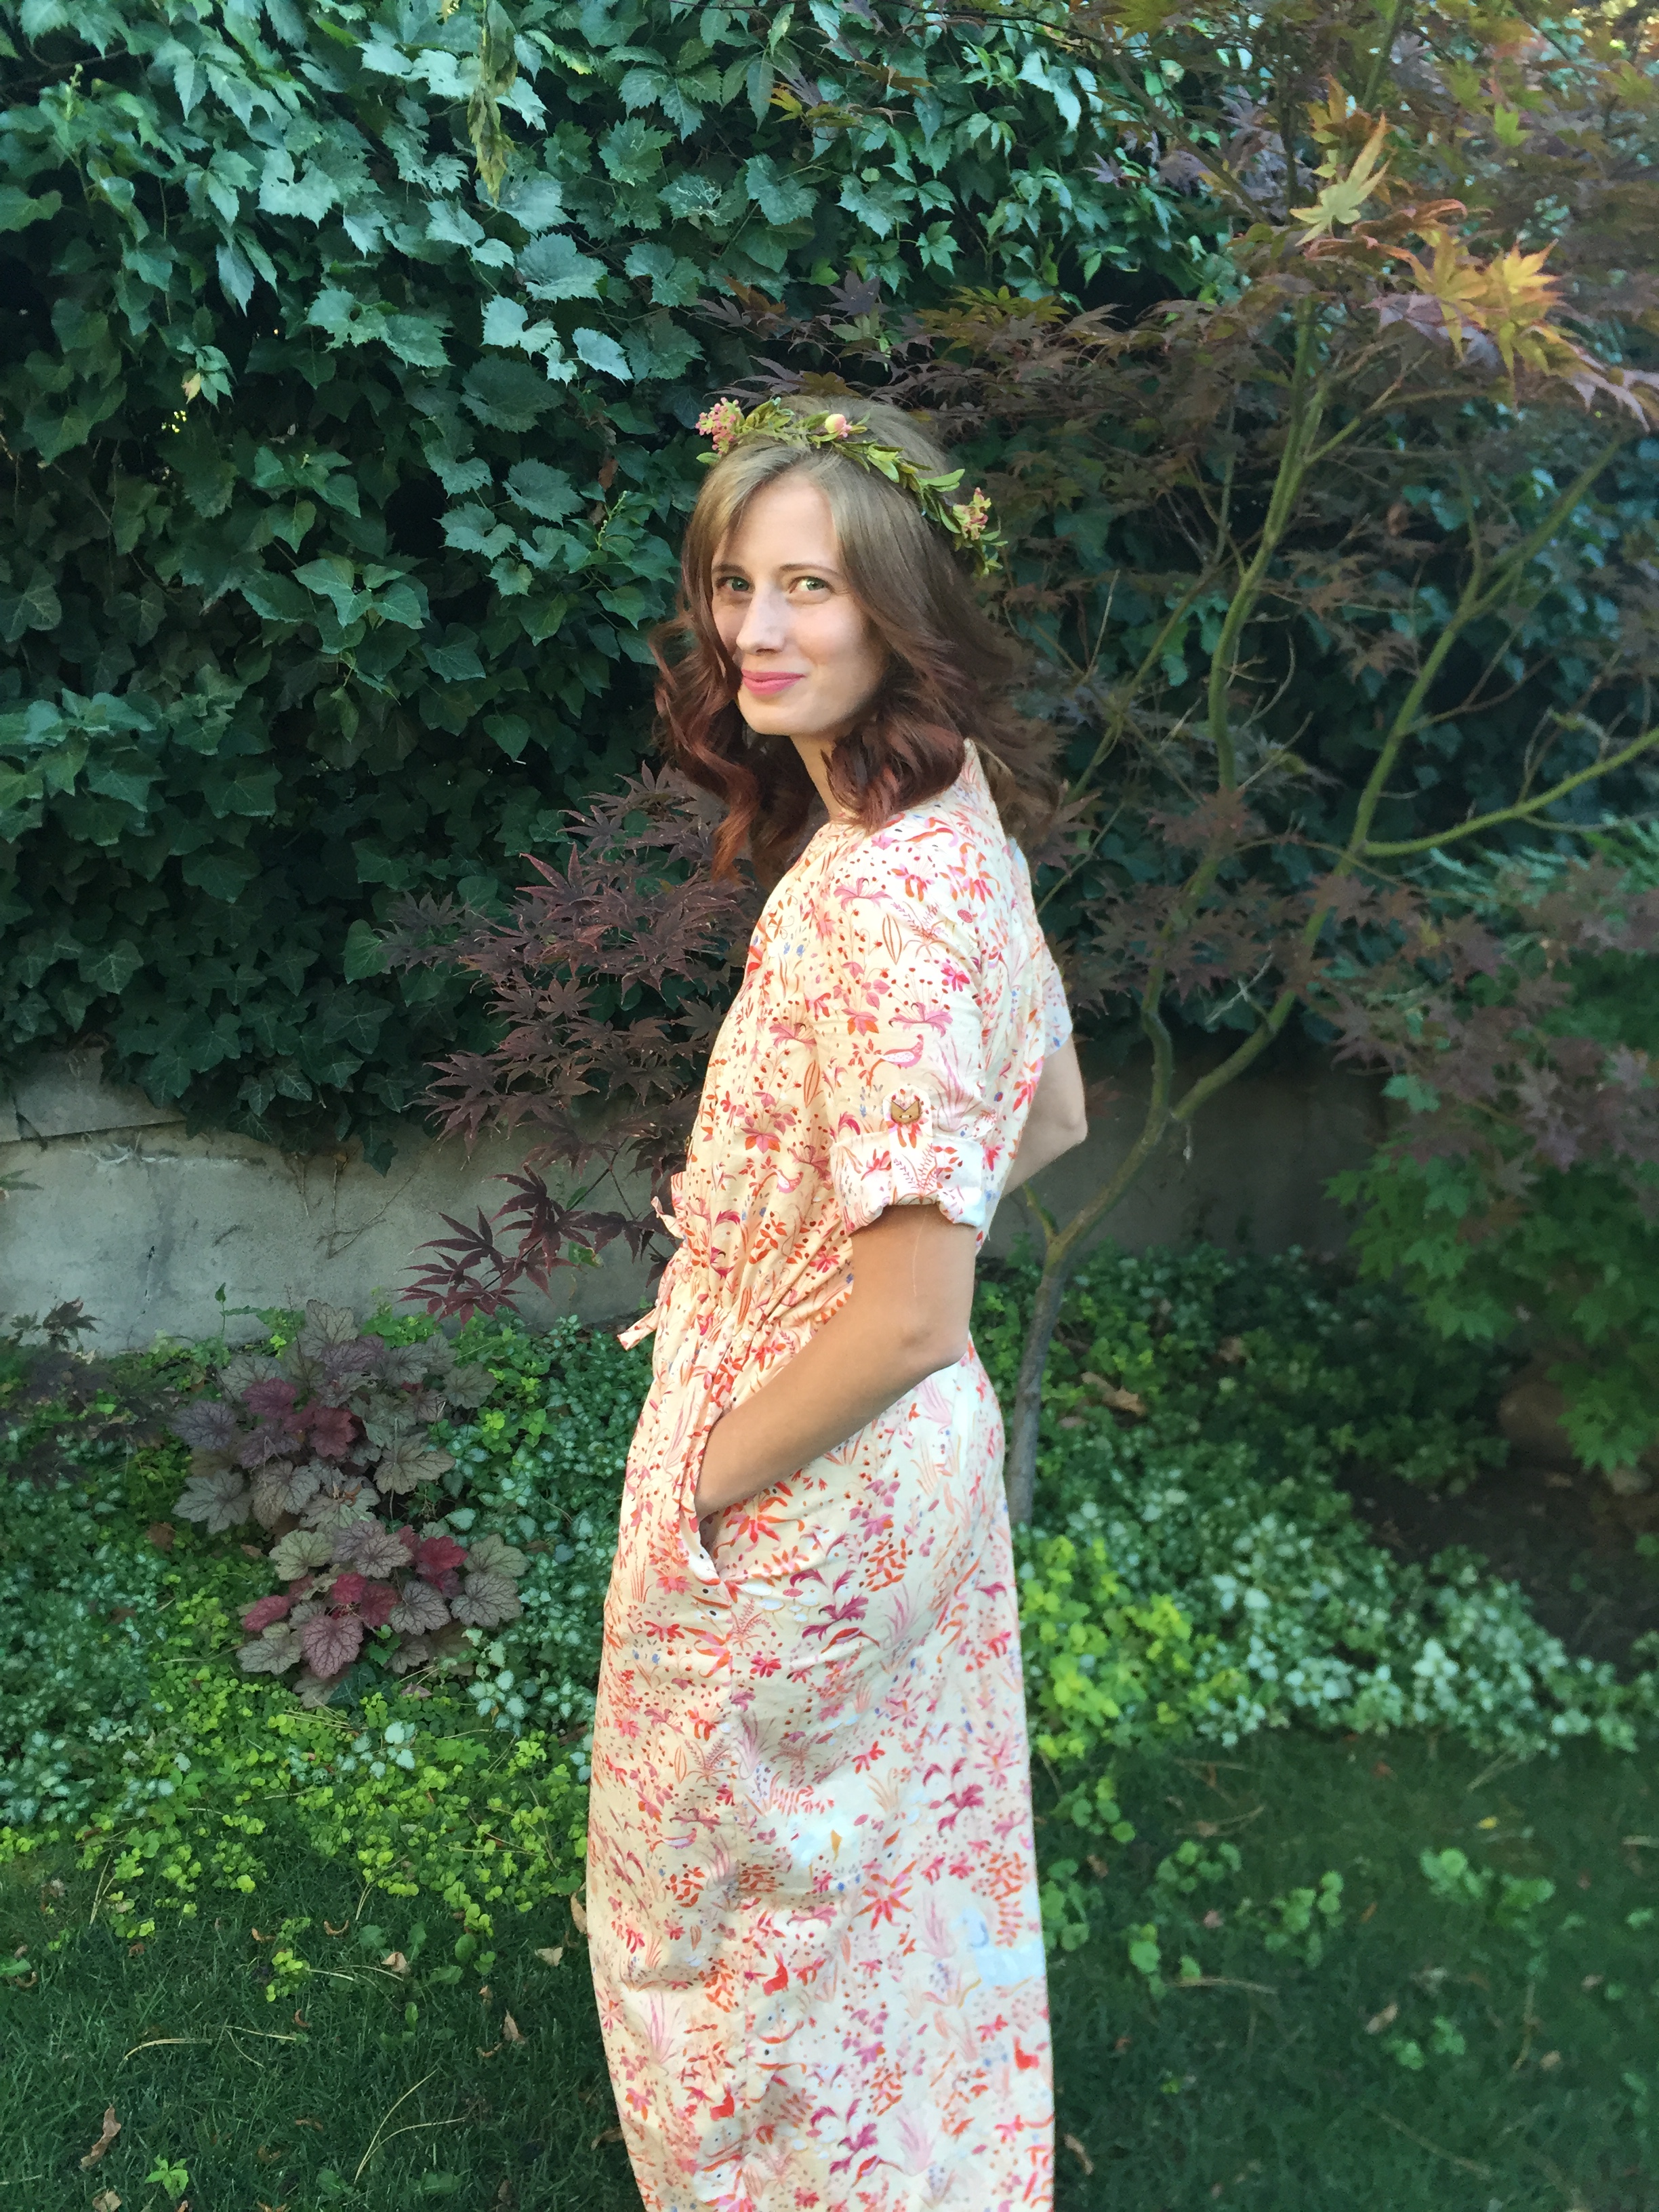
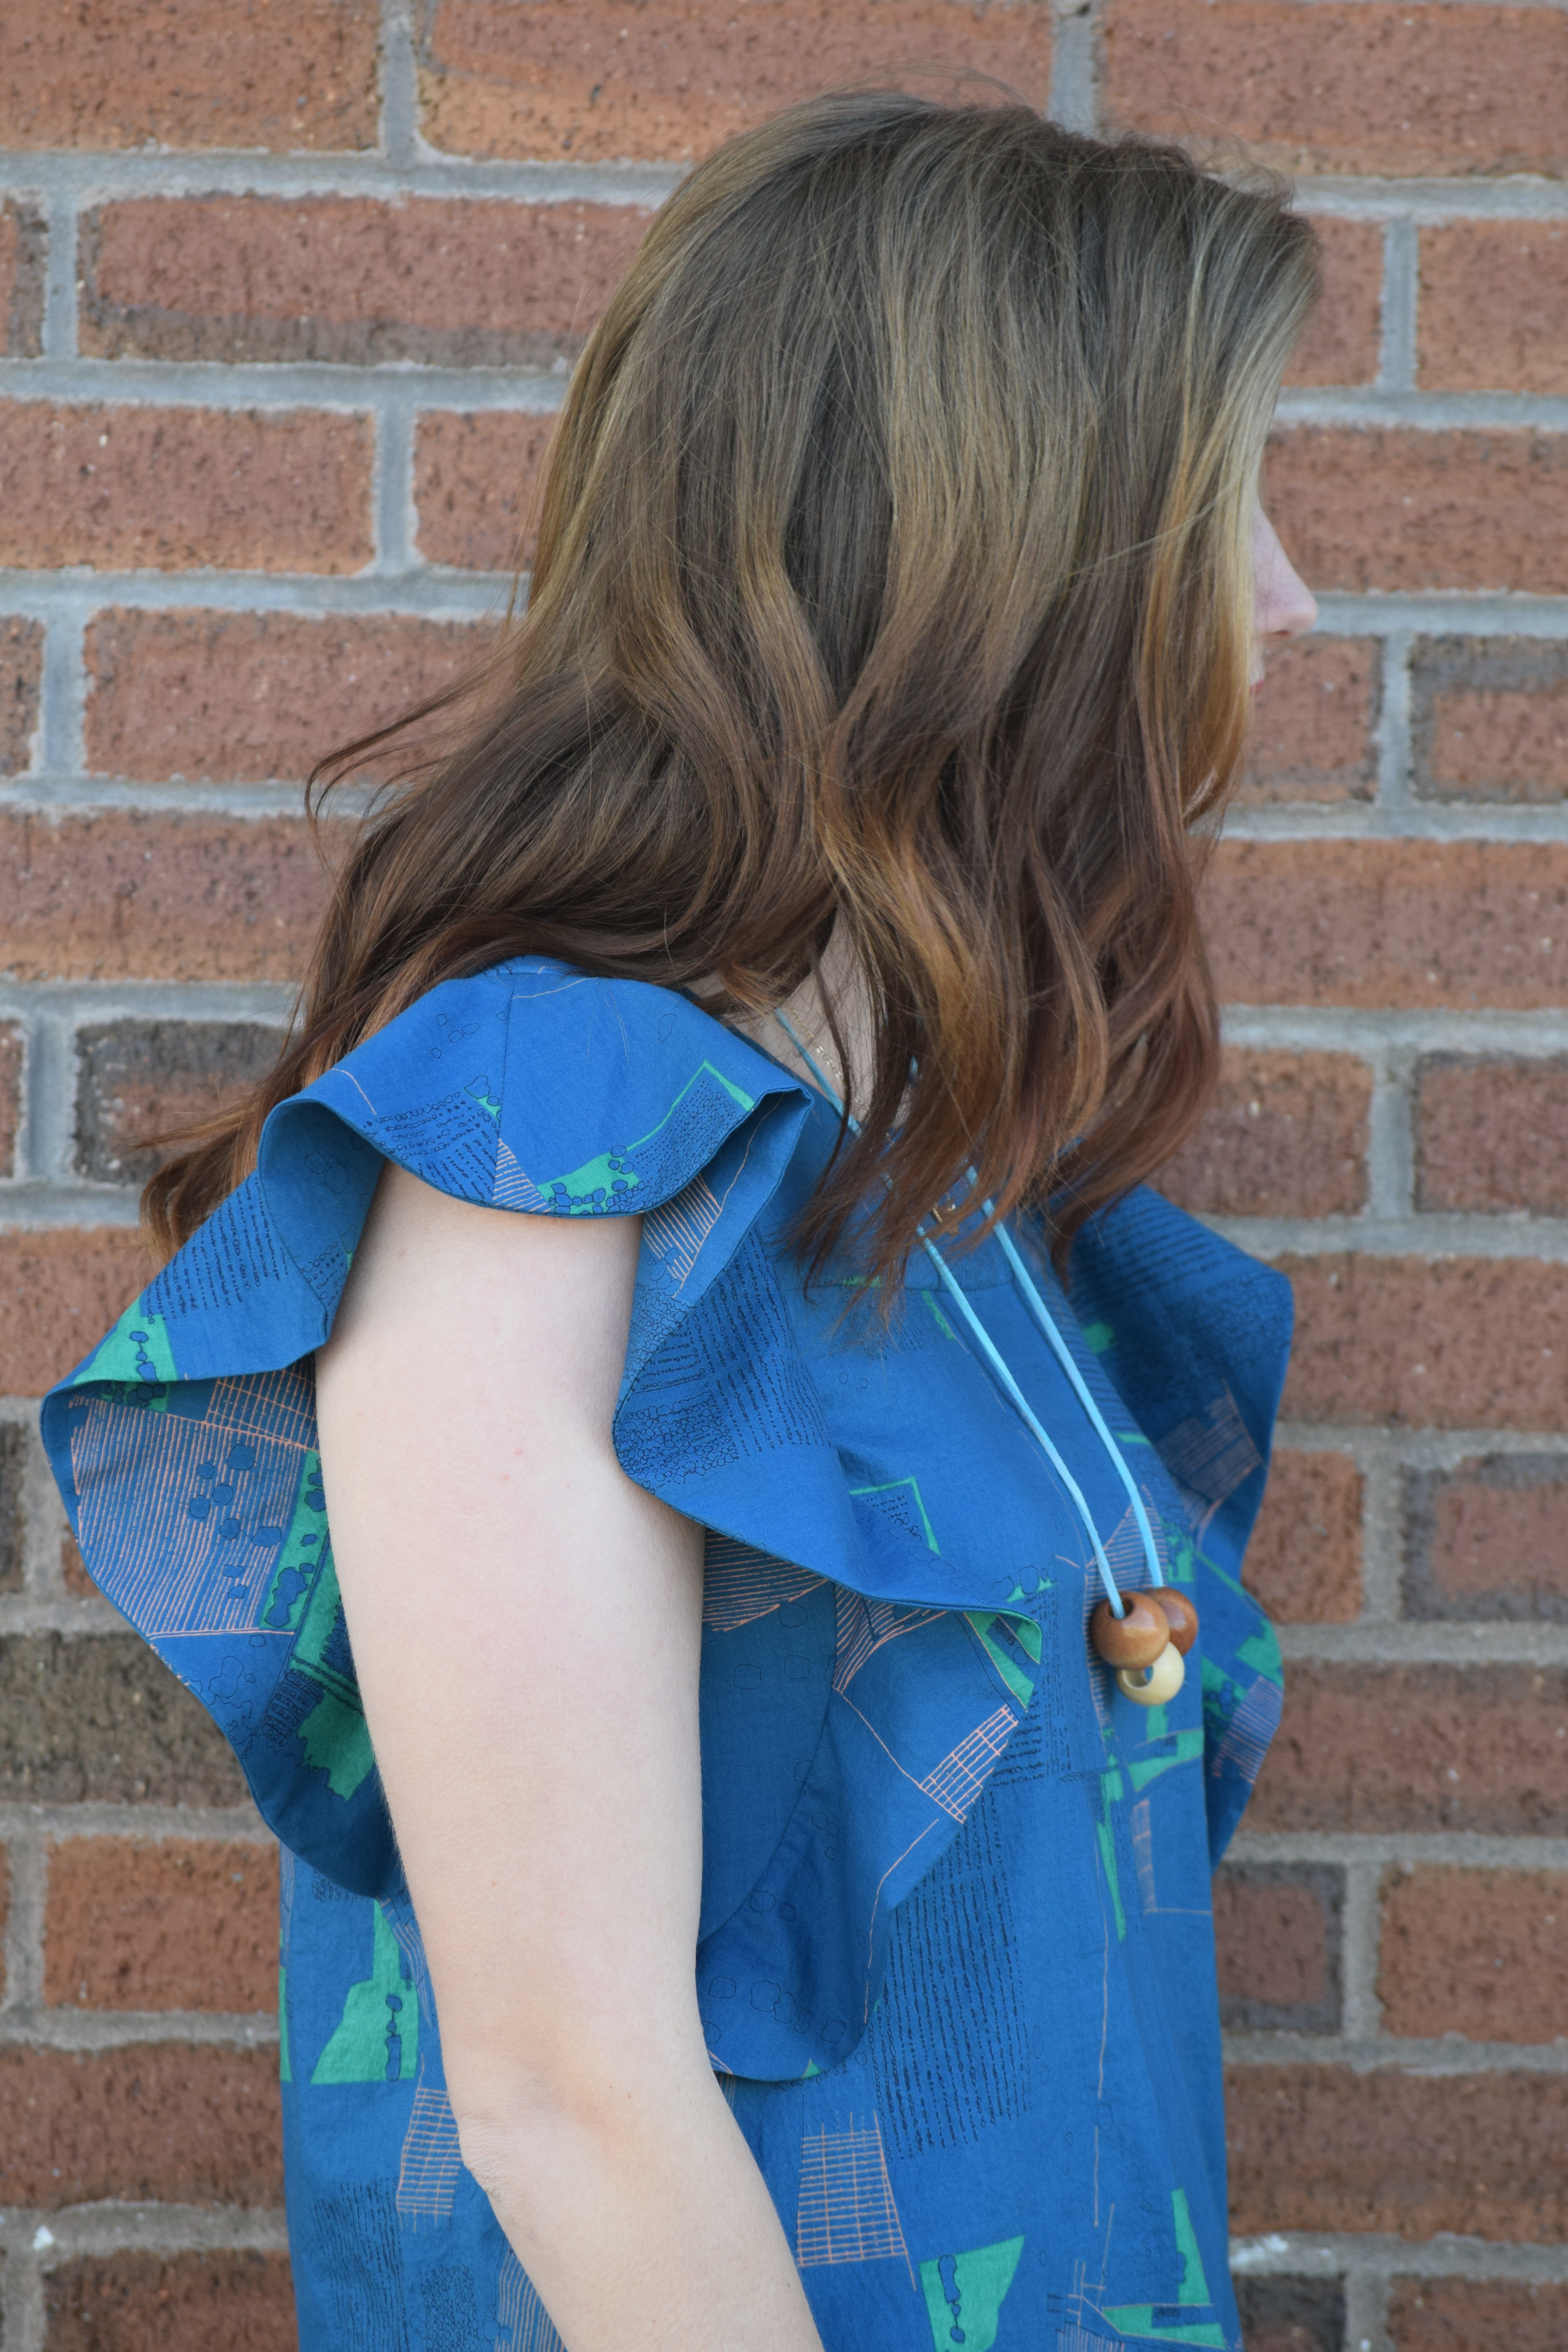
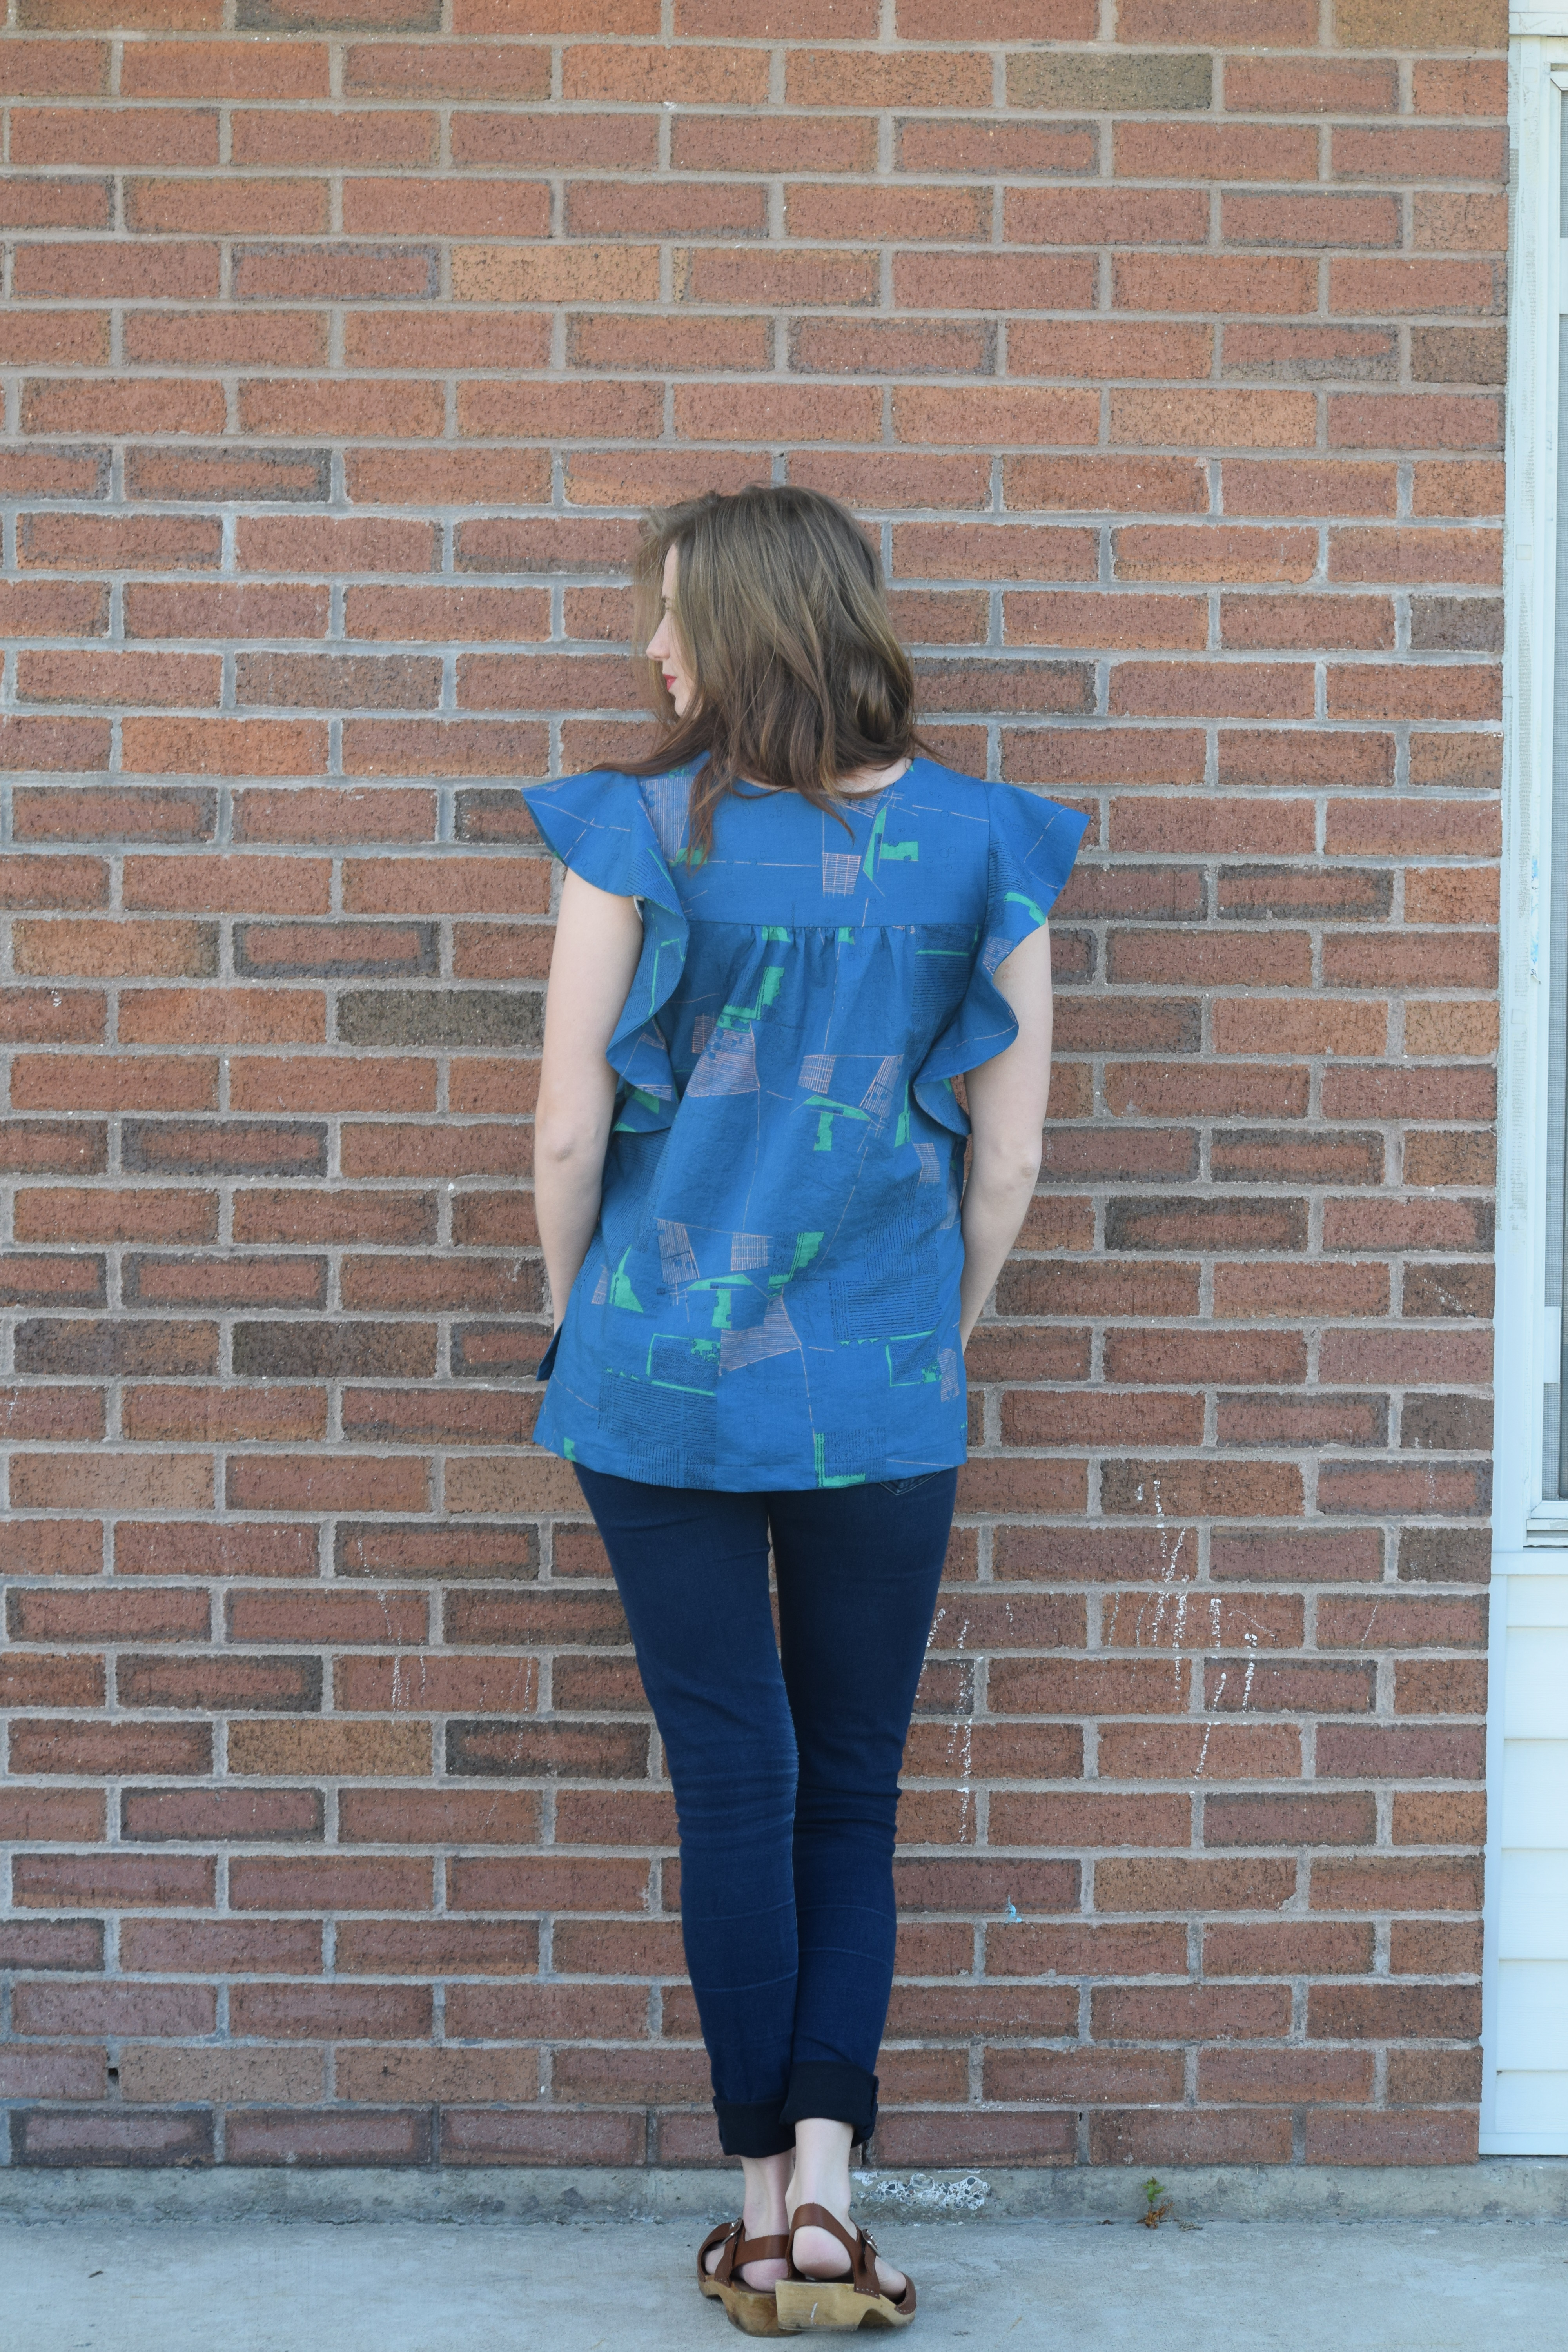
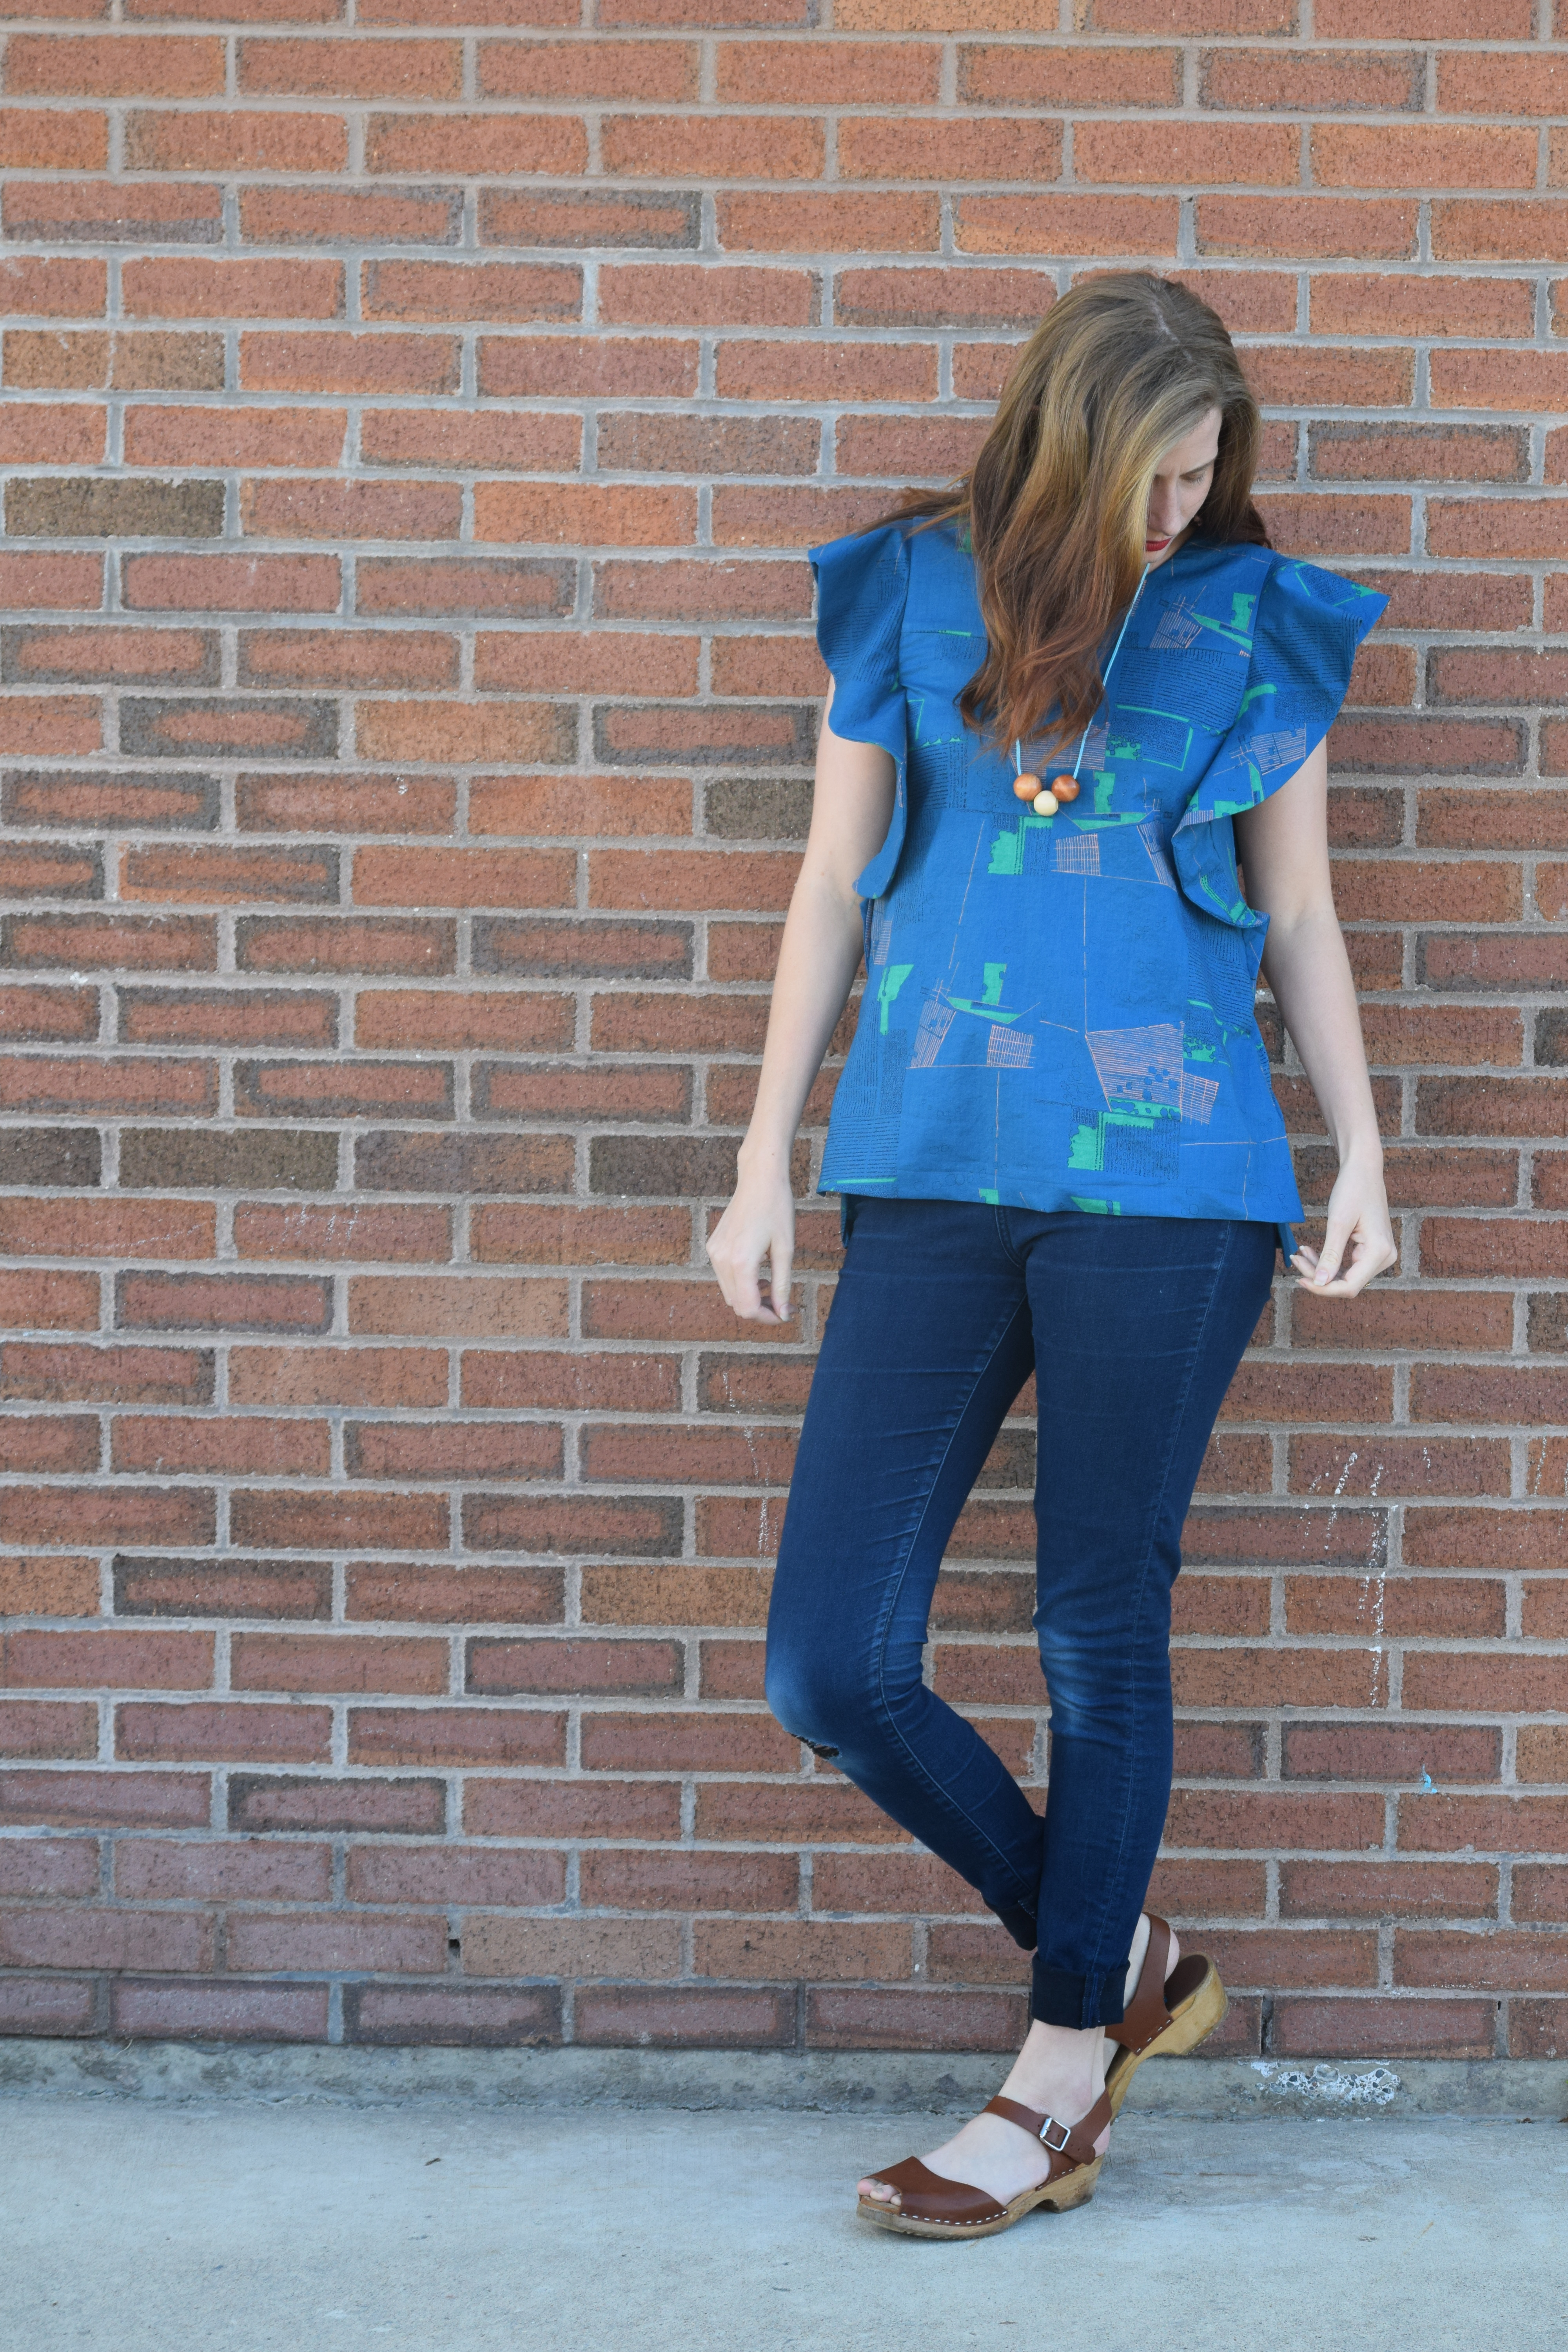
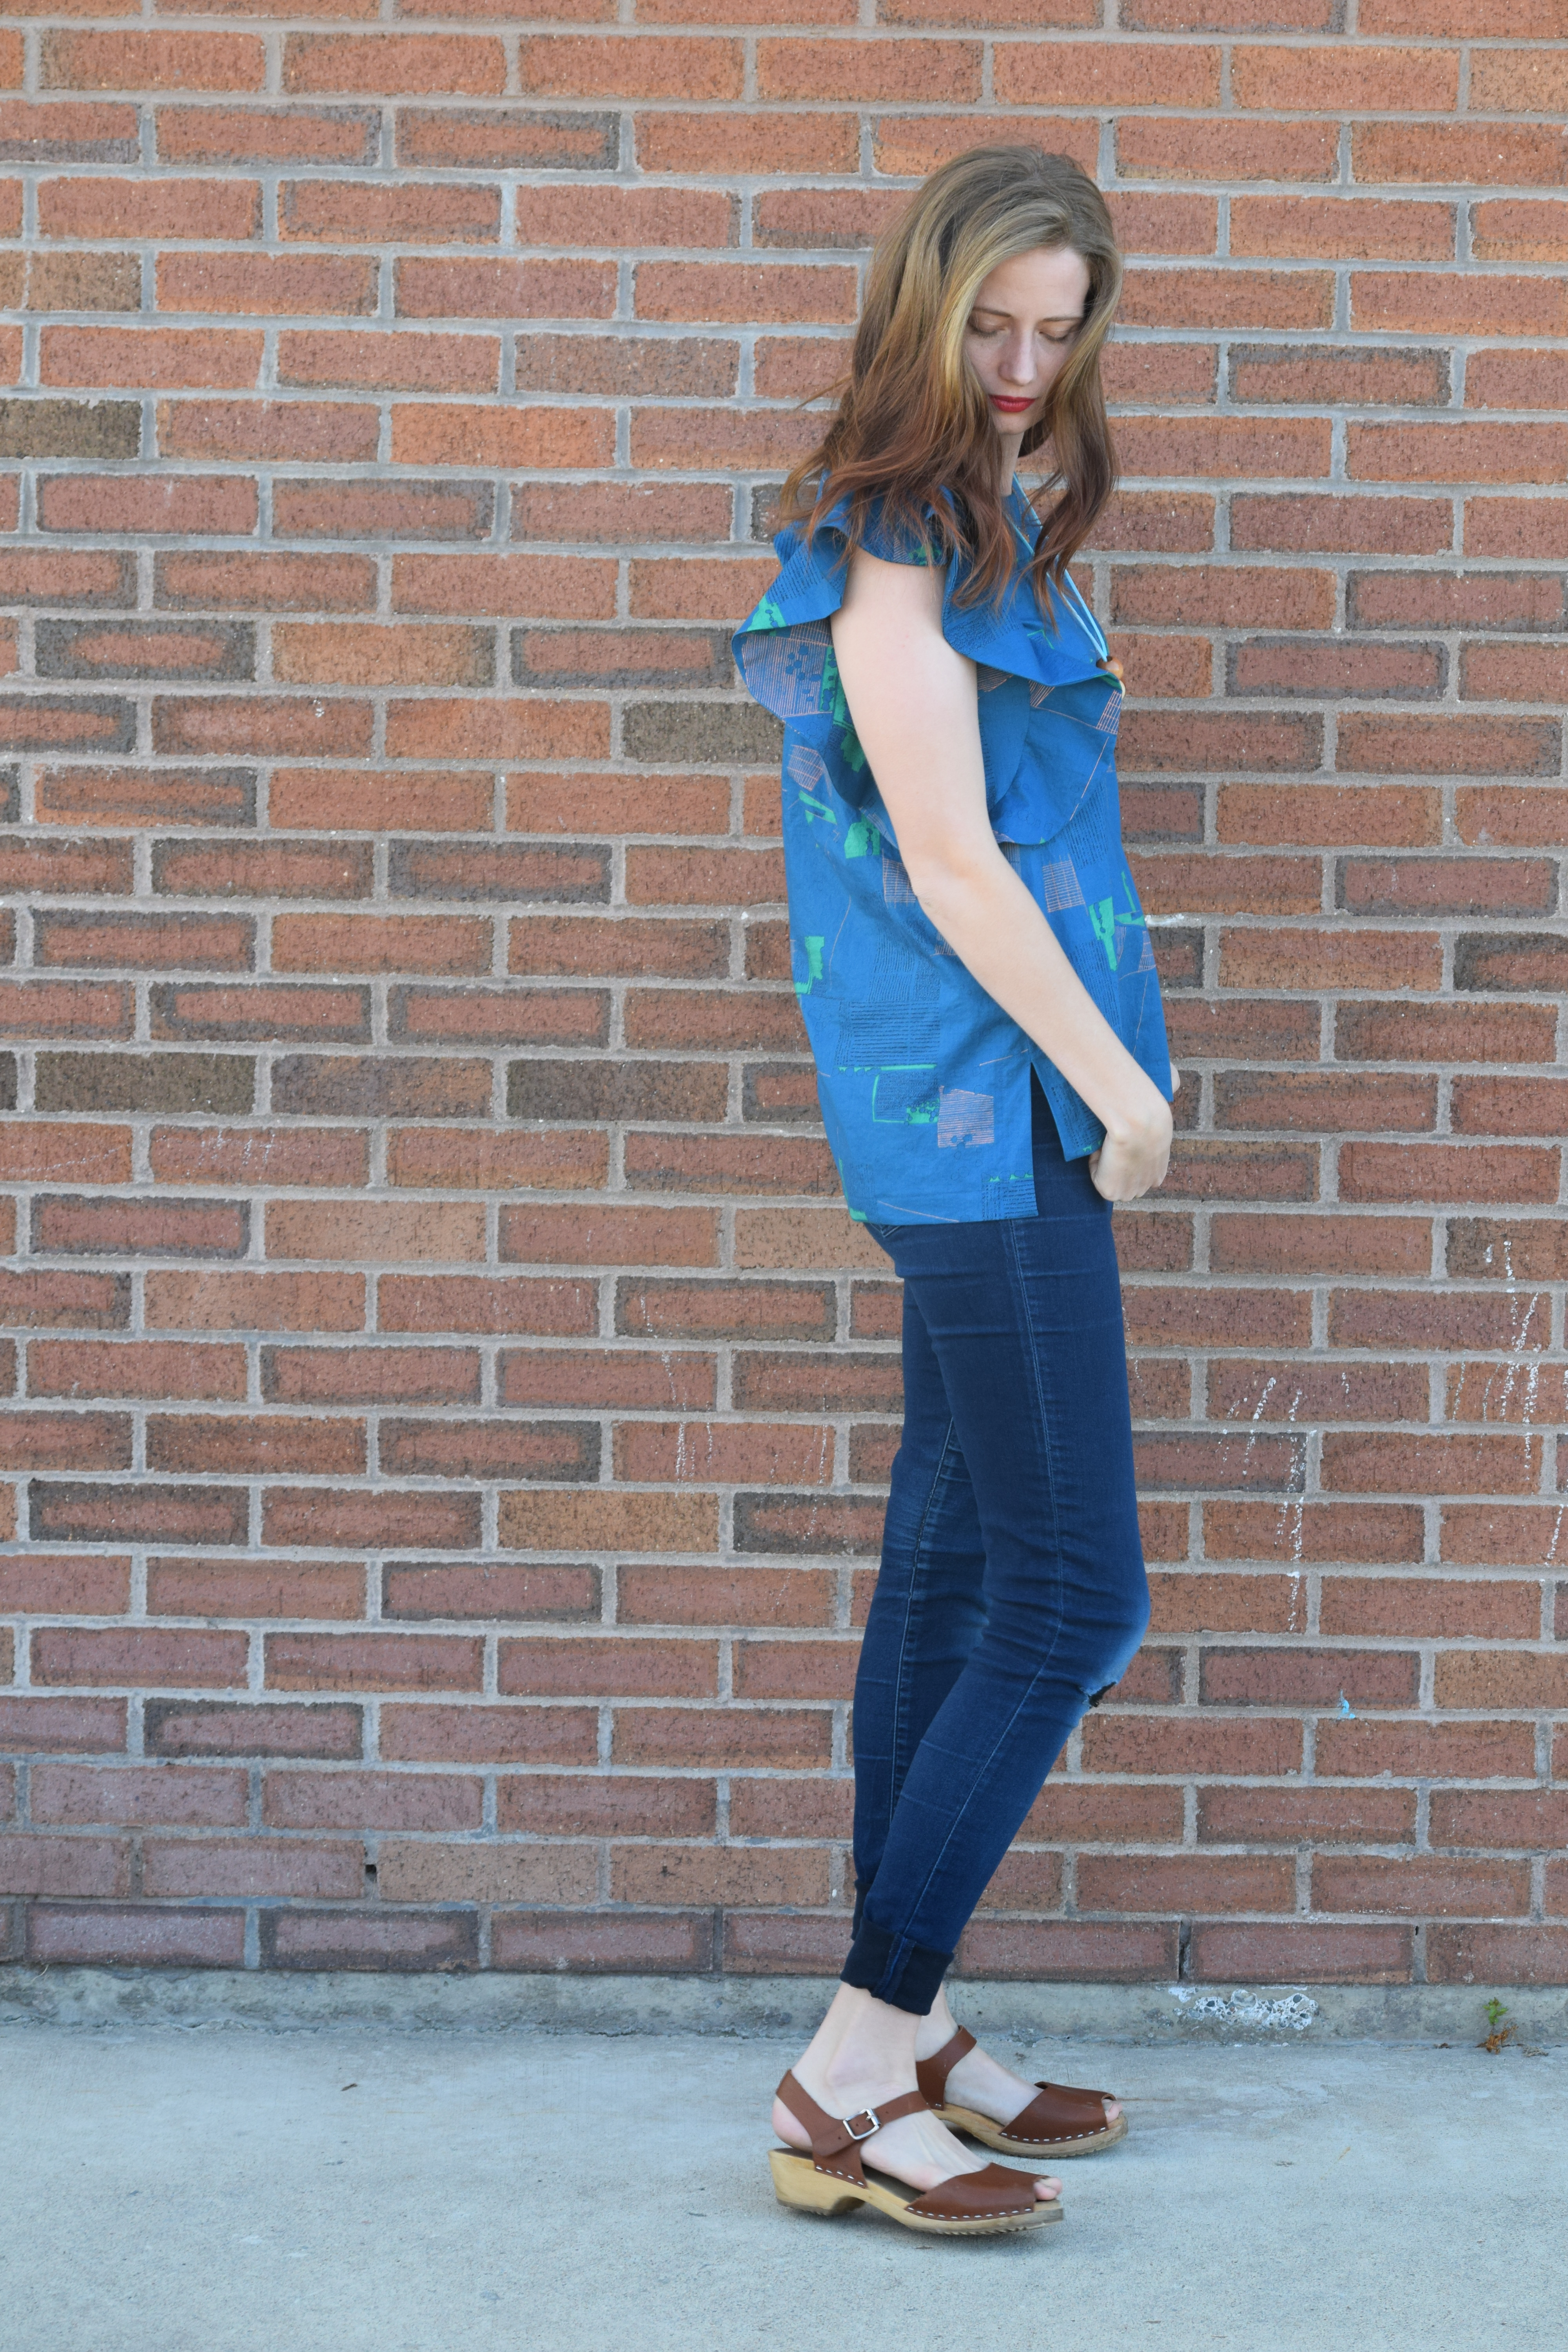
I couldn’t let my son have all the fun with the Club Spring release and this Abstract Floral rayon challis caught my eye almost immediately. The large scale gives the fabric a modern look while the coloring screams spring. After last month’s frantic fancy pants sewing, I’ve been spending February focusing on tops to pair with my fancy pants. Rayon challis is my favorite substrate for woven tops and I knew this print would be a welcome wardrobe addition.

Although I planned to make some sort of top, I waited to receive the actual fabric before deciding on a pattern. Sometimes you just need to drape a fabric around your body to find out what it wants to become. Eventually I decided to sew up an Ensemble Patterns Perkins Shirt. I tested the pattern last May (see my test versions and more pattern details in this post), and my gathered version has become one of my wardrobe staples.

I again opted to make the cropped version. Other than adding 2 inches to the length, I sewed a straight size 4. Sewing took place over an afternoon and an evening taking maybe 4-5 hours total. The result is a top that I’m sure will be worn regularly throughout the spring and summer months. The soft pastel colors paired with the boxy shape make the look feel unexpected and just right all at once. I can’t wait to mix and match this Perkins Shirt with different pieces of my handmade wardrobe style it in new ways.

Conclusions

I’ve been a customer of Raspberry Creek fabrics since 2017 and have used their Club line french terry for nearly 20 pairs of joggers, several sweatshirts, and a few tees. Although I knew the french terry cardigan would be a hit, this was my first time using the Club rayon challis and I was happy to find that it sewed beautifully. The printing process can make the fabric feel slightly stiff until the first wash but, it softens well after washing. Now that I’ve used it, I think that I’ll start purchasing and using it more often. My son is overjoyed to have a giraffe cardigan and both of these makes will likely be favorites throughout spring.

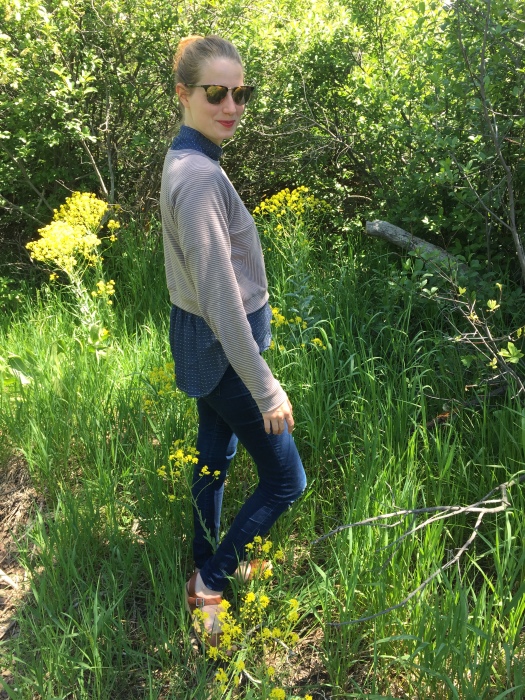
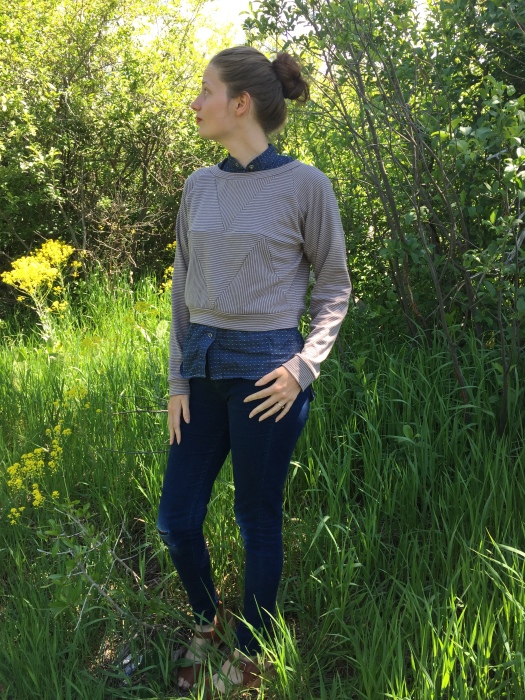
My son and I both paired our Spring ’19 Club Fabrics with pants made from Cone Mills Black Stretch Denim purchased from Raspberry Creek Fabrics. Mine are the Ginger Jeans (posted about these exact pants in this post) and his are the Misusu Patterns Olli Summer Pants.

Thanks for reading!

Style Maker Fabrics Spring Style Tour 2018

Hello! I’ve been anxiously waiting for this day since Michelle asked me to be part of this tour. Style Maker Fabrics is fully stocked with new arrivals. When I saw all the fabrics, my imagination ran a bit wild and I planned approximately fifty new projects. It took me a day or two to come back down to earth and realize making all of them might not be realistic on any sort of deadline. I spent about a week deliberating and finally narrowed my decision down to three projects and four fabrics.

IMG_8139

I know you’re supposed to save the best for last, but I’m bucking tradition here and going all in by talking about my favorite piece first. This woven stripe was love at first sight. Do you ever see a fabric and think “I need that on my body?” No? Just me? Well, that’s how I felt about this fabric. I considered some sort of button up shirt, but after scrolling through Instagram for inspiration I saw the Wiksten Oversized Kimono from issue 4 of Making Magazine (here) and couldn’t get the thought out of my head. Michelle was a great help in selecting a coordinating fabric and suggested this washed linen. They’re a match made in heaven, don’t you think?

IMG_8116

The over sized shape and giant pockets drew me in, but the possibility of making the kimono reversible is what sold me. If you’ve been following me for a while you might know that I like bold patterns and colors. My love affair with print and color has made my wardrobe a technicolor dream, but that does create some issues when putting outfits together. This way I can have bold, but it will also coordinate better with some of my louder pieces. I realize the over sized look isn’t everyone’s cup of tea although it is certainly mine. This is bound to get endless wear over the next few months and I envision it being my go-to on cold summer evenings.
IMG_8112

Next up, my latest Grainline Studio Lark Tee. Everyone has their favorite tee pattern, and this one is mine. I’ll be honest and say that I actually haven’t made any other basic tee pattern because I liked this one after the first try. I’ve made six or seven of them and wear them regularly.  I made a size 4 and in this coral jersey knit it’s my idea of a perfect fitted, but slightly slouchy tee.

IMG_8129

IMG_8135

Finally, let’s talk about these jeans. These were my second pair of Ginger Jeans (see my first ones here) and was able to sew them up in just a couple of days. I used this brushed denim and comfort is an understatement (hardware kit also available here). They are unbelievably soft and every bit as comfortable as the old worn-in mom jeans that I actually stole from my mom (a bit of a tangent about those on this post). Skinny jeans and comfort don’t usually go hand in hand, but in this case they get along quite nicely. I was careful not to over fit them and they’ll be just as nice to wear for a day at the park as they will be for date night.

IMG_8132

Lest I lead you astray, making these jeans wasn’t all sunshine and rainbows. This was my first attempt at installing rivets which ended up being a bit of an ordeal. First, I attempted to install them at home with a wimpy little hammer that promptly broke. Next, I secured a new hammer at my parent’s house and using an old skillet as a metal surface when I dented the skillet in several places (sorry mom and dad). Then, I dug through boxes and found a cast iron skillet, installed the rivets, and thought everything was complete. Upon a final pressing and inspection I noticed a few tiny holes near the back pockets. These holes were apparently made during my rivet installation fiasco and I almost cried when I saw them. For once, I decided to keep a clear head and find a solution right away. Finally, I settled upon the idea of a little visible mending. I stabilized the holes and used perle cotton to stitch the shape of an asterisk in four places. I chose to stitch four so that it would look more like an intentional design feature than a mistake that needed to be fixed. It may seem silly, but I often toss a project to the side when a mistake like this is made. The extra stitching actually adds a nice little detail and reminds me that sometimes you just have to “make it work.”

IMG_8134
IMG_8128

Now that I’ve gabbed on and on about my outfit, I just want to add on a little shout out to my husband who is the real MVP when it comes to these photos. Due to a small shipping delay and our schedules, the only time we had to take these photos was in the middle of wild winds and under threat of rain. I got dressed, we hopped in the car, and crossed our fingers that we could get the necessary photos. Guys, we took these photos in five minutes. After all the photos he’s taken for me, I think we’ve finally found our stride. The threat of rain and wild winds may have been a factor in making this photo session so quick, but I’m seriously impressed that we were able to just get it done. I’ll leave you with one last decent photo of my outfit and if you scroll to the bottom there’s one that will illustrate the hilarity of our 5 minute session.

IMG_8145

Now, I think that I’ve sufficiently run out of words. Are you ready to shop the Style Maker spring fabrics? Find the new arrivals here. Want more spring sewing inspiration? Check out yesterday’s post by Leslie (here) or see Lori’s post coming tomorrow (here). Want to be inspired by everyone on the Style Maker Spring Style Tour? Find links to all the tour posts here.

Finally, here’s likely the only reason you read or scrolled all the way to the bottom of this lengthy post:

IMG_8108

Whew! You’ve made it all the way to the end? Are you ready to read more? No? that’s cool this was a huge post. Yes? Here are links  to a couple of other projects I’ve made using fabrics from Style Maker. See my Joy Jacket here or my Gemma Dress here.

A Weekend Retreat and My Driftless Cardigan

image1

Way back in October of last year, I purchased this gray jersey knit from Suppose and cut out my Driftless Cardigan (find the pattern here). I was clearly getting ahead of myself because I had approximately one billion other deadlines at the time. April came around and I thought to myself, “Life has finally slowed down, I can now finish all of those other projects that I started last fall.” I was wrong. My husband ended up applying for and accepting an amazing new job which meant life was about to get crazy again.

image3

Meanwhile, I attended a blogger meet up in SLC and Sara and I came up with the idea for a small weekend sewing retreat. I spent the next few weeks stressing about my upcoming move and finally decided to pull the trigger on planning a retreat. This mama needed a break. Sara and I set a date, I got permission to use the family cabin, and we began counting the days.

image2

The weekend finally arrived and it turned out to be both rejuvenating and productive. My sewing weekend goal was finishing a pile of unfinished projects so that they would no longer clutter my sewing area. Each of my projects were only a few steps away from completion, but had been sitting unfinished for months. Sewing for an entire weekend allowed me to complete a couple of baby quilts, a quilted pillow cover, two simple baby dresses, and my Driftless Cardigan.

IMG_1888

While setting aside time to actually sew this took months; the actual time it took to sew this cardigan was roughly 3 hours. One of those hours was used to hand stitch the neckband. I have loved Grainline Studio patterns for years because of the clean lines and well-executed details. The Driftless Cardigan is a great example of this with its hidden pockets and optional split bottom band. This was completed a month ago and it’s gotten quite a bit of use despite the blazing summer temperatures. It’s perfect for an extra layer at the movie theater (ours is always freezing) or for wearing on chilly evenings.

IMG_1889

A quick note on sizing: I sewed up a size 4 and added 2.5 inches to the length at the lengthen/shorten line. I also added about 1.5 inches to the sleeve length because I like my sleeves extra long.

Special thanks goes to Kim of Sweet Red Poppy for taking these lovely photos.

Blueprints Geodesic and “Letting it Go”

I’ve been admiring the Blueprints for Sewing Geodesic Sweatshirt pattern for quite a while now. I just couldn’t get myself to pull the trigger on buying the PDF version, so I nearly jumped for joy when a printed version was announced. I purchased my pattern the day they arrived at Suppose and couldn’t wait to get started.

IMG_0970

I chose to to make a cropped version for easy layering on cool summer mornings/evenings. The fabric used is an organic cotton interlock made by Cloud 9 fabrics and purchased from Suppose. I would consider it a medium weight which is perfect for this pattern. It’s not quite as bright as the fabrics that I’d usually select, but I’m making a concerted effort to add more neutrals into my wardrobe.

IMG_0980

Let’s talk a bit about my construction process. This sweatshirt was sewn in small snippets of time over the course of about two weeks. The last month has been chaotic to say the least, and I needed a simple stress-free project. When cutting the triangles, I decided to alternate the stripe direction in order to add a bit more interest and eliminate the need for stripe matching.

You may notice that my version has a slightly different layout than the illustration on the pattern cover. Can you spot the difference? Look at this photo and see if you can find it. Found it? My version has the bottom row of triangles upside down. This was a blunder I found only after sewing up the side seams. Whenever I make a sewing mistake, I ask myself three questions: Does this ruin the fit? Can I live with it? Will I still wear it? If the answer to the first question is yes, then I immediately work to remedy the issue. If not, I move on to the other two questions. Often I can justify keeping the mistake if it doesn’t affect the actual fitting of the garment. This was one of  those times.

IMG_0960

Anxiety sometimes tries to get the best of me when I goof up. In order to calm myself, I repeat two phrases:

“Done is Fun”- Alison Faulkner (The Alison Show)

“Let it Go” (Can’t say that one without singing the “Frozen” theme)

These phrases remind me that my errors often aren’t as glaring as they may initially seem. Life is really too short to waste time fixing an error that doesn’t have to be seen as an error. It’s a design decision, right? It is likely that the only people who may notice the error are those who are familiar with the pattern. Overall, I’m happy with the look of my Geodesic and isn’t that what matters in the end?

IMG_0978

These photos were snapped during a short getaway to the cabin. My husband proposed to me in this place and our wedding reception was held on the property. I always leave wishing we could spend just a little more time here. My clothes are a bit wrinkly because my son and I woke up and walked the property while watching the sunrise. By the time my husband was available to help take pictures, I’d spent half the day wearing this outfit. I’ll leave you with a blurry, but lovely self-timer photo snapped during our sunrise walk.

IMG_0942

Itch to Stitch Anza Jumpsuit

Last spring, I purchased a gorgeous Anna Maria fabric fully intending to make a jumpsuit. Life got busy and many of my sewing plans got pushed aside. By the time summer ended, I had given up on finding and making my perfect jumpsuit and used the fabric to make a pattern hack of another Itch to Stitch pattern. You can find that dress here. Luckily, Kennis of Itch to Stitch is not only a talented and detailed pattern designer, she is also some sort of mind-reading wizard who is releasing the perfect jumpsuit pattern just when I needed it. Today I’m thrilled to show you my tester version of the Anza Jumpsuit.

DSC_0323

I was browsing the selection of fabrics at my local fabric store Suppose when Kennis annouced a tester call for the Anza Jumpsuit and dress. I immediately put down the bolts I had been carrying around the store, borrowed a measuring tape, took my exact measurements, and filled out the application form. I purchased 4 yards (only ended up needing 3) of this Lizzy House Printmaking lawn and crossed my fingers that I’d be chosen. The next morning when I received an email inviting me to the tester group, I excitedly told my husband that I’d be making myself a literal birthday suit as a gift to myself (my birthday was coming up the following week). Sometimes, I think that I’m hilarious until I remember that not even my  3 year old laughs at my jokes.

DSC_0408

Let’s bring it back to talking about the jumpsuit and pretend like I didn’t just write several sentences detailing my own lame joke. Now we’re going to talk details and features. Itch to Stitch patterns often include well thought out details that add interest without stealing the show and overwhelming the wearer. The Anza pattern is no exception. It includes cuffed sleeves, pleated chest pockets, drawstring waistband, elastic at the ankles, and pants pockets. Basically, this is the jumpsuit I was preparing to draft for myself until I saw that Itch to Stitch had made a pattern even better than what I’d imagined in my own mind.

DSC_0393DSC_0409DSC_0388

Speaking of details, can we talk about these amazing Arrow Mountain buttons? These are the Minimalist buttons in Arctic Ice. I used the wooden version of the Minimalist buttons on maxi dress also made from Lizzy House lawn that you can find here. In fact, If you’d like to see more of the Arrow Mountain buttons in my handmades, check out my Itch to Stitch Bonn Shirt and Bonn Shirt Turned Maxi Dress posts found here and here. I’ve ordered from Arrow Mountain several times now and only found great quality and excellent customer service.

DSC_0340

A quick note on alterations:

This pattern is drafted for the height of 5’6″ and may some require some lengthening or shortening if you are not  5’6″. Since I am somewhere between 5’9″ and 5’10” I ended up adding 1.5″ to both the bodice and the rise.

One great thing about Itch to Stitch patterns is that Kennis includes pieces for cup sizes A-DD. This means less alteration time and more sewing time. Which is always a good thing. Let’s all make sure to applaud Kennis for taking the extra time and effort to make our lives easier.

DSC_0337

Overall, I am 100% satisified with my Anza Jumpsuit and cannot wait to wear it again and again all summer long. Now, go grab your copy here.

Farrah Top by Chalk and Notch

Today I’m looking forward to showing you my version of the newest release by Gabriela of  Chalk and Notch. The Farrah Pattern has top and dress options for two different views. I opted to make the top in View A. I sewed a straight size 4 with no alterations. This is an intermediate level pattern with sleeve ruffles, underarm gusset, and a mitered split hem. I was unsure about whether or not this style would suit me, but now I’m thrilled to say it’s my new favorite.

DSC_0276

Let’s talk fabric for a minute. I selected a cotton lawn by Carolyn Friedlander. I’ve been anxiously awaiting the release of these lawns since they were announced last fall. I bought it almost immediately once it Arrived at Suppose. Lawn has a lightweight, almost silky hand. It doesn’t have the same graceful drape as a rayon, but it is much easier to sew. Lawn presses beautifully and I love the way it exaggerates the ruffles in this design.

DSC_0291

DSC_0301

The fact that this top slips over the head and has no closures, doesn’t make it any less interesting. It’s a great skill builder with the ruffles, gusset, and mitered hem. My favorite is the mitered high-low hem. I’ve only sewn a mitered hem once before this top, but I love it. It makes the finish look and feel professional. Gabriela’s clear pictures and tutorials make trying new techniques less intimidating and more satisfactory.

DSC_0285

The pattern releases exclusively on UpCraft Club today and will be available through Chalk and Notch later this week. Be sure to check out the #farrahpattern on Instagram for more inspiration and to see more of the fantastic tester versions.

DSC_0289

Simplicity 8084: My Dream Maxi Dress

I’ve been meaning to restart my blog for a couple of years now, but kept finding excuses or other ways to fill my time. After a summer filled with fun and inspiration, I’ve decided to quit making excuses and start blogging again. I’ve got some fun posts planned and cannot wait to share them with you. Today I’m sharing my Simplicity 8084 maxi dress.

IMG_6737
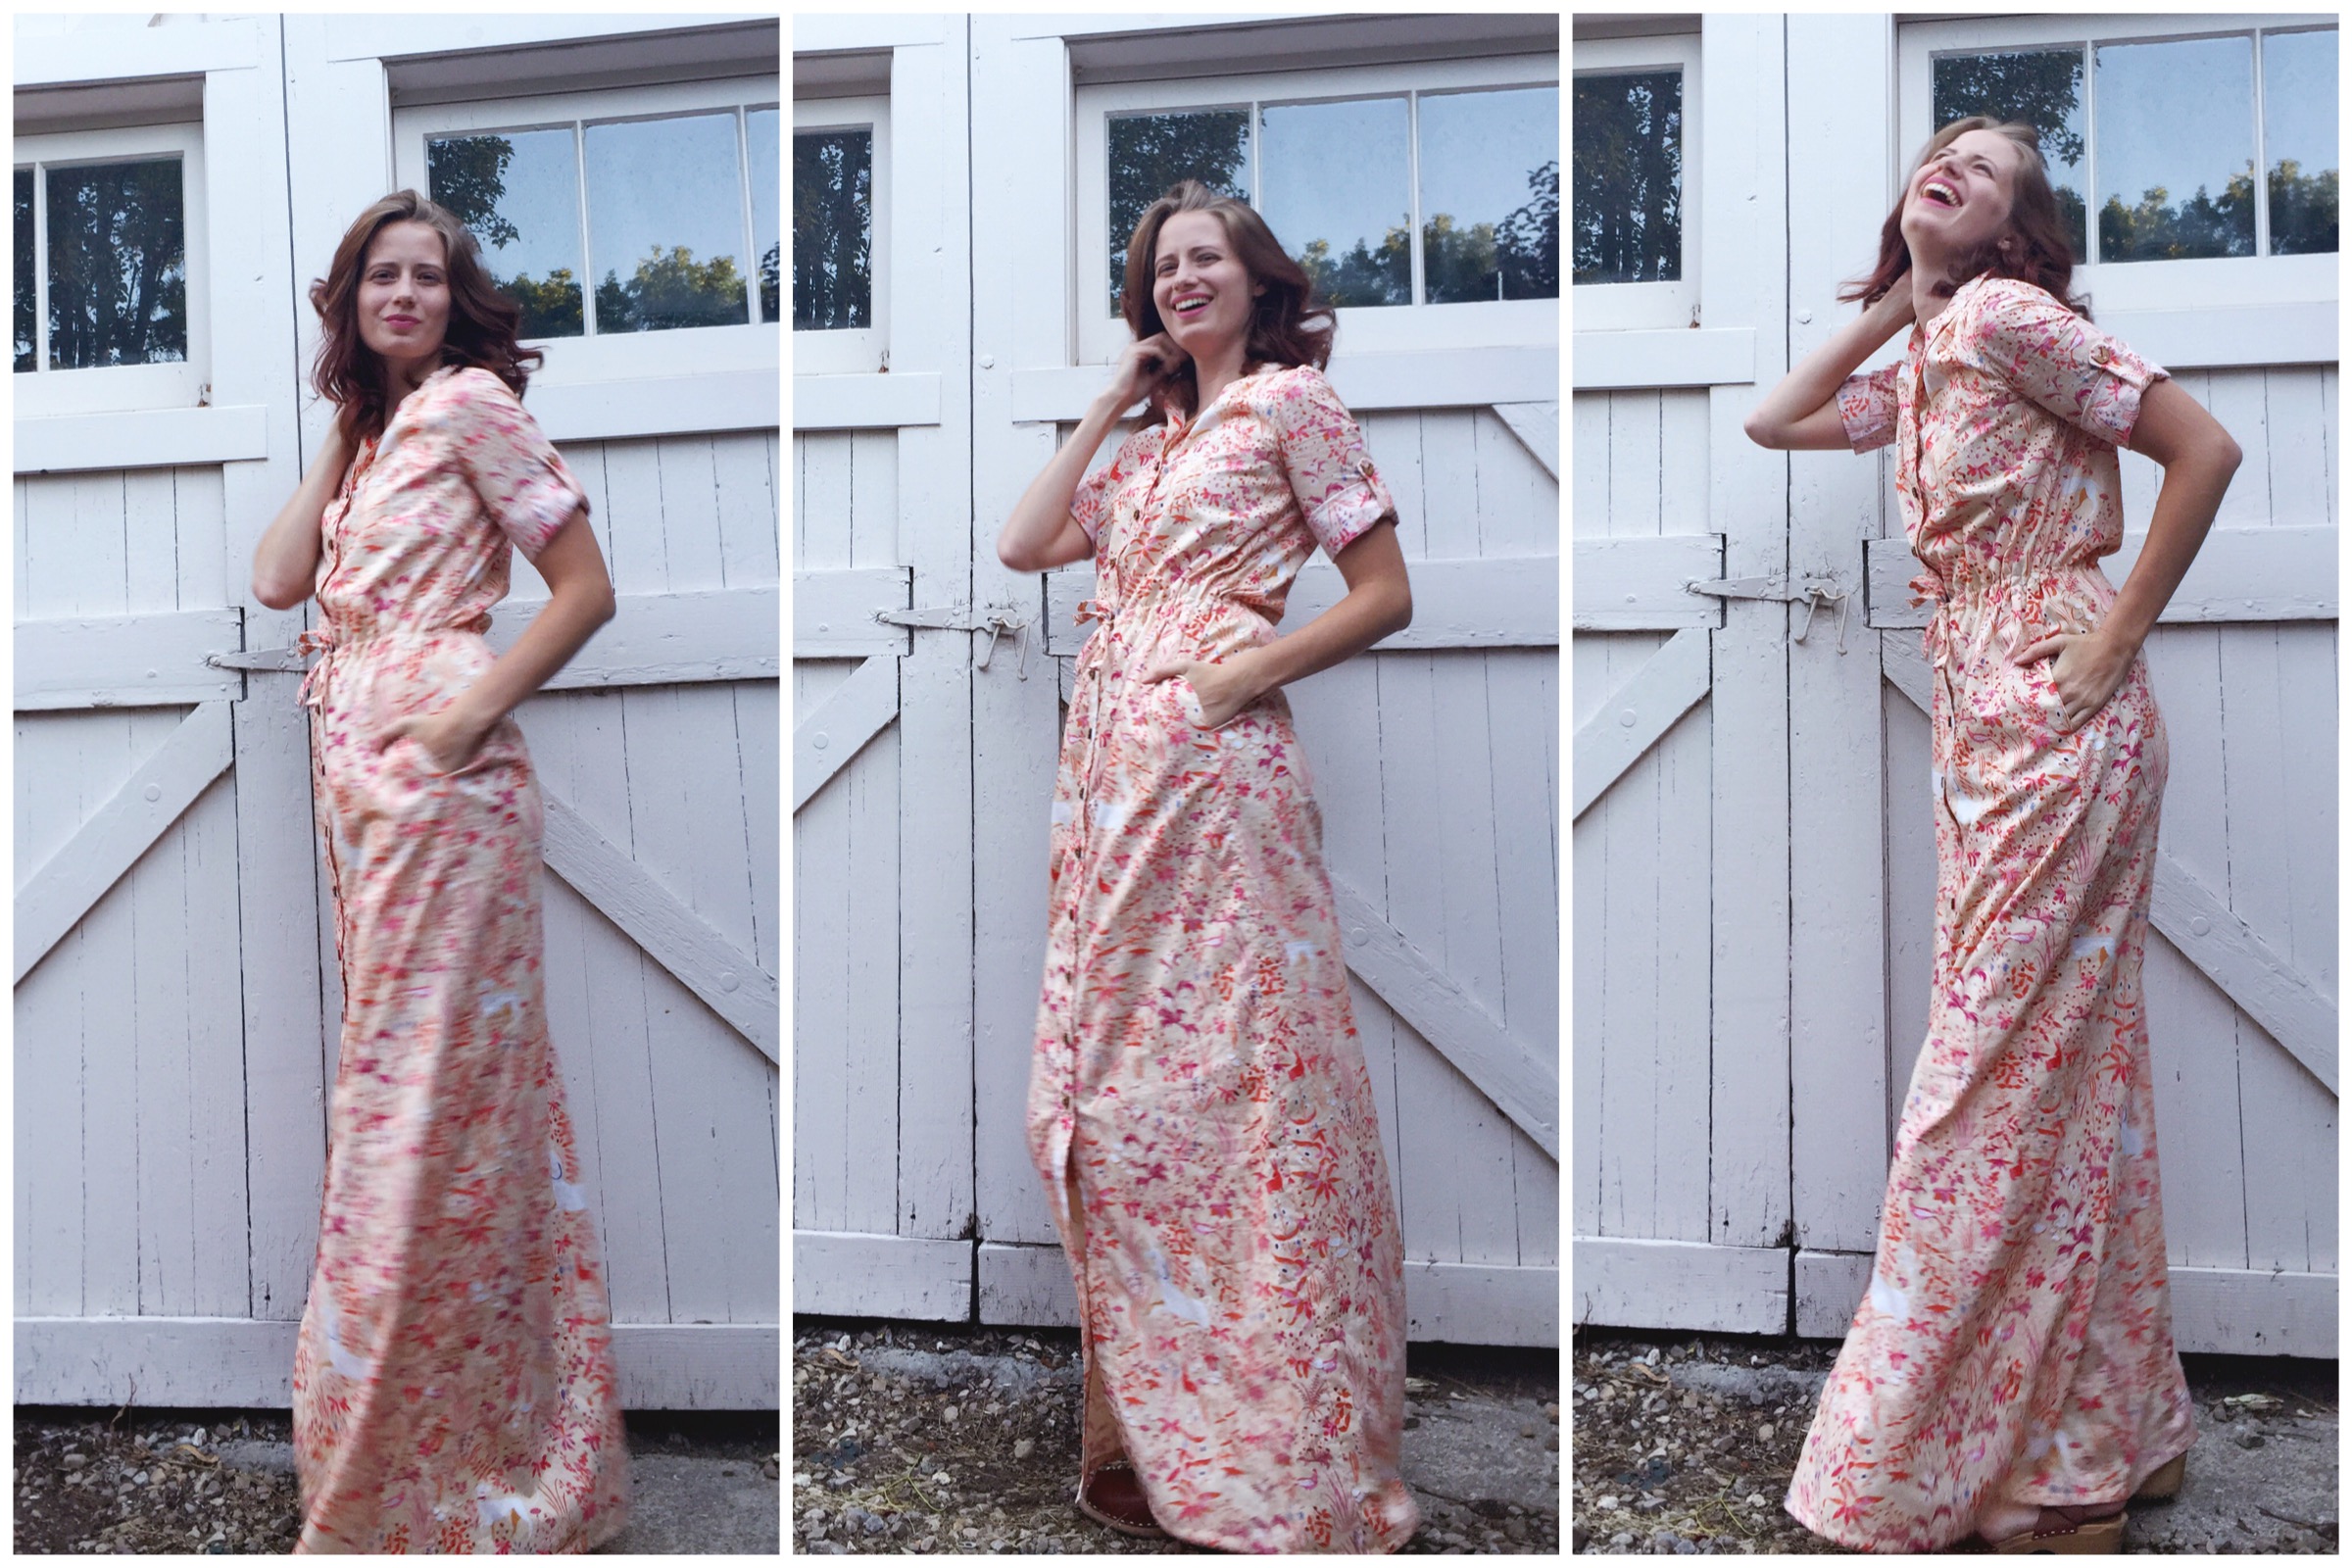
The photos above were taken using my self-timer so they’re a little blurry, but I love the way they show the movement of this dress.

I worked on this dress a little bit each month this summer and finishing it was the perfect way to celebrate a fantastic season. I selected this Lizzy House lawn from Suppose back in May and couldn’t wait to use it. Life got in the way so cutting the fabric wasn’t started until June. I sewed a step here and there throughout July, but really got to work in August when my wooden buttons arrived from Arrow Mountain.

image
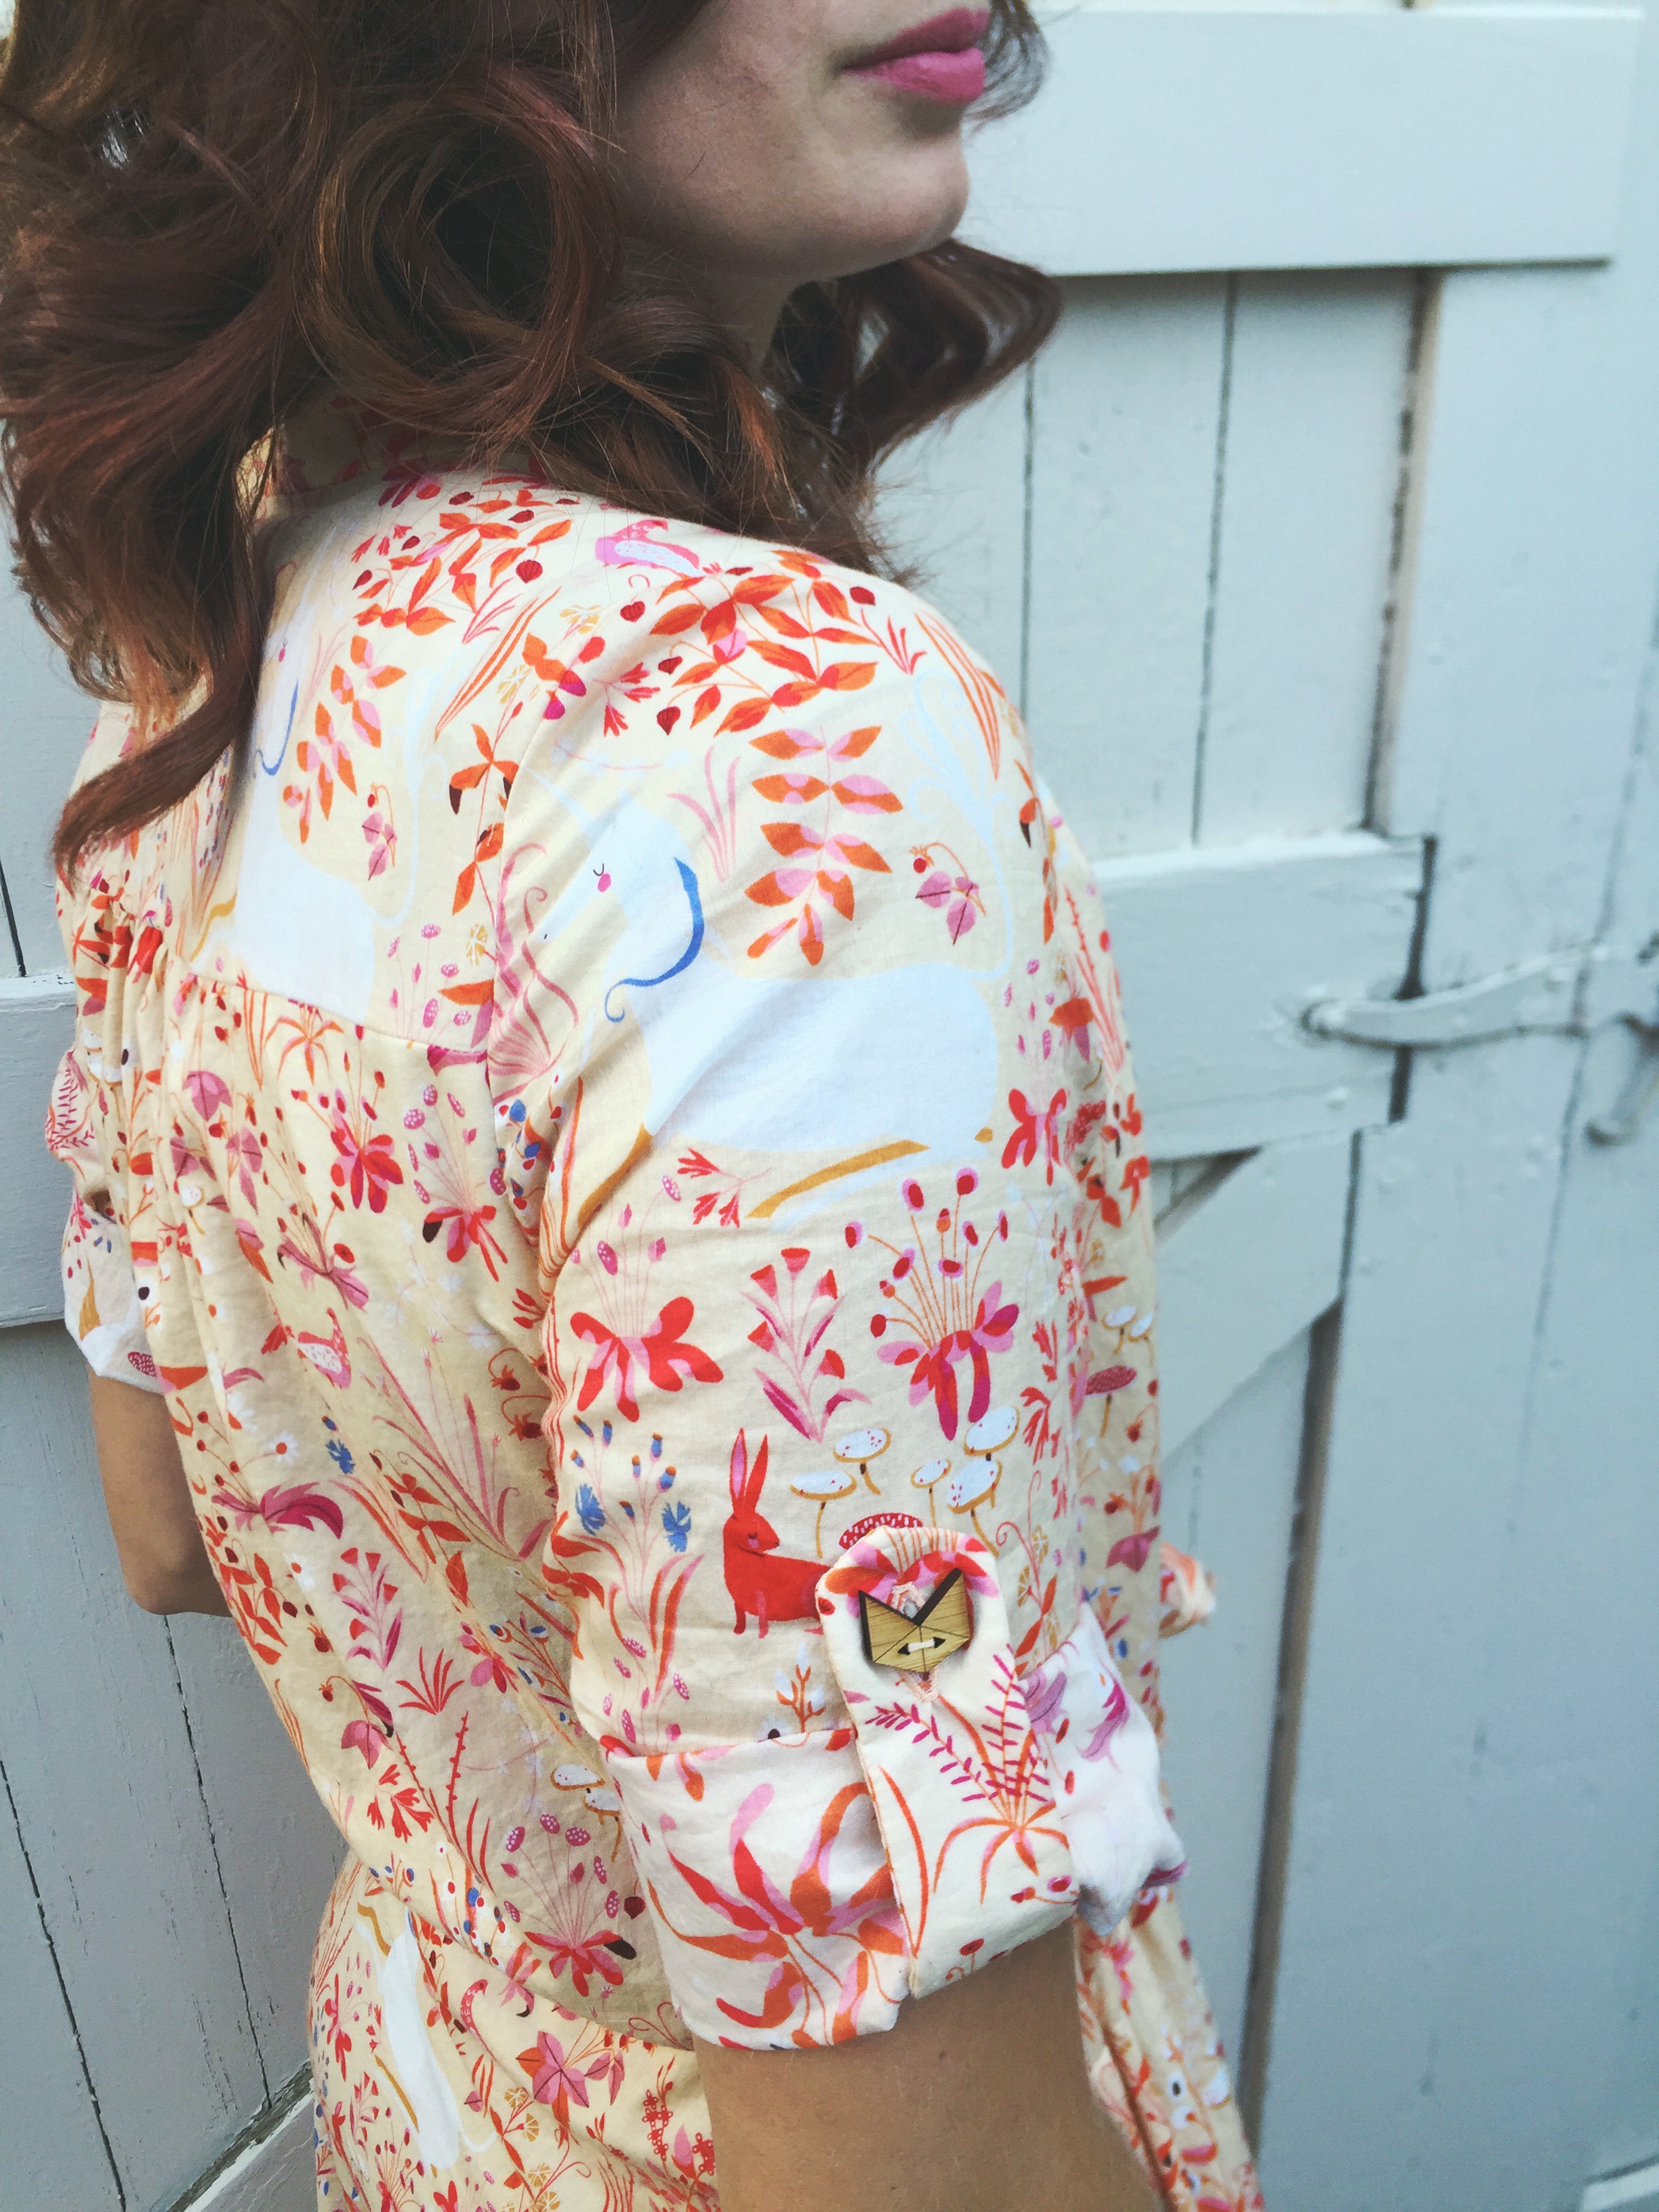
Here is a close-up view of the fox buttons I added to the sleeve tabs. The front of the dress uses the minimalist buttons also from Arrow Mountain.

My biggest challenge with the dress was sewing the waistline casing. When looking through all my handmade clothing, I was surprised to realize that I had never actually sewn a garment with a casing like the one in this dress. It really wasn’t too difficult, I was just too lazy to mark the waistline when I first sewed the casing. This resulted in a late-night Netflix binge while seam ripping my first attempt. On my second attempt I made sure to mark the waistline and sewing the casing was a breeze.

I’ve now worn this dress three times since finishing it in early August. The pockets have made it more functional and wearable than any other maxi dress I have owned.They’re just the right size for my phone and keys so I don’t have to carry a bag every time I leave the house.

image1 (2)image

I look forward to wearing this dress again and again. It will be a great transitional dress for fall and it’s sure to get a lot of wear. I’d love to hear about your favorite summer project. Did you make anything you absolutely adore this summer?