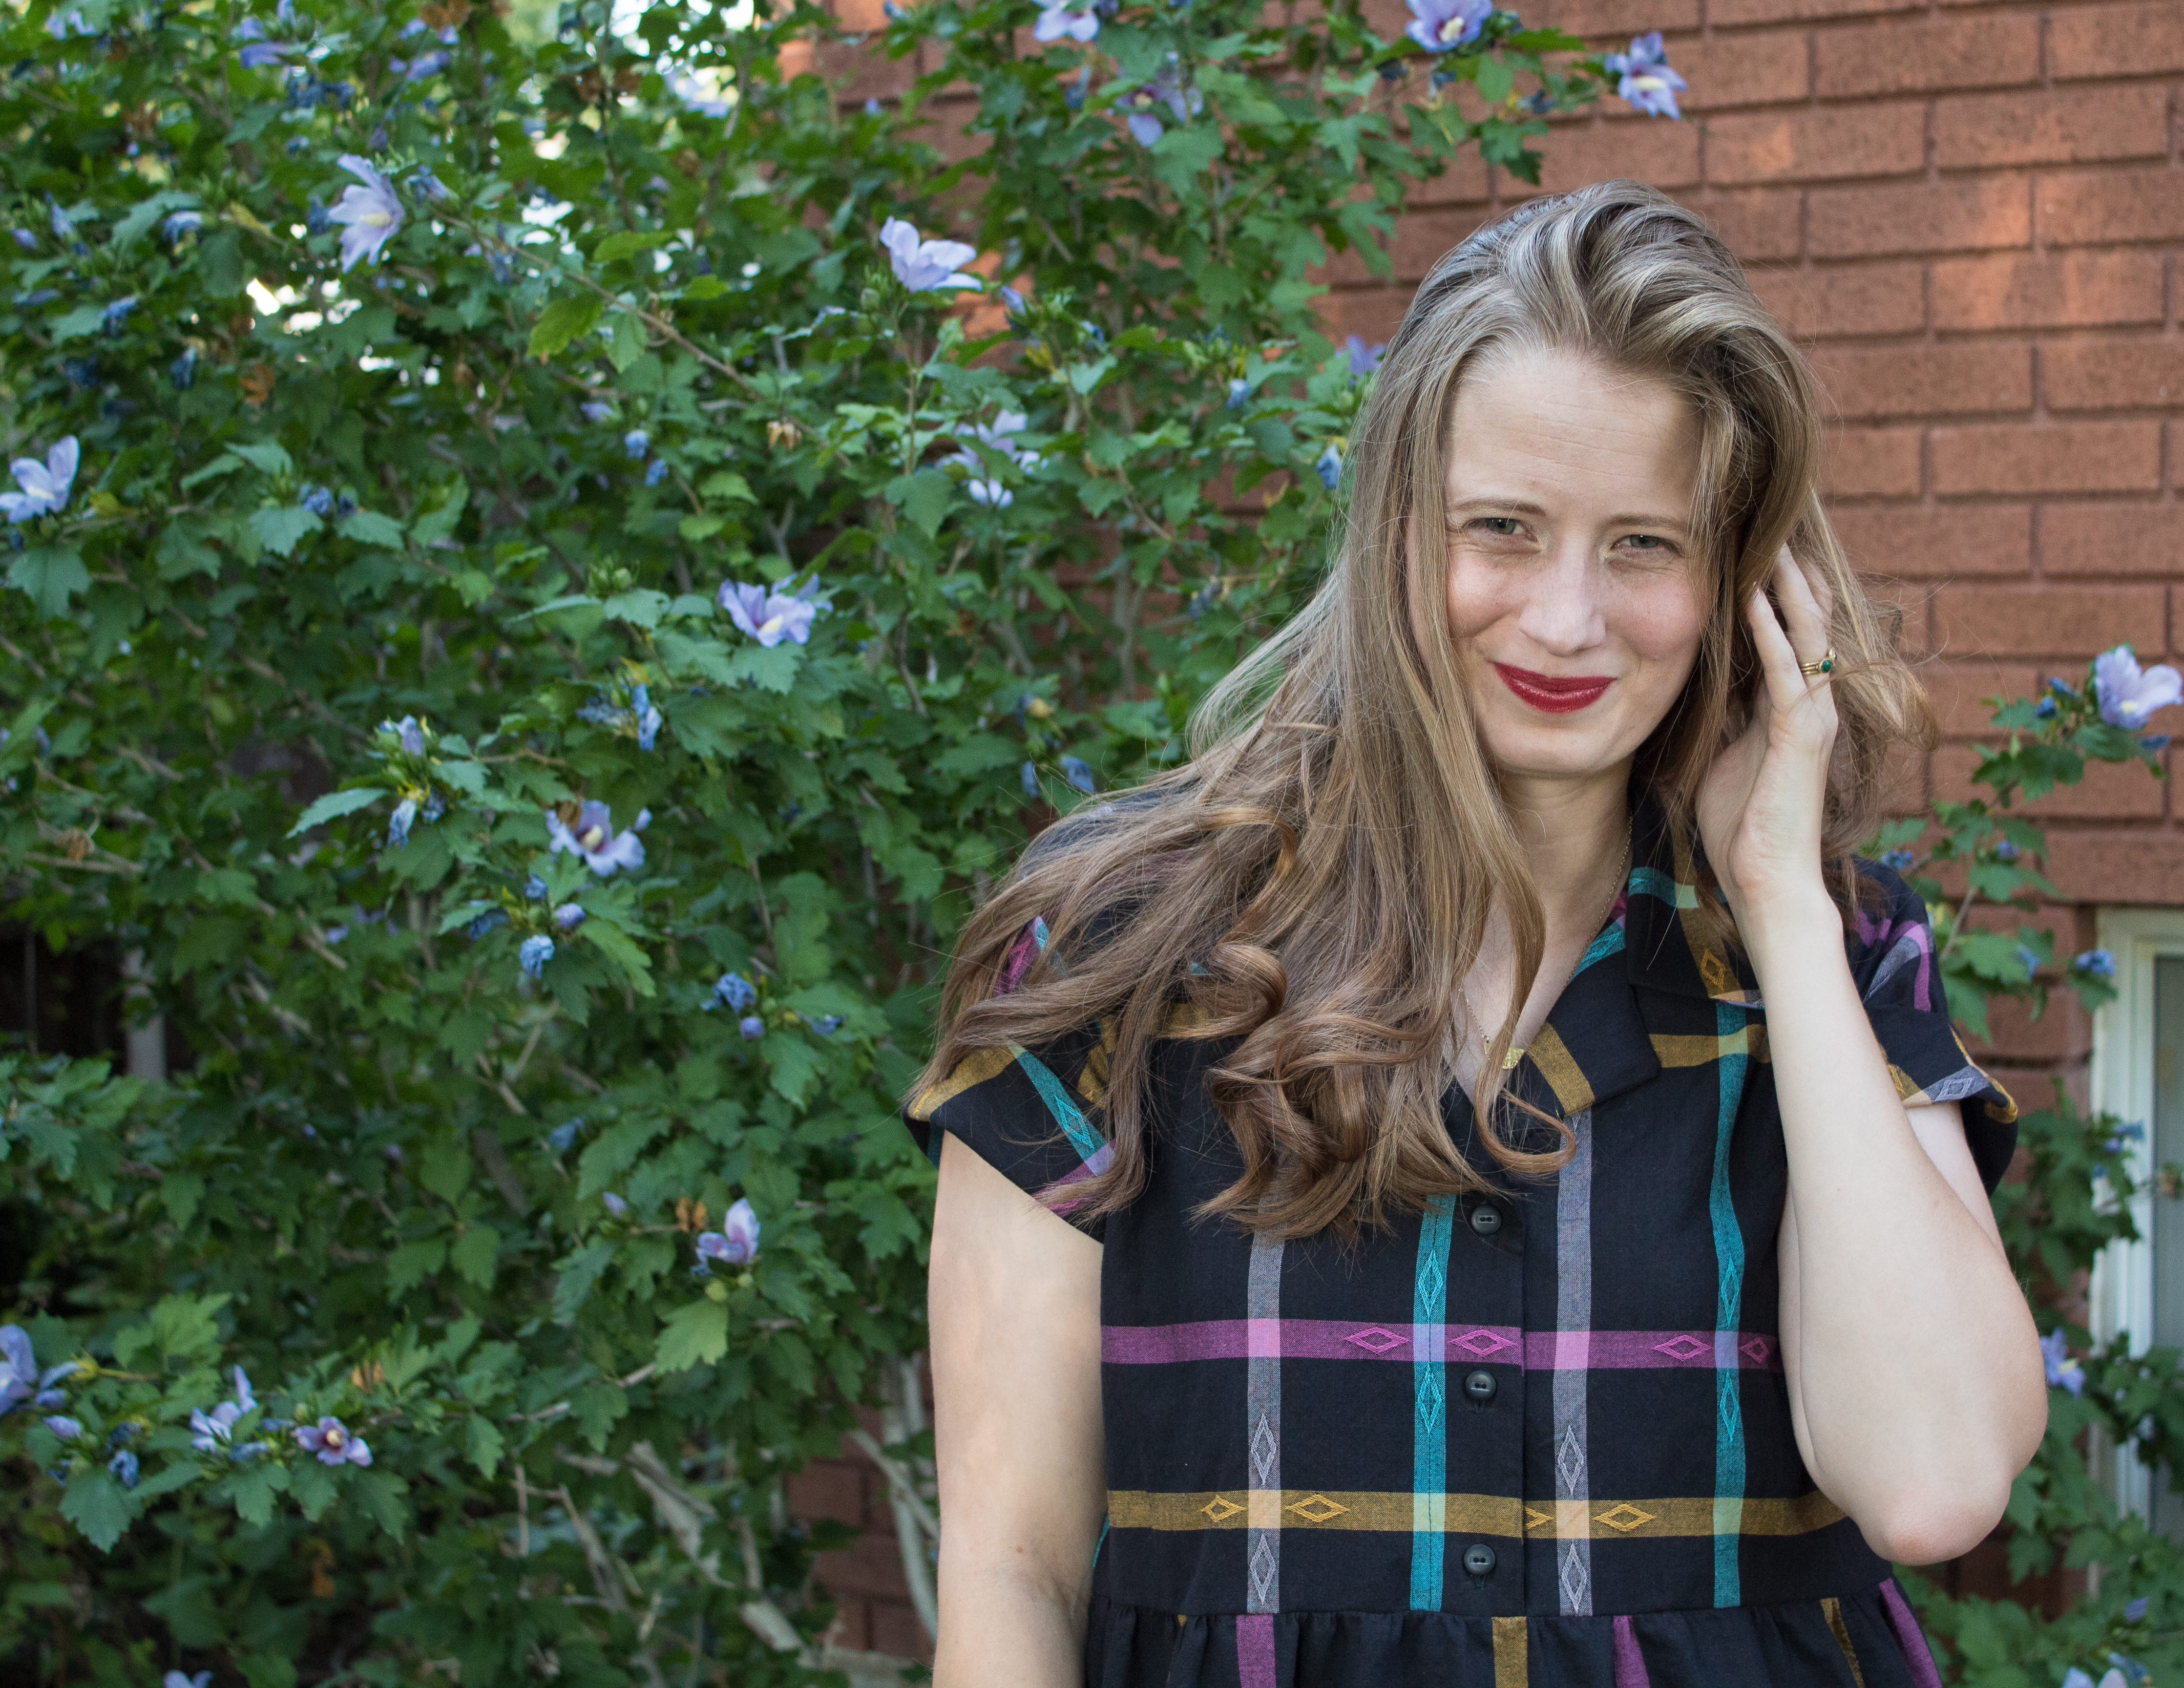
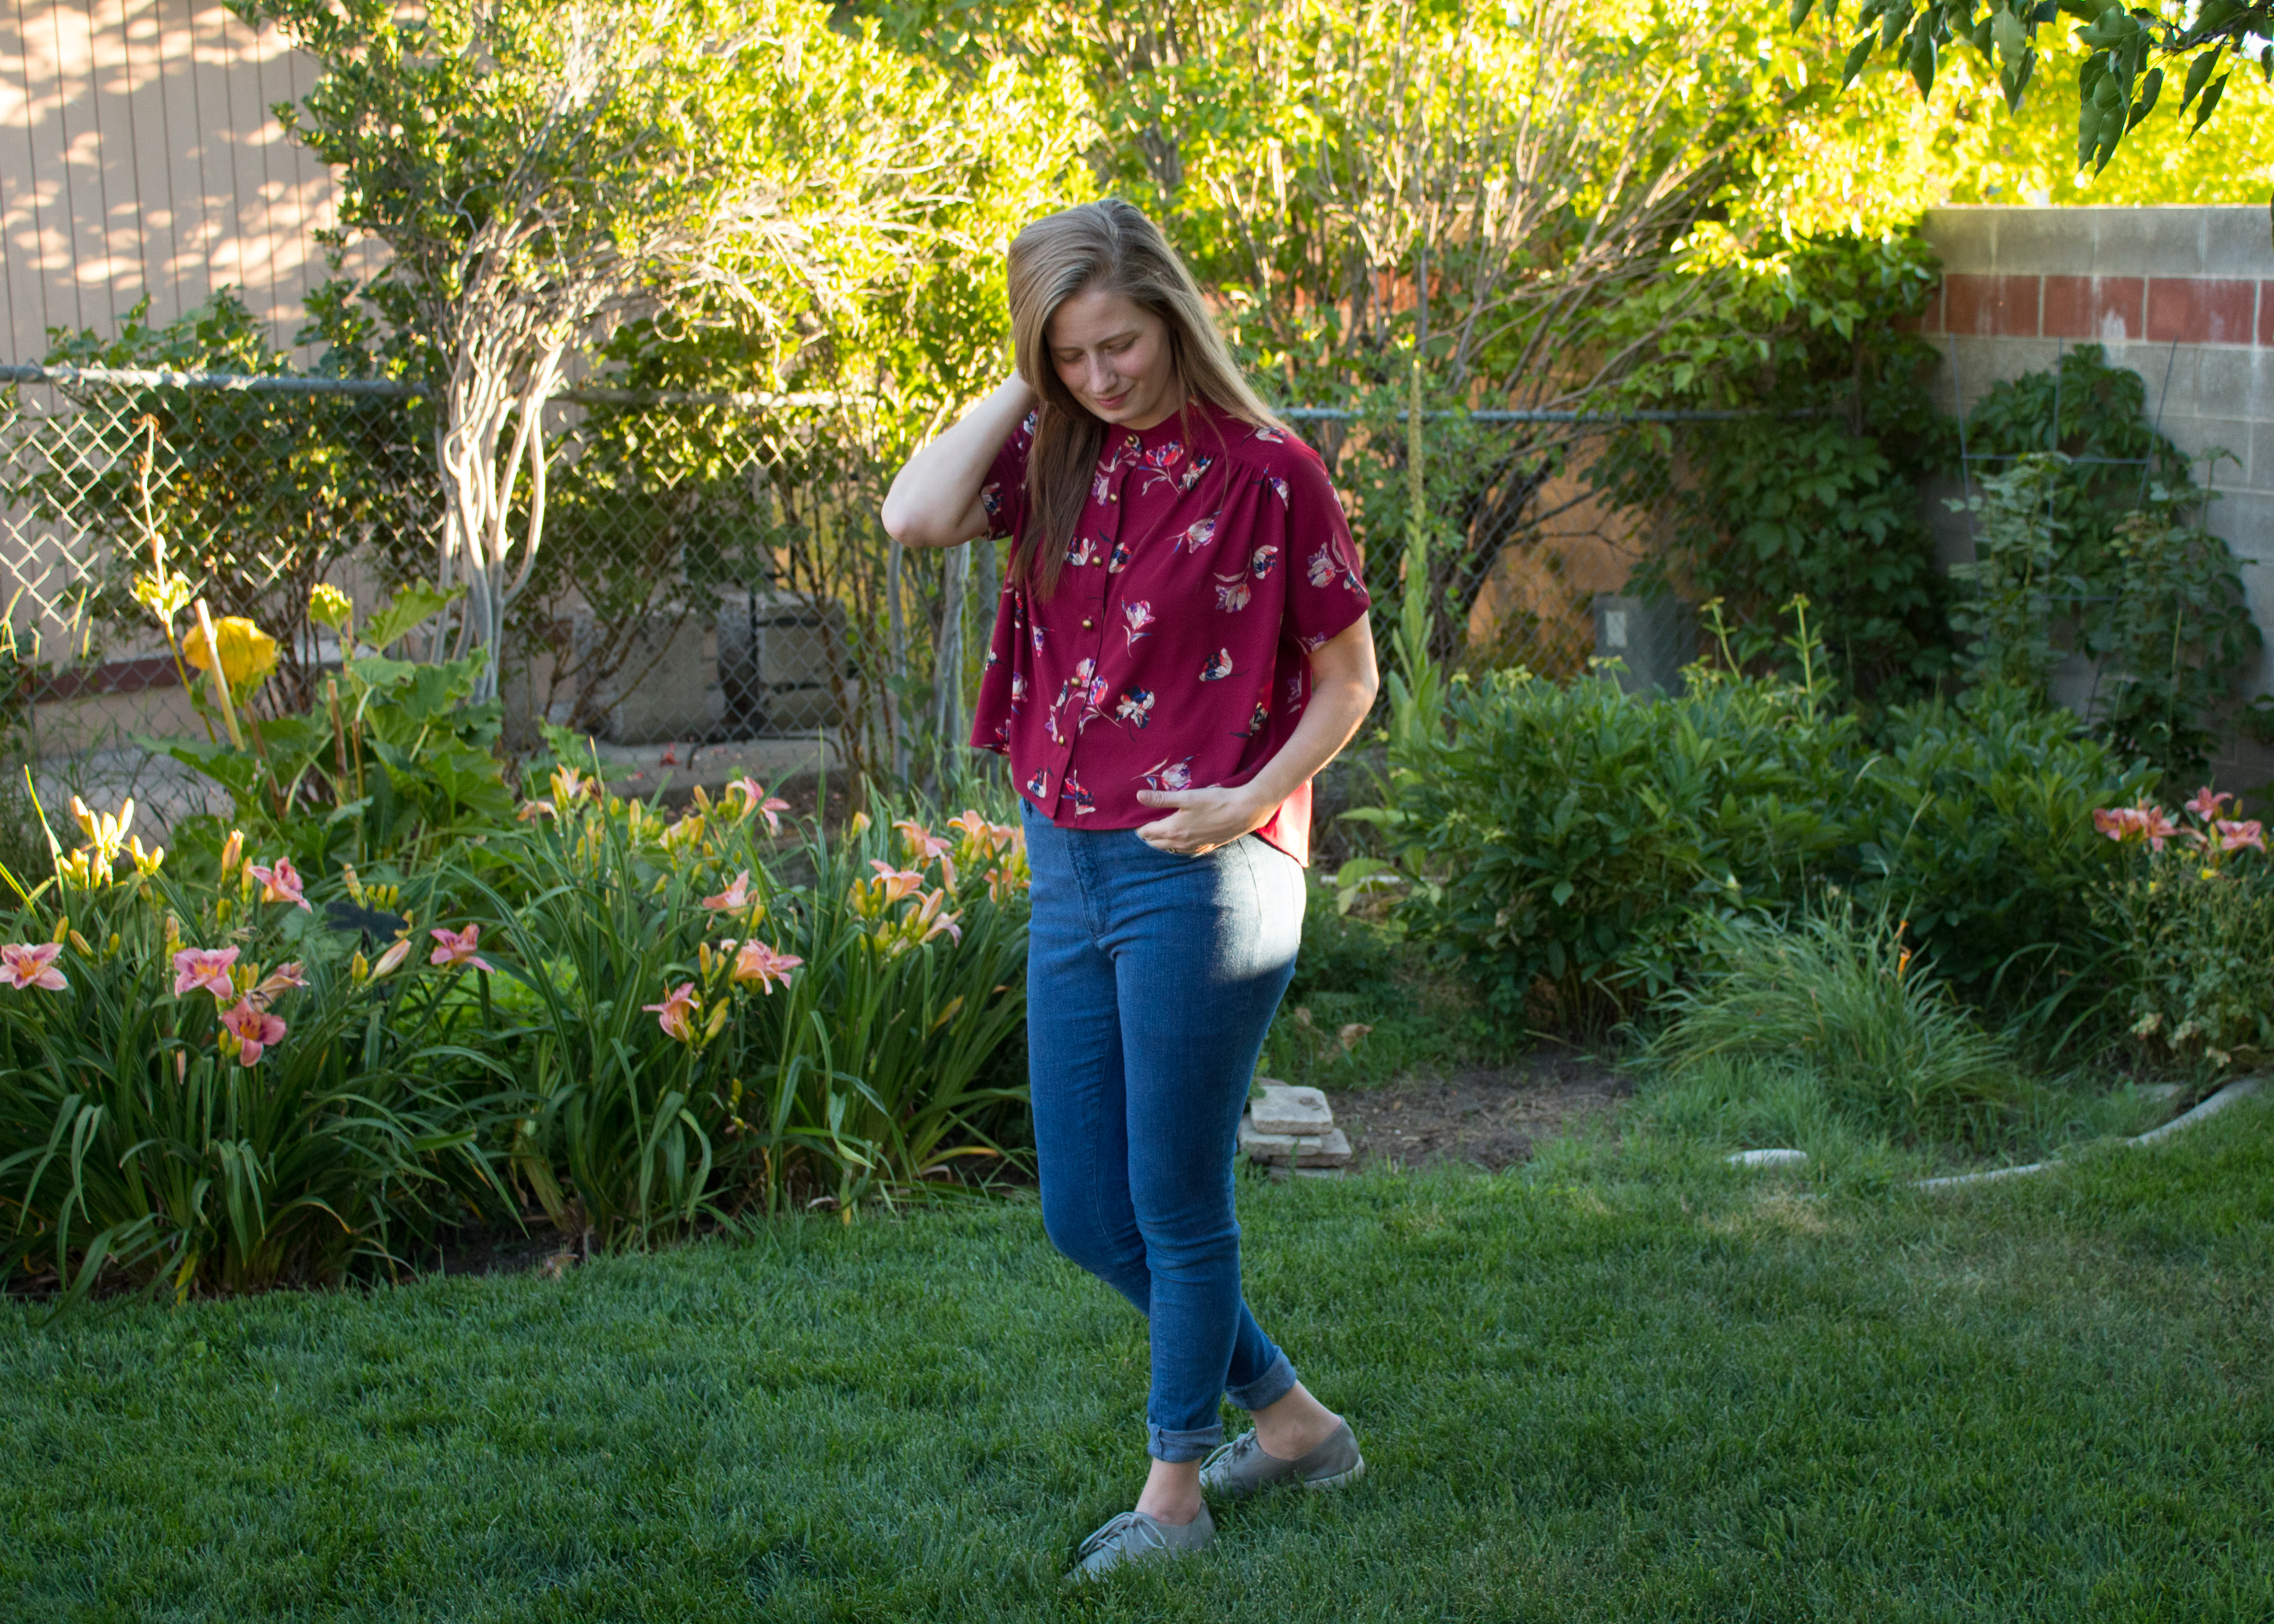
Orchid X Parasol Jumpsuit Collaboration by Chalk and Notch and Ensemble Patterns

Happy Wednesday! This Wednesday is an especially good one because I get to share my latest jumpsuit with you. Last month, Gabriela of Chalk and Notch invited me to be a tester for this  Orchid Midi and Parasol Jumpsuit collaboration with Celina of Ensemble Patterns. When I found out this collaboration included a jumpsuit, my answer was an emphatic “Yes!” I can’t put into words, why I feel so strongly about jumpsuits except to say that they make me feel like my best and most true self. Couple that with the fact that I never regret sewing up one of Gabriela’s designs, and testing this jumpsuit was a no-brainer.

First, let’s chat fabric choice. I currently have three other jumpsuits in my wardrobe, all of which are quite bold in color and/or pattern. This time, I opted to make a simple black jumpsuit. With the holiday season around the corner, I wanted something both elegant and fun for parties or date nights. The fabric is a linen/rayon blend purchased from JOANN. I can’t seem to find the exact fabric online, but it does seem to be available in most of their brick and mortar locations. It has just enough weight to be opaque, more drape than a 100% linen, and the light, soft feel of linen. I’ve been hoarding several yards of it since spring when I was able to purchase it for $7/yd. It’s become a favorite for making wearable muslins and finished products alike. 

Now that I’ve raved about fabric, let’s move on to talking about this dreamy mash-up. This collaboration includes 3 bodice options, 3 pant length options, and 1 skirt option. I opted for the long sleeved Orchid bodice paired with the Parasol long pants option. I also chose to add belt loops and the waist tie.

The way the bodice pieces are gathered and attached to the front and back yokes is one of my favorite features. It’s a simple, feminine detail that feels just right. You may have noticed that I’ve been having moment with wide-leg pants and the pants on this jumpsuit fit in nicely with my latest makes. The final feature that sold me on this pattern is the roomy pockets. Nothing ruins my day faster than putting on a one-piece outfit and realizing it has no pockets. Ok, so maybe it doesn’t ruin my day, but I don’t like it either. 

The wrap front makes adding a closure unnecessary; which makes for a delightfully quick sew. It can, however cause a bit of difficulty when getting undressed. After a couple years of jumpsuit wearing, I’ve come to the conclusion that a well-fitting jumpsuit simply takes a bit of practice to get on and off. Over the years, I’ve developed a technique I like to call the “Jumpsuit Shimmy.” First, you will have a side of the jumpsuit that seems easier to get on or off. Usually this is the side that wraps over the top. On my jumpsuit, this is my right side. I drop my right shoulder, and using my left hand, gently tug on the sleeve until it is off my shoulder. I then remove my right arm from the sleeve. Dropping your left shoulder, and using your right hand, repeat for your left side. Once you’ve freed your arms, I’ll let you figure out the rest. Now you know the “Jumpsuit Shimmy.” We can all try the dance (while keeping our jumpsuits on) with a virtual Instagram dance party celebrating the release of this collaboration. Just post a video on your grid or stories and tag me @nf_merritts on IG and #thejumpsuitshimmy . There are no prizes in it for you or me, but a 100% guarantee of fun and laughter. Join me? 

Whenever I wear a jumpsuit, someone will ask the inevitable question: “What do you do when you have to visit the bathroom?” Ladies and jumpsuit-loving gentlemen, I am here to tell you that the bathroom conundrum really isn’t as much of an issue as you might think. Sure, having your top half uncovered while using the restroom may not be ideal, but it’s literally 1 minute of your day. Are you willing to give up the joy of jumpsuits for a few minutes of awkwardness ( in which nobody else will actually care or notice because you’re by yourself in a stall)? I say, “No!” Honestly, does anyone truly feel comfortable in a bathroom stall any way? Jumpsuit or no jumpsuit? I’ll step off my soapbox here. I’m just really passionate about jumpsuits, ok? 

I’m now realizing that I’ve rambled on and on without notes on sizing. I’ll leave you with a few notes. My measurements put me in a 4 at the chest and a 10 at the hips. In order to make this jumpsuit work, I started with a 4 at the shoulders and bust then graded the bodice to a 10 at the waist. I then cut a straight 10 for the pants. I added 1″ in length to the bodice, 1/2″ to the rise on the pants, 1″ to the sleeve length, and 3″ to the pant length. These alterations are all standard for me, and I found the original drafting consistent with the size chart. 

If you’ve made it all the way to the end here, I’d just like to say, “Thank you!” My feelings about jumpsuits can be intense and I truly applaud you for reading all the way to the end. 

Special thanks to my Instagram (and real life) husband, Marshall for taking these photos. He’s been stepping up his photo taking skills over the last year and it’s been a lot of fun learning this photography thing together. 

Itch To Stitch Blog Tour: Mila Shirt

Happy Tuesday all! It’s been a while since I sewed something that wasn’t a cropped top or wide-leg pants. Today I’m mixing it up as part of the Itch to Stitch Blog Tour. This blog tour is one of the largest of which I’ve been a part. There are several talented bloggers and generous sponsors participating. Be sure to read all the way to the bottom for info on winning one of the amazing prizes. Kennis of Itch to Stitch has an impressive pattern library so narrowing down an idea took me a bit of time. Eventually I settled on the idea of sewing a Mila Shirt as I thought it would be a great transitional piece as the weather changes from blazing heat to cooler fall weather.  Bonus: Kennis has agreed to put the pattern on a special sale just for the tour.  Today only snag it for just $9.

One of our wonderful sponsors Tammy of  D+H Fabrics Co was kind enough to send me this beautiful rayon designed by See You at Six fabrics. She had this fabric imported from Belgium in order to carry it in her shop. In my opinion it was 100% worth it because this stuff is glorious. I cut this project out at a sewing night last week and nearly everyone there was “oohing” and “ahhing” over it. It’s that good.

The colors in this fabric will fit into my wardrobe year-round while the print is busy enough to hide any minor construction flaws and food stains. In fact, immediately before these photos were taken, my son tripped and fell on the cement. He was fine, but a little shaken up. Naturally, however, he wiped his tears and snot directly on my shirt. You’d never know it though, because this print hides it all. Moral of the story: if you have children, work with children, or are just a messy eater (also me) you need this print in your wardrobe.

Now that I’ve given you the low down on this fabric; let’s talk about this pattern and the modifications I made to the Mila in order to better fit my style. I have this quirk about long-sleeved woven tops like the Mila. I just don’t really like them unless they’re made in flannel. I find that fabrics like rayon challis don’t actually provide much warmth when layering and I’d rather just have short sleeves so they can be worn year-round. I also like that there won’t be added bulk when I choose to wear a cardigan over this shirt. In order to achieve this, I made an extremely simple modification. The sleeves are cut 2 inches above the sleeve lengthen/shorten line. I sewed a 1″ hem and then rolled it twice for the cuffed look. Simple, right? This change made the Mila shoot to the top of my favorite patterns pretty quickly. 

I did make one other straightforward modification to my Mila. Since the print on this fabric is rather busy, I knew the back pleat detail wouldn’t be noticeable and decided to do away with it. Instead, I gathered the back to fit the yoke and the result is simple and fuss-free. Just the way I like it. 

Let’s talk sizing: One reason I love sewing Itch to Stitch patterns is that the sizing always seems to be spot on. I also love that Kennis provides separate cup sizes. As someone who should probably be making a small bust adjustment on clothing (I never do), I appreciate that the work is basically done for me here. For this top I sewed a size 4 with the A cup. I graded to an 8 at the hips, but probably could’ve gotten away with just grading to a 6. Since I am  5’10” I also added 1″ to the length of this shirt.

On to the construction. About 70% of the sewing process went nice and smooth. The other 30% was a different story.  I had a sick child while sewing this so I was sleep deprived which likely contributed to my mistakes. My missteps while sewing all revolved around the placket. Itch to Stitch patterns always have great detailed instructions which are extremely helpful if you actually read them. My first mistake was simply glancing at the diagram and sewing without reading. I sewed the placket to the right side of the fabric instead of the wrong side and had cut the placket opening before realizing my faux pas. Thanks to fray check and a steady hand with the seam ripper, I was able to remedy my mistake without too much time or effort lost. 

One thing I must admit is that it almost felt weird sewing something tunic length after going through a cropped shirt phase. I almost didn’t know how to style this top, but decided to keep it simple and pair it with these Ginger Jeans. Once cooler weather hits I can see this top easily paired with leggings and a cozy cardigan or Wiksten Kimono. In spring and summer, it would be equally lovely tucked into a skirt. I’m thinking a black Lawley Skirt? Overall, I’m giddy about this make. I think it will make a great transition piece and I’m obsessed with this fabric. Now my question is how much of this fabric is too much? I just might need more of it. 

Thanks for reading all about my Mila. Are you ready for some more Itch to Stitch inspiration? Read below and follow the links to check out all of this week’s bloggers. 

September 17th 
September 18th 
September 19th 
September 20th 
September 21st 
 

Need some fabric inspiration? Be sure to check out all of our sponsors and follow the Rafflecopter instructions below if you’d like to enter to win a prize package.

Itch to Stitch: 2 PDF patterns of choice
Simply By Ti: Prize of $20 GC
So Sew English Fabrics: Prize of $30 GC
Mabel Madison Modern Makers: Prize of 3 yard coordinated bundle
Sly Fox Fabrics: $25GC
Raspberry Creek Fabrics: $50 GC
Surge Fabric Shop: $20 GC
Organic Cotton Plus: $25 GC
WarmCrochet: Pair of scissors

a Rafflecopter giveaway

Burnside Bibs and My Dream 1970’s Style Outfit

Hello All! Earlier this summer, I moved into a home built in the 1970’s and apparently decided to lean alllll the way in. Kidding, my home was built in the 1970’s but besides a hint of the original wallpaper inside a bathroom cabinet and the original kitchen cabinets, it’s not all that groovy. Honestly though, while I have no desire to have lived in the 1970’s, I have always been a fan of the style. Bold patterns, an array of color, and women wearing pants. What’s not to love? Except maybe an abundance of polyester, of course. 

Last Summer, I purchased the Sew House Seven Burnside Bibs pattern and found this mystery blend striped knit in a local store for $3/yd. I just didn’t quite know that they were destined to form my dream outfit. The color combination in the knit reminded me of a shirt owned by my mom and made me so happy that I couldn’t leave the store without it. I knew that I wanted to sew up a tee with it, but loved it so much that I was afraid to cut into it. That is, until I came upon the FREE Carine Tee pattern by Elbe Textiles. This fabric and pattern are a match made in apparel sewing heaven

The fabric for my Burnside Bibs is this Lyocell denim purchased from Joann. I bought it on impulse last spring when denim fabrics were on sale for $7.99. To be frank, I had a little bit of trouble working with this fabric. It was likely user error, but this fabric did not want to behave. It was a little shifty and the end result is that one of my front pockets is slightly lower than the other. I didn’t notice my mistake until the last step of sewing and decided that fixing it wasn’t worth having to rip everything apart. This mistake is difficult to notice unless you’re looking for it and hasn’t kept me from loving or wearing them. 


The back of these bibs are a favorite detail. I love the gathered, but not too bunched look created by this version. I opted to make version #1 because I felt it would be the most flattering for my shape. I’m pear-shaped and didn’t want to add too much extra bulk around the waist or hip area. 

Since finishing my bibs almost a month ago, I’ve worn them a few times and added them to my list of secret pajamas. The lyocell fabric is soft and lightweight while the bibs are fitted enough to look stylish and loose enough for ultimate comfort. Wearing clothes that are secret pajamas feels somewhat like wearing cute, matching underwear. People know you’re wearing clothes, but nobody is privy to the fact that you could just as easily be wearing this outfit lounging in bed or cuddled on the couch. It’s a gooooood feeling. 

My only regret is that I didn’t make these when I first bought the pattern in the summer of 2017. Now, if you’ll excuse me, I have to practice my lines as I audition to be an extra on the Brady Bunch. Ok, I’m really just scheming up a second more winter friendly pair of Burnside Bibs. 

I’ll leave you with a quick note on sizing. My waist and hip measurements put me right at a 10 with my bust measurement right around a 4. Since these are bibs, I decided not to bother with grading between sizes and just cut a straight size 10. I did end up adding 1/2″ to the length on the bib, 1/2″ to the rise, and 1.5″ to the  leg length. That’s it. Easy alterations and a great pattern. Have you tried the Burnside bibs yet? If not, what are you waiting for?

Want more overall sewing inspiration? Check out my Named Ronja Dungarees. Can’t get enough Sew House Seven Patterns? Check out my Tea House Dress or Toaster Sweater. Do you love 70’s style too? Look up my denim Lander Pants.

Marcella Romano Blog Tour: Persephone Pants or Technicolor “Kamm Pants”

Hello! Today I’m thrilled to be part of the Marcella Romano blog tour and am sharing my technicolor dream pants. A couple of months ago I  was introduced to Marcella Romano fabrics (check out their beautiful selection here)  and had a chance to peruse their website. Upon seeing this striped fabric, I knew it was destined for something fantastic. I spent a few days pondering on several patterns before settling on the Anna Allen Persephone Pants ( I purchased my pattern through Indiesew). They have just enough detail to look thoughtful and well-designed while allowing the fabric to shine. This fabric wants and deserves to steal the show.

Can we talk about this fabric? The bold design and bright colors were what initially attracted me until it arrived. Once it arrived, I found out that it had even more to offer than beautiful color. The fabric content is 88% cotton, 7% polyester and 5% Lycra. I would classify it as a mid-weight fabric which makes it perfect for pants, jackets, and structured skirts or dresses. The Lycra content gives the fabric just a bit of stretch (I’d estimate around 15%). It’s just enough stretch give the pants comfort while maintaining a structured fit. The weight and fabric content make working with this fabric a breeze. As someone who started out quilting, I will always have a soft spot for the way cotton presses. It’s a freaking dream. Maybe I just feel this way because my last few projects used more difficult fabrics but; pressing this was a breath of fresh air. Now that I’ve sung the praises of this textile, let’s move on to how it became this striking pair of pants.
I mentioned earlier that I chose the Persephone Pants pattern because it would allow the fabric to claim the spotlight. A majority of the Persephone Pants I’ve seen have been made in solid colors. The solid colored versions are minimalist, modern and universally flattering (which I love even though I rarely dress this way). I love all the solid colored versions so much that I made a pair as a wearable muslin prior to sewing this pair. The same details that are well highlighted in a solid colored pair can also nicely blend into the background making this pattern the perfect choice for both options.

Let’s discuss the ace details that work equally well with solid and printed fabrics.

  • No side seams:  Perfect for bold printed fabrics because there are less seams to break it up.
  • Front waist pockets: The pocket placement makes them nearly invisible in this pair and removes the necessity for pattern matching printed fabrics. Honestly, I almost omitted them in this pair, but I’m glad I didn’t. I always regret not having pockets when I need a place for my phone or id.
  • No back pockets: Back pockets are great and usually I’d advocate for them. In this instance, however, I love the simplicity of the back pant with darts being the only detail.
  • Concealed Button Fly: I opted to not use this detail and insert a fly zip instead. As recommended by Allie of Indiesew (in this post) I used the True Bias Lander Pant zipper expansion pattern pieces and instructions as a guide.

I wanted to get the fit on these pants just right so I actually made a muslin before cutting into the good stuff. I  almost NEVER do this (maybe once a year), but since this fabric deserved greatness, I made the sacrifice. Both my waist and hip measurements fall right in between a 10 and 12 on the Persephone Pants sizing chart. Since this fabric has a bit of stretch I decided to start with a size 10 and fit from there.  First, I made two alterations that I make to nearly every pair of pants and those were to add 1/2″ to the crotch length and 2″ to the leg length.

The initial fitting actually wasn’t awful. They fit me about how any high waisted style in ready to wear would fit. The waist was spot on with a small amount of extra fabric in the thighs and below my rear.  My first alteration after fitting was to remove an extra 1/4″ from the inseam. I did this simply by taking a larger seam allowance. This fixed my issue of width in the thighs, but I still had a bit of extra fabric below the rear. To correct this I did basically the same alteration mentioned above and took an extra 1/4″ into the seam allowance in the back crotch seam. I did not take any width out of the front crotch seam.

After these alterations, I noticed some small wrinkles below the darts between the top of my buttocks and my waist. They were minimal and I probably could have left them, but I decided to give fixing them a try. This was possibly the easiest fix yet as I simply redrew  and stitched the darts to extend them down 1/2″.

Overall, I was surprised with how easy it was to fit these pants. Pants can be a real pain in the rear (pun intended) to fit since there are a myriad of shapes and curves to fit on the lower body. I feel like I’ve hit the jackpot as Anna Allen’s drafting block seems to be the closest to my specific shape that I’ve found. I’ll certainly be looking out for future pant patterns from her.

I’ve given you all the details, so let’s get to the fun stuff: feelings. One may ask: How do you really feel about these pants? The subject of bold pants can be polarizing as many seem to have strong feelings one way or another. What I’ve learned after making these pants is that rainbow striped pants aren’t for everyone, but gosh darn it, they ARE for me! They’re comfortable, wild, and, yes, even a bit out of my comfort zone, but I’ve never had a pair of pants that feel so uniquely “me.” A pair of pants like these can bring out either self consciousness or self confidence depending on style preferences. After wearing them, I felt only confidence. I’m taking that as I sign that these pants will fit right in with the rest of my vibrant wardrobe.

Ready for more Marcella Romano fabric inspiration? Be sure to follow the links below to check out all the other ladies on tour this week.

MARCELLA ROMANO BLOG TOUR
SEPTEMBER 3rd – SEPTEMBER 6th 2018

MONDAY
Vicky – SewVee | Fleurine – Sew Mariefleur

TUESDAY
Heidi – Handmade Frenzy | Nicole – Merritts Makes

WEDNESDAY
Leslie – Threadbear Garments | Star – Well Fibre

THURSDAY
Eveline – Frölein Tilia | Dominique – Kreamino

Special thanks to my friend Sara of The Sara Project for her help styling and taking these photos. Always thankful to have you on my side, friend!

Hacking the Hey June Willamette Shirt into a Dress

Remember when I said (in this post) that I was already planning a fourth Hey June Willamette (pattern here)? Between painting and packing, I managed to squeeze in just enough time for a Willamette Shirt to dress hack. In my last Willamette post, I mentioned that the Willamette is my current pattern obsession. Every time I fall in love with a fabric I think, “Wouldn’t this make a great Willamette?” This was the exact scenario that played out when I set eyes on this fabric from Anna Maria Horner’s Loominous II line. Weeks ago, I was desperately searching Etsy for a continuous 12 yards of another Loominous II fabric I intended to use for curtains. Once I found the desired fabric from La Antigua Textiles this large plaid fabric somehow jumped into my cart as well. When you’re buying 12 yards of fabric, it’s pretty easy to justify the cost of an extra 4 yards. Besides, I had an Etsy gift card that covered the price of this fabric so I can basically pretend it was free, right?

IMG_8363

Now, let’s get on to talking about this dress hack. I was inspired by the shape of this dress from Roolee. The boxy shape and minimal gathering are both elements I wanted to include in my latest summer dress. Once upon a time, I regularly wore shorter and more fitted styles but then; I had a child and realized that limited movement was no longer my jam. If I can’t wear something as a house dress, to the park, and to church, then it’s unlikely to find it’s way into my closet. I decided to hack the Willamette for this dress because the collar, cuffs, and yoke detail add interest to the dress and keep it from looking too much like a sack. I, for the record, love a good sack dress, just didn’t want that look for this one.

IMG_8369

The actual “hacking” of this pattern was quite simple. Let’s start with alterations made to the top. I removed 3 inches from the length of the cropped version so that the beginning of the skirt would hit around my natural waist. I opted for a button front instead of sewing the the front pieces together at the placket (Tori of The Doing Things Blog talks about her button front version here). One of my favorite details is the box pleat at the back of the dress. Originally, I just pleated the top of the back bodice piece near the yoke. After attaching the skirt, i realized the back needed a bit more shaping to achieve the desired look. The solution was to repeat the box pleat at the bottom center of the back bodice. It was a simple fix, but required some time with my seam ripper. I considered not fixing the issue, but realized it was worth the extra effort to make something I would be proud to wear. I sucked up my pride, made friends with my seam ripper, and got to work removing the skirt. This fix took about an hour to execute and was worth every minute.

IMG_8378

Moving on to the skirt. This was such a simple “hack” that it feels almost blasphemous to call it one. Since I wanted only minimal gathering I multiplied the finished width of my front and back bodice pieces (both were right around 20″ with that added back pleat) by 1.4. This gave me 28″. I cut two rectangles 28″ x 34″. I then added inseam pockets to the side seams and sewed the side seams together with a 1/2″ seam allowance. There are approximately one million tutorials for adding inseam pockets, but if you’re unfamiliar with them, this is a good one to check out.   Using a basting stitch at 3/8″ and 5/8″ gather the skirt to fit the bodice. Then attach the bodice and skirt right sides together using a 1/2″ seam allowance. Hem the skirt to your desired length and that’s it. You’re done. Seriously, this hack is one of the easiest I’ve ever completed.

IMG_8354

IMG_8375

In the midst of all the (good) stress and craziness of the last month or so it felt good to sit at my machine and sew this dress purely out of a desire to create. I thoroughly enjoyed squeezing in a bit of time here and there to reconnect with my machine. Two more weeks and we have no choice, but to be done with this moving madness (because our apartment lease will be up). A little time simply creating for pleasure was just what I needed to get me through the next weeks. Looking forward to sharing more with you in my new space.

IMG_8362IMG_8359

Thanks for reading! Want to see a different Willamette Shirt to Dress Hack? Check out Michelle’s here. Can’t get enough of Anna Maria Horner’s fabrics? Me either! I’m a total fan girl. Check out other items I’ve made with her fabrics like the Highlands Wrap Dress, Fringe Dress, Butterfly Blouse, Bonn Maxi Dress, and Bonn Shirt.

Favorite Sewing Patterns for Clothing the Baby in Your Life

It’s been a while since my baby was an actual baby (he’s 5). Although I no longer sew for a babe of my own, I’m able to get my fill of baby sewing by making gifts for friends and family. Due to a combination of my geographical location (Utah feels like the baby capital of the US) and life stage, I seem to always know someone having a baby. Over the last few years, I’ve found seven baby sewing patterns that I reach for again and again. Today I’d like to share them with you. I’ve decided to list the patterns starting with my most used first. Be sure to read all the way to the bottom because I’ve just discovered a couple new ones that I’ll definitely be using more often in the future.

img_6753

Alison’s Tiny Harem Pants

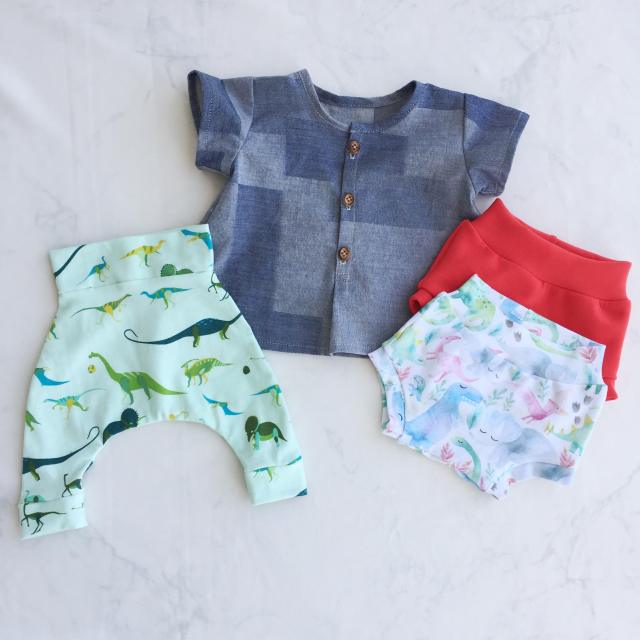
I’ve made this FREE pattern at least a dozen times. It takes about 20 minutes to sew and can be made from less than 1/3 yard of fabric. It only comes in one size, but is the perfect size for those teeny tiny newborns. Babies that I’ve made these pants for have usually been able to wear them from their first day until one or two months old. While they’re too small to be worn beyond a few months, the ease of making them and the fact that they’re irresistibly cute make them a baby shower favorite. The shape and style is gender neutral which makes them the perfect gift for every new babe.

Knick Knack Knickers

This is another quick and easy FREE pattern. Just follow the hyperlink above and click on the cute picture of a baby in knickers to download the pattern. These take me a little longer to sew than the pants above mostly because it takes a few minutes to insert the elastic. Don’t worry too much though, they take about 45 minutes to maybe an hour if I’m taking my time. You’ll need just about 1/2 yard of fabric for 1 pair. This is another pattern I’ve made at least a dozen times. I love them because I make the smallest size which works as pants for newborn babes and then as shorts/bloomers until about 1 year old. Babies grow so quickly that having something to grow with your baby is kind of a nice change from pulling out new clothes every couple of months. If you plan to make more than a couple of pairs of these pants; may I suggest buying some of these elastic threaders? They made my life infinitely easier when I had thread 1/4″ elastic through six pairs of these pants.

Piece A Cake Baby Dress

A couple of years ago, it seemed that everyone pregnant woman I knew was having a baby girl. I wanted to make dresses, but didn’t have a lot of time to make them. I stumbled upon this pattern by Anna Maria Horner and was sold. It’s simple shape allows for the use of all the fun prints. The pattern uses about 1/2 yard of fabric and I’ve been able to squeeze it out of a little less when in a pinch. It’s great for using rayons, quilting cottons, double gauze, lawn, basically any woven that isn’t a heavy weight. This is another “grow with me” pattern that can be worn for a long time. A newborn babe can wear it as a dress and then it becomes a cute swing top as she grows. Did I mention this pattern is another FREE one?

Pitaya Bummies

This pattern designed by Sew Like My Mom is worth every penny. The sizing goes from newborn to 5T so you can use it for several years. There are two views and three waistband options. The pattern has even been updated with a fun skirted and ruffle bum variation. I just bought it in March and have already made five pairs (which is a lot when you are only sewing a pattern for gifts). One pair can be whipped up in 15 to 20 minutes using only 1/4 yard of fabric (for the smallest sizes). I’ve made these bummies for both boys and girls and they’ve been worn and loved several times already. If my husband and I ever decide to have another child, these are sure to be a wardrobe staple for my babe.

Field Trip Raglan

I firmly believe that a basic tee pattern is a staple in any child/baby’s wardrobe. You just can’t beat the sweetness of a teeny tiny tee. This basic raglan tee pattern by Oliver + S has been in my collection for years. I’ve used it to make shirts for my son, but hadn’t used it for babies until this year. The size range starts at 6-12 months, but in my experience, most babies can fit in a 6 month size starting at a just a few months old. It’s also nice as a parent to have baby clothing in a variety of sizes since babies grow so quickly. I’ve made this pattern a total of 6 times and twice for babies. Both of those babes have worn their tees and looked like tiny little men. Too cute!

Olli Lined Pants

img_7254

In May, I made the FREE Olli Lined Pants pattern for the first time. I used a mid-weight denim and lined them with flannel. They’re sure to keep baby’s legs cozy during the cold winter months. The pattern ranges from size 0-3 months up to 2-3 years. It also includes a cute side pocket option which I omitted on this pair. I used just under 2/3 yard of each fabric for these pants. This one is worth mentioning because Misusu patterns also just released the Summer Olli Shorts and Pants pattern (in sizes 0-3 months up to 5/6 years) so your babe can wear these stylish pants year-round. I’ve only made the lined pants once for a baby, but just completed three pairs of the shorts for my 5 year old and they’re a hit.

Lullaby Layette Top

IMG_6748

I’m embarrassed to admit that I’ve owned this pattern for over two years and finally made it for the first time last month. I purchased it after seeing this modified version on Instagram. I had under a 1/2 yard left of this beautiful yarn dyed fabric and used pretty much every single inch to make this top. Sewing time was something between 1-2 hours. I ended up loving it so much that I nearly didn’t gift it. I wanted to keep it for myself. The pattern also includes a sweet jacket, pants and a onesie or romper version of this top. I have the pattern pieces and fabric already set aside for the next baby who is in need of this top. Immediately planning a second version is a great indicator of a good make.

Thanks for reading! Hope you’ve been able to find some inspiration for your baby sewing. If you have, get to sewing and clothe those babies! Do you have a favorite baby sewing pattern? If so, I’d love to hear about it. I’m always looking for fun patterns to make and gift.

Perkins Shirt by Ensemble Patterns

In the midst of the madness of buying a home in an insane market, I couldn’t help but apply as a tester for the Ensemble Patterns Perkins Shirt Dress. I was powerless to resist the siren song of this ultra hip take on a traditional button down. Its song was so strong that I made not one, but two versions.

IMG_8339

IMG_8316

On occasion (who am I kidding? about 80% of the time), I blatantly ignore the recommendation to not buy or use my “good” fabric for a test. I do occasionally make up a quick and dirty muslin, but I just love using pretty fabric and have faith that if things don’t work out I’ll be able to refashion the item. This time, however, I actually had some great fabrics in my stash waiting to be used.

IMG_8328

During the first phase of testing, I made the basic cropped version in a black and white striped rayon challis. I purchased this fabric from Raspberry Creek Fabrics back in January and used it to line both my Joy Jacket (here) and  the sleeves of my Clare Coat (here). I had just over a yard of this fabric and was barely able to eke out all the pattern pieces. The simple stripes and drape of the rayon combine to make this top into a closet staple. The pattern’s style lines add visual interest to the top and elevate the cool factor a bit above that of a basic button down. I opted to use the wrong side of the fabric on the back yoke in order to highlight some of those style lines.

IMG_8337

IMG_8333

During the second phase of testing, I made the gathered cropped version. My talented and generous friend Kim of Sweet Red Poppy had some scraps left over from making a couple of dresses last summer (see them on her blog here). She was kind enough to share them with me and I’ve been anxiously awaiting the perfect pattern pairing. The fabric is a polyester crepe from Stylish Fabrics (here). I tend to gravitate towards natural fibers, and as a result, have very little experience working with polyester. This was also my first foray into working with crepe. I was pleasantly surprised with how easy this fabric was to sew. Combining the fabric with this gathered version was a no-brainer. It gathered easily and its drape is a dream. Bonus: These photos were snapped after I’d been wearing this top for several hours during my son’s birthday party. Thanks to the polyester content, The top still looks fresh and wrinkle-free.

IMG_8323

IMG_8327

Let’s talk construction. Once in a while, I come upon a construction method that is simultaneously brilliant and baffling. The “dumpling method,” as Celina referred to it, took a moment to understand, but was surprisingly simple. The instructions provided excellent detail and held my hand throughout the process. This method encloses the sleeve hem and raglan seams. This top also includes french seams along the sides for a clean-finish inside and out. Anyone with an intermediate level of skill shouldn’t have any trouble constructing this top. If you’re an adventurous beginner, however, don’t be discouraged. There’s a good chance you could have success here as well.

IMG_8320

I’ll leave you with a sizing note: My bust measurement put me right at a size 4 for this pattern. Based on that, I sewed a straight size 4 in both versions. My only adjustment was adding 2″ to the length.

IMG_8317

IMG_8330

Now that I’ve got a yard to use as a photo background, I’m really itching to sew up some more summer basics. Realistically, I might not be doing much sewing until fall, but a girl can dream, right? What are you sewing this summer?

Yari Jumpsuit by True Bias

I’ve long been an admirer of jumpsuits, overalls, and basically any type of one-piece outfit. Thanks to my height of 5’10”, I’ve never actually been able to wear ready-to-wear jumpsuits without discomfort. Last year I made my first jumpsuit and fell in love (see it here), so I was all in when Kelli  of True Bias asked me to test the Yari Jumpsuit (purchase pattern here). The pattern includes both a shorts and full-length option as well as sleeved and sleeveless options. There is also an option to add a D-ring cinch at the sides for more waist definition.

IMG_8287

After seeing Kelli’s samples and the line drawings for the Yari, I had a vision of a woven striped jumpsuit inspired by Ace and Jig. Luckily, Indiesew had the perfect fabric (teal is sold-out, but orange is still available here). I LOVE the metallic thread woven throughout the fabric because it kind of makes wearing this jumpsuit feel like magic.

IMG_8294

I couldn’t use a beautiful fabric and not use equally magnificent buttons so I turned to my Arrow Mountain stash. I used these mirror buttons to add even more sparkle because this look clearly isn’t bold enough on its own. I’ve been ordering buttons from Arrow Mountain since the summer of 2016 and I don’t plan on stopping soon. In fact, my stash is nearly depleted so I’m filling up my Etsy cart as we speak (did you see the gold mirror buttons? I NEED them).

IMG_8296

I found construction of the Yari to be straightforward and enjoyable. In fact, the actual construction of the jumpsuit took me several hours over the course of one evening. This fabric doesn’t allow for them to be very visible, but the princess seam lines in this jumpsuit are everything! They also allow for a bit more shaping if necessary.

IMG_8304

Let’s talk sizing and alterations for a quick minute. I’m a definite pear shape with a small chest and hips that don’t lie. My small chest and wider hips put me in a size 4 bust with a 10 at the hips. This woven cotton doesn’t have much drape, so I took in the bust and waist by a total of 1 inch (.5 inches on each side) for a bit of a closer fit. If I had added the optional D-rings, I likely wouldn’t have needed to do this as those would’ve given that shaping.  I found the sizing at the hips to be spot on, but my legs are a size or two smaller than my hips. For this reason, starting at the bottom of the pockets, I took about 1 inch out of each leg. I removed .5 inches from the leg outer seams and the inseam.

IMG_8283

The last alteration I made was to add length. I added 1.5 inches to the bodice length and 2.5 inches to the leg length. The length added to the bodice was a bit too much as I probably should’ve only added .5 inches to the bodice length and  instead added that extra 1 inch to the leg length for a total of 3.5 inches to the legs. As a result, the crotch sits a little lower than I’d like. This is really due to my lack of muslin vs. the actual pattern. Maybe next time I’ll learn my lesson and make a muslin…maybe.

IMG_8313

Despite my unintended dropped crotch, I plan to wear the heck out of this jumpsuit over the summer. This fabric is lightweight and breathable enough that it should take me seamlessly from lounging around the house to a day spent at the amusement park. True Bias Patterns have a way of making me feel a little bit more cool and hip than I really am, and the Yari is no exception. I’m now on the hunt for a black tencel twill for my next version. If you find any good sources,  please send them my way.

IMG_8305

IMG_8285

Me Made May 2018 Weeks #2 and #3 Recap

05.07.18

Got dressed and ready real quick today because when I called to schedule an oil change, the dealership had an opening right away. I wanted to look at least a little bit put-together because I was meeting with a home inspector and the current owner to discuss the home we’re buying. The weather was somewhere in the mid-70’s on this day and this outfit took me seamlessly through all my errands and an afternoon at the park. My top is the Cali Faye Collection Valley Blouse sewn in Cotton and Steel Double Gauze (read more info about this version here). I love this blouse for spring and fall because the long sleeves provide a bit of warmth, but the loose shape makes it breathable enough for those warmer days. Trying to get some more wear out of this one before it gets too blazing hot. I purchased these black pants last fall in a moment of desperation after realizing my last pair of jeans was failing me. I needed a pair of basic, casual pants to tide me over until I could make some jeans.
img_6606

05.08.18

Didn’t snap a picture today, but I wore my Tea House Dress designed by Sew House Seven (you can see the dress here).

05.09.18

Tried to be a “cool mom” today and wore my dinosaur shirt. Made this one 3-ish years ago with scraps from my stash. The pattern is Simplicity 1366, which is actually made for use with wovens. I just sized down and added a neckband. It’s one of the oldest makes that I still wear regularly. I love that it’s a little bit quirky. Apparently it also turns me into a bit of a goofball (see more evidence here). My jeans are my second Ginger Jeans (more about them here) in StyleMaker Fabrics brushed denim. They’ve been pulling their weight this month and are my current favorites.

img_6608

05.10.18

Today I mostly took care of things around the house and then headed to a sewing night with my friends in the evening. I meet together with a few of my sewing friends about once a month and it never fails to boost my mood and save my sanity. Since we meet in the evenings in our homes, most of us can be found wearing sweats at our monthly get meet-ups. It was a little cooler this day so I wanted to be both warm and extremely comfortable. First, I started with my Helen’s Closet Avery Leggings and paired them with my Grainline Studio Lark Tee in rayon/french terry (used the same fabric for this top). I added extra warmth and comfort with my Seamly Moto Sweatshirt in oatmeal french terry from Raspberry Creek Fabrics. All of these fabrics are no longer available and I regularly wonder why I didn’t buy 10 yards of both the rayon french terry (from Indie Sew) and the oatmeal french terry (from Raspberry Creek).

img_6609

05.11.18

The outfit from yesterday was calling my name so I wore it again today. No shame in my repeat outfit game.

05.12.18

Today was a cool rainy Saturday spent at the cabin with family. Dressed for warmth and comfort in my Hepburn Turtleneck (full post on that here), Joy Jacket (full post here), and Ginger Jeans. I’m only mourning the end of winter because I can’t wear this Turtleneck in 90 degree heat. It is one of the softest tops I own and as a result, was worn 2-3 times a week all winter long.

img_6610

05.13.18

Today was Mother’s Day which means I got the luxury of sleeping in and having breakfast prepared for me. I chose to celebrate the occasion by wearing my favorite and most feminine dress, the Highlands Wrap Dress. My son joined me in wearing handmade with another Sketchbook shirt in Anna Maria Horner fabric. Teaching him young to appreciate color and beautiful floral prints.

img_6611

05.14.18

Today I continued my love of floral dresses into Monday. This modified Chalk and Notch Waterfall Raglan has been in heavy rotation since I made it in February 2017  (read about it and my modifications here). It’s extremely versatile and gets worn all months of the year. Last summer I wore it to church, the amusement park, 4th of July fireworks, etc. In the winter I mostly wear it to church paired with tights, boots, and a cardigan.

img_6613

05.15.18

I’m definitely seeing a comfy, casual look emerging this month. My life as a SAHM, seamstress, etc. doesn’t leave a lot of room for anything that isn’t extremely functional. I’ve definitely seen my style evolve to pieces that are more functional at this stage of my life. I used to wear more restrictive tight-fitting clothes pre-motherhood. Now an item has to allow full range of movement for “Head, Shoulders, Knees, and Toes” before it will catch my eye. Today my son was sick so I threw on my Grainline Studio Scout Tee and Crushed Velvet True Bias Hudson Pants for lounging around the house and a quick trip to the store.

img_6614

05.16.18

Every Wednesday I visit my mom to keep her company and assist with household chores. Today before heading over, I put on a rayon/spandex Grainline Studio Scout Tee and cotton checkered Ready To Sew Jumpy pants (original post here). I mostly like the fit of these pants except for the rise. I think that I need to add at least 1 inch to the rise. This pair sits just below the top of my hips when I think it should sit closer to my natural waist. My issue with the fit is that they tend to slide down my hips throughout the day.  As I was walking the dog today I had to keep pulling at my pants to keep them up. Perhaps I’m just not tying the front tight enough, but I really think a higher rise would eliminate my issue.

img_6615

05.17.18

Wore my cropped Willamette Shirt (full post here) and first pair of Ginger Jeans (full post here) today. This was one of those days where I wonder if I accomplished anything. At least I felt cool and hip while trying and failing to accomplish things. I don’t know what it is about this combination of jacquard chambray and crop top, but they feel hip to me. Although, as a 27 year old mother and seamstress, I’m not sure that I have more than two hip bones in my body. See? Now I’m telling dad jokes. Probably the farthest from hip I can be.

img_6616

05.18.18

Today my husband and I celebrated 6 years of marriage. It seemed momentous to us as this last year has been filled with more changes than any other (well, except for the year our son was born of course). During our 6th year of marriage we moved out of our first apartment, moved to a new city, my husband took his dream job, replaced both of our old cars (20 years old and 16 years old), took our first real family vacation, and started the process of buying our first home. We celebrated with dinner at our favorite local place and a night at a hotel in Park City (for about 2-3 weeks in May you can find hotels for quite cheap there as it’s in-between skiing season and summer vacation season). Once we checked into our hotel I took the uninterrupted time to style my hair and makeup. After getting ready we headed to dinner. My husband snapped this picture after dinner. When I looked at it I realized this was the first time all month that I’ve taken the time to style my hair and wear a full face of makeup. Maybe I should attempt that more often. Maybe…

Apologies for the rambling. Let’s get back to the outfit. I made this Grainline Studio Scout Tee hack back in April of 2016 (IG post about it here). I had a little less than 1.25 yards of this Nani Iro fabric and wanted to use it for something special. I took my time to carefully measure and draw each scallop onto the fabric. Sewing the scalloped hem took longer than constructing the rest of the top, but sometimes those details are just worth it. Paired the top with none other than my brushed denim Ginger Jeans (told you they were my favorite).

img_6617

05.19.18.

This morning we checked out of our hotel and headed home. In the afternoon, I took my son to the Great Salt Lake so we could help my friend Rachel of Little Fish with a swim trunks photo shoot. Didn’t grab an iphone pic of my outfit, but Rachel helped me out with this one which is clearly better than a phone pic. I’m wearing the Sew Liberated Matcha Top in a linen blend and my Ginger Jeans. Both fabrics for this outfit came from StyleMaker Fabrics. One of my favorite details of this outfit is that the jeans pockets are actually lined with the linen blend used for my top. Whenever I wear these together I feel like I have some sort of clothes matching secret (kind of like when your underwear matches your outfit).

IMG_9686 copy

05.20.18

If you haven’t caught on by now, my perfect formula for a church outfit is Anna Maria Horner fabric and an indie pattern. The Chalk and Notch Fringe Dress is one I’ve been dying to make again. This was my test version last summer (that post here) and I love how easy it is to wear. I don’t know if it has to do with the dart placement or the neckline, but this dress manages to float away from the body without looking like a sack. Don’t get me wrong, I love a good sack dress. This one is just infinitely more flattering.

img_6618

Hey June Handmade Willamette Shirt

Every once in a while, I’ll find a pattern that I want to make over and over again. I’ll see any pretty fabric and think “Hey! that would make a great (insert favorite pattern here).” The last pattern that made me feel this way was the Grainline Studio Scout Tee. I’ve surpassed double digits with that pattern, but have been waiting to fall in love with another pattern the way I fell in love with the Scout. Enter the Willamette Shirt by Hey June Handmade. Although, I’ve since made a third version, today I’ll be talking about my first two versions.

IMG_2702

I’m about to say something that may sound blasphemous to some, but this was my very first Hey June pattern. I’ve had the Union St Tee bookmarked in my browser for literally years, but the my introduction to the Willamette is what finally pushed me over the edge. Last May, I invited a few of my sewing friends to join me for a sewing weekend. During that weekend I watched Sara of The Sara Project and Rachel of Little Fish Apparel each sew a Willamette. Admittedly, watching them make their versions gave me a bit of FOMO; so I immediately added the Willamette to my must-make list.

IMG_2709

For my first version I opted to sew view A in Rifle Paper Co. rayon. This first one took a total of 7-ish hours to sew up over the course of a few weeks. The instructions were clear, and I found the construction to be fun and just challenging enough to keep it interesting. Due to the shifty nature of the rayon, I spent at least two of those sewing hours attempting to get the placket nicely top-stitched. I must’ve redone it 3 or 4 times before deeming it “good enough.” Despite the placket’s imperfections, the busy floral does a great job hiding them.

IMG_2710

What I love about this version: The bold jewel toned floral makes a statement without looking childish. This rayon fabric has just enough drape to make the top feel breezy and balance out the boxy shape. I can see this top looking equally lovely paired with a skirt as it does with the jeans pictured here.

IMG_2678

Before I started my rayon version, I was undecided between View A and the cropped View C. I settled on View A but promised myself that a cropped version would be in my future. This cotton chambray was purchased from Fancy Tiger Crafts back in September and sat in my stash until inspiration struck. It was the end of a bolt and I only had a little over a yard and a half so I wanted to be sure that I was making the perfect selection. Once my decision was made I cut the project immediately and waited for sewing time.

IMG_2693This cropped version came together in one morning. I spent somewhere around 3-4 hours sewing this top including the time it took to feed my son breakfast and help him with his online preschool program. I’ll attribute the quick turnaround and ease of construction to a few things. First, this wasn’t my first rodeo and being familiar with the construction techniques was a real bonus as I didn’t have to spend so much time reading and rereading instructions. Second, the cotton chambray was stable and that placket top-stitching was “good-enough” on the first try. Winning! Third, the straight hem took at least 15 minutes less to press and stitch than the curved hem on View A. It’s not often that I complete a sewing project before noon so this one felt like a victory.

IMG_2694

What I love about this version: The stiffness of the chambray combined with the cropped length create a true boxy silhouette that I’m all about. The fabric is less busy than my first version and really lets the yoke, cuff, and collar details shine. I love the comfy, casual vibe of this top and can’t wait to experiment with styling over the summer.

IMG_2705IMG_2683Over the winter months, I didn’t get a significant amount of wear from these tops, but I have big plans to make them wardrobe staples over the summer. Now, please excuse me while I go plan another Willamette for every day of the week.

IMG_9281Kaddy__preview.jpg

A quick note on sizing: All versions are sewn in a size 4 with 1.5″ added to the length.