Helen’s Closet York Pinafore

Hello! The last few weeks have been a whirlwind and, although I’ve been sewing, I haven’t had much time to document it. I fully intended to sew up a York Pinafore during Sew Bibs in March until other sewing plans got in the way. One month late, the Helen’s Closet York Pinafore is finished.

Fabric

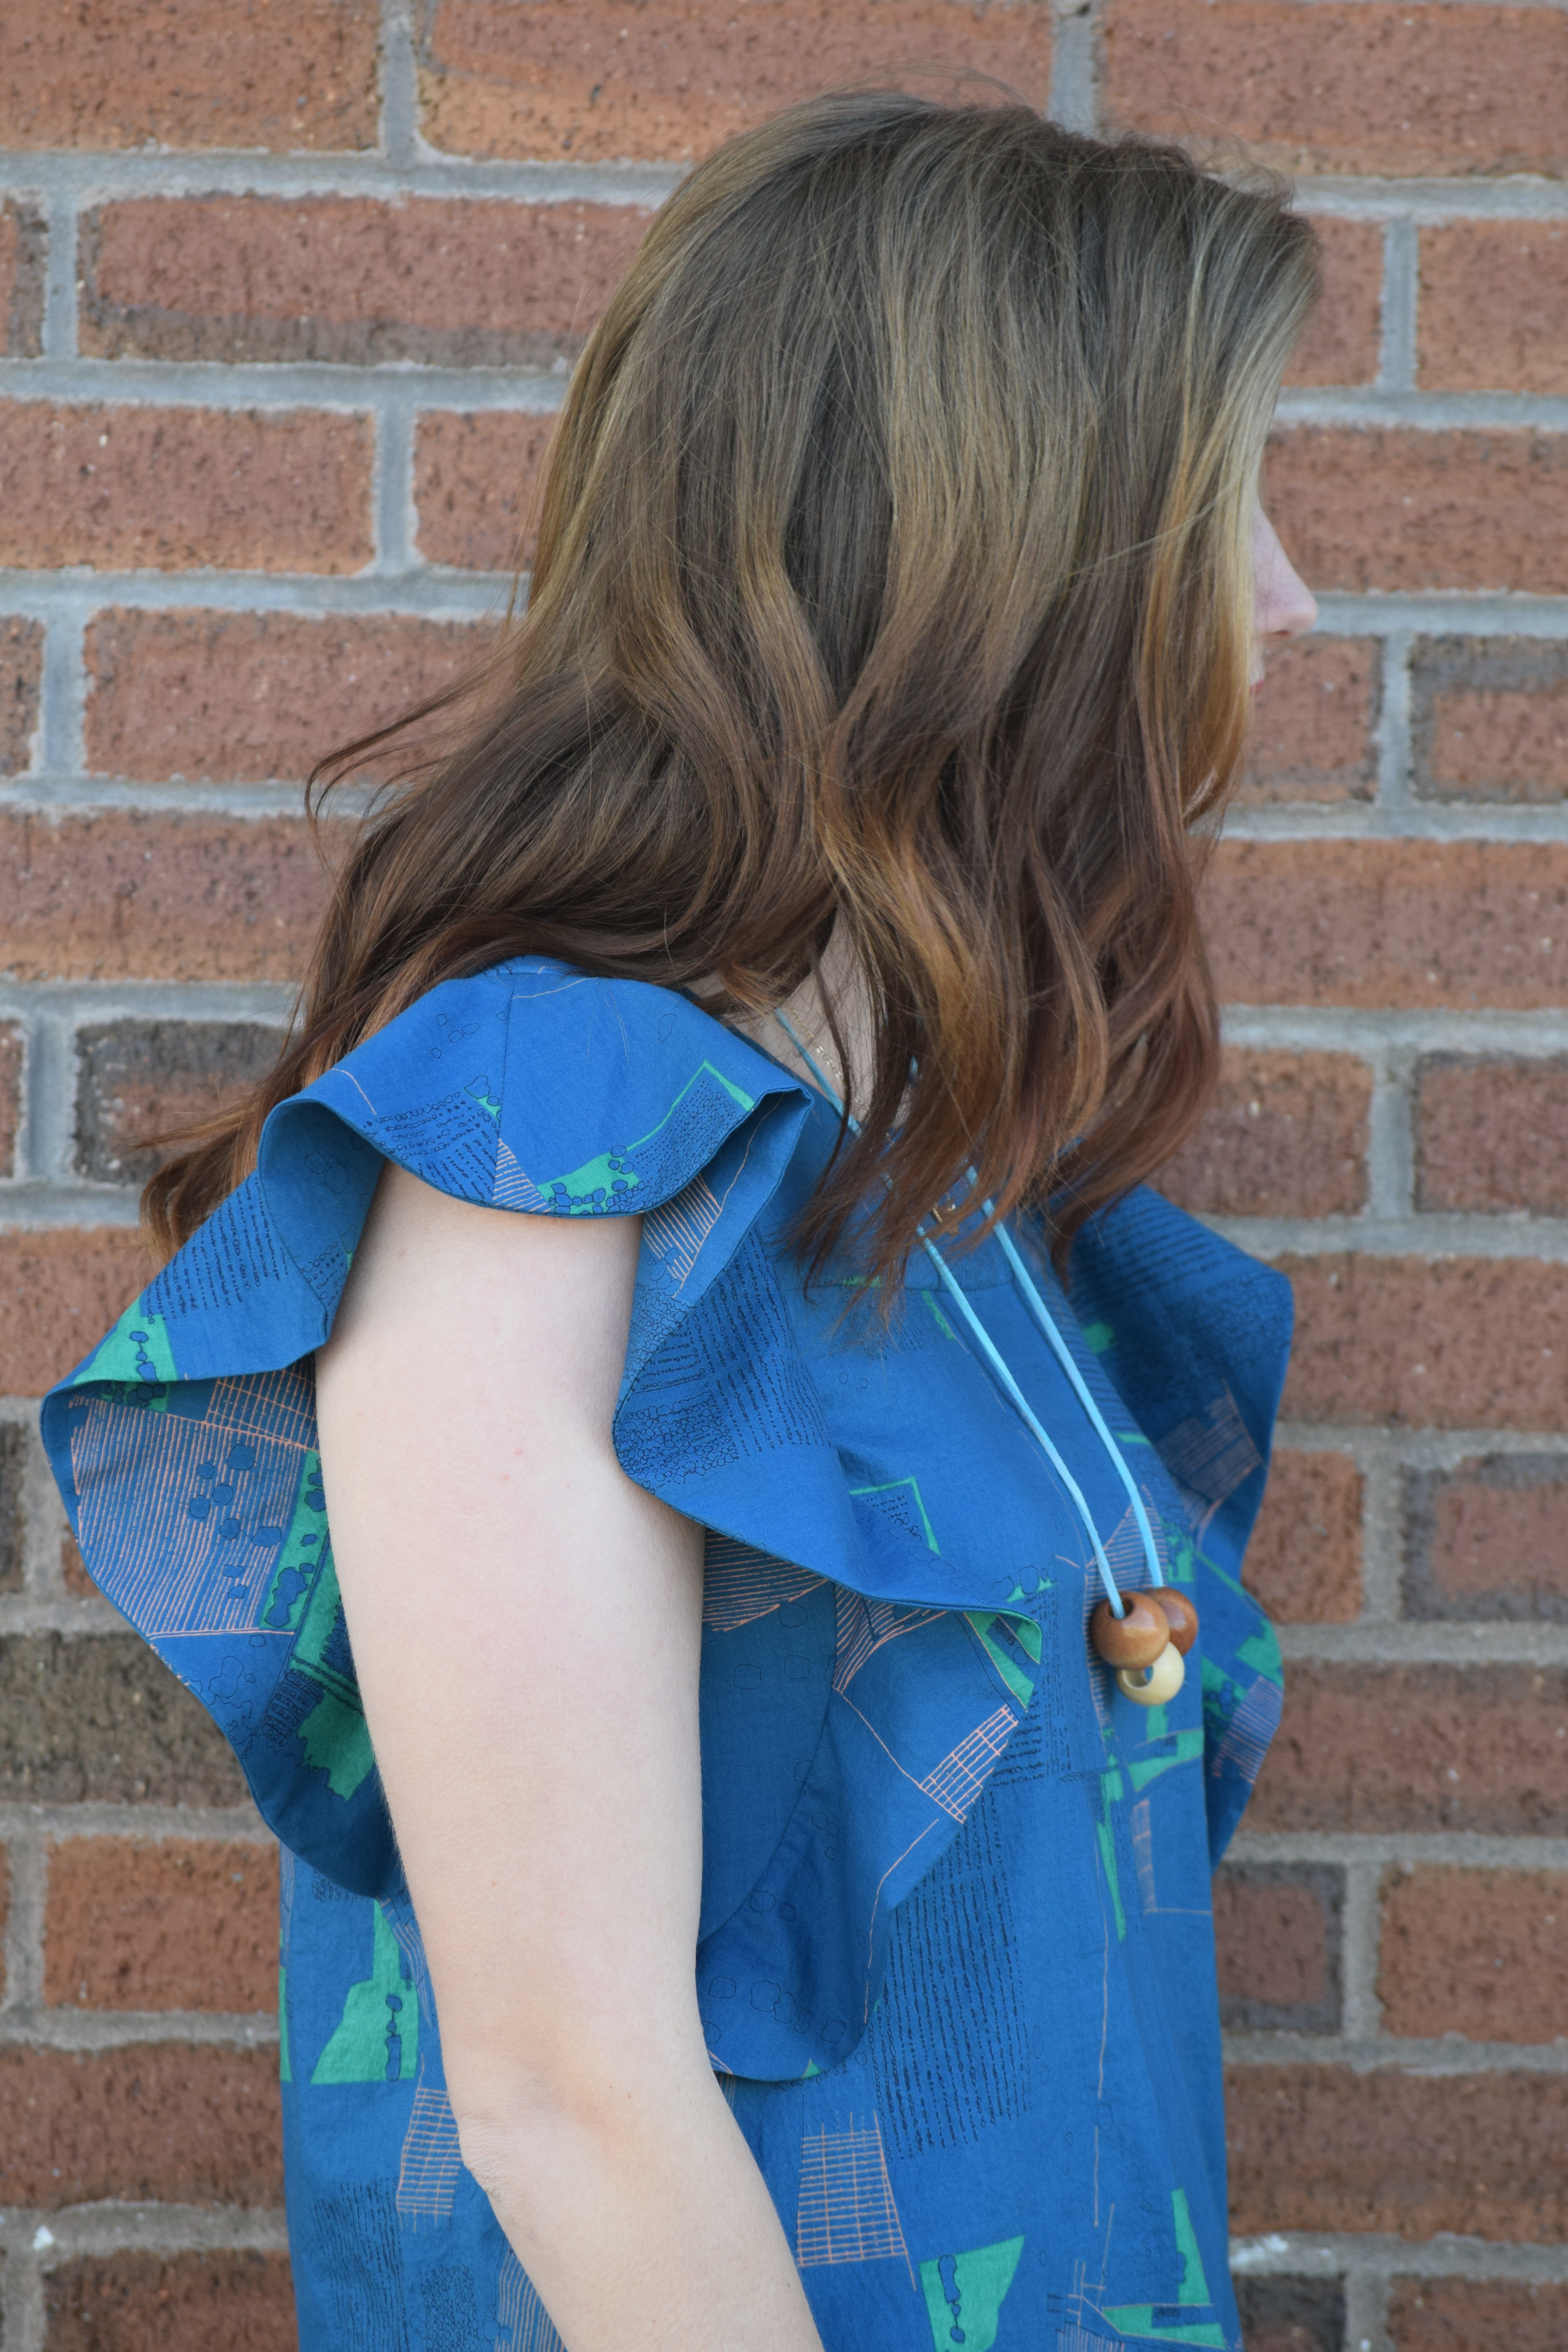
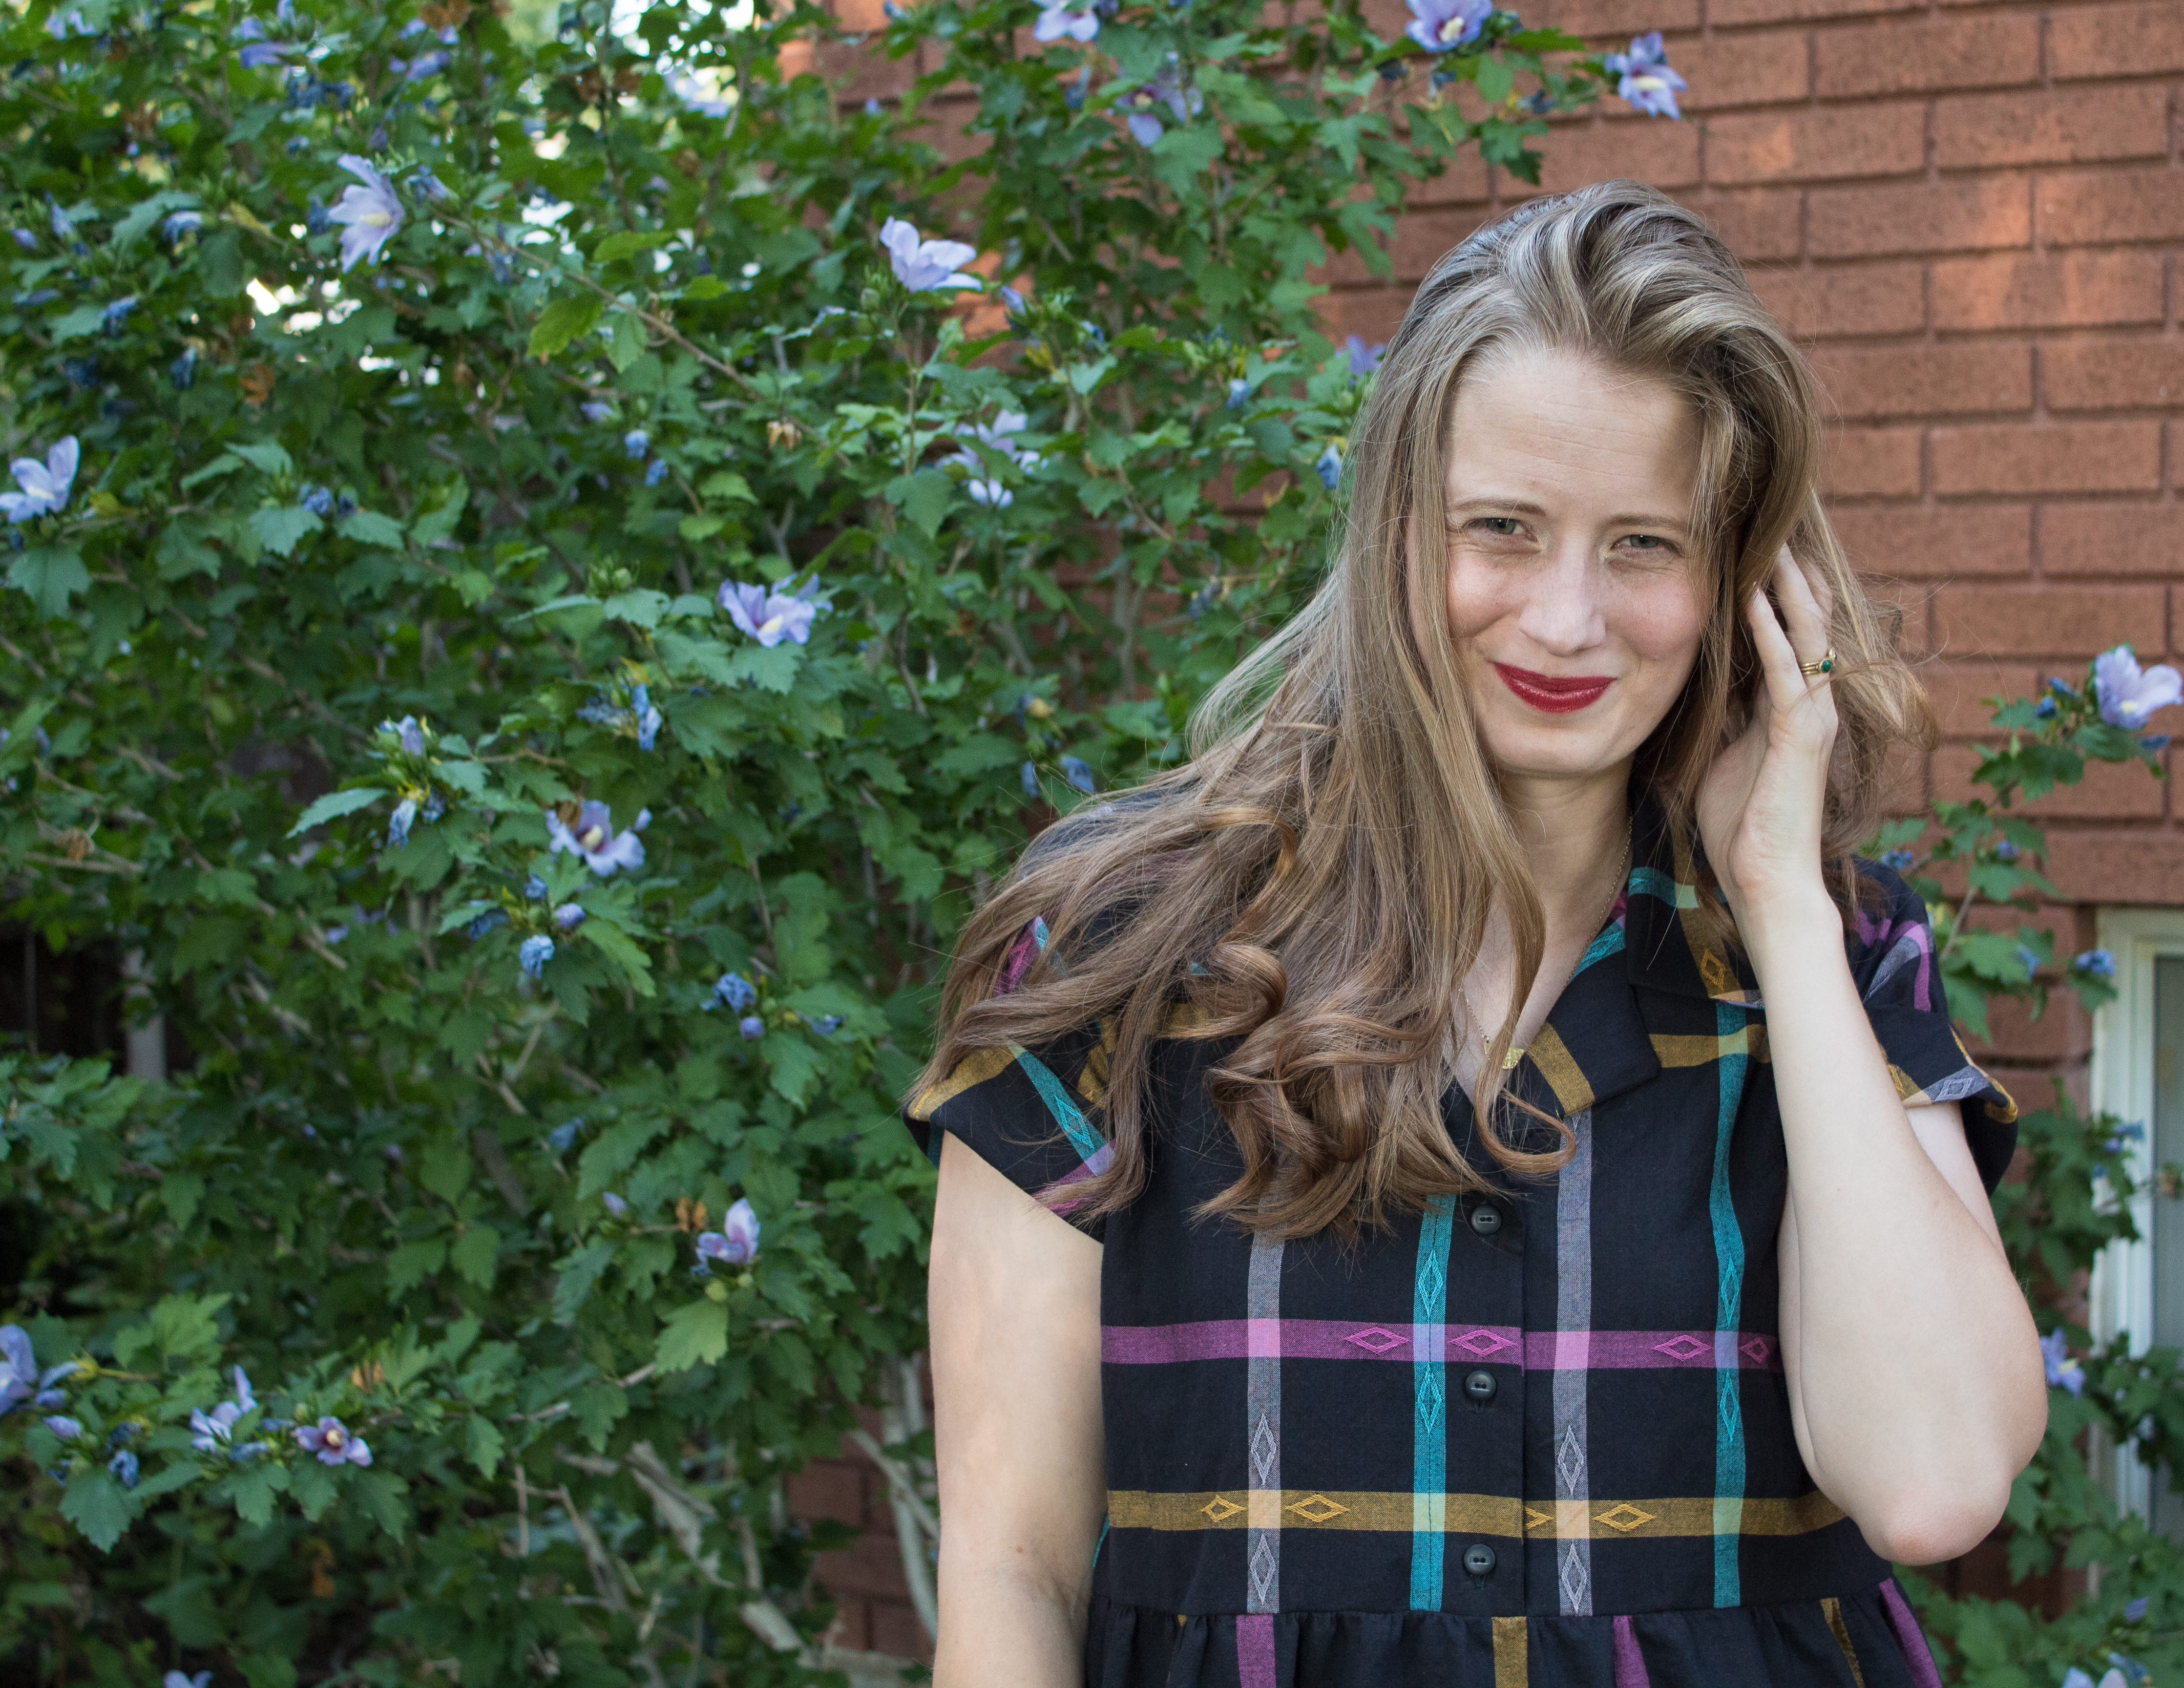
Mmm…This fabric. In early March, I took a little day trip to my favorite local-ish fabric store, Suppose. It’s one of those beautifully overwhelming places where the project possibilities feel endless. I often spend over an hour browsing and dreaming up ideas (much to my son’s dismay) until reminding myself that my sewing time nor my wallet size are unlimited. This time I was smitten with the subtlety and dimensionality of this print. Designed by Carolyn Friedlander for her Polk collection, this cotton/linen blend has enough weight for the York while still being light and breezy enough for summer wear.

I’ve been a fan of Carolyn Friedlander’s designs since her Doe line released years ago. Although I liked Doe, the line that endeared me to her work was Carkai. I made my favorite Scout Tee and two shirts for my son from Carkai fabric. A tear or two may have been shed when my son finally outgrew those shirts.

Carkai and Doe were both printed on quilting cotton which somewhat limited my pattern choices at the time. Then Carolyn and Robert Kaufman did something phenomenol in her next few lines releasing prints on cotton/linen blends, lawn, and knits. Since then, I’ve used her fabrics for a Farrah Top, Ronja Dungarees, and even included her first cotton/linen blend prints (the overalls and jumpsuit pictured below) in a children’s clothing collection I designed to show at Utah Fashion Week in 2017 . I guess you could say I’m a fan.

Sizing and Alterations

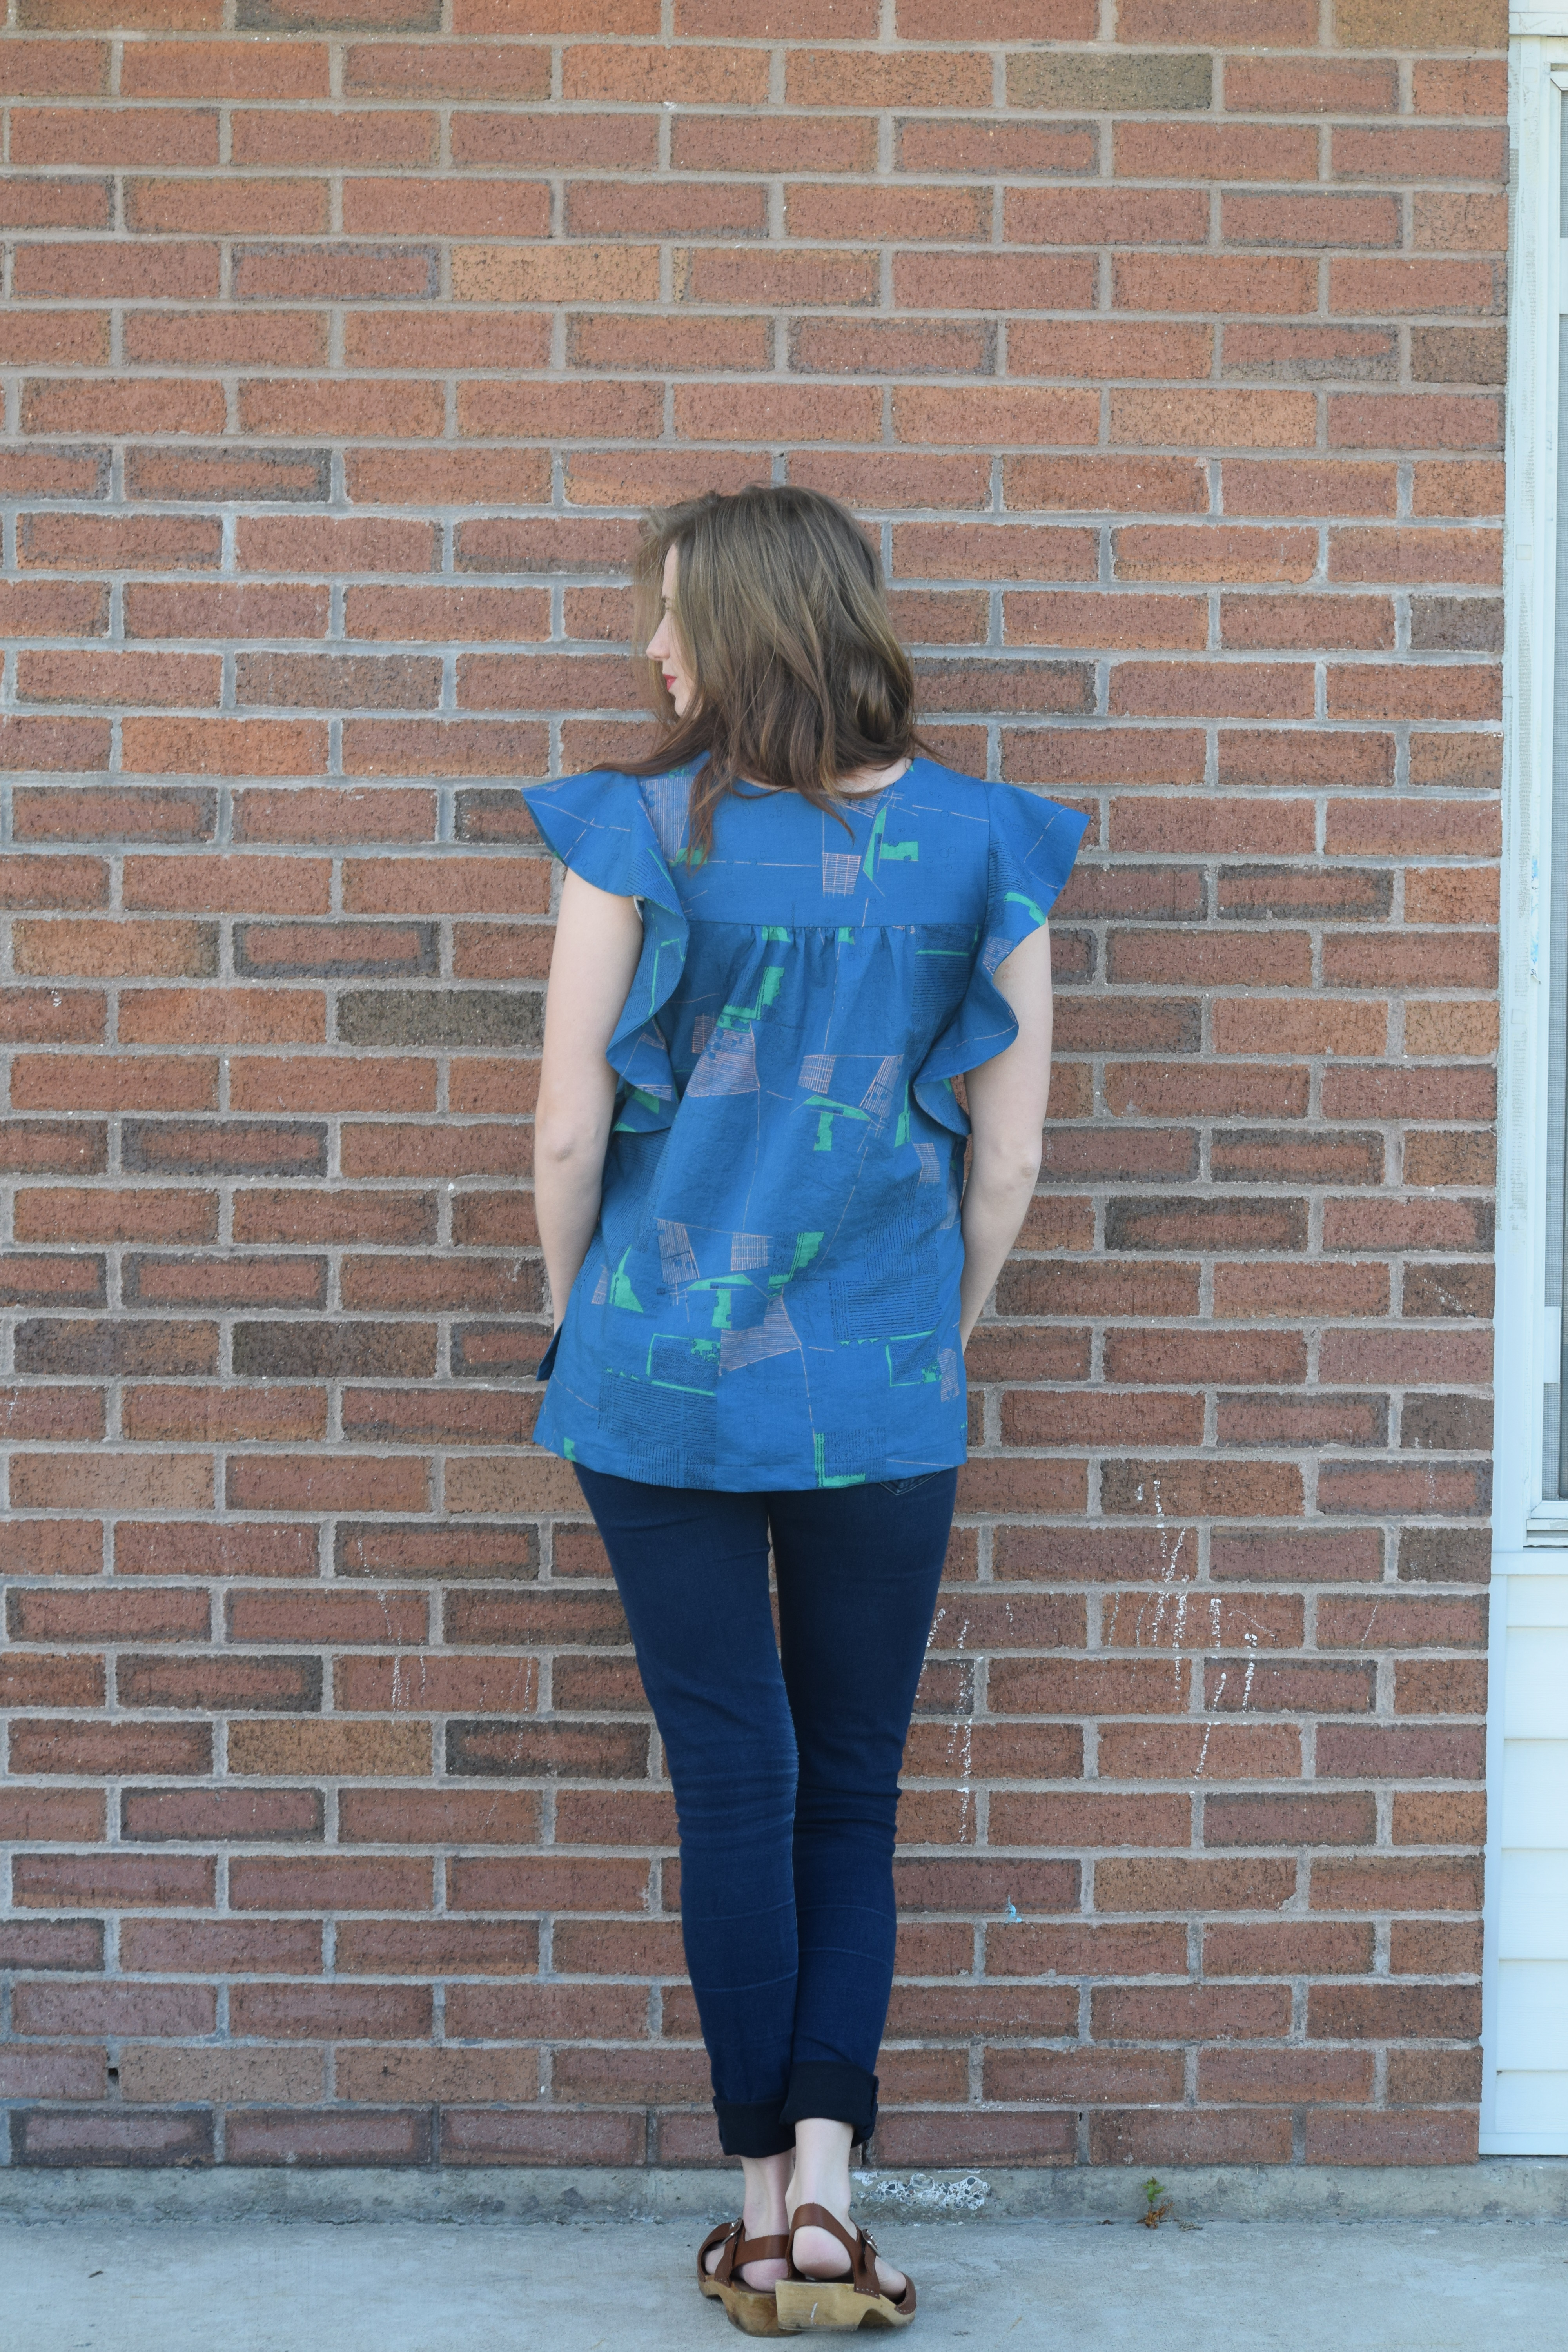
Ok, I know, you probably aren’t here for the trip down memory lane. You’re here to talk about the York so we’ll get back to it. Using the size chart, I determined that I would need to make a 6 at the bust, graded to a 12 at the hips. That is exactly what I did and it seemed to work perfectly. Helen’s closet recently updated the sizing on the York to include a wider range of sizes and I think this made size selection more accurate than the previous S-M-L-XL sizing. Since I didn’t make the previous version, I can’t be sure of that but, it’s an assumption I feel somewhat justified in making. My only other sizing alteration was adding four inches to the length at the hem.

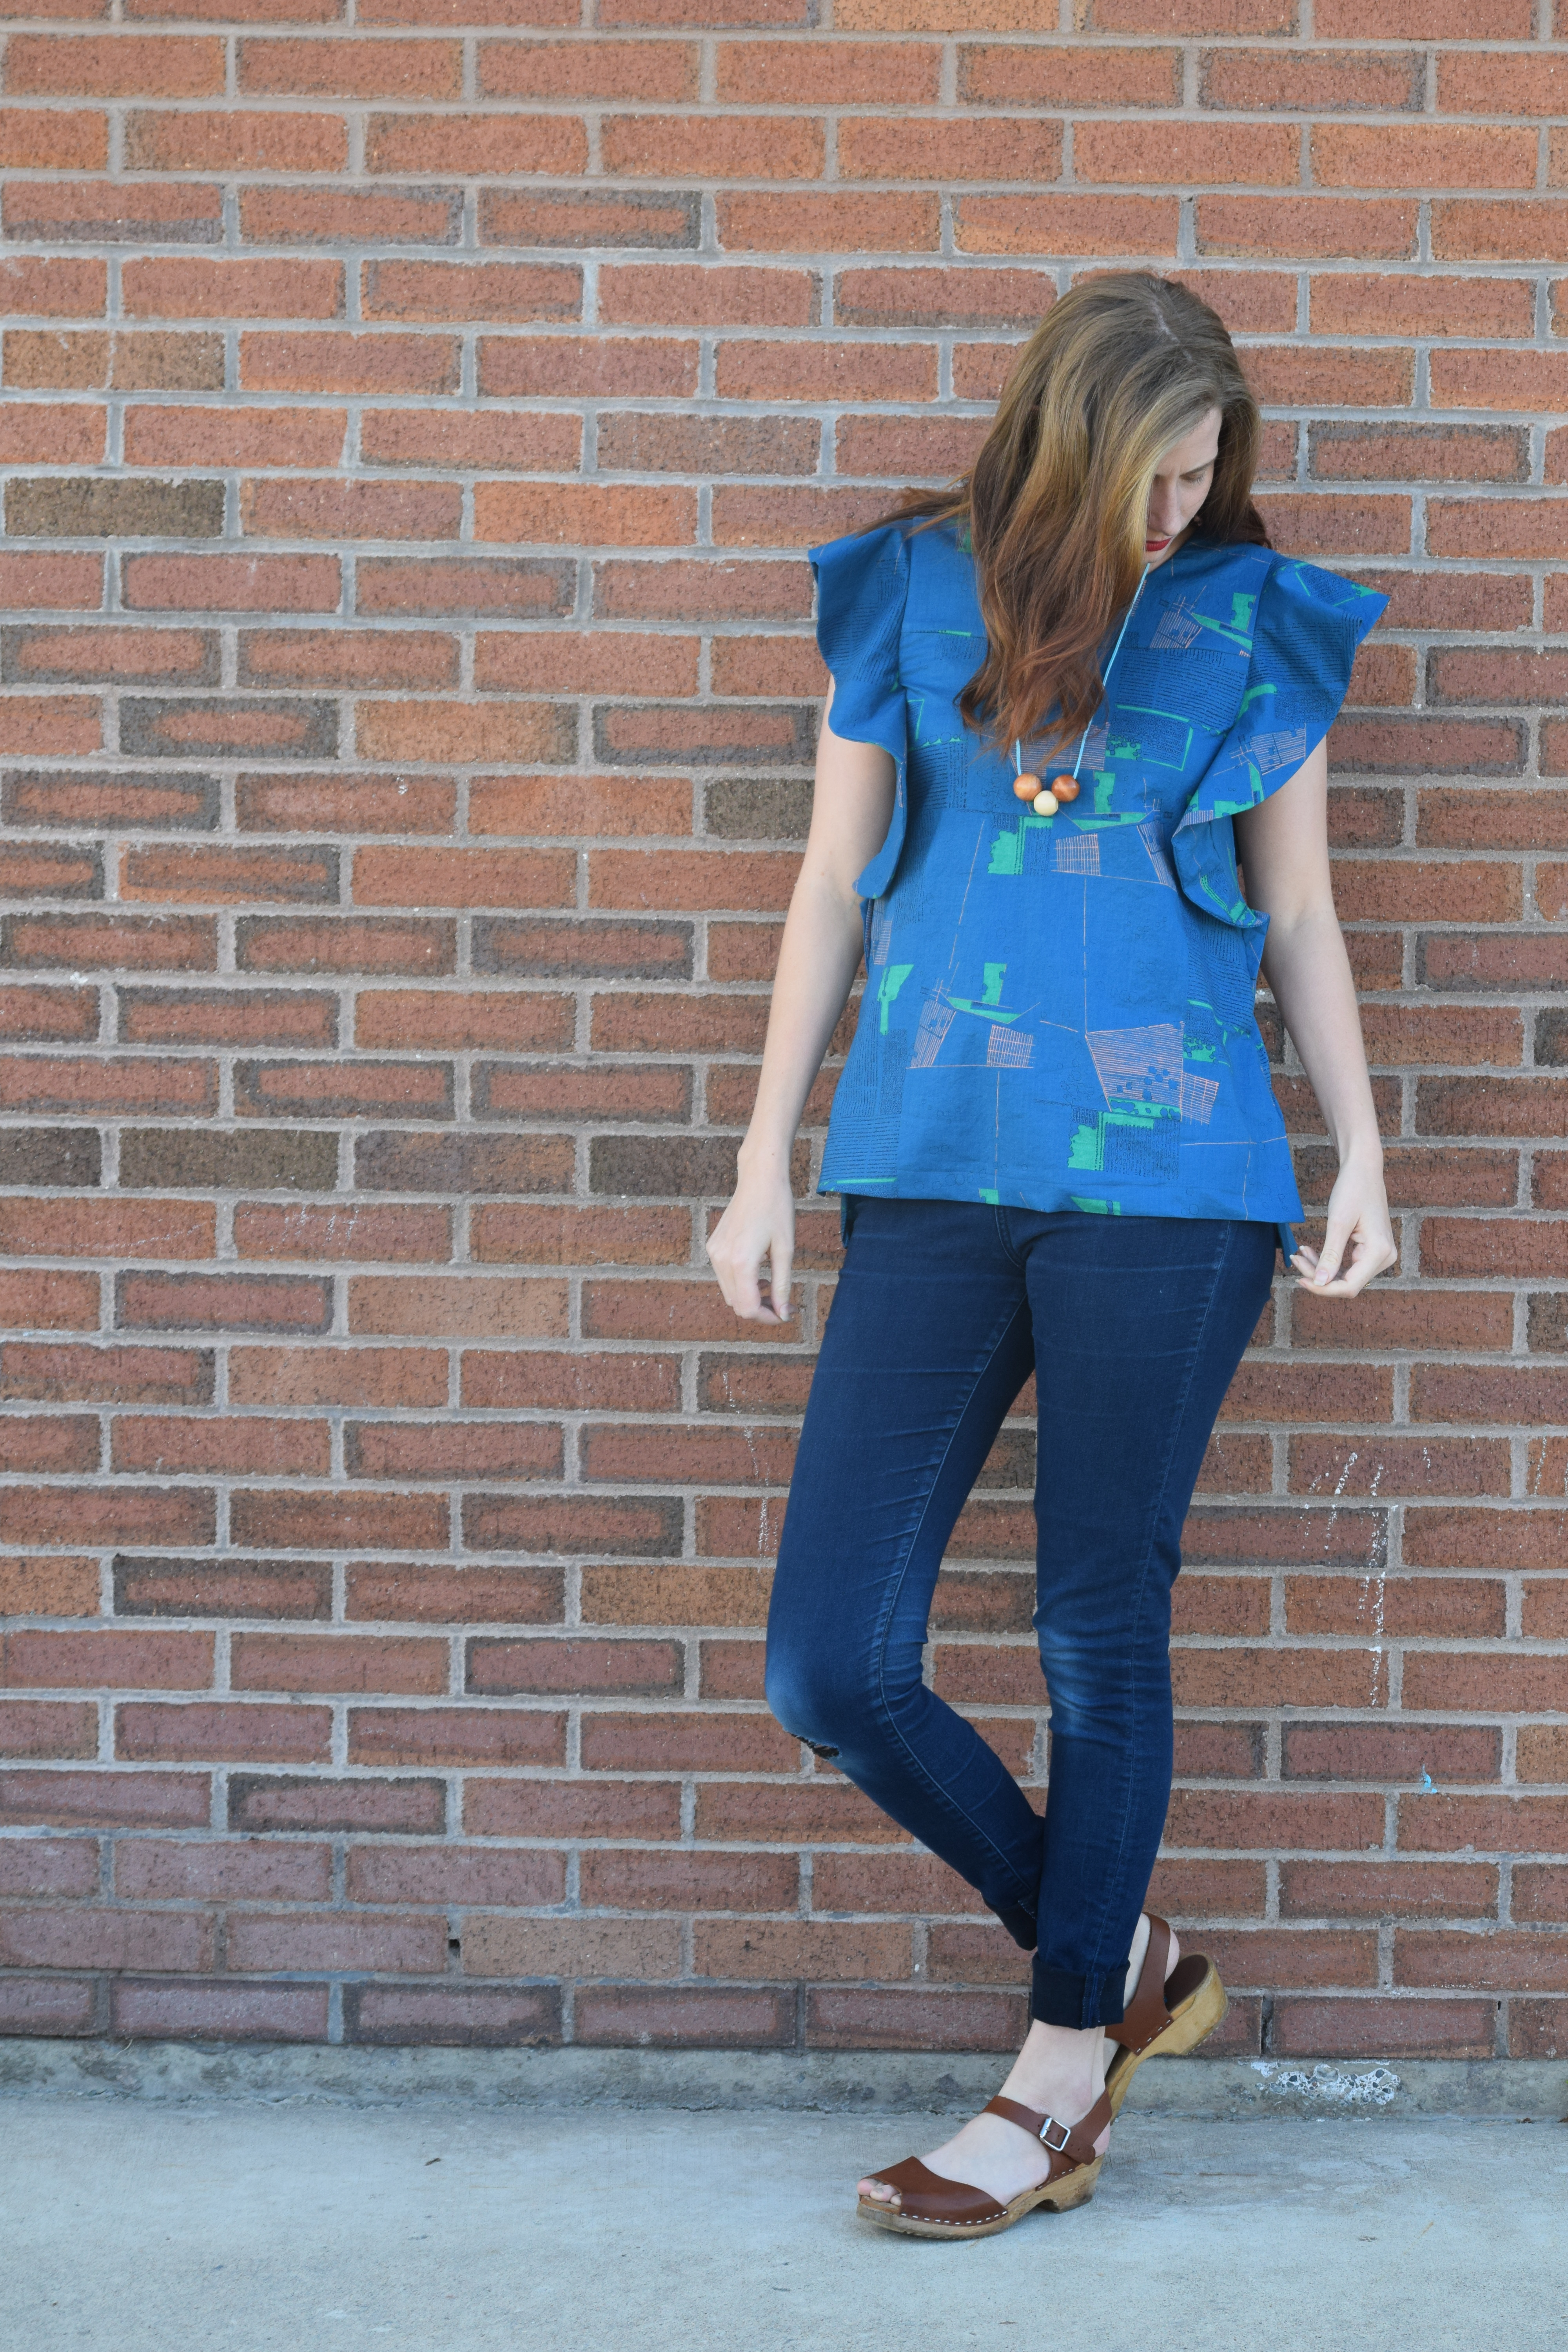
Two other non-sizing alterations were made. One intentional and one not. Tiahna of Ammon Lane made her first York last summer and her self-drafted angled pockets persuaded me to give the York a try after initially overlooking it. So, I copied her almost exactly in making these angled pockets.

My unintentional alteration was the addition of a center back seam. Unless I’m testing a pattern, I almost never look at pattern layouts or cutting instructions, paying attention only to grain lines. This time, my haste and haughtiness caught up with me. I was laying out the pattern pieces on the fabric when I realized the only way the pattern pieces would fit on a folded 45″ wide piece of fabric was if I added a seam allowance to the center back, not cutting it on the fold. I cut out the fabric, silently wondering why the fabric requirement chart didn’t note the need for more fabric. That is, until I went back to the instructions and realized the pieces were meant to be cut in one layer on 45″ wide fabric. Lesson learned. Perhaps next time I’m feeling puzzled about pattern layout, I’ll actually check the instructions before cutting.

Construction

Sewing the York took the better part of one afternoon. In fact, making the bias tape may have taken almost the same amount of time as the rest of the construction. It really is almost as easy as attaching the pockets, and then sewing the front and back together. The most difficult step: Attaching the bias tape. That’s it. If you’ve never attached bias tape, I promise you it’s nothing to fear. The bias tape adds a polished look to the insides and provided a fun opportunity to play with a contrasting print. I used other prints by Carolyn Friedlander for a fun, scrappy bias finish.

Final Thoughts

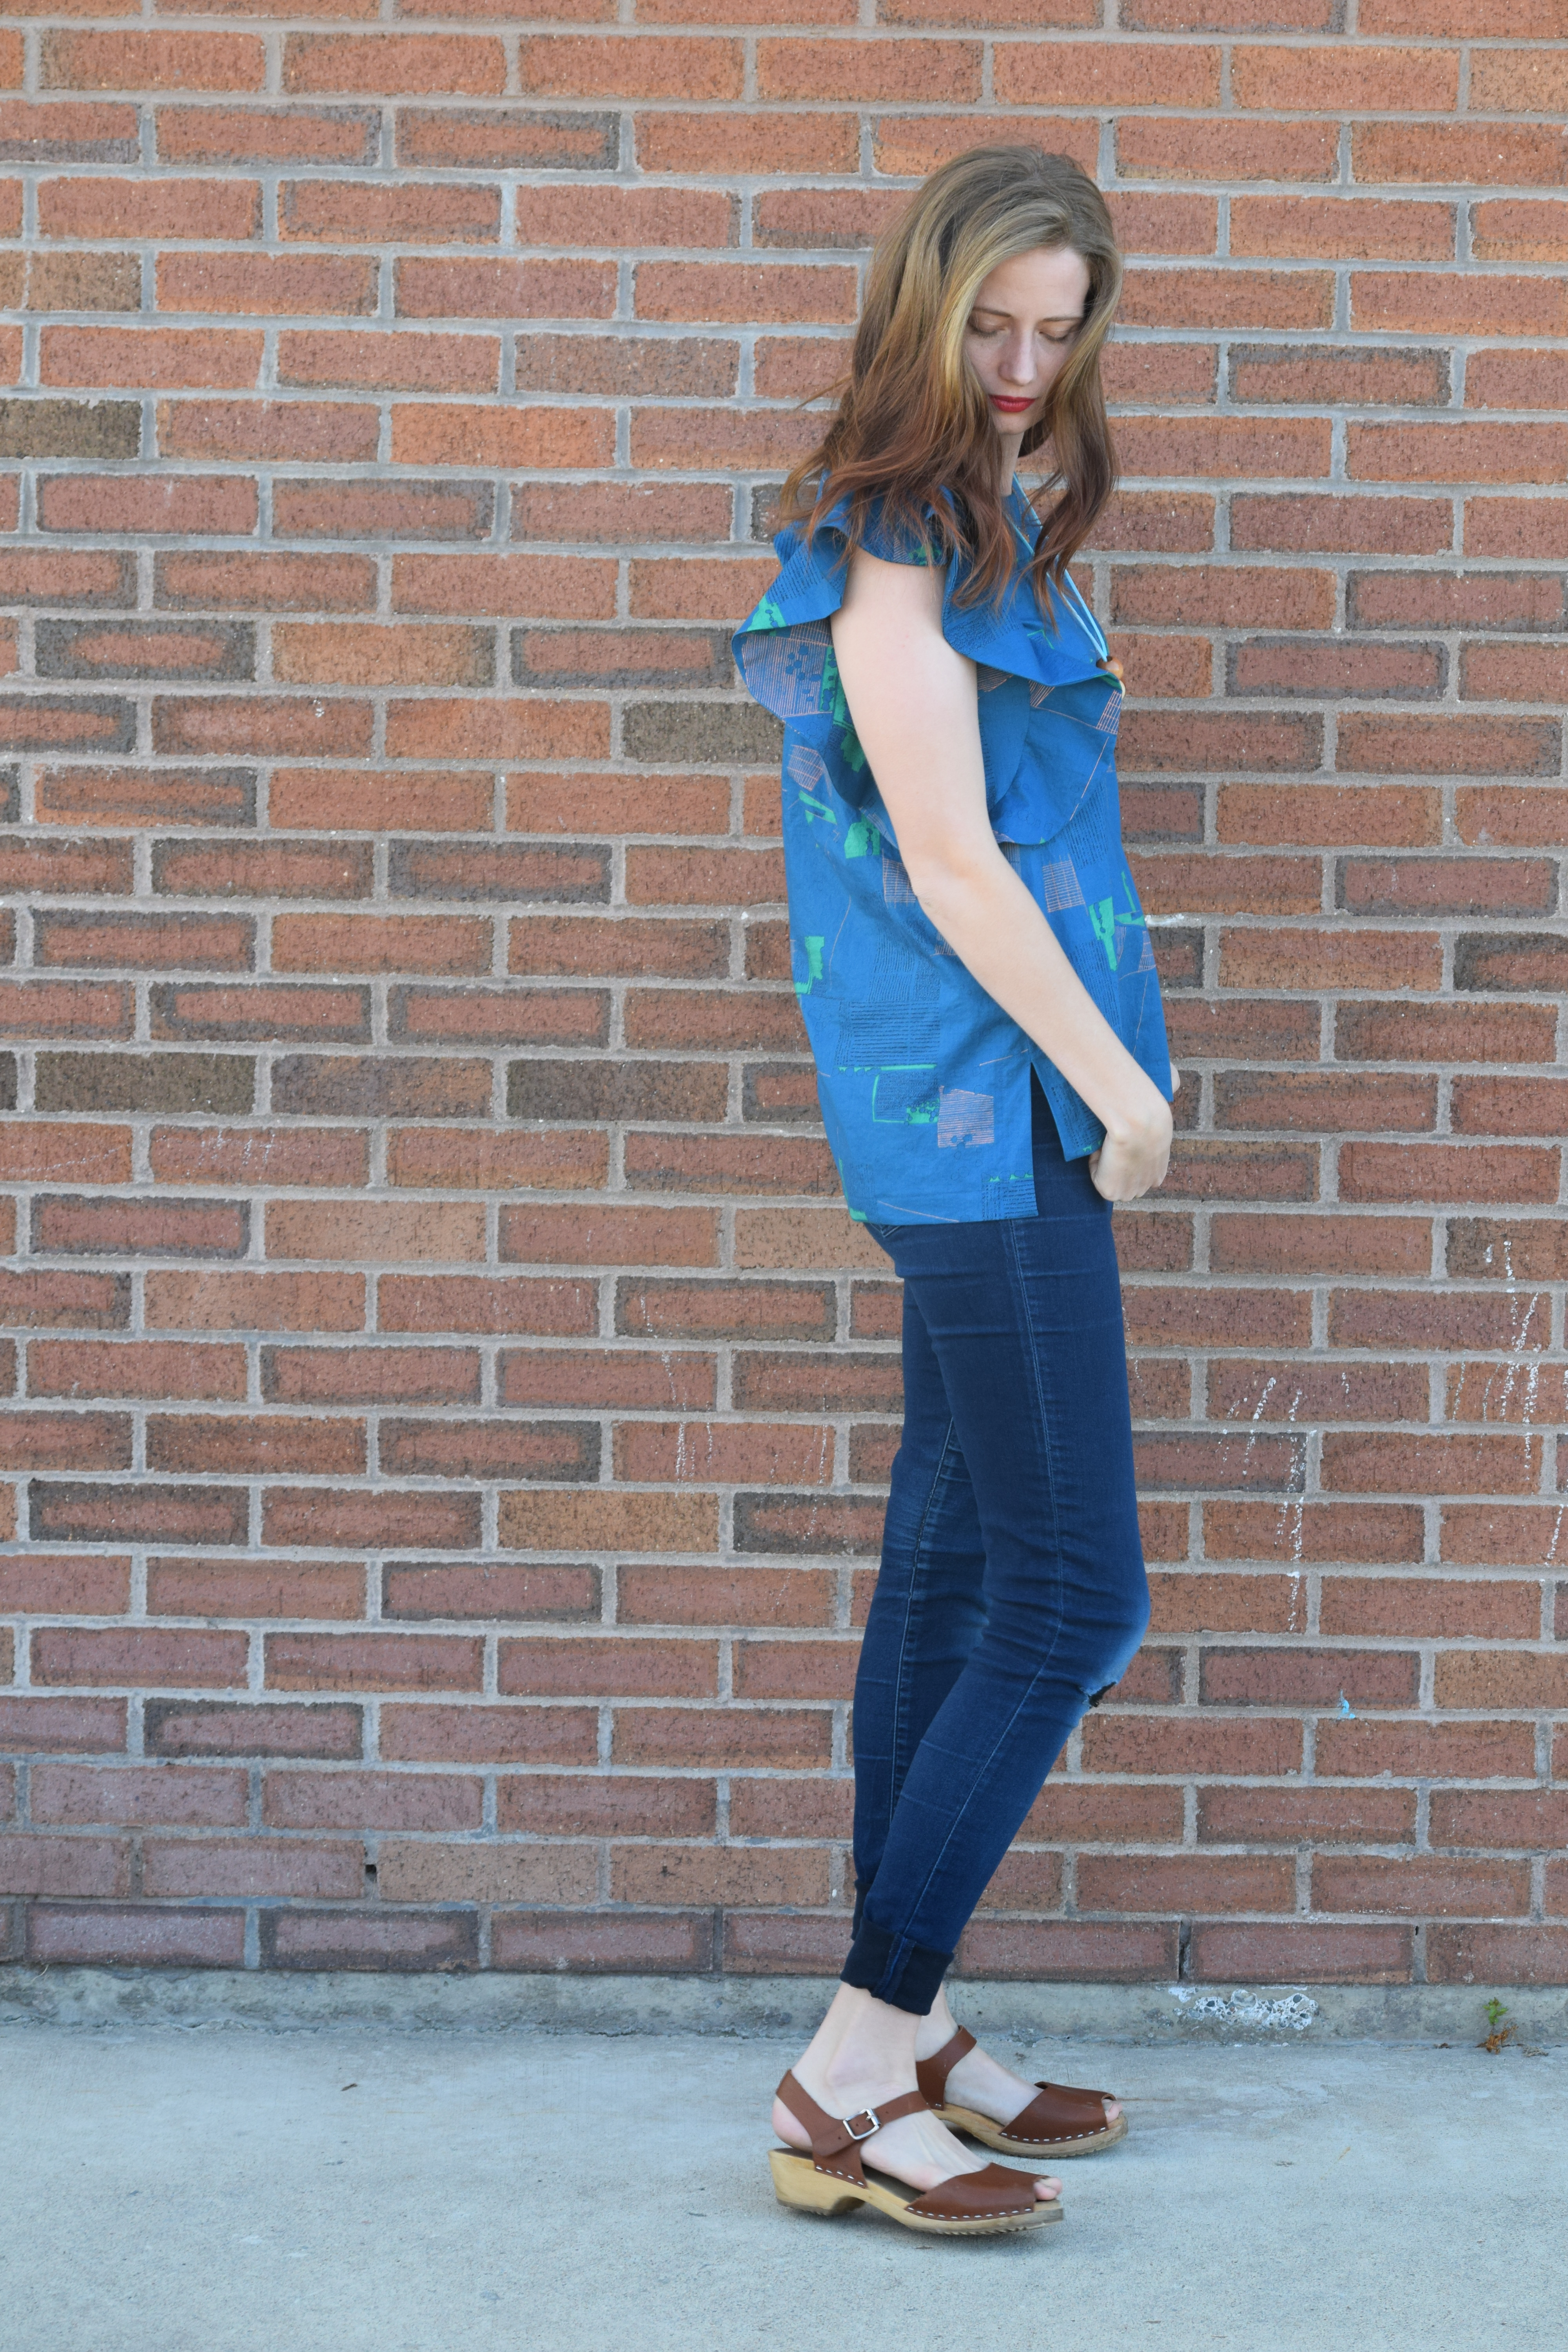
I just might become a pinafore person. You know my undying love for overalls and this pinafore fever feels like an extension of that. My favorite part about this pattern is the simplicity of it all. Clear instructions and a straightforward sew make this a pattern I will gladly recommend to my beginner sewing friends. It was a quick sew that, paired with the right fabric, feels casual enough for daily wear and dressed up enough for church or family events. Yesterday the deep pockets came in handy for hiding snacks, safeguarding my phone, and carrying small toys. All necessary things at this stage in my life. Now, how long do I wait before sewing another one?

Suit Up for Summer with Raspberry Creek Fabrics

There may be snow on the ground, but we’re already dreaming of summer and days spent in our favorite swimmers. Thanks to the Raspberry Creek Fabrics 2019 Swim collection, I’ve gotten a head start on summer sewing. Initially I couldn’t wait to get my hands on swimwear fabric and get to making myself a new suit. A few days later, however, the insecurities set in. Did I really want to share my body in a swimsuit with the internet? Should I get a spray tan? It’s been years since I last made myself a swimsuit, what if it’s a colossal fail? This. This is why I blog and give myself deadlines. If I hadn’t made the commitment, I would’ve let these doubts get the better of me. Despite my doubts, I’m always thankful that blogging pushes me out of my sewing and style comfort zones. Alright, enough about my insecurities, let’s talk about these suits.


My Son’s Palm Euro Suit

My 5 year old has been wearing this style of trunks since 2017 when I met Rachel of Little Fish Apparel. I purchased a pair of her trunks and since then, my son hasn’t worn any other style. Last spring Sew Like My Mom released the Palm Euro Suit pattern and I fell in love with the style and quick construction. My son fell in love with the fully lined inside and options to have his favorite style in a variety of fabrics. There was no question that this would be the pattern for my son’s newest suit. I got this Flamingo Vertical Stripe swim fabric and got to work.


When I say construction is quick I mean that a pair of these can literally be whipped up in the time it takes to get my child ready for the day. I sewed this pair one morning last week in about an hour including interruptions like getting oatmeal for my son, reminding him to get dressed, and answering approximately 100 Minecraft questions. My son wasn’t thrilled with the suit when I first finished it but, was sold after putting it on for these photos. In fact, he opted to wear it under his clothes for the rest of the day. Calling that a win.

This pair is the brief length, fully lined in a size 5. Sizing was spot on when compared to the size chart.

Do we look cold here? We might be a little cold.

Opian Pilatus Swimsuit

The last time I made myself a swimsuit was in 2015 (here). Back then I wasn’t blogging and had a following on Instagram that was mostly limited to family and friends. I shared the photo on Instagram and remember being only slightly nervous. This time I was again nervous, but more so since I planned to also blog about my suit. Upon finishing the suit, my nerves lessened because I realized that this body made a freaking swimsuit which makes me feel pretty good about it. Life is too short to not show your body love for the things it can do. Stepping down off my tiny soapbox because it’s time to talk about this suit.

Fabric and Pattern Choice

With over 30 Raspberry Creek Fabrics swim prints (plus a nice selection of stripes, dots, and gingham), picking my favorite design was a daunting task. Originally I planned to use a Watercolor Palm Leaf print until a moment of inspiration had me changing my mind to this bold Vertical Multi Stripe. Some sewists choose a pattern and then look for the fabric. In my case, I generally choose the fabric first and allowing it to tell me what it should be. This fabric was begging to become an Opian Pilatus. With a cut out back, tie front, and high waisted bottoms, the Pilatus swimsuit combines the fun of a two-piece swimsuit with the security and functionality of a one-piece. Now that I’ve sewn it I can echo others and say that it’s a good one. I did however, make a few changes for my own personal comfort.


Sizing and Alterations

According to the measurement chart, my measurements put me at a size 2 bust with a size 6 waist and hip. Based on this I traced a size 2 top and size 6 bottoms. The pattern is drafted for someone approximately 5’6″ in height so I made a couple more initial adjustments to fit my 5’10” height. To address this, I added 1/2″ to the top of the bottoms, and a total of 1″ to the bodice pieces (1/2″ added to each the top of the straps and bottom of bodice pieces). Finally, I needed to address the coverage on the back bottom pieces. My initial muslin showed much more of my buttocks than I’d like to share with the world. I have no issue with others wearing a suit fitting this way, it was just more than I personally felt comfortable showing. After a couple more muslins, I ended up adding 1 and 1/2 inches at the fullest part tapering to the original pattern lines at the top and bottom. With fitting sorted, I was ready to start sewing.

Construction

I sewed in bra cups but otherwise followed the pattern as written and found it straightforward. Construction took around 4 hours (including lots of try ons between steps because I was loving it). I used my machine’s lightning stitch for the seams and hemmed the waistband and leg openings with neon green thread and a double needle. Upon completion, my bottoms were gaping slightly at the back waist. Begrudgingly, I ripped out the top hem, removed the original back elastic, and replaced it with a piece 1″ shorter than recommended. This fixed the gaping and with a new hem, my suit was complete.

Final Thoughts

What more can I say? Clearly we’re already enjoying our new suits over here and I can’t wait to make more over the next few months. We’re heading to a Great Wolf Lodge next month and my goal is making a new swimsuit for both days we’ll be enjoying the waterpark. Will it actually happen or will I get distracted by other projects? Hoping that typing it here will keep me accountable but not making any guarantees here.

Ready for more swimwear inspiration? The Raspberry Creek Fabrics Suit Up for Summer tour is happening all week. Make sure to check out the other talented ladies included.

Friday: Its Liesel / Amber Lauren Boutique / Violette Field Threads / Confetti Unicorn

For this week, March 11-15, 2019, our readers can enjoy 20% off SWIM ONLY from these sponsors!
Wardrobe By Me code: Raspberry Creek
Simple Life Pattern Company code: SLPCO-RCSWIM
Titchy Threads code: SUITUP19
5oo4 code: RCFSWIM

A huge thank you to all of our sponsors!


Boo Designs / Sew A Little Seam / Titchy Threads / Simple Life Pattern Co. / Jalie
Little Lizard King / Made for Mermaids / Love Notions / Striped Swallow Designs
Patterns for Pirates / Violette Field Threads / Wardrobe By Me / 5oo4 / Sew Like My Mom

Thanks for reading!

Fabric for this post was provided to me by Raspberry Creek Fabrics but all opinions are my own.

Hacking the Hey June Willamette Shirt into a Dress

Remember when I said (in this post) that I was already planning a fourth Hey June Willamette (pattern here)? Between painting and packing, I managed to squeeze in just enough time for a Willamette Shirt to dress hack. In my last Willamette post, I mentioned that the Willamette is my current pattern obsession. Every time I fall in love with a fabric I think, “Wouldn’t this make a great Willamette?” This was the exact scenario that played out when I set eyes on this fabric from Anna Maria Horner’s Loominous II line. Weeks ago, I was desperately searching Etsy for a continuous 12 yards of another Loominous II fabric I intended to use for curtains. Once I found the desired fabric from La Antigua Textiles this large plaid fabric somehow jumped into my cart as well. When you’re buying 12 yards of fabric, it’s pretty easy to justify the cost of an extra 4 yards. Besides, I had an Etsy gift card that covered the price of this fabric so I can basically pretend it was free, right?

IMG_8363

Now, let’s get on to talking about this dress hack. I was inspired by the shape of this dress from Roolee. The boxy shape and minimal gathering are both elements I wanted to include in my latest summer dress. Once upon a time, I regularly wore shorter and more fitted styles but then; I had a child and realized that limited movement was no longer my jam. If I can’t wear something as a house dress, to the park, and to church, then it’s unlikely to find it’s way into my closet. I decided to hack the Willamette for this dress because the collar, cuffs, and yoke detail add interest to the dress and keep it from looking too much like a sack. I, for the record, love a good sack dress, just didn’t want that look for this one.

IMG_8369

The actual “hacking” of this pattern was quite simple. Let’s start with alterations made to the top. I removed 3 inches from the length of the cropped version so that the beginning of the skirt would hit around my natural waist. I opted for a button front instead of sewing the the front pieces together at the placket (Tori of The Doing Things Blog talks about her button front version here). One of my favorite details is the box pleat at the back of the dress. Originally, I just pleated the top of the back bodice piece near the yoke. After attaching the skirt, i realized the back needed a bit more shaping to achieve the desired look. The solution was to repeat the box pleat at the bottom center of the back bodice. It was a simple fix, but required some time with my seam ripper. I considered not fixing the issue, but realized it was worth the extra effort to make something I would be proud to wear. I sucked up my pride, made friends with my seam ripper, and got to work removing the skirt. This fix took about an hour to execute and was worth every minute.

IMG_8378

Moving on to the skirt. This was such a simple “hack” that it feels almost blasphemous to call it one. Since I wanted only minimal gathering I multiplied the finished width of my front and back bodice pieces (both were right around 20″ with that added back pleat) by 1.4. This gave me 28″. I cut two rectangles 28″ x 34″. I then added inseam pockets to the side seams and sewed the side seams together with a 1/2″ seam allowance. There are approximately one million tutorials for adding inseam pockets, but if you’re unfamiliar with them, this is a good one to check out.   Using a basting stitch at 3/8″ and 5/8″ gather the skirt to fit the bodice. Then attach the bodice and skirt right sides together using a 1/2″ seam allowance. Hem the skirt to your desired length and that’s it. You’re done. Seriously, this hack is one of the easiest I’ve ever completed.

IMG_8354

IMG_8375

In the midst of all the (good) stress and craziness of the last month or so it felt good to sit at my machine and sew this dress purely out of a desire to create. I thoroughly enjoyed squeezing in a bit of time here and there to reconnect with my machine. Two more weeks and we have no choice, but to be done with this moving madness (because our apartment lease will be up). A little time simply creating for pleasure was just what I needed to get me through the next weeks. Looking forward to sharing more with you in my new space.

IMG_8362IMG_8359

Thanks for reading! Want to see a different Willamette Shirt to Dress Hack? Check out Michelle’s here. Can’t get enough of Anna Maria Horner’s fabrics? Me either! I’m a total fan girl. Check out other items I’ve made with her fabrics like the Highlands Wrap Dress, Fringe Dress, Butterfly Blouse, Bonn Maxi Dress, and Bonn Shirt.

Perkins Shirt by Ensemble Patterns

In the midst of the madness of buying a home in an insane market, I couldn’t help but apply as a tester for the Ensemble Patterns Perkins Shirt Dress. I was powerless to resist the siren song of this ultra hip take on a traditional button down. Its song was so strong that I made not one, but two versions.

IMG_8339

IMG_8316

On occasion (who am I kidding? about 80% of the time), I blatantly ignore the recommendation to not buy or use my “good” fabric for a test. I do occasionally make up a quick and dirty muslin, but I just love using pretty fabric and have faith that if things don’t work out I’ll be able to refashion the item. This time, however, I actually had some great fabrics in my stash waiting to be used.

IMG_8328

During the first phase of testing, I made the basic cropped version in a black and white striped rayon challis. I purchased this fabric from Raspberry Creek Fabrics back in January and used it to line both my Joy Jacket (here) and  the sleeves of my Clare Coat (here). I had just over a yard of this fabric and was barely able to eke out all the pattern pieces. The simple stripes and drape of the rayon combine to make this top into a closet staple. The pattern’s style lines add visual interest to the top and elevate the cool factor a bit above that of a basic button down. I opted to use the wrong side of the fabric on the back yoke in order to highlight some of those style lines.

IMG_8337

IMG_8333

During the second phase of testing, I made the gathered cropped version. My talented and generous friend Kim of Sweet Red Poppy had some scraps left over from making a couple of dresses last summer (see them on her blog here). She was kind enough to share them with me and I’ve been anxiously awaiting the perfect pattern pairing. The fabric is a polyester crepe from Stylish Fabrics (here). I tend to gravitate towards natural fibers, and as a result, have very little experience working with polyester. This was also my first foray into working with crepe. I was pleasantly surprised with how easy this fabric was to sew. Combining the fabric with this gathered version was a no-brainer. It gathered easily and its drape is a dream. Bonus: These photos were snapped after I’d been wearing this top for several hours during my son’s birthday party. Thanks to the polyester content, The top still looks fresh and wrinkle-free.

IMG_8323

IMG_8327

Let’s talk construction. Once in a while, I come upon a construction method that is simultaneously brilliant and baffling. The “dumpling method,” as Celina referred to it, took a moment to understand, but was surprisingly simple. The instructions provided excellent detail and held my hand throughout the process. This method encloses the sleeve hem and raglan seams. This top also includes french seams along the sides for a clean-finish inside and out. Anyone with an intermediate level of skill shouldn’t have any trouble constructing this top. If you’re an adventurous beginner, however, don’t be discouraged. There’s a good chance you could have success here as well.

IMG_8320

I’ll leave you with a sizing note: My bust measurement put me right at a size 4 for this pattern. Based on that, I sewed a straight size 4 in both versions. My only adjustment was adding 2″ to the length.

IMG_8317

IMG_8330

Now that I’ve got a yard to use as a photo background, I’m really itching to sew up some more summer basics. Realistically, I might not be doing much sewing until fall, but a girl can dream, right? What are you sewing this summer?

Highlands Wrap Dress by Allie Olson

Last weekend, I was finally able to finish this maxi length Highlands Wrap Dress. I originally intended to finish it back in June but moving and life in general just got in the way. Way back in late winter/early spring, I had the opportunity to test this pattern for Allie. I ended up making a midi length version using gray rayon chambray. I loved the fit of the dress, but the fabric just wasn’t my favorite. I knew I needed to make a second wrap dress in fabric more suited to my style (aka: more color/print).

IMG_1701

IMG_1757

I’ve literally been in love with this Anna Maria Horner rayon challis print for years. This fabric was originally printed back in 2014 so I thought I’d missed my chance to buy more until a bolt showed up at Suppose. I immediately knew it was meant for a Highlands Wrap Dress and purchased a few yards.

IMG_1714IMG_1740

When tracing the pattern I selected a size 4 and graded to a 6 in the hips. I added a total of 4 inches to the length to accommodate my height (2″ at the hips and 2″ below the slit). In retrospect, I probably should’ve added all 4 of those inches above the slit because it is cut just a bit high for my personal preference. I plan to unpick a bit of the side slits and resew them to hit right above my knee. The high slits are a lovely design feature, just not quite as practical for my lifestyle.

IMG_1761IMG_1753

Back when I made my original test version, I didn’t add interfacing to the front facings. That was a terrible mistake and made top-stitching the facings a real pain in the you know what. This time, I decided to make a better choice and chose to interface them. I chose a tricot knit interfacing and it worked like a dream. Stitching the facings in place was about 100 times easier and I totally kicked myself for not using it on my first Highlands. I was originally introduced to knit interfacing when sewing a pattern by Gabriela of Chalk and Notch. She recommends it in many of her patterns, and that chick really knows her stuff. I know it’s going to be good if it’s recommended by Gabriela.

IMG_1729

Saying that I’m happy with this dress would be an understatement. There’s just something about a flowy, floral print dress that makes me feel put together and pretty. Now excuse me while I go experiment with ways to style this dress for fall and winter. It’s far too lovely to wear only during the summer months.

Note: You might notice that the darts are looking a bit high in these photos. I noticed this when I got home and started editing these. I made the mistake of wearing a different bra when fitting the dress than I was wearing the day I took these photos. Until I started sewing my own clothing, I never realized how much wearing the right undergarments matters (it matters a lot). Now that I’ve made this mistake, I’ll hopefully remember which bra to wear when taking photos in the future.

A Dress for Date Night: Lodo Dress by True Bias

IMG_1566

I fell in love with the Lodo Dress almost immediately after it was introduced (here) in April. I quickly purchased the pattern and ordered some fabric to make my first Lodo Dress. You can check out my first one here. I’ve gotten so much wear out of that first Lodo Dress and knew I needed another. My first dress is a bit more casual so I wanted my next one to look a bit dressier. I selected this red scuba knit from Indie Sew after seeing Allie’s blue version. The solid red was a bit of a bold choice, but I think it was the right one.

IMG_1559

My husband and I got the rare opportunity to go out on a date last week and I had him snap a few photos in my parents’ backyard before we left. Never thought I’d love sage brush, but I’ve started to see the beauty in it after living in Utah most of my life. The promise of a date was all the motivation needed for me to get working on my Lodo Dress. Our date was on Wednesday so naturally, I started cutting out my project on Monday. Tuesday night I sewed a few hours after bedtime and was able to complete the dress. There’s just something satisfying about finishing a project that is both quick and stylish. It never gets old and I see another Lodo or two in my future.

IMG_1543

This was my first time working with scuba and I was a bit nervous to use a new fabric. It was surprisingly easy. The only difficulty I had was when sewing the back slit. The fabric shifted a bit more than expected, so my stitching isn’t quite as perfect as I’d like. It is, however, such a small imperfection that I decided it was not worth the time it would take to fix it. I made one small modification to the instructions and sewed bar tacks at the top of the back slit and at the underarms. Hoping that the bar tacks will further secure the seams in areas where they’ll experience the most strain. So far, so good.

IMG_1529

My red scuba Lodo Dress turned out to be the perfect date night dress. It’s stylish enough for a night out, but simple enough to wear to the local dive. This dress feels like wearing a light, soft sponge. It’s also got plenty of room for indulging in the large amounts of food I  may or may not consume. What I’m trying to tell you is that it checks all boxes for an essential date night dress. Do you have anything specific you love wearing for date night? What do you require in clothing for a night out?

IMG_1541

Just a quick note on sizing: My dress is a size 2 graded to a 4 in the hips. I made the midi length and added just 1″ to the length.

IMG_1540

Named Clothing Ronja Dungarees

I’ve loved overalls for as long as I can remember. In fact, last time I was at my parents’ house, I looked through old photo albums and found two first day of school pictures in which I’m wearing overalls. I even brought my newborn son home from the hospital in a tiny pair of overalls because teeny tiny overalls will always win my heart. Every time overalls come back in style I find myself poring over photos and planning all the possible outfits. Basically, I have a love affair with overalls and will likely continue to wear them long after they’re no longer “in style.” With that said, I’d like to introduce you to my Named Clothing Ronja Dungarees (find them here). The Ronja Dungarees feature front and back pockets, button closures, a cropped ankle-length, plenty of top-stitching, and tie straps. There’s no shortage of details and I love that about this pattern.

IMG_1642IMG_1654

I added these lovely flower buttons (purchase here) from Arrow Mountain. I’ve almost exclusively used Arrow Mountain buttons since discovering them over a year ago. Good quality, stylish buttons are sometimes hard to find, but I find myself wanting to buy ALL the Arrow Mountain buttons (see more ways I’ve used them here, here, and here).

IMG_1648IMG_1676 
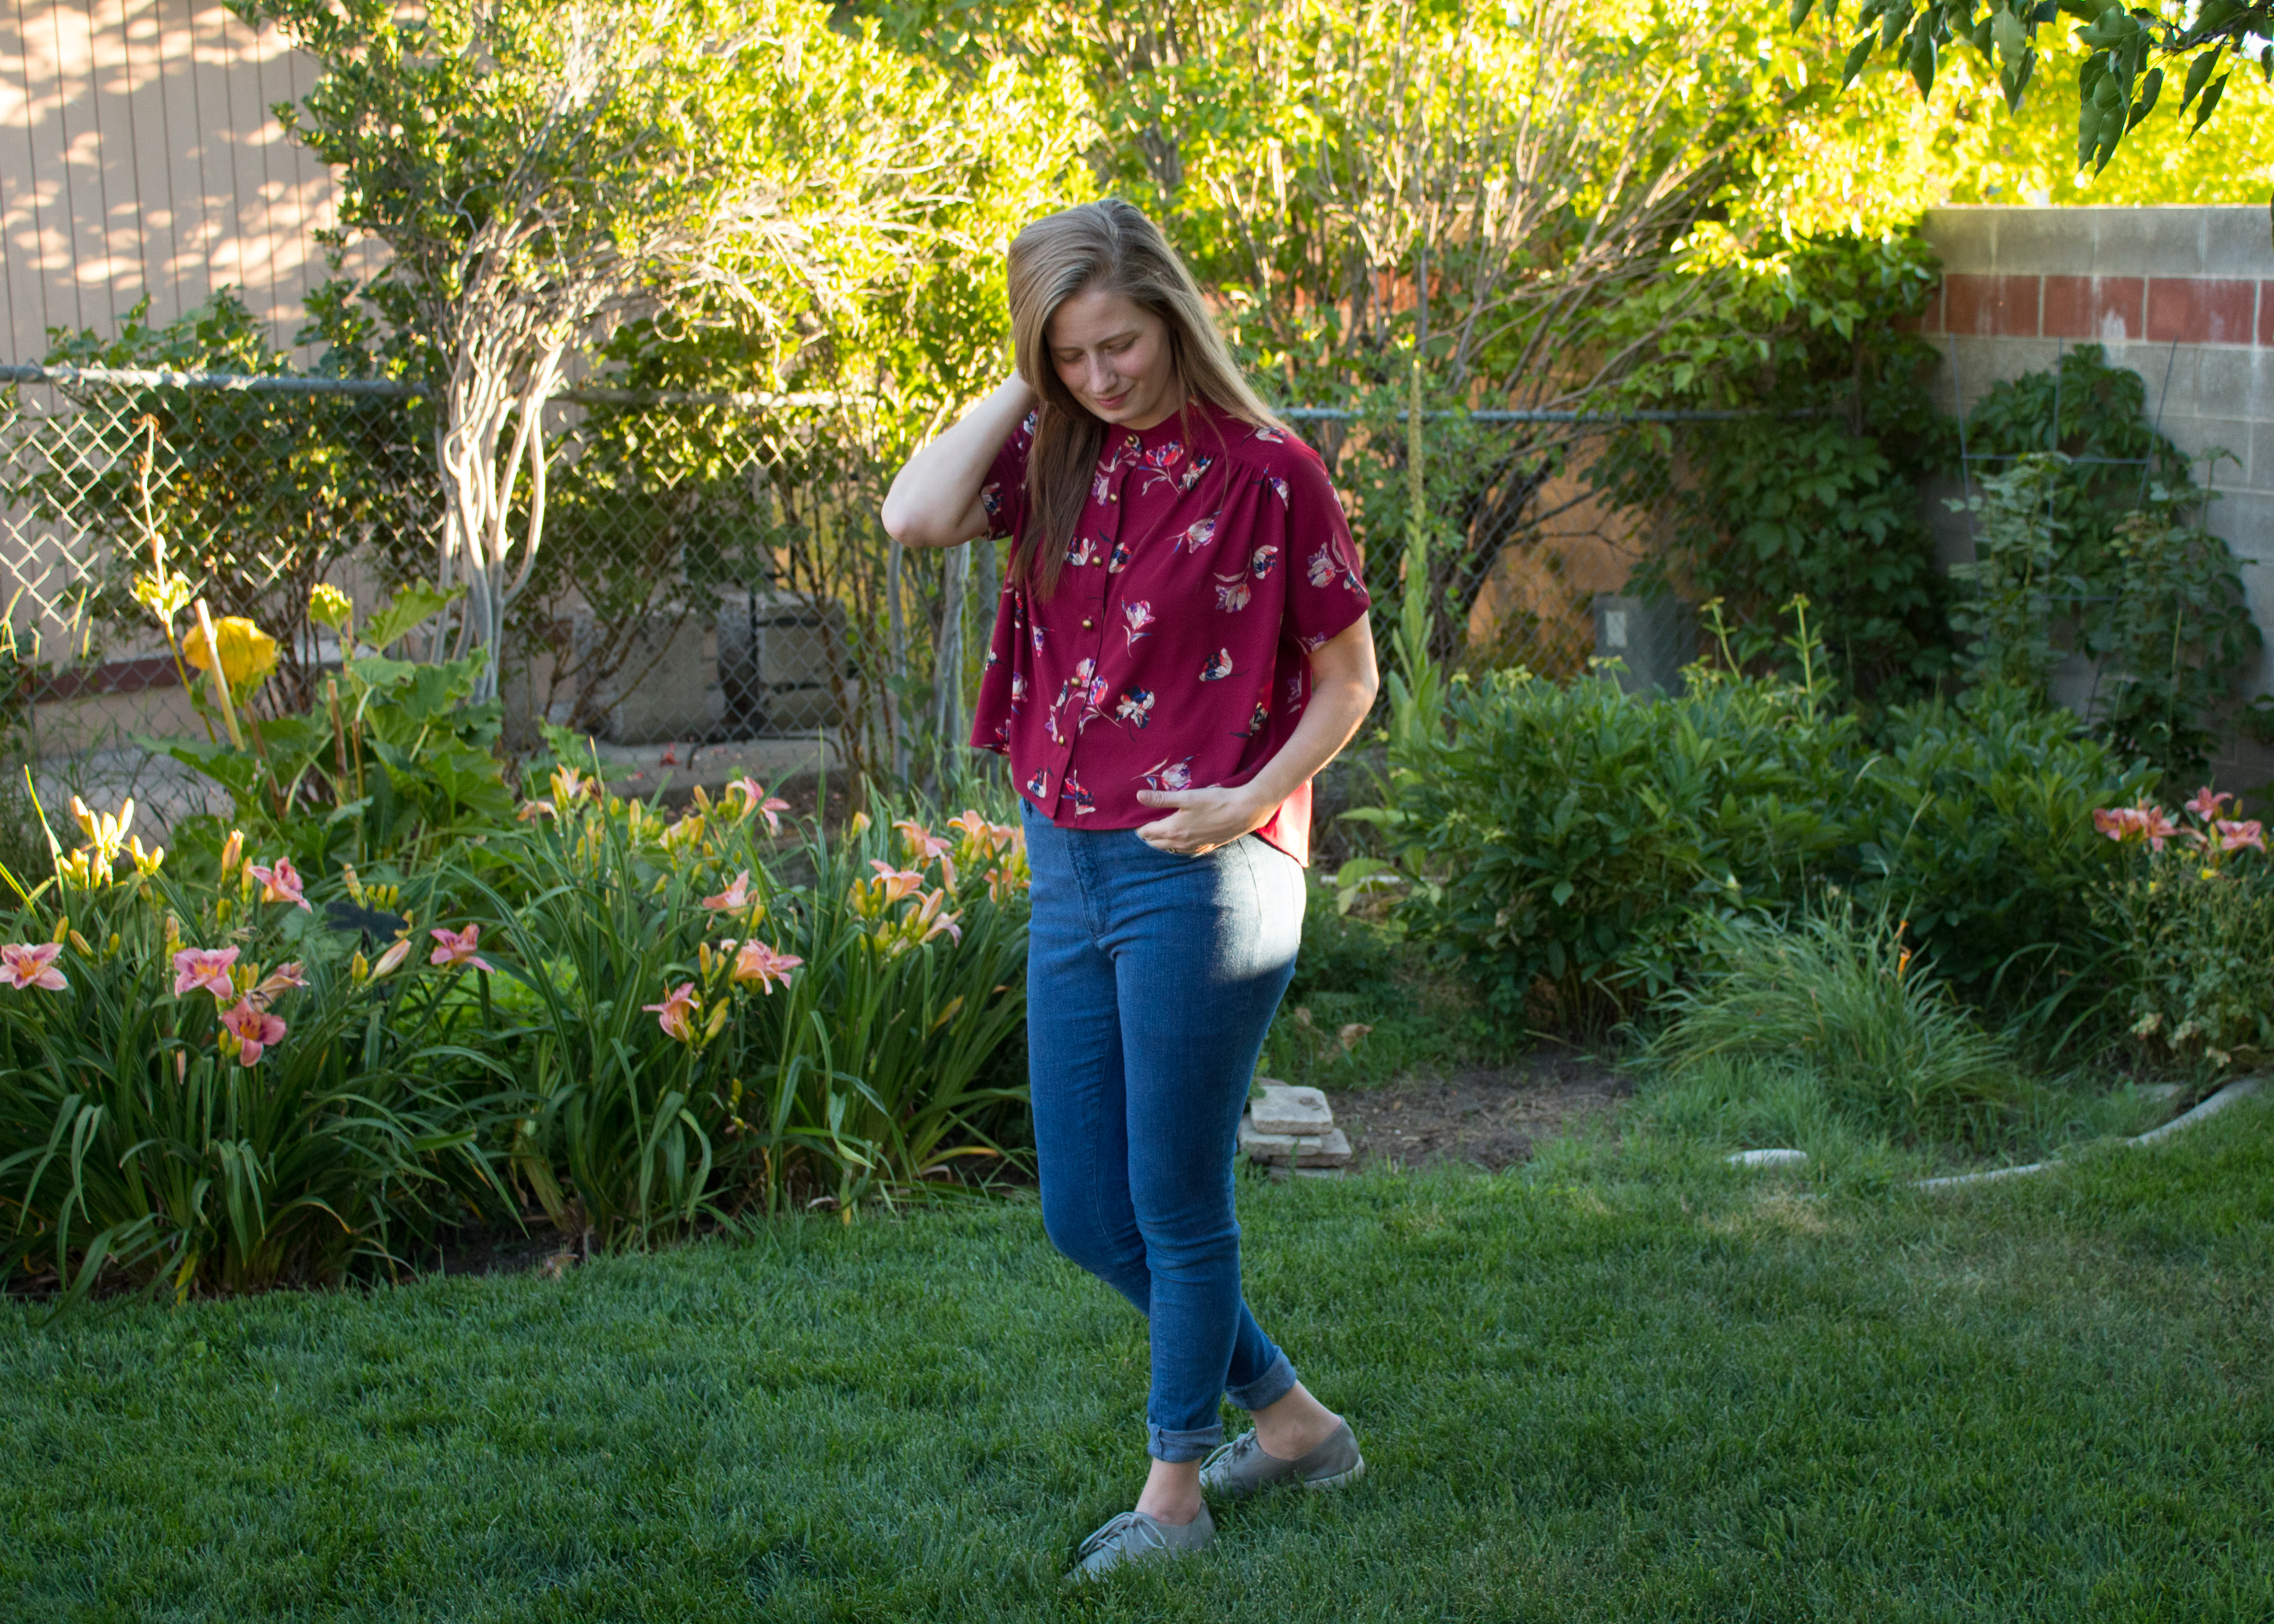
When choosing my fabric, I was presented with the dilemma of whether to use a print or a solid. I waffled back and forth between the two until I remembered that I had some of this Euclid fabric in my stash. This is a print designed by Carolyn Friedlander for Robert Kaufman Fabrics. It is printed on their Essex Linen which is a cotton/linen blend. The weight of the fabric is somewhere between a canvas and a quilting cotton. It doesn’t have much drape which makes it great for a bit more structured pants and skirts. As per usual, I purchased the fabric from Suppose.

IMG_1665IMG_1645

These are constructed in a way that makes it a bit difficult to test garment fit as you sew, because of this I would highly recommend sewing a muslin first. Sometimes, out of pure laziness, I ignore my own advice.  This was one of those times.  I pretty much just held my breath and hoped the overalls would fit in the end. I was expecting my Ronja Dungarees to be fun but; I did not expect that they would actually flatter my back side. This was a pleasant surprise. My husband even remarked that these overalls were “very flattering.” I’m almost certain that the words “overalls” and “flattering” are rarely used in the same sentence. I mean, I definitely don’t usually reach for overalls and think “Man, I look good in these.” These Ronjas make me feel that way and it’s a fun change from my regular momiform of loose flowy dresses.

IMG_1659IMG_1641

The challenge of sewing something a bit more advanced after many simple projects, was a great refresher for me. It’s sometimes nice to change the pace and sew something one small step at a time instead of all at once. This pattern reignited my love of overalls, and I’ve already purchased the Burnside Bibs pattern by Sew House Seven. How do you feel about overalls? Are you over them?

IMG_1592

I’ll leave you with a few notes on my sizing and alterations: I am close to 5’10” and sewed a size 38 with few length modifications. Named Clothing drafts for a height of 5’8″ so I decided not to add any length to the rise and add elsewhere instead. I added 1/2″ of length at the bust, 1″ of length at the thigh, and 1″ of length at the knee. I’m really happy with the length and think it will be great for late summer and transition well into early fall.

Tea House Dress by Sew House Seven

It’s not often that my husband and I can both agree that a dress is stylish AND flattering. My Tea House Dress, however, is one on which we can both agree.  My style tends to gravitate towards dresses that are cool, flowy, and functional (aka: muumuus). This pattern by Sew House Seven piqued my interest from the first time I saw it.
IMG_1337

A few weeks ago, I attended a dinner with bunch of sewing friends and bloggers. I need deadlines to keep me motivated; so I used the dinner as my deadline for my Tea House Dress. The dinner was to be held on a Monday evening. Naturally, this meant that I started tracing the pattern and cutting my fabric on Friday. It came together pretty quickly and I managed to finish it by sewing for a couple of hours each night of the weekend. I finished the hem and gave it a final press just hours before the dinner. That dinner was two weeks ago. I’ve already worn this dress four times since that evening.

IMG_1289

The Tea House Dress includes a few style details that caught my eye and inspired me to purchase the pattern. First, I love a good v-neckline. It’s low enough to be flattering, but high enough to keep from flashing innocent bystanders when I lean over. Second, The seaming of the yoke and front panels add interest and shaping to an otherwise simple slight a-line shape. Third, the wide waist ties define the waist while also allowing for occasional adjustment (i.e. ate too much ice cream). Fourth, the midi length is perfect for keeping cool in the summer without requiring me to shave up above my knees. Fifth, the pockets are the perfect size for holding my phone and keys. They’re also just a nice feature when I’m feeling awkward and don’t know what to do with my hands.

IMG_1334

IMG_1315

I used a double gauze print from the Charms line designed by Ellen Luckett Baker for Kokka. Since this double gauze is 100% cotton it’s both breathable and comfortable. I love wearing double gauze in the summer as it tends to look a bit more casual than a rayon or lawn, but is every bit as comfortable. I had nearly a yard less fabric than the pattern recommended so I had to get a bit creative when it came to laying out and cutting each pattern piece. It was doable, but I certainly wouldn’t recommend it.

IMG_1322IMG_1343

The pullover style of the Tea House Dress appeals to my no fuss style of getting dressed. I plan to make another one for a family member who sometimes has difficulty with fiddly closures. I’m also planning to make a second one for myself as soon as I find a few extra hours in the day.

IMG_1310IMG_1294

Just a quick note about sizing: I sewed up and straight four with the only alteration being that I added two inches of length at the hem. This is a common adjustment for me and I found no issues with the sizing.


Itch to Stitch Anza Jumpsuit

Last spring, I purchased a gorgeous Anna Maria fabric fully intending to make a jumpsuit. Life got busy and many of my sewing plans got pushed aside. By the time summer ended, I had given up on finding and making my perfect jumpsuit and used the fabric to make a pattern hack of another Itch to Stitch pattern. You can find that dress here. Luckily, Kennis of Itch to Stitch is not only a talented and detailed pattern designer, she is also some sort of mind-reading wizard who is releasing the perfect jumpsuit pattern just when I needed it. Today I’m thrilled to show you my tester version of the Anza Jumpsuit.

DSC_0323

I was browsing the selection of fabrics at my local fabric store Suppose when Kennis annouced a tester call for the Anza Jumpsuit and dress. I immediately put down the bolts I had been carrying around the store, borrowed a measuring tape, took my exact measurements, and filled out the application form. I purchased 4 yards (only ended up needing 3) of this Lizzy House Printmaking lawn and crossed my fingers that I’d be chosen. The next morning when I received an email inviting me to the tester group, I excitedly told my husband that I’d be making myself a literal birthday suit as a gift to myself (my birthday was coming up the following week). Sometimes, I think that I’m hilarious until I remember that not even my  3 year old laughs at my jokes.

DSC_0408

Let’s bring it back to talking about the jumpsuit and pretend like I didn’t just write several sentences detailing my own lame joke. Now we’re going to talk details and features. Itch to Stitch patterns often include well thought out details that add interest without stealing the show and overwhelming the wearer. The Anza pattern is no exception. It includes cuffed sleeves, pleated chest pockets, drawstring waistband, elastic at the ankles, and pants pockets. Basically, this is the jumpsuit I was preparing to draft for myself until I saw that Itch to Stitch had made a pattern even better than what I’d imagined in my own mind.

DSC_0393DSC_0409DSC_0388

Speaking of details, can we talk about these amazing Arrow Mountain buttons? These are the Minimalist buttons in Arctic Ice. I used the wooden version of the Minimalist buttons on maxi dress also made from Lizzy House lawn that you can find here. In fact, If you’d like to see more of the Arrow Mountain buttons in my handmades, check out my Itch to Stitch Bonn Shirt and Bonn Shirt Turned Maxi Dress posts found here and here. I’ve ordered from Arrow Mountain several times now and only found great quality and excellent customer service.

DSC_0340

A quick note on alterations:

This pattern is drafted for the height of 5’6″ and may some require some lengthening or shortening if you are not  5’6″. Since I am somewhere between 5’9″ and 5’10” I ended up adding 1.5″ to both the bodice and the rise.

One great thing about Itch to Stitch patterns is that Kennis includes pieces for cup sizes A-DD. This means less alteration time and more sewing time. Which is always a good thing. Let’s all make sure to applaud Kennis for taking the extra time and effort to make our lives easier.

DSC_0337

Overall, I am 100% satisified with my Anza Jumpsuit and cannot wait to wear it again and again all summer long. Now, go grab your copy here.

Farrah Top by Chalk and Notch

Today I’m looking forward to showing you my version of the newest release by Gabriela of  Chalk and Notch. The Farrah Pattern has top and dress options for two different views. I opted to make the top in View A. I sewed a straight size 4 with no alterations. This is an intermediate level pattern with sleeve ruffles, underarm gusset, and a mitered split hem. I was unsure about whether or not this style would suit me, but now I’m thrilled to say it’s my new favorite.

DSC_0276

Let’s talk fabric for a minute. I selected a cotton lawn by Carolyn Friedlander. I’ve been anxiously awaiting the release of these lawns since they were announced last fall. I bought it almost immediately once it Arrived at Suppose. Lawn has a lightweight, almost silky hand. It doesn’t have the same graceful drape as a rayon, but it is much easier to sew. Lawn presses beautifully and I love the way it exaggerates the ruffles in this design.

DSC_0291

DSC_0301

The fact that this top slips over the head and has no closures, doesn’t make it any less interesting. It’s a great skill builder with the ruffles, gusset, and mitered hem. My favorite is the mitered high-low hem. I’ve only sewn a mitered hem once before this top, but I love it. It makes the finish look and feel professional. Gabriela’s clear pictures and tutorials make trying new techniques less intimidating and more satisfactory.

DSC_0285

The pattern releases exclusively on UpCraft Club today and will be available through Chalk and Notch later this week. Be sure to check out the #farrahpattern on Instagram for more inspiration and to see more of the fantastic tester versions.

DSC_0289