Sew Fancy Pants Project 5: Closet Case Patterns Jenny Overalls

Hello again! Today I’m back on the #sewfancypants train with this pair of tapered leg Jenny Overalls. I’ve loved overalls for as long as I can remember and can find at least three “first day of school” pictures in which I’m wearing a pair. Surprisingly, I was on the fence about this pattern for a while until seeing Sara’s tapered corduroy Jenny Overalls. Her version won me over and I knew these were the pants I needed in my life. In fact, these were the first pants I planned when throwing around the idea of the Sew Fancy Pants challenge.

Fabric

Often I plan projects after finding the perfect fabric, this time though, I planned this project around the pattern. After searching through several online shops, I saw this 14 oz Cone Mills Dark Olive Denim (use code ‘Fancy15’ to save 15% through Jan. 31st) from Sewing Studio. Karleen was kind enough to send me this fabric for use in this post and I was delighted when it arrived. The deep color and substantial weight of this denim is perfect for a hefty, durable pair of overalls. I was nervous that my machine would have difficulty handling several layers, but with fresh, sharp denim needles it handled just fine. Only one needle was sacrificed in the making of these overalls.

Fitting

According to the size chart included with the Jenny overalls, my measurements put me right between a 10 and a 12. In previous experiences with Closet Case Patterns, I’ve sized down when in between sizes and had success. I chose to cut a size 10 and use pattern pieces from a tapered leg pants pattern as a reference when straightening out the legs. The original shape of the crotch and waist seams were kept the same when doing this. One mistake I made when cutting the fabric was not adding my standard 1/2″ of length to the front and back rise. This mistake likely led to more fitting work than I estimated.

I went through three baste-fittings, attempting to attain a ‘good fit.’ I found this post by Closet Case Patterns and this post by Melly Sews good references while fitting. I had quite a wedgie in the back so I scooped the back crotch a bit and that seemed to work. My other fit issue were some serious lines in the front. After examining them, I determined the best course of action to be a bit of a round pubis adjustment. Both of these adjustments seemed to help my major issues and after several days of fitting work; I decided to call the fit ‘good enough.’ It’s not perfect, but I’m happy with it and plan to wear these despite any imperfections.

Construction

As I’ve come to expect from Closet Case Patterns, the instructions were fairly detailed and I didn’t have any issues understanding them. These overalls were the most intensive and time consuming of all my Sew Fancy Pants projects. After spending 3 evenings on fitting, I spent 4 on the construction. The first evening was spent on prepping pockets, the second attaching pockets and inserting the zipper, the third attaching the bib portion to the pants, and the fourth on hems and hardware. While intensive, I wouldn’t consider this project more difficult than any of the jeans I’ve made and I quite enjoyed making a distinctively different from my other recent projects.

Details

Something that will always draw me to overalls is the perfect criss-cross of their straps. I’m not sure what makes me love them, but that ‘x’ across the back gets me every single time. The pattern also includes Interestingly angled bib pockets with front pants pockets having openings that similarly mirror those angles. The curved back pockets provide a nice contrast to all the included angles while also flattering the backside. Overall, I’m smitten with the detailed look of these overalls and took my time sewing each one.

Conclusions

It felt deeply satisfying to check this pair of overalls off my list. They’re more traditional than my Ronja Dungarees and Burnside Bibs and I love having a pair of overalls that hints at traditional, but provides a lovely twist with the dark olive color. I see them acting as a neutral in my wardrobe and pairing well with many of my tops, but love them paired here with my favorite Archer Shirt. The beautifully hefty fabric is sure to last well and my hope is that I’ll be able to wear these Jenny Overalls for years to come.

Thanks for reading!

Breaking the Pattern Ruska Knot Dress

Happy Monday! Taking a small departure from #sewfancypants to throw my hat in the ring for #sewtwistsandties by sharing my Ruska Knot Dress. This is another pattern included in the book Breaking the Pattern written by the ladies of Named Clothing. The Kaste Dress is what convinced me to buy the book, but projects like this Ruska Dress make me want to try everything.

Fabric

Back in December, I was fortunate to work with the ladies of Merritt Makes to share my Archer Button Up. When they asked me if I’d like to collaborate again and use some of their new sweater knit, I happily agreed. I had swatches of the fabric (they offer free swatches if you just ask), and knew it was something I’d like to use. This fabric was provided to me, but I also purchased 1.5 yards of another color to make a Nikko Top because it’s that good (see the Nikko I made in this post). The combination of rayon/modal/cotton/spandex in this sweater knit makes it feel lightweight and cozy all at the same time. The weight is perfect for a layering piece like a Nikko or even a t-shirt during transitional months. For this dress, I chose the charcoal color, and it’s opaque enough that I don’t feel a need to wear any type of slip underneath. Honestly, I should have bought a couple yards of each color because I’ve worn my Nikko in the mink color at least 3 times a week for the last 2 weeks and this dress for the last two days. In short, I’m a fan.

Preparation and Alterations

In general, I prefer the convenience of PDF patterns to paper patterns or books but, when a book includes so many beautiful options, I have to concede. A sweet former co-worker of mine introduced me to Pellon 830 or Easy Pattern years ago and it’s become my go-to for tracing patterns. It’s more durable than tracing paper, can be sewn (I often baste it together to check fit before cutting main fabric), and even ironed on a low setting when my pieces inevitably become crumpled due to my poor pattern organization. If I’ve convinced you to give it a try it’s usually available at JoAnn Fabrics and on Amazon.

I spent an evening tracing the 5 pattern pieces and cutting fabric. Like most people, I’m not a straight size and had to do a little bit of grading. I used a size 2 at the bust, graded to a 4 at the waist, and a 5 at the hips. I also added 4 inches to the length, but after trying on the nearly completed dress, decided to cut off 3 of those extra inches before hemming. Lesson learned. Next time I’ll just add 1 inch to the length. Other than minor grading and adding some length, my only other alteration was to use the long sleeves instead of the short sleeve length.

Construction

Unfortunately, I never quite keep an accurate count of the time spent on construction due to the regular disruptions that come with sewing and parenting at the same time. Nevertheless, I do know that this was a fairly straightforward and quick sew. I spent one evening constructing the dress and part of an afternoon hemming it. The trickiest part of construction was hemming the ties, but I pressed them well, used lots of pins and took my time with the double needle. As long as you’re not trying the rush the process, I think success can be yours. To sew the seams, I just used the lightning stitch on my regular machine. I then pressed them open and finished all the raw edges with my serger. Since this is a knit, finishing the edges isn’t necessary and you can complete this project without a serger. Adding twill tape at the shoulder seams provided necessary stabilization and was much easier than the clear elastic often recommended for the same purpose. Constructing this dress was a breath of fresh air in the middle of this month’s pants frenzy, a reminder that mixing things up once in a while is a welcome idea.


The Why Behind Making the Ruska Dress

When planning this dress, I had a date night outfit in mind. I don’t own a basic black dress and wanted something that was simultaneously comfortable, simple, and sexy. My day to day look includes little to no makeup, a top knot, and a simple top and pants. It’s rare these days that I get a chance to dress up and feel like an adult apart from my role as a mother. Earlier this month, my husband turned 28 and I wanted something extra special to wear for going out.

My husband’s birthday is always an extra special occasion because it also marks the anniversary of the first time we spent time together outside of school classes. Twelve years ago, he left his own 16th birthday party to come hang out with me and my friends at a high school basketball game. Afterwards, we went to Wendy’s where we got chased out of the restaurant after Marshall (my husband) and a couple of his friends attempted to go through the drive through with a shopping cart. We got in our respective cars and regrouped at Burger King before deciding that maybe we should go home before getting into any more trouble. I still remember going home that night and giggling with my sister Amanda and friend Teisha about this goofy boy that got us kicked out of Wendy’s. I’m sitting here smiling at the memory of my 15 year old self slowly falling for the boy who wooed me by knowing the nickname of Iowa (I moved to Utah from Iowa at 15) and left his birthday party to spend time with my friends and me.

Final Thoughts

Honestly, I’m unsure of what to say that hasn’t already been said. This sweater knit and the Ruska Knot Dress seem destined for one another and I don’t want to ever take this off (currently wearing it as I type). Perhaps this spring or summer I’ll even find the time to whip up a short sleeve version of this dress. It would look equally lovely in the marine or oxblood colors of this knit also available from Merritt Makes. The fit, fabric, and design are exactly what I was looking for and, while not 100% perfect, I don’t think there’s anything I’d change.

Thanks for reading! Leaving you with a photo that’s a more accurate representation of what taking blog photos usually entails.

Megan Nielsen Jarrah Sweater

It’s mid-way through December and the holiday season is in full swing around here. I had lofty sewing goals for December that had to be trimmed thanks to a minor, but unexpected hand surgery. Once I found out that surgery was necessary, I decided to drop all sewing plans except the Archer I posted last week. Had surgery just over a week ago and am feeling quite well. Thanks to a clear schedule (in case I wasn’t feeling well) and a nicely replenished fabric stash, I felt like sewing this week. On Monday afternoon I knocked out a bit of Christmas sewing and on Tuesday decided to sew up this Megan Nielsen Jarrah Sweater for myself. I mashed up the sleeves of View A with the curved hemline of View B to make a perfectly simple oversized sweater. 

Choosing the Fabric

I usually don’t have a large fabric stash for projects sewn on a whim, but I’ve tried to add a few favorites over the last few months. This organic hemp fleece from D & H Fabrics was begging to become a cozy sweater. It’s a mid-weight sweatshirt fleece with 2-way stretch and pillowy soft backside. It’s one of those fabrics that everyone should have in their stash ready and waiting for the next cozy sweatshirt pattern to come along. 


After the release of the Jarrah, I started looking for good ribbing. I usually just use a self fabric for ribbing, but have been inspired by all the matching ribbing I’ve seen lately. One night I was browsing Etsy, when I decided to search sweatshirt ribbing. I looked at several options before finding this black striped ribbing and falling in love. The black, mustard, and grey mixed with gold read as a combination that could be fun without looking childish. Although I found the ribbing on Etsy, Miekkie Fabrics also has a website (here) with a larger selection of fabrics and ribbing. I opted to purchase through Etsy since I had a gift card, but will likely purchase from their site in the future.  (Just a heads up: Miekkie Fabrics is based in Poland so the ribbing took about 3 weeks to arrive in the United States. ) Once the ribbing arrived, I was pleased with it’s weight and quality. My only complaint would be that when I ordered a quantity of 3, my ribbing was sent in 3 90cm pieces instead of one continuous piece. I didn’t ask for it to be continuous, so this was likely user error. Next time I will contact them before and ask if a continuous piece is possible. 

Fitting

Now, let’s take a minute to talk fit. According to the pattern sizing chart, my bust is right between that of a 2 and a 4 with my hip at a 12. After looking at the finished garment measurements, I noted that there was plenty of ease and too much grading up wouldn’t be necessary. Quickly, I settled on using a 4 at the bust and grading to a 6 at the hips. My only other adjustment was the regular length adjustment. I added 1.25″ to the sleeves and 1.5″ to the front and back pieces. Overall, I’m rather pleased with the fit although as a personal preference I could’ve added another .5″ to the sleeve length. 

Construction

Besides finishing a garment, sewing one up is my favorite part and there’s nothing that satisfies the need to sew like a quick and easy sweater. My son attends Kindergarten in the afternoon and this occasionally gives me two free hours to clean, grocery shop, or sew (I usually choose sewing). On Tuesday morning I assembled the pattern and cut my fabric. After dropping my son off at school, I grabbed my favorite drink (A Starbucks Caramel Apple Spice), put a movie on Netflix, and began sewing. Construction went quickly without any major mistakes and I was able to finish the entire sweater before heading back out the door to pick up my son. 

Overall, the outcome of my Tuesday afternoon sewing was successful. I satisfied the my need to sew, gained a cozy sweatshirt, and began a love affair with sweatshirt ribbing (Seriously, send me all your favorite sources for fabric with matching ribbing because I want to use it in every future sweatshirt). Next, I plan to find a good pink sweatshirt fleece to make a Jarrah in the knot front View C since I already have another striped ready for that project. What are you making for the holidays? Are you sewing for others or getting in some good selfish sewing as I did here?

Thanks for reading!

Want to see more projects I’ve made with fabrics from D&H Fabrics? Check out my Kaste Dress or Mila Shirt.

Ready for more winter sewing projects? Read about my Gemma Sweater, Clare Coat, or Toaster Sweater.

Ikat Archer Button Up

Hello! I can hardly believe that December is upon us. Somehow I’m feeling baffled that this last year has flown so quickly and simultaneously feeling that it lasted forever. Time is weird. Let’s get back to the reason you’re here. My latest make is one of which I’m quite proud. This Archer Button Up made with an Ikat from Merritt Makes is one of those projects that reminded me “practice makes (almost) perfect.” 

First, Fabric.

Merritt Makes is an online fabric shop run by a mother/daughter team. As someone who spent five years working in a shop run by a mother/daughter team, I have a soft spot for mother/daughter run businesses. About a month ago, I was browsing their website and couldn’t stop planning projects. You know the fabric is good when one look at the website results in the planning of an entire seasonal wardrobe. After emailing back and forth with Merritt, she helped me settle on making an Archer in this delicious Ivory Ikat fabric.

This woven ikat fabric is lightweight 100% cotton. The weave is slightly looser than a quilting cotton, but still tight enough to make handling it easier than a rayon challis. The hand feels similar to a gauze which makes wearing this fabric both breathable and comfortable. Pressing it was a dream which made it ideal for the crisp structure of a button up. Working with this fabric felt luxurious and I found myself taking extra care with each step.

Next, Construction.

As mentioned above, my love for this ikat fabric led me to take extra care during the construction of this top. Due to the slightly looser weave of the fabric, I chose to finish all the exposed seams with french seams instead of a serged edge. I then used two lines to top stitched the french seams so they would lay flat. This meant that each of the exposed seams was sewn a total four times. It took extra time, but the end result is a garment that looks just as neat on the inside as it does on the outside. I want this shirt to last and decided the best way to ensure that would be to take my time on its construction. 

I’m no stranger to button-up shirts, in fact, I’ve made my son at least 12-15 over the last several years. This was my fourth Archer Button Up, but the first using view B and with a standard collar instead of a mandarin collar. The last Archer I made was made in the summer of 2016, so coming back to this pattern felt a little like visiting an old friend. I came back to it with fondness as well as wisdom gained from an abundance of sewing over the years. As with anything I’ve made, there are slight imperfections here and there. However, this top is the best I’ve ever sewn a button up and that realization feels pretty darn good.

I was proud of where I was skill-wise 2.5 years ago when I made my last Archer, and now I’m proud of the progress I’ve seen since then. There have been countless times over the last few years when I’ve thrown a project across the room in frustration, muttered a few choice words, and felt like giving up. Finishing things like this Archer makes me thankful that I didn’t. I still have a ridiculous amount of room for improvement in my sewing, but this project reminded me that improvement happens when we just keep trying. Sometimes it happens more slowly than we’d like, but it does happen.

Despite being pleased with my construction here, it didn’t come without mishaps. Due to the yarn-dyed woven nature of this ikat, there isn’t a definitive right or wrong side to the fabric. In a lot of ways, this is great. Unfortunately, I forgot to double check that I was sewing the correct sides of the fabric together when attaching the sleeves. I didn’t notice my mistake until I had french seamed and top stitched both the sleeves and side seams. As a result, my continuous sleeve placket that should’ve been turned to the inside, was now turned to the outside. My late-night sewing brain determined there were only two options: leave the plackets on the outside and call it a design feature or rip out 24 lines of stitching to reattach the sleeves with the actual right side out. In frustration, I decided to call it a night and come back to my sewing in the morning. Nothing clears your head like a good night’s rest and the next morning I realized there was a third option that would fix my problem in just a few minutes with only one small seam to rip out. All I had to do was unpick a 3/8″ long diagonal seam holding the top of the placket together (for reference see this Archer sewalong post). I then flipped the placket to the new wrong side, re-stitched the diagonal seam, and all was well.

Finally, Fitting.

According to the Archer measurement chart, my bust put me in a size 4 with my hip measurement right between an 8 and a 10. After looking at the finished measurement chart, I decided to go for a straight size 4. In retrospect, I likely should’ve graded to an 8 at the hips for a straighter fit. My only real adjustments to the pattern were adding length. I added 1″ in length to bodice and 1/2″ in length to the sleeves. Overall, I’m pleased with the fit of this top. It gives me full range of motion while the semi-fitted nature of it keeps me from looking as if I just rolled out of bed and grabbed my husband’s shirt. 

Thanks for reading! If you need me, I’ll be cozied up in my Archer and a chunky cardigan for the foreseeable future. Be sure to check out Merritt Makes on IG or at their website. I can almost guarantee that you’ll be as tempted as I am to make an entire seasonal wardrobe with their lovely stock. 

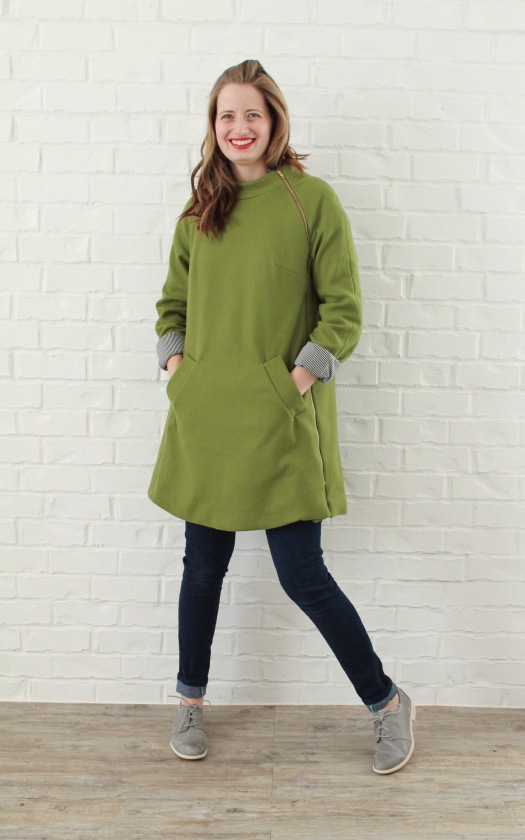
Closet Case Patterns Clare Coat and a Coat Making Party

Can you believe it’s the first day of spring? I’m celebrating in unusual fashion by finally posting about my Clare Coat. Not unlike my Ginger Jeans, I’ve had the Clare Coat Pattern on my “to make” list for years. Luckily, my friends Rachel, Tiahna, and Jennifer wanted to make one as well. This last January we joined forces to host a Coat Making Party on Instagram. We were fortunate enough to work with a few generous sponsors, Riley Blake Designs, Raspberry Creek Fabrics, and Closet Case Files, who provided us with fabric and generous giveaways for participants. Without the motivation of sewing friends and our awesome sponsors, I’m not sure that I would’ve finished this coat, but I’m about to tell you why I’m so glad that I did.
IMG_2582

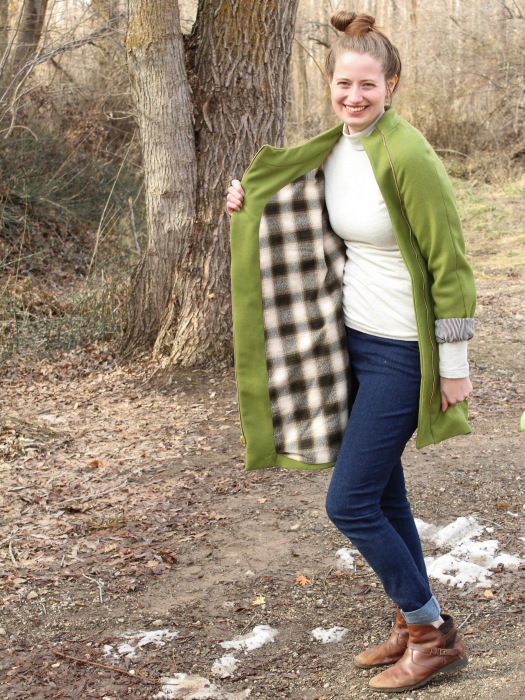
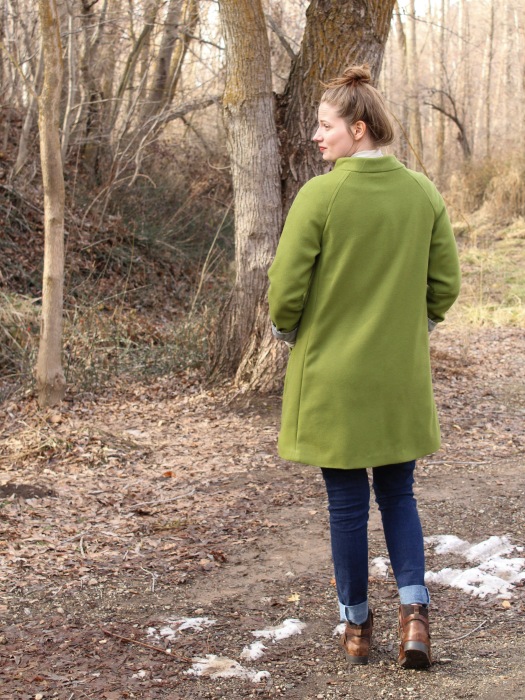
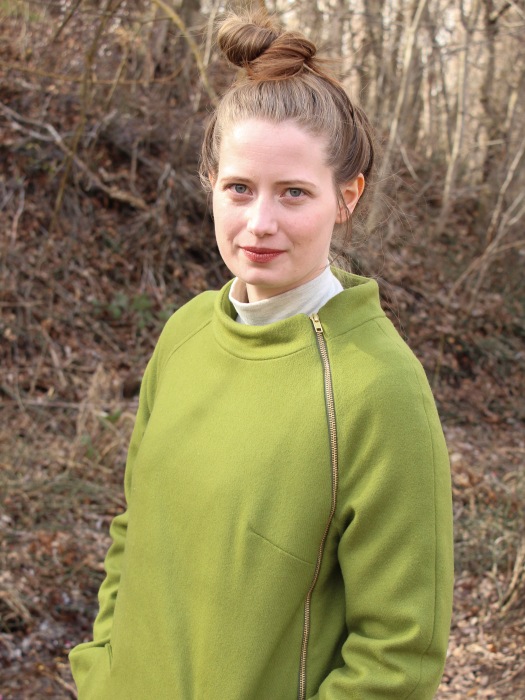
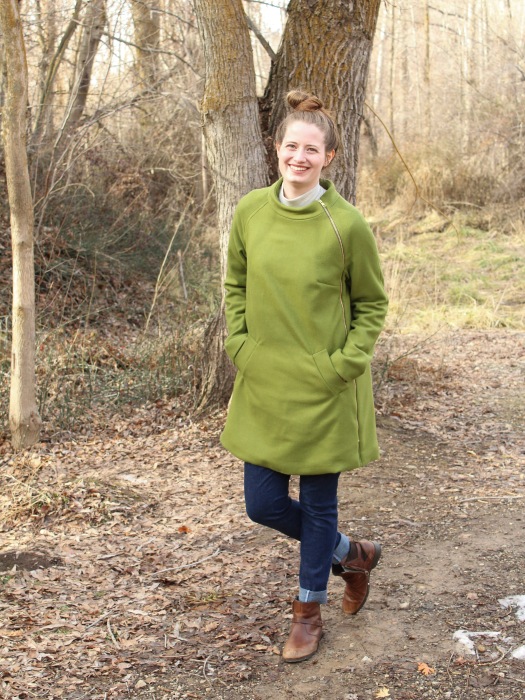
First, let’s talk about this olive green wool from Riley Blake Designs. Riley Blake was one of our sponsors and was gracious enough to provide each of us with wool to make the outer shell of our coats (see Rachel’s dark green one here, Tiahna’s pink one here, and Jennifer’s red one here). I chose this Olive colored wool and anxiously awaited its arrival. This wool is a mid-weight and seems similar to the weight of the fabric on my favorite ready to wear coat. I found working with it to be relatively easy and enjoyable. I did have a bit of trouble pressing, but this is likely due to the fact that I have a terribly cheap old iron and not an issue with the actual fabric.

IMG_2593

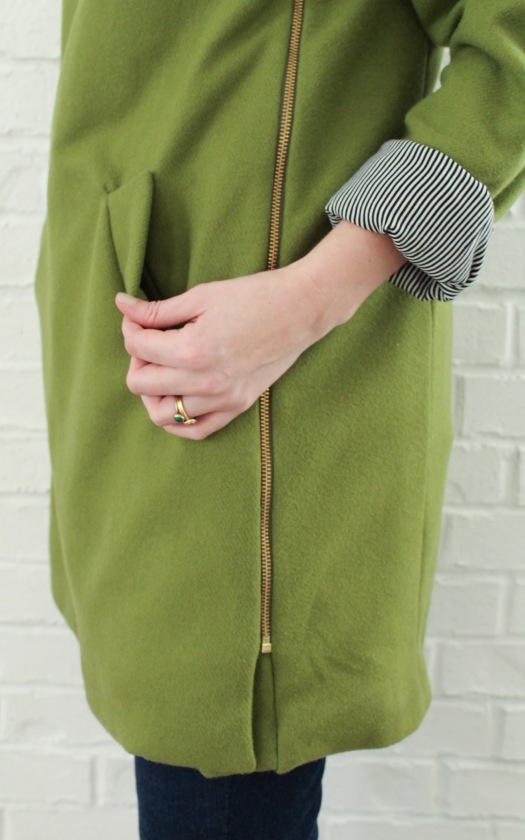
While the olive green shell of the coat is certainly striking, I think the lining is my very favorite part. Our other fabric sponsor, Raspberry Creek Fabrics, provided me with this Robert Kaufman Mammoth Flannel. I took a bit of a leap of faith selecting this without seeing it next to my wool and I’m so glad it turned out to be a perfect match. The flannel lining makes this coat extra cozy. It really feels like I’m wearing a secret blanket which is exactly how I want to feel in the winter. One aspect that I overlooked when planning this coat was the need for a sleeve lining that would be a bit more slippery to make the coat easier to put on and take off. I had already planned to use this black and white striped rayon challis as the lining for my Joy Jacket (see it here), so I simply added an extra yard to my order and used it to line my Clare Coat sleeves as well. I’ve found myself regularly wearing my sleeves rolled just to show off the fun striped lining.

IMG_2587

Now that I’ve talked your ear off regarding fabric choices, let’s talk about the actual process of making the coat. I spent four evenings preparing fabric, tiling the pdf pattern, and cutting out all the pieces to the coat. The amount of preparation that goes in to making a coat is something that I wasn’t wholly prepared for before I started this project. It likely would’ve only taken three evenings for the prep work if I hadn’t spent an entire evening tiling the pattern pieces for view b when I was supposed to be tiling the pieces for view a. How I assembled all the pieces before realizing it was the wrong view is beyond me. That is a mistake I plan to avoid in the future and a time-consuming lesson that I likely won’t forget.

IMG_2717

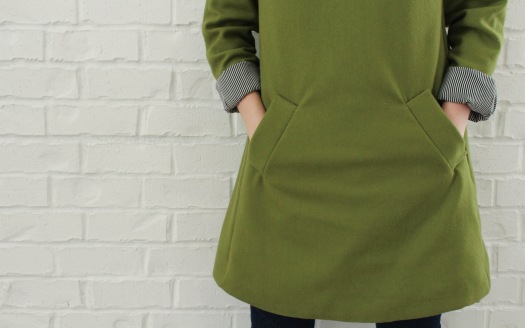
About halfway through January, I finally completed all the prep work and got down to business. These welt pockets on the front were the first and most time consuming aspect of the project. I spent my first evening focusing solely on them and despite a few minor imperfections, I think they turned out well. These perfectly-angled and flannel-lined pockets keep my hands nice and toasty when I forget my gloves (which happens almost every time I go out).

IMG_2719

Once the welt pockets were installed, the rest of the coat construction went rather smoothly. As a visual learner and first time coat maker, I found myself relying heavily on the sewalong (here) to understand each step. I was a bit nervous about the zipper installation, but soon found that I had no reason to worry. As it turns out, installing a separating zipper is even easier than a regular zipper. Who knew? I also got a bit confused about bagging the lining, but found it to be rather simple and magical once I followed the instructions and just went for it.

IMG_2722

Before I wrap this up, let’s talk for just a second about sizing and adjustments. I chose a size 10 for my Clare and because I wanted it large enough to fit over a bulky sweater. If I planned on only wearing thin layers underneath I could’ve possibly sized down to an 8, but I’m really happy with the fit of the coat as a 10. I only made one minor fit adjustment to the pattern and that was to use the full length (view b) sleeves and add 2 inches to their length.

IMG_2566IMG_2574

Honestly, January was a bit of a rough sewing month for me. I had a hard time getting back in the swing of things after the holidays and was seriously lacking in motivation. Most days I felt like sewing was more of a chore than a pleasure. This doesn’t happen regularly, but when it does I sometimes wonder why I sew. Looking back on January, I’m feeling grateful that I forced myself into the sewing room because I was able to accomplish two huge sewing goals , jeans (here) and this coat, that gave me the confidence boost needed to fall right back in love with sewing come February. Over the last few years of growth, parenting, and change, sewing has been the constant that reminds me I can do hard things, I can be proud of those things, and there’s always something to learn. In short, sometimes you won’t always love insert hobby or passion here, but that doesn’t mean it’s time to give up. It just might mean that it’s time to push through resistance because something great is on the horizon. It also might not mean anything, I’m not claiming any miracles here.

Named Clothing Gemma Dress

Today I’d like to introduce you to my Named Clothing Gemma Dress. My inner 90’s girl jumped for joy when stretch velvet started making a comeback a couple of years ago. I first fell in love with the sweatshirt version of the Gemma pattern, but have yet to find the perfect fabric combination for it. When my cousin got engaged earlier this year and announced that she’d be married in December, I knew this was the perfect excuse for making a new winter appropriate dress.

IMG_2328IMG_2351

I snagged this olive colored stretch velvet and the Gemma printed pattern from Stylemaker Fabrics during their Black Friday Sale. I ordered on Thursday and had the goods in my hands by the following Monday. Michelle currently has a great selection of stretch velvet available and I’m doing my best to convince myself that I don’t need it in every color of the rainbow.

IMG_2343IMG_2336

Styling this dress presented me with a bit of a conundrum.  You may have noticed that I always wear the same few pairs of shoes. Almost two years ago, I decided to purge and scale back my shoe wardrobe. I had nearly 30 pairs of shoes that were rarely worn or falling apart because they were poorly made. I love a good pair of shoes, but these were just feeling like a waste of my space and money. I made a list of shoes that were necessary in my wardrobe (snow boots, athletic shoes, a pair of dress shoes, etc.) Eventually I whittled my collection down to 8 pairs of shoes. This system has worked quite well for me over the last few years. It’s encouraged me to be more intentional about shoe purchases and creative with my styling. I’m not great at scaling back in many areas of my life, but this one has brought me a little peace of mind. Here’s my little soapbox of the day: You don’t have to Marie Kondo your entire life to feel peace of mind. Find one thing that you can live with less of  (decorations, shoes, pants, t-shirts, pens, etc.) and start there. Maybe you’ll be surprised with what you can live without, or maybe not. I’m really no expert here.

IMG_2324IMG_2350

Now that I’ve presented my little soapbox, let’s get back to my styling conundrum. After seriously considering purchasing a new pair of shoes, I decided to dress the outfit down a bit by wearing my Teva ankle boots. While not the prettiest option, they were certainly my most practical when presented with the thought of walking on ice and winter slush. In order to make it work, I decided on a slightly boho vibe. I selected a pair of simple dangle earrings, patterned tights, and decided on a crown braid for my hair styling. The thought of a crown braid presented me with another issue: I cannot braid to save my life. Enter Vienna: My kind and beautiful friend Vienna of The Late Sew offered to braid my hair and assist me in taking photos. Sewing friends are some of the freaking best, seriously.

IMG_2354IMG_2345

Overall I couldn’t be more pleased with this dress and can’t wait to invent a million occasions to which I can wear such a lovely thing. Who am I kidding? I totally wore this to the grocery store, cooked dinner, and while sewing last night. I might never take it off.

IMG_2325

As always, I’ll leave you with a little note on sizing: I sewed a 38 graded to a 40 at the hips. My only other modifications were adding 2 inches to the length and sewing the slit closed an extra 4 inches for a bit more coverage on the back.

Want to see another Named pattern sewn up? Check out my Ronja Dungarees here.

Love the Gemma pattern? See my Gemma Sweater here.

Need a some more Gemma Dress inspiration? Check out Sara’s gorgeous maternity version here.

Itch to Stitch Blog Tour: Hepburn Turtleneck

I’m thrilled today to be part of the Itch to Stitch Love Blog Tour.  Kennis of Itch to Stitch has quite the repertoire of well-drafted patterns under her belt and I’ve enjoyed sewing her patterns in the past (see those here, here, and here).  Recently, Kennis was on vacation and came home to find that her home had been burglarized. Thieves took her computers, machines, and many other things essential to her and her husband’s businesses. This tour came about because the sewing community joined together to support one of our own. Read to the end of the post for information on all the generous sponsors and talented bloggers joining together this week.

When I was invited to join, I searched the website to find inspiration and decide on a project. Upon seeing and buying the Hepburn Turtleneck pattern, I knew I had the perfect fabric/pattern combination.  I purchased this soft striped rayon french terry from Indiesew and it’s been sitting in my stash for months waiting for inspiration to strike.
IMG_2182

IMG_2199

Today I’m sharing my Hepburn Turtleneck styled two different ways. It’s been several years since I owned a fitted turtleneck and I wasn’t quite sure how to style it. The first look is a slightly dressed up classic look that I envision wearing for a night out or even to Thanksgiving dinner. I pulled my hair into a low bun, painted on red lipstick, and paired my new top with these denim Lander Pants (more about those here).

IMG_2183IMG_2193

This first look seemed like a simple and natural styling choice. I love the understated elegance of this outfit, but likely won’t dress up quite this much on a regular basis. My second look is a casual one that is less classic and more trendy. When styling this outfit, I pulled my hair into a top knot, applied minimal makeup, grabbed my Rifle Paper Co. Keds, and pulled out my vintage Levi’s 550 jeans.

IMG_2149IMG_2155

These jeans are my literal mom jeans because I took them from my mom’s closet. I’m pretty picky about jeans and only own one pair besides these. My mom wore these jeans when I was younger, and it seems only natural that I would wear them now that I’m a mother. They’re worn to comfortable perfection and have completely sold me on the mom jeans trend. I wasn’t sure how to feel about this outfit until I put it on and realized that it’s likely to become my winter momiform.

IMG_2173IMG_2175

My Hepburn Turtleneck has been worn at every opportunity since it was finished a few days ago. It’s the perfect fit and weight for winter layering and wearing as a transition piece in late fall and early spring. I’m already envisioning new ways to style this top and keep it in constant rotation. How would you style a fitted turtleneck? Which look do you prefer?

IMG_2195IMG_2166

A quick note on sizing: My bust measurement fell between the size 2 and size 4 with my hip measurement being a size 6. I opted to make a size 4 and grade to a 6 at the hips. I’m 5’10” and added 2″ to the body length and 1.5″ to the arm length.

Read below for more inspiration and instructions on entering a couple of great giveaways. 

Your ITS Love bloggers are:

Monday: Sew Sophie Lynn, Merritts Makes, Sewing with Sarah, Sewing with D

Tuesday: Shalini’s Blog, Auschicksews, Rebel and Malice, Sewing Vortex

Wednesday: Replicate Then Deviate, mahlicadesigns, Sewing with D, The Petite Sewist, kreamino

Thursday: Sewing Curves, Creative Counselor, Sew Mariefleur, Fairies, Bubbles & Co, Sewing by Ti

Friday: Harper+Lu, MeMade, On Wednesdays We Sew, Heather Handmade, Bellevi, and visit by mooglii on IG

The ITS Love Tour sponsors have been so generous in support of Kennis of Itch to Stitch that we’ve been able to put together several prize packages to share with you.
First, you may enter our giveaway to win one of three prize packs:

Prize Pack #1 includes:

5 Itch to Stitch patterns

$25GC to Simply By Ti

$50 Raspberry Creek Gift Card

$50 Bella Sunshine gift card

                  Prize Pack #2 includes:

$50 Knit Pop GC

$25 Designer Stitch GC

$25 Chalk and Notch GC

3 patterns of choice from Coffee And Thread

Prize Pack #3 Includes:

$15 Thread & Grain store credit

$25 Maker Mountain Fabrics GC

3 patterns from Halla Patterns

A Rafflecopter Giveaway

Your second way to win is to share with us your recent Itch to Stitch creations (made between October and November 2017). Add your creations to our Link Up Party before Nov. 20th for a chance to win one of two prize packs.

LinkUp Prize Pack #1 includes:

5 Itch to Stitch patterns

A $40 value PFRE Sly Fox Fabrics.

$25 Maker Mountain Fabrics GC

$50 Love Notions GC

LinkUp Prize Pack #2 includes:

$25 Stylish Fabric GC & sewing box kit

$25 Chalk and Notch GC

5 patterns from Rad Patterns

Pattern of choice from DG Patterns

Click here to view and add your links.

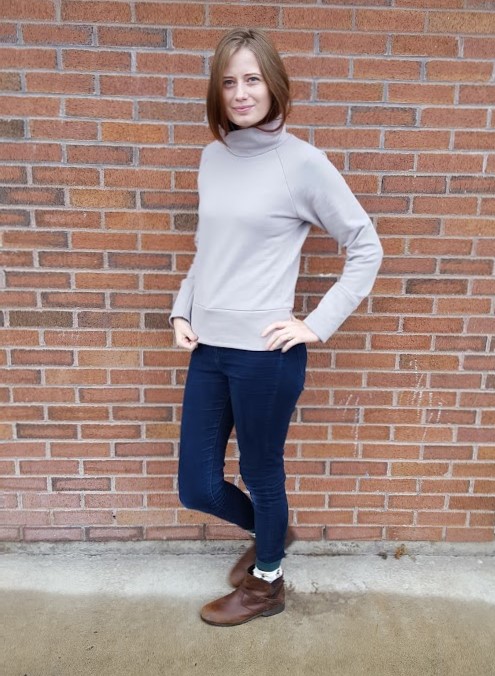
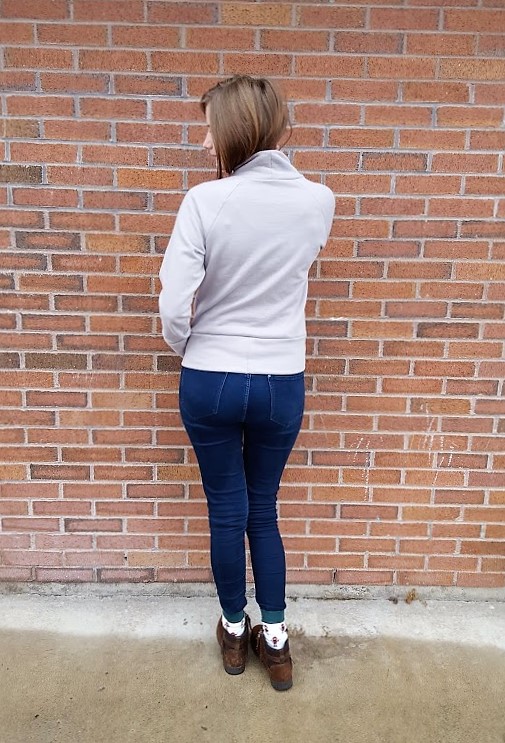
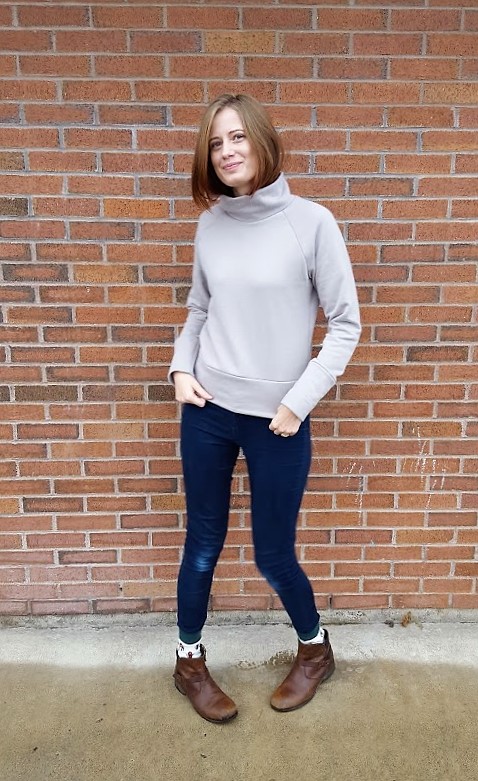
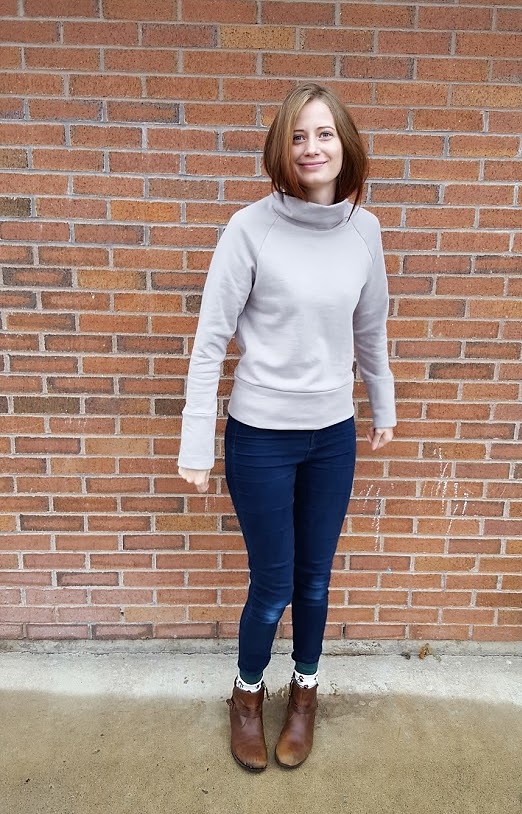
Toaster Sweater #1


November and December were hectic months in the Merritts household. My husband and I both had exciting interviews, he graduated college and started his career, my baby sister got married, and I finished up a decent amount of commission sewing work. I got far too little sleep and most of those months are a bit of a blur, but I’m proud of what we were able to accomplish and the lessons we learned in those challenging months. During especially busy weeks/months, I find that my sanity is restored with a bit of “just for fun” sewing. This Toaster Sweater #1 by Sew House Seven was one of my sanity saver projects in December.

20161216_092742

One morning I had just dropped off the last of my commission quilts at the quilter and was waiting for fabric to arrive for my next assignment. My husband and I were going on our first date in months that evening and I wanted something new to wear. I remembered that I had already traced and cut the pieces for a Toaster Sweater and assembly was the last step. Sewing it together took me about two hours including the time taken to feed my 3 year old and assist with potty breaks. The assembly could probably be finished in about an hour with no distractions.

20161216_092750

The fabric I used for my sweater is an organic cotton fleece made by Birch Fabrics. It feels even cozier than my favorite over sized sweatshirt, but looks a bit more stylish. After completion, I tried on my Toaster Sweater and basically didn’t take it off  for the next three days. It kept me warm in my freezing apartment, cozy while waiting for a train in a snowstorm, generally feeling much less sloppy when running errands. I honestly just feel like I need to make several more of the exact same sweater so that I can use it as my winter uniform. I always struggle with feeling stylish in winter because I only want to wear cozy sweats and my husband’s sweatshirts in the freezing weather. A Toaster Sweater uniform just may be the solution to my dilemma. Does anyone else find themselves wearing a “winter uniform?”

20161216_092746

Just a couple quick notes on sizing and alterations:

-I sewed up a size small and added 3 inches to the bodice length. When making this again, I would probably add another inch to the bodice to make a total of 4 inches added. The current length is great with my high waist jeans, but just a bit short for my lower rise jeans.

– I added 1.5 inches to the sleeve length and am very happy with the finished length because I like my sleeves extra long.

20161216_092752

img_8718